 Just like clockwork, every August I crave old back-to-school lunchbox favorites. Yes, I know I am a childless adult who is more than a decade away from her last first day of school, but I guess it’s pavlovian. In years past, it’s been peanut butter & jelly and Rice Krispies Treats. This time around, it’s arguably the second* best packaged sandwich cookie out there: Oatmeal Creme Pies.
*Oreos are first, obviously.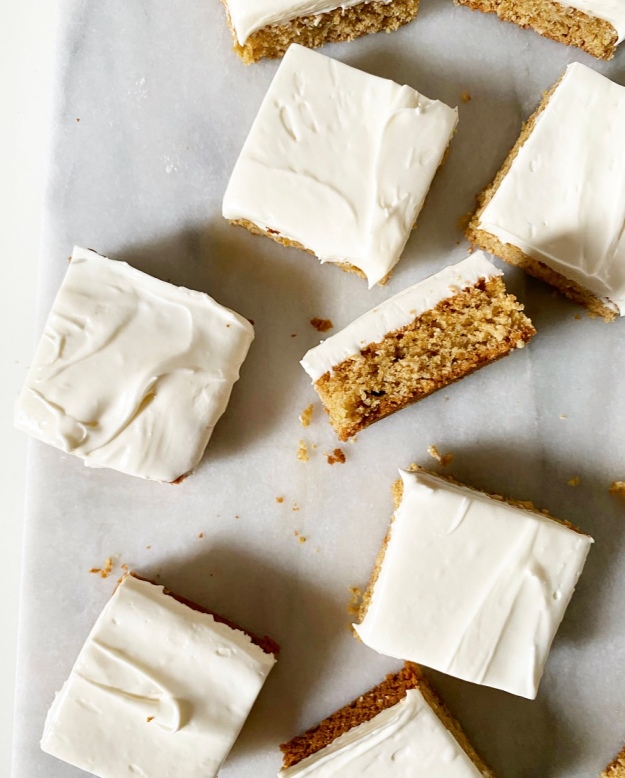 Now, I already have a recipe for a homemade version of Oatmeal Creme Pies—two actually—but this is a non-traditional school year and I think that warrants a non-traditional recipe. Nothing radical, nothing complicated. We’re talking all the flavor, soft texture and marshmallow magic of Oatmeal Creme Pies, but less than half the work.
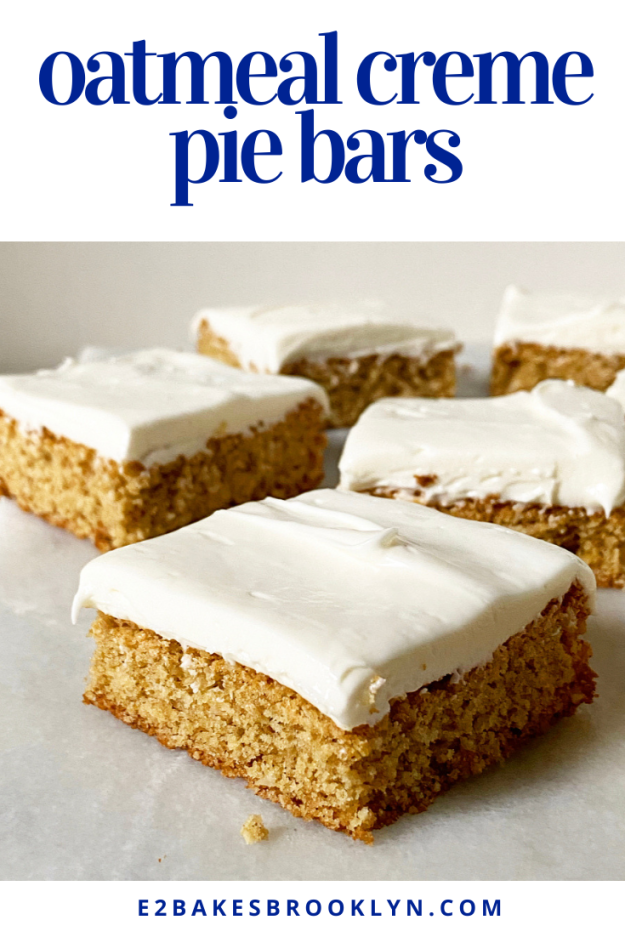
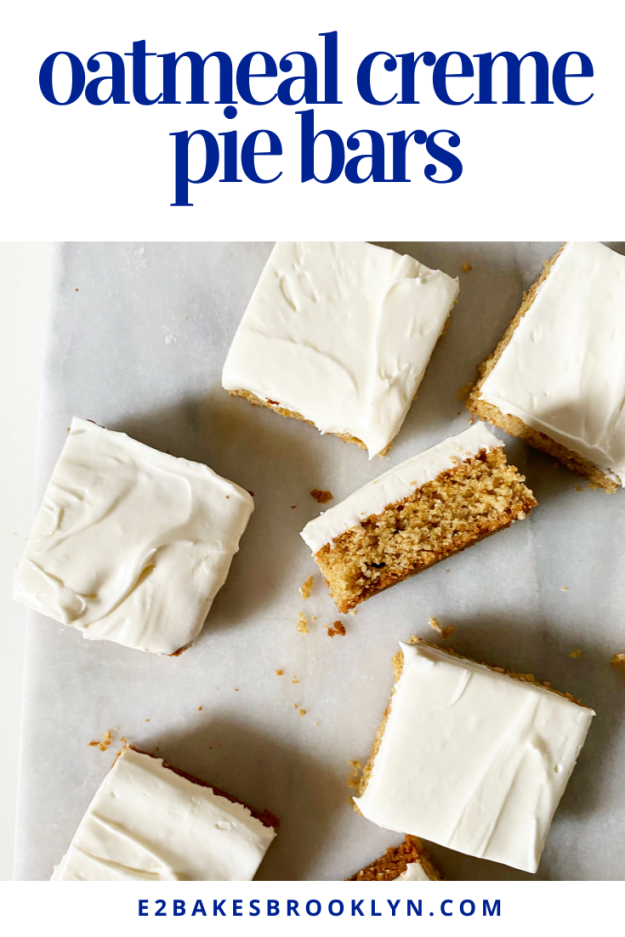
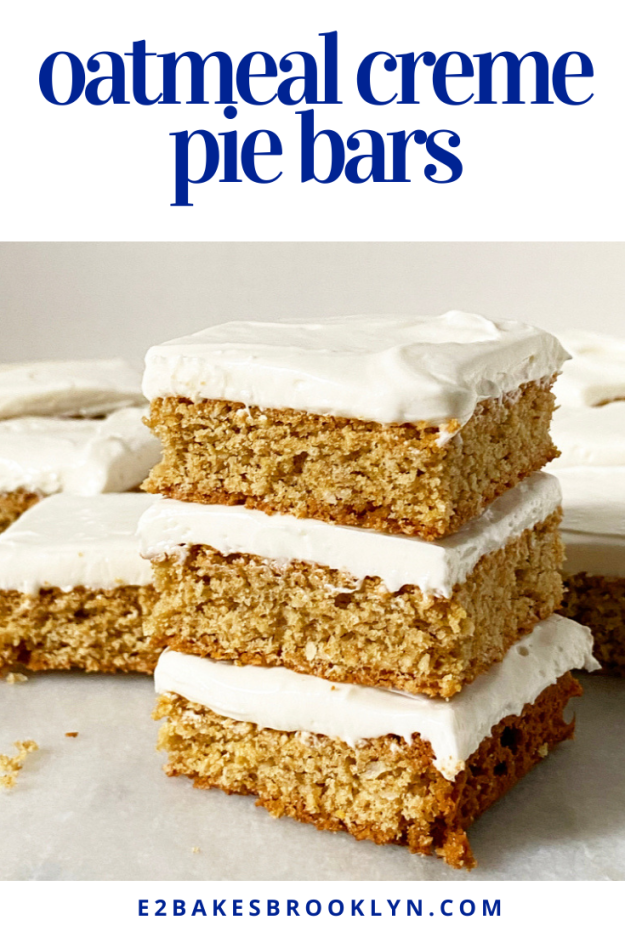
 Oatmeal Creme Pie Bars, y’all! These sweet squares are a cross between a thick cookie and a blondie topped with a soft & swoopy marshmallow frosting, and they taste *just* like your favorite school lunchbox treat. Yesssss.
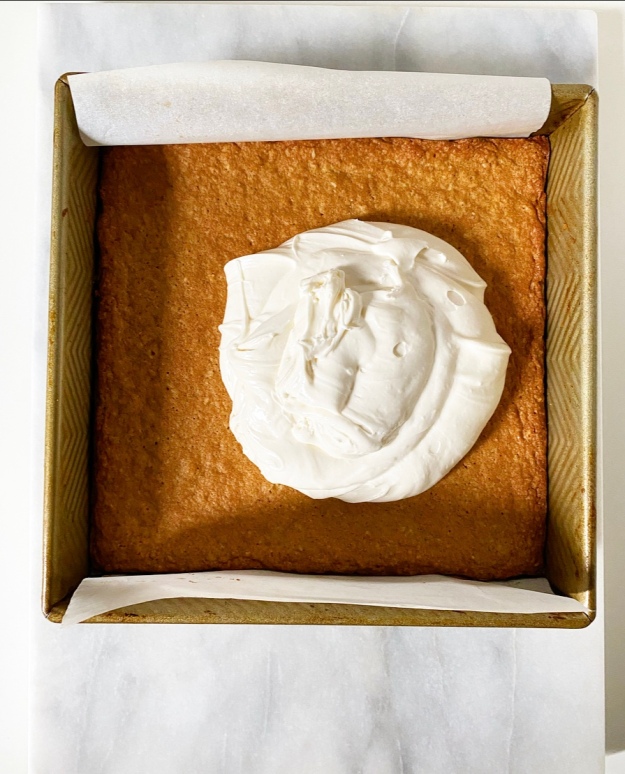 The cookie layer is a streamlined version of my usual Oatmeal Creme Pie dough, made with quick oats (homemade or store bought) and a hint of cinnamon. The only “major” change is the addition of a tiny spoonful of baking powder for a little extra lift. The batter comes together in minutes before being spooned into a pan, then baked until golden at the edges and nearly cakey in the middle, the way all good Oatmeal Creme Pies are.
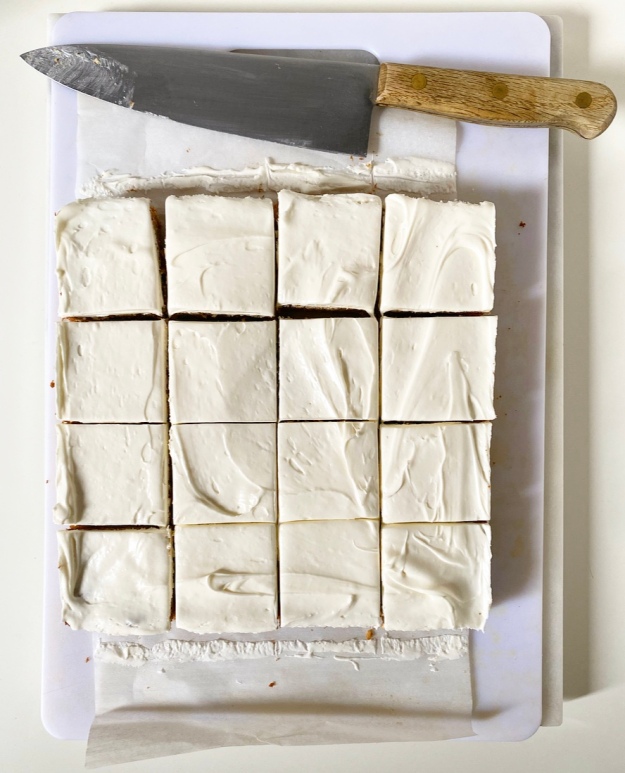 The marshmallow frosting is a take on my usual Oatmeal Creme Pie filling. It’s super smooth and a bit glossy in the best possible way. In the past, I’ve used shortening in my Oatmeal Creme Pie filling for maximum nostalgia, but swapped it for butter here with good results.
Heads up that this frosting will not “crust” or set in the same way as a traditional American buttercream, but a brief chill helps it to slice cleanly. It should be soft but not runny, and completely irresistible. With both marshmallow fluff and confectioner’s sugar, it will seem too sweet, but keep in mind that the cookie bar base is pretty light on sugar compared to most, so the end result will be pretty balanced. I mean, it’s still dessert, but it’s not cloying.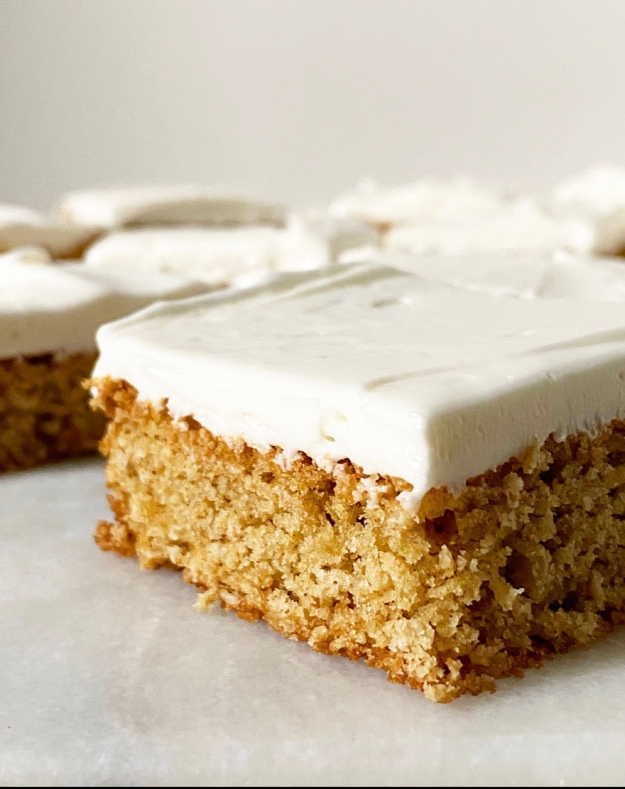 This batch of Oatmeal Creme Pie Bars came together in a relative flash—less than two hours top to tail, including cooling—meaning you might have time to whip some up soon, regardless of the fact that lunchboxes may not be a part of your life right now, whether it be because school is virtual or because you’re a 35 year old childless adult with a snack cake habit.
That said, I have it on good authority that after-school/afternoon snacks apply at all ages.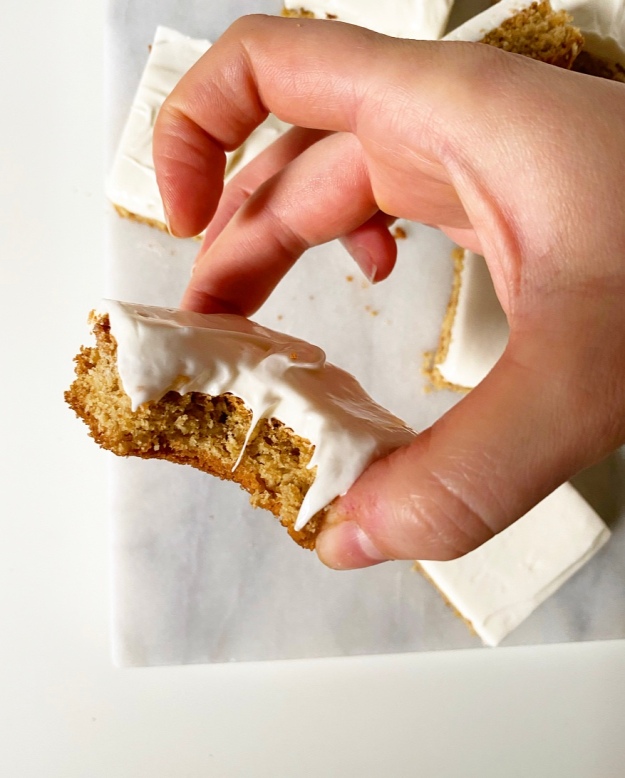
Oatmeal Creme Pie Bars
makes one 8- or 9-inch pan, about 16 bars
Bars:
3/4 cup all-purpose flour
1 1/2 teaspoons cornstarch
1/2 teaspoon ground cinnamon
1/4 teaspoon baking powder
1/4 teaspoon baking soda
1/2 teaspoon Kosher or sea salt
1/2 cup (1 stick) unsalted butter, softened to room temperature
2/3 cup dark brown sugar, packed
1 large egg + 1 large egg yolk, room temperature
1 teaspoon real vanilla extract
3/4 cups quick oats*
Marshmallow Frosting:
1/2 cup (1 stick) unsalted butter, softened to room temperature
7 ounces marshmallow fluff (about 1 1/2 cups)
1 1/2 cups confectioner’s sugar
1/2 teaspoon Kosher or sea salt
1 teaspoon real vanilla extract
Preheat oven to 350F. Grease an 8- or 9-inch square pan. Line with parchment, leaving some overhang on two sides for removal. Grease again. Set aside.
In a small bowl, whisk together flour, cornstarch, cinnamon, baking powder, baking soda and salt. Set aside.
In a medium mixing bowl, use an electric mixer to beat butter until light and fluffy, 60-90 seconds. Beat in brown sugar, followed by egg and yolk and vanilla. Add dry ingredients and mix to combine. Mix in quick oats.
Spoon batter into the pan and spread in an even layer all the way to the edges. Bake 20-22 minutes, or until a toothpick inserted in the center comes out clean. Let bars cool completely in their pan on a rack.
Make the marshmallow frosting. Cream the marshmallow fluff and shortening with an electric mixer until light and fluffy. Beat in confectioner’s sugar and salt. Add in vanilla and mix on high until the frosting is very fluffy.
Spread frosting over the top of the cooled bars. Chill for 30 minutes to set. Frosting will not harden.
Run a thin knife around the edge of the pan, then use the parchment overhang to lift the bars onto a cutting board. Use a large, sharp chef’s knife to slice bars, wiping clean between cuts. Serve.
Leftovers may be kept covered at room temperature for a couple of days, or in the refrigerator for up to a week. Ideally, they should be kept in one layer, but if stacking, place layers of parchment or wax paper between.
Note:
If you don’t have quick oats, you may blitz 1 cup of old-fashioned oats in the food processor until there are no whole oats visible. Steel cut oats will not work in this recipe.
 This summer is going to be a little different, but one thing remains the same: its unofficial kick-off, Memorial Day, is coming up next week. While it’s highly unlikely that I’ll find myself around a campfire or even on a rooftop anytime soon, I will not let this year go by without a s’mores-centric treat.
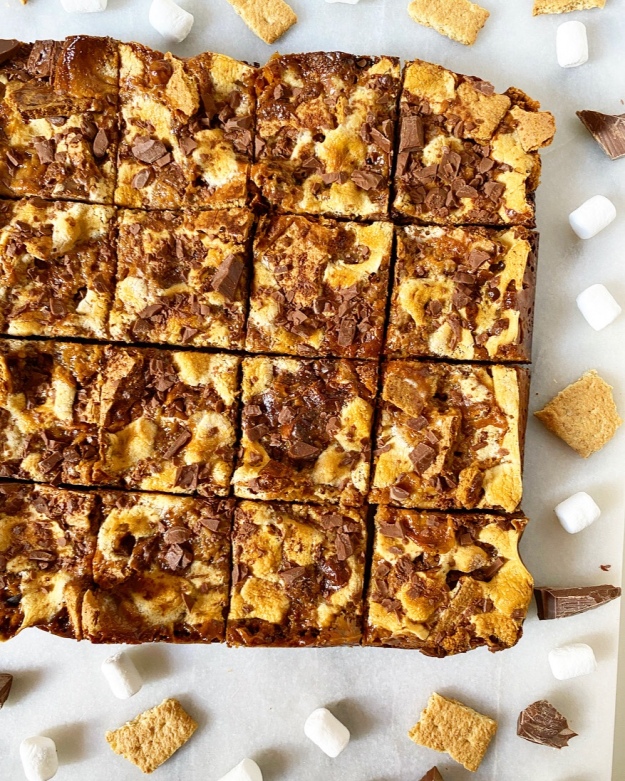 Is there anything that says “summer” quite like a s’more? I mean, what’s not to love about crisp graham cracker, milk chocolate (or
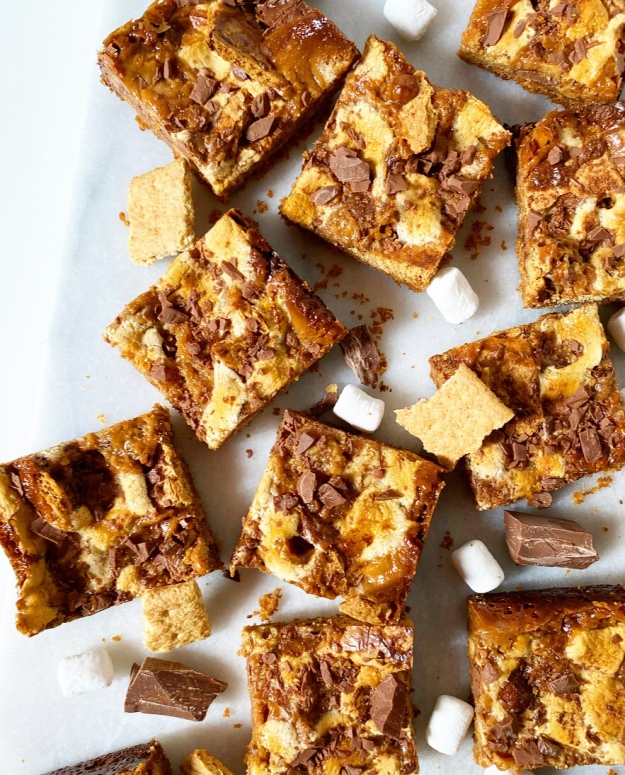
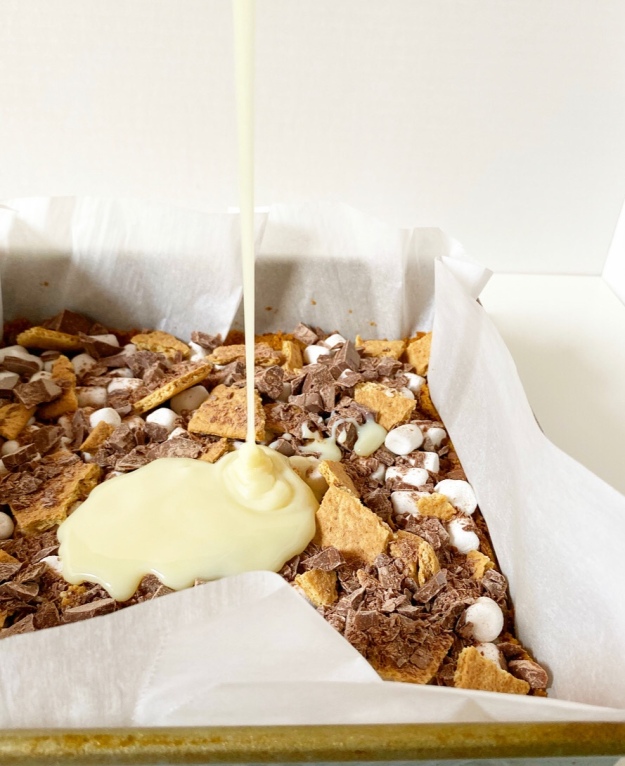
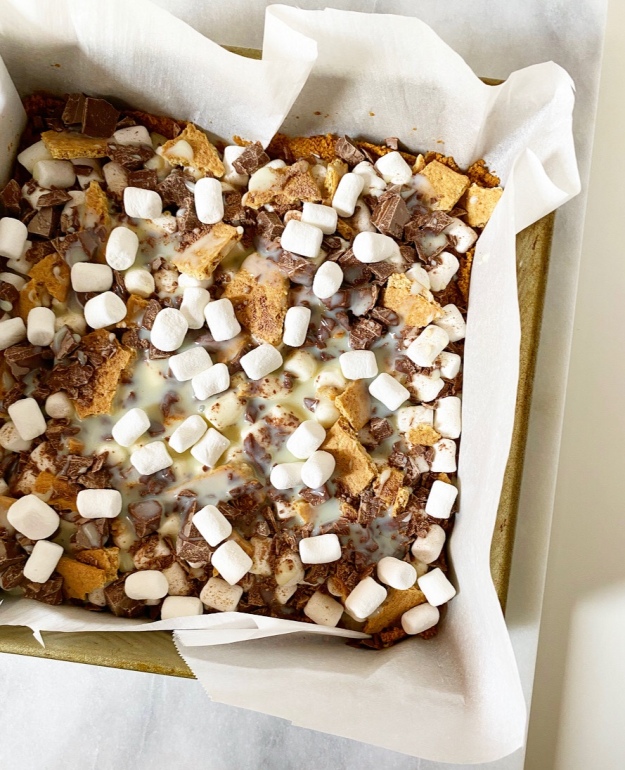
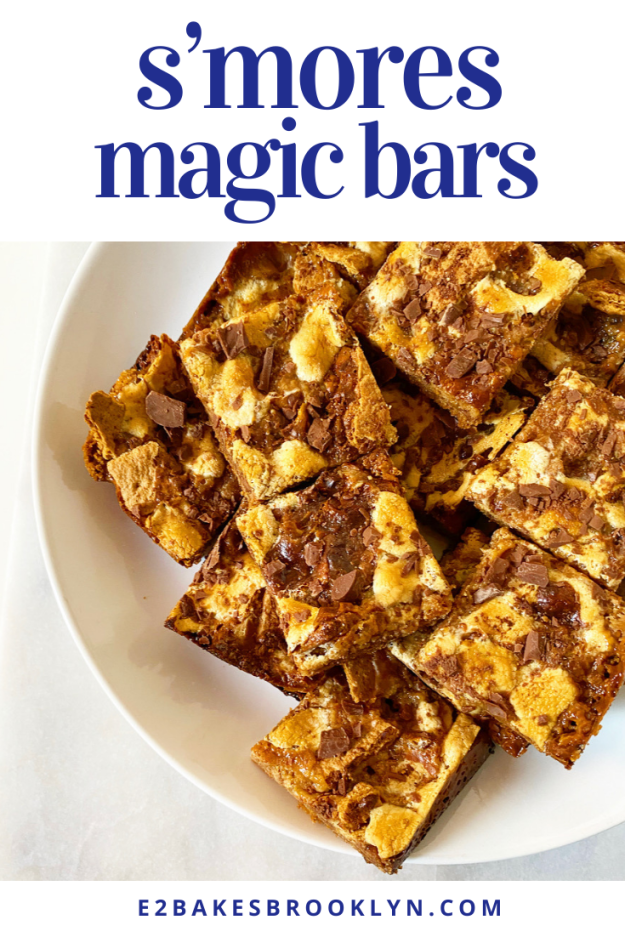
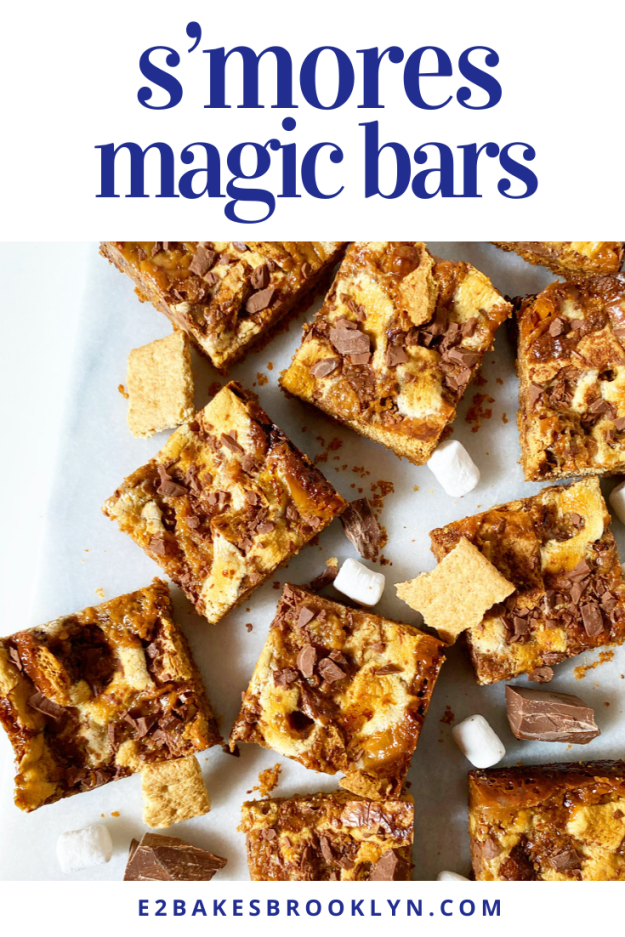
 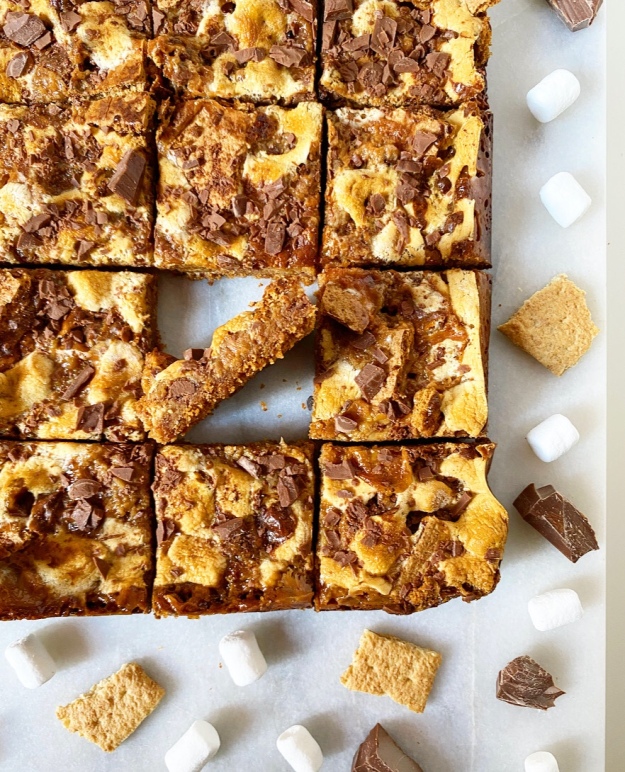 These S’mores Magic Bars aren’t your traditional summertime fare, but they have plenty of graham crackers (in the form of crust and crispy shards), chopped milk chocolate and toasted marshmallows. It straight-up doesn’t count as a s’mores dessert if the marshmallows aren’t toasted, am I right?!
 As with
 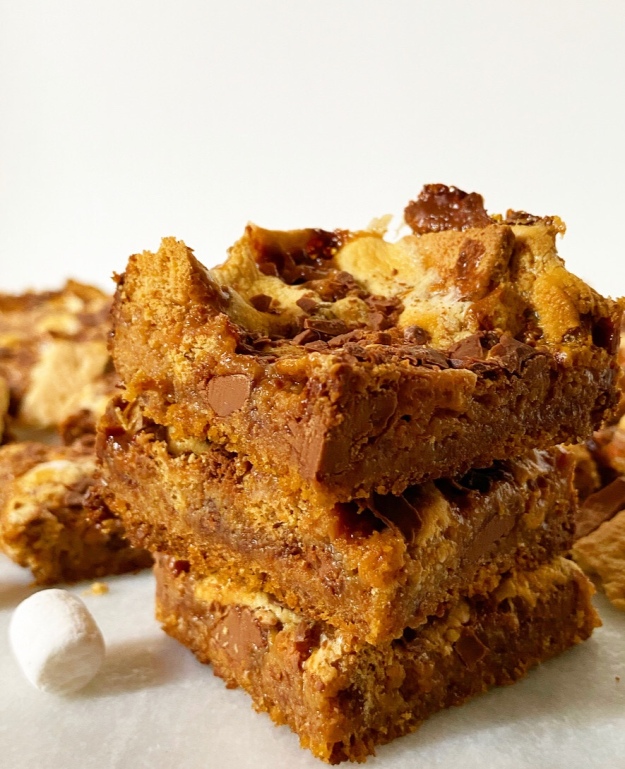 The sweetened condensed milk also gives these bars a slightly gooey finish, which is a good thing because while the marshmallows do get nice and golden brown, they also have to cool completely before you slice the bars. Like I said, we’re not going for tradition, we’re going for the most efficient way to get toasted marshmallow, graham cracker and milk chocolate into our faces in a less than ideal summer situation!
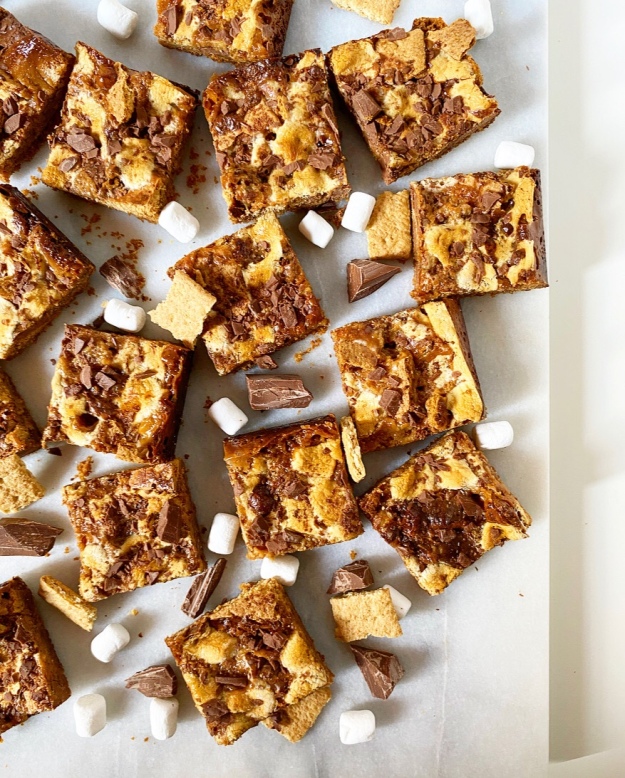 Also, unlike traditional s’mores, these sweet squares will stay good for days after baking. Days! That’s a very good thing, because I have a feeling I’m going to need a few batches between now and Labor Day.
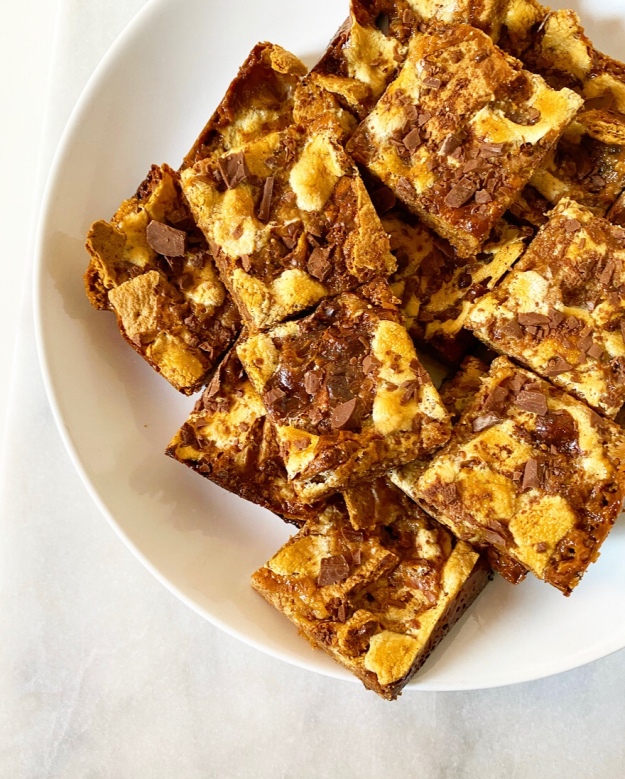
 If you’ve been around here a while, you know I loathe
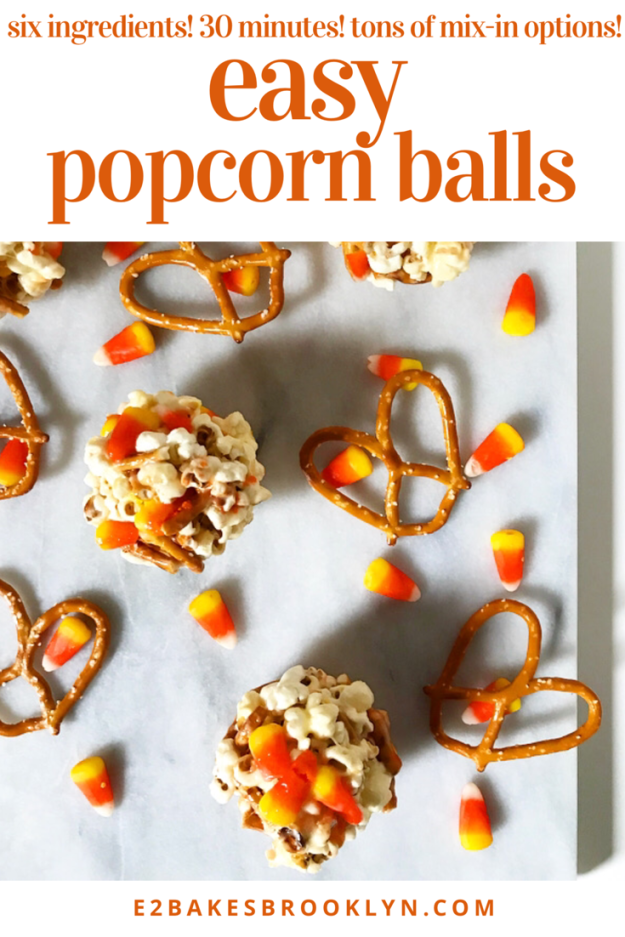
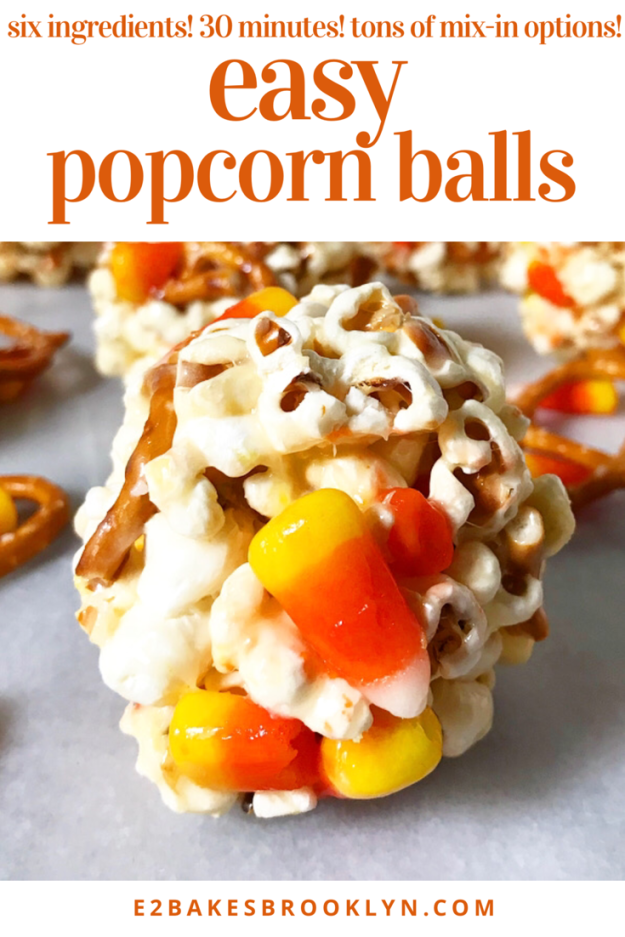
 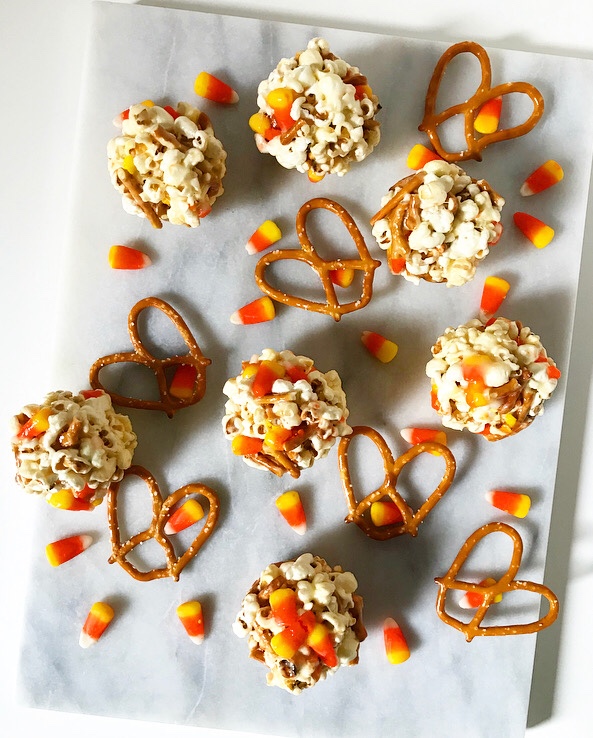 But seriously, I have no idea why I had never had a popcorn ball before a few weeks ago. Maybe it’s a northern thing? Do Texans just not make popcorn balls? Do I secretly love Halloween? Is my entire life a lie???
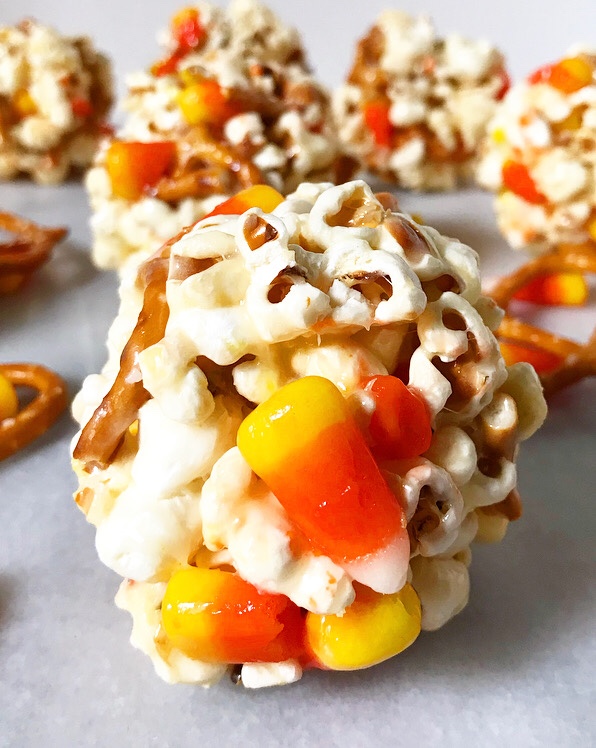
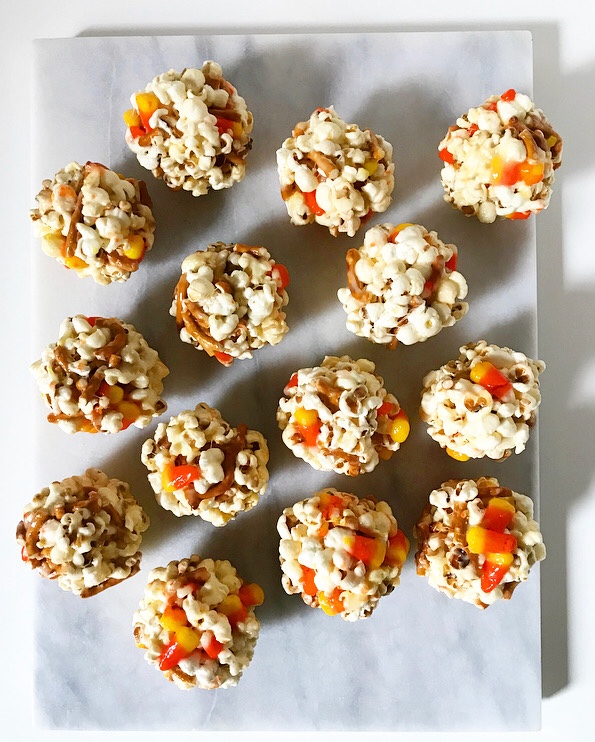 …whatever it is, I am now firmly in support of all things Halloween as they relate specifically to spherical sticky-sweet popcorn. And also
 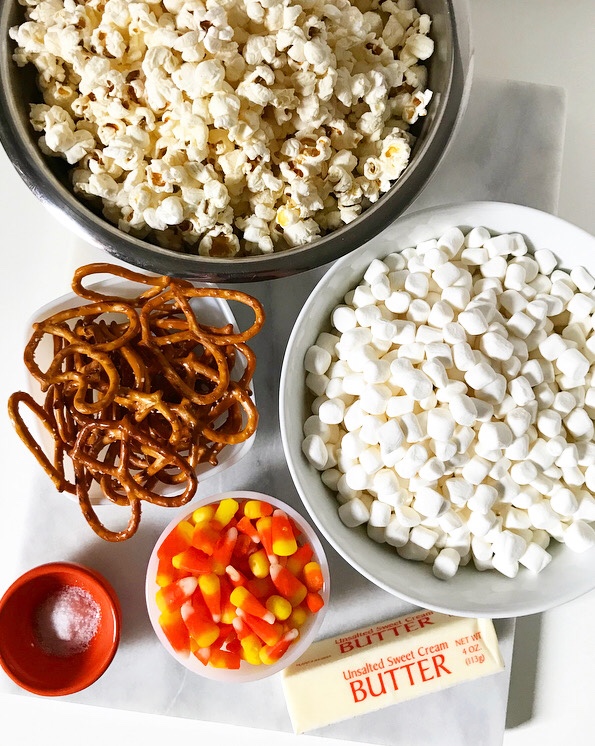 Lots of popcorn ball recipes are molten sugar or caramel-based and require a candy thermometer, but I went in a different, easier direction, using
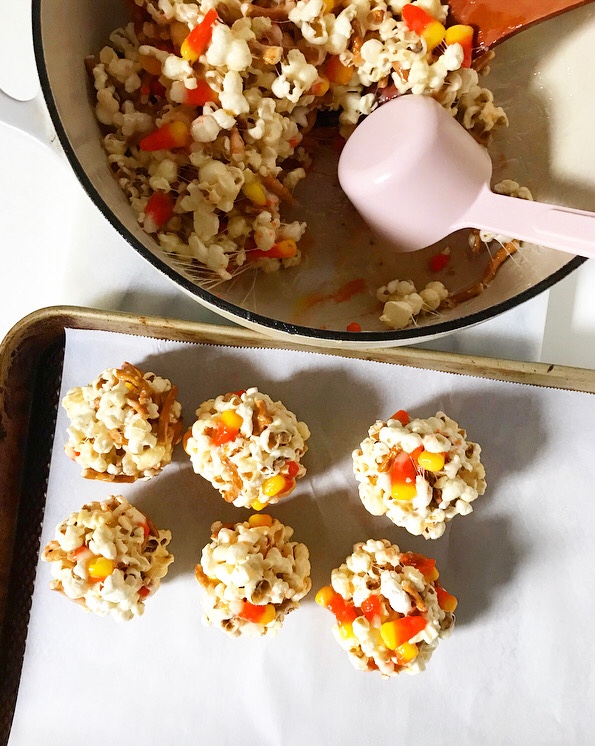

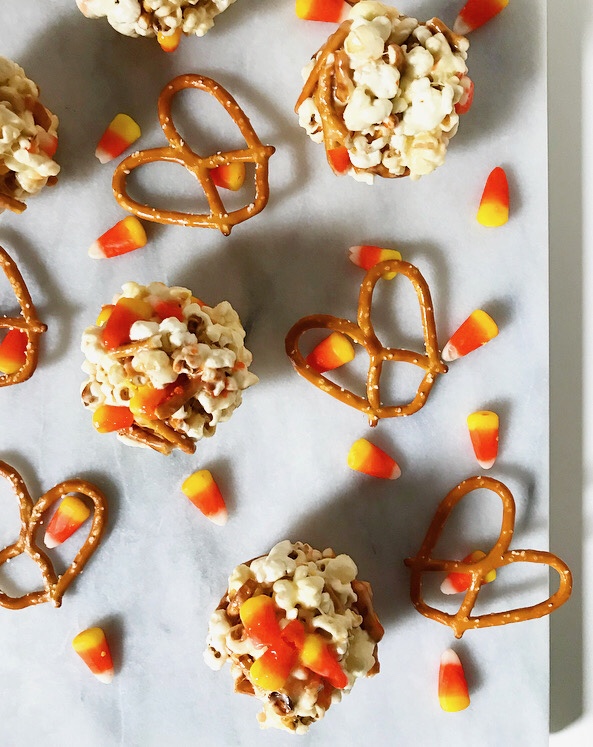 Once the mixture is to your liking, let it cool for about 5 minutes, just until you can handle it. Then butter your hands and press heaping 1/2 cups of sticky popcorn into balls and set them on a piece of parchment. After that’s done…well, you’re done. Except for the part where you watch the World Series and eat crunchy, just barely gooey, candy corn & pretzel-studded popcorn balls and call it Halloween. Or maybe that’s just me.
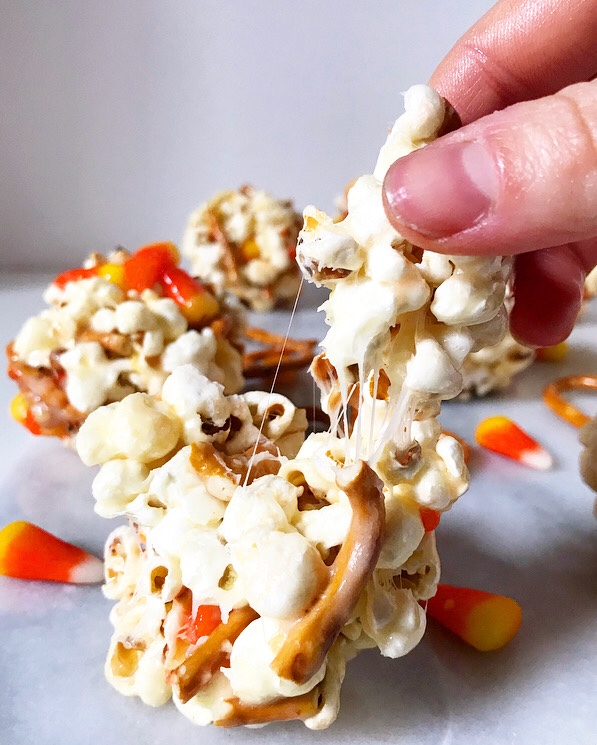
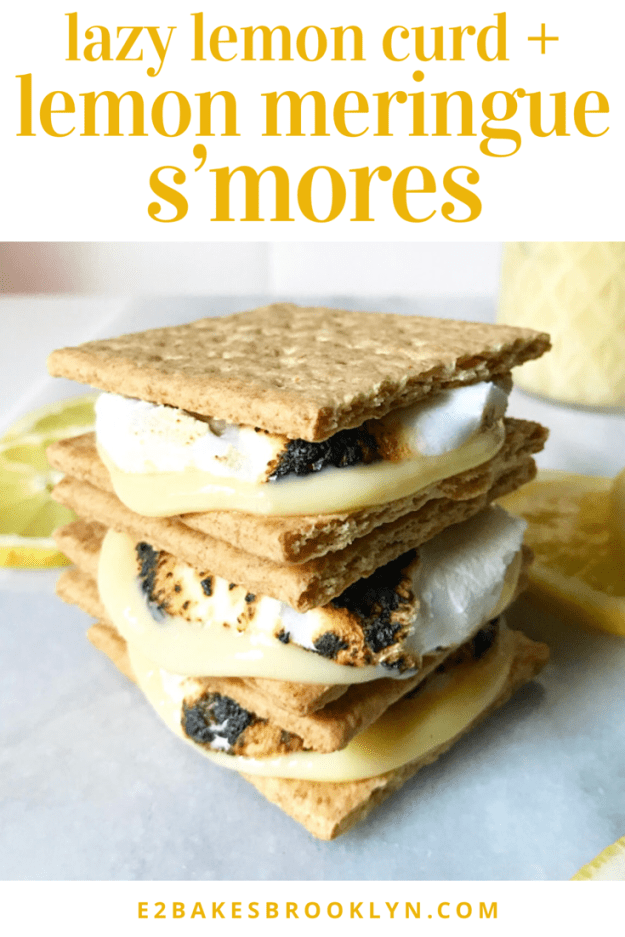
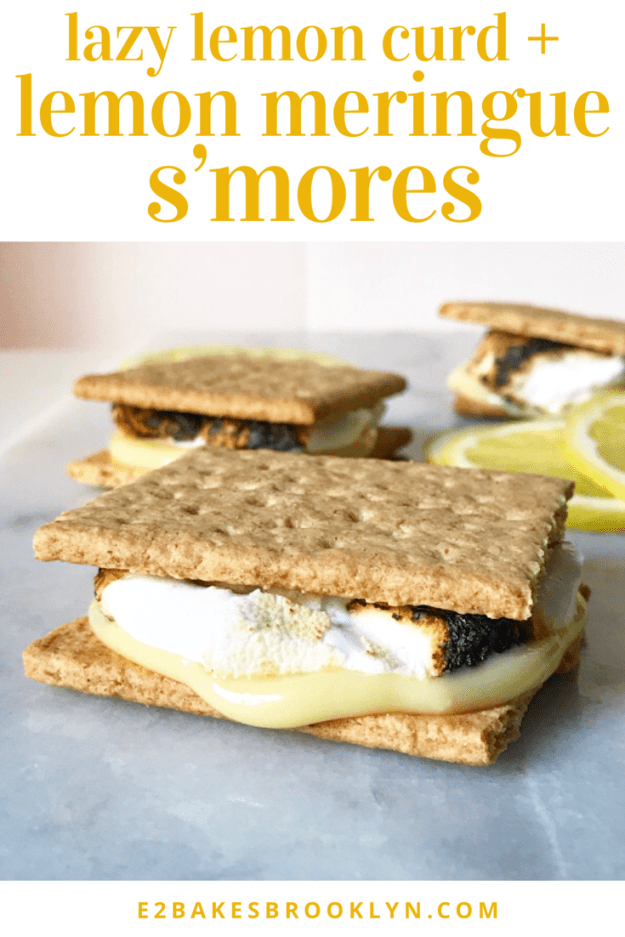
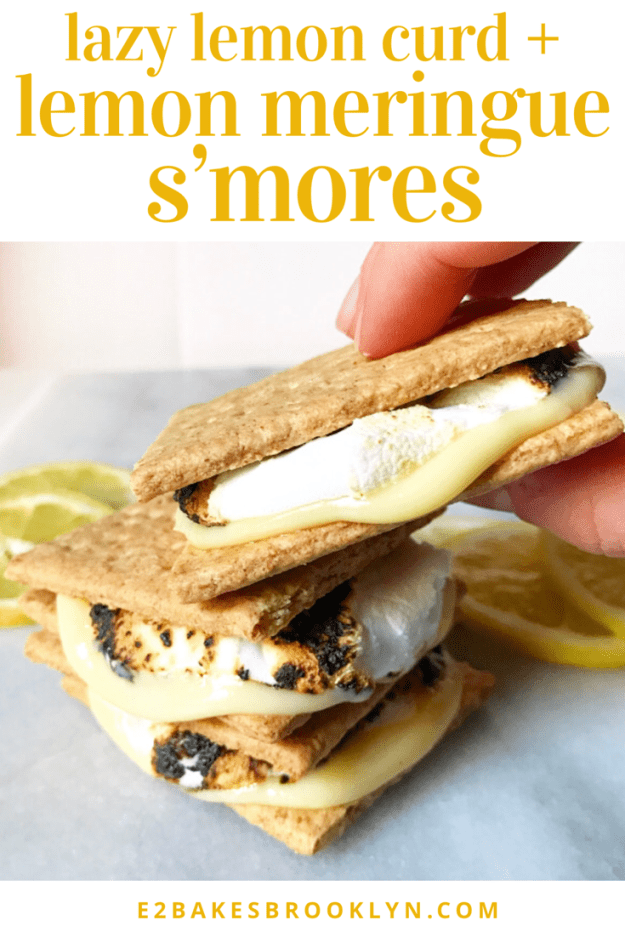
 Is there any food that celebrates summer quite like a s’more? I don’t think so. I mean, it’s pretty difficult to argue with the near-perfect combination of graham cracker, melty toasted marshmallow, and chocolate on a searing hot day…
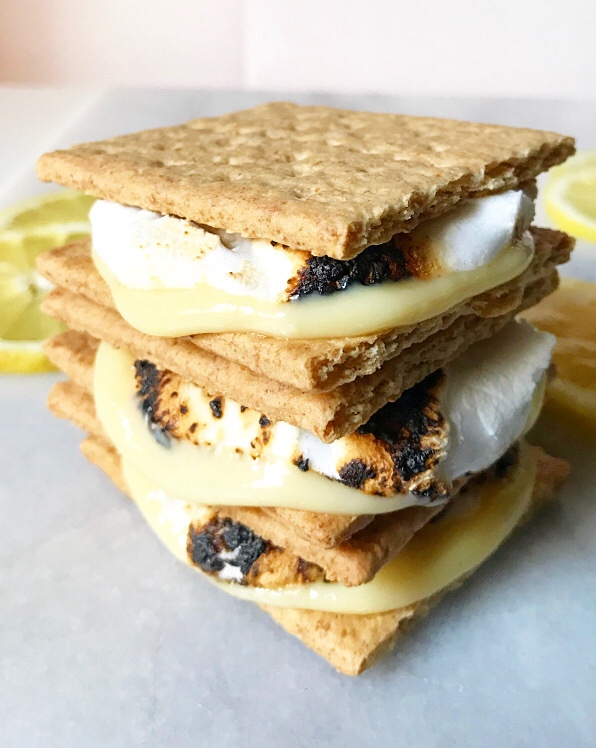
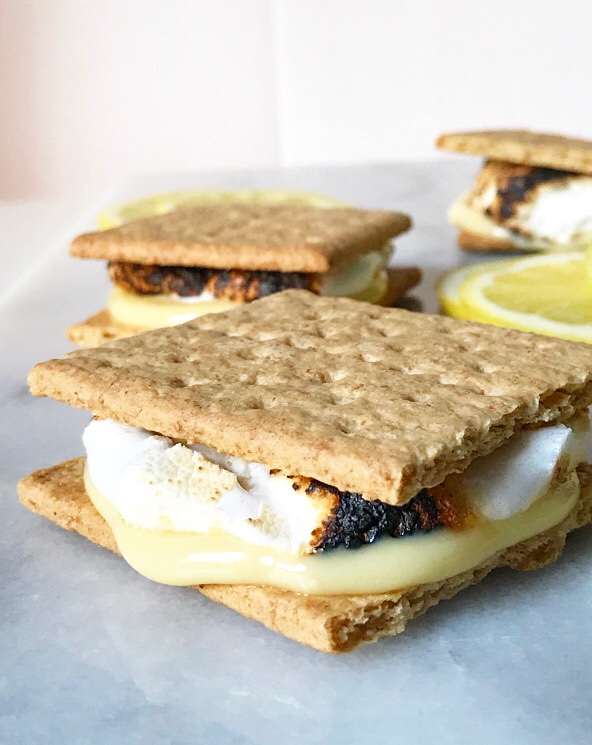 …but I’m going to anyway because of course I am. I like to occasionally dabble in the contrarian arts, and nothing on this blog screams “I do what I want!” louder than today’s Lemon Meringue S’mores!
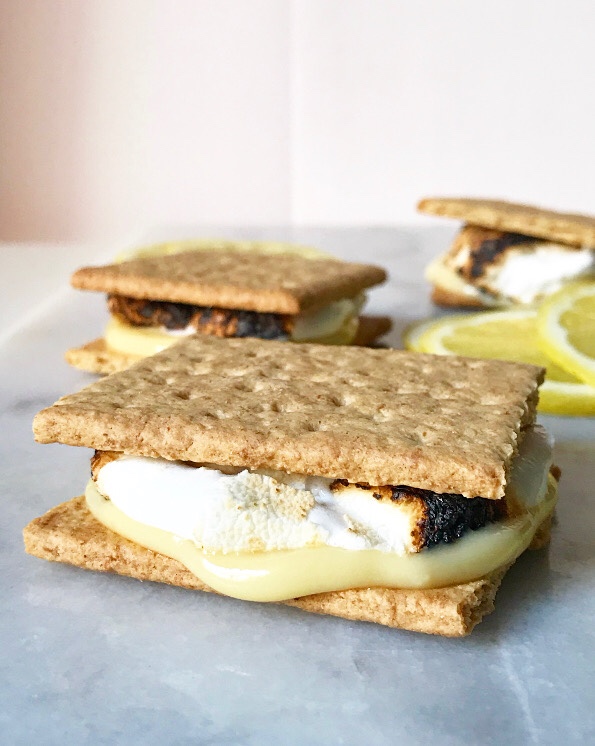 Yes, Lemon Meringue S’mores. As in,
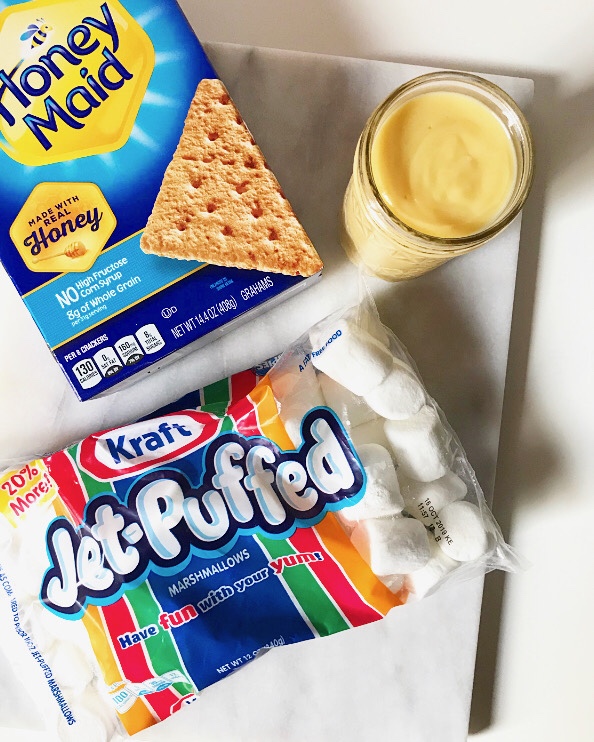
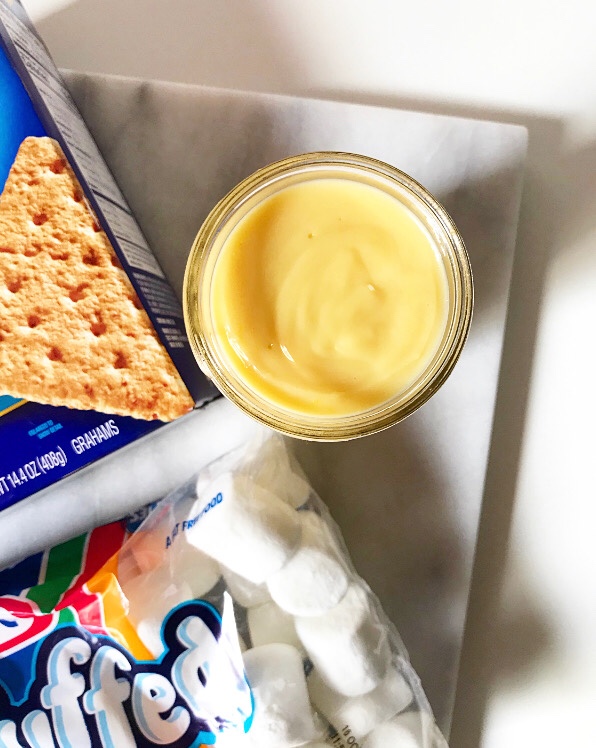 You see, the lemon curd I use for Lemon Meringue S’mores isn’t just any lemon curd, y’all. It’s Lazy Lemon Curd. I mean, you’ll be hard-presses to find a
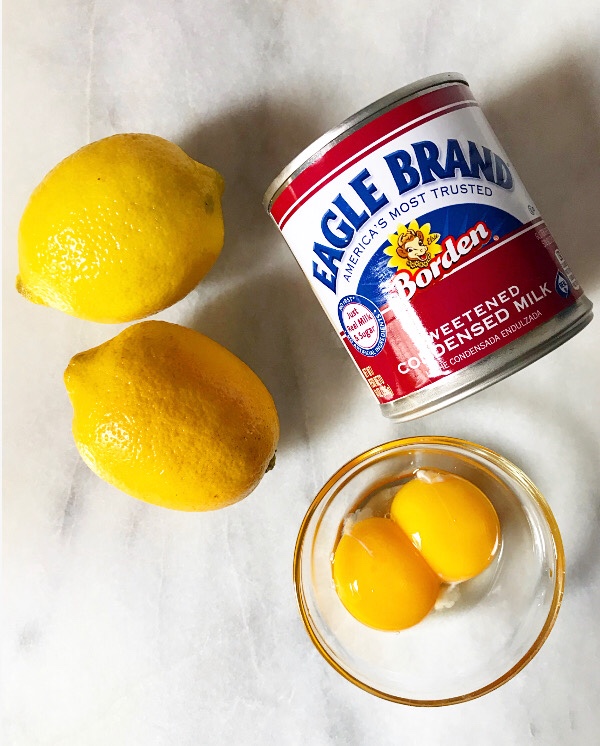
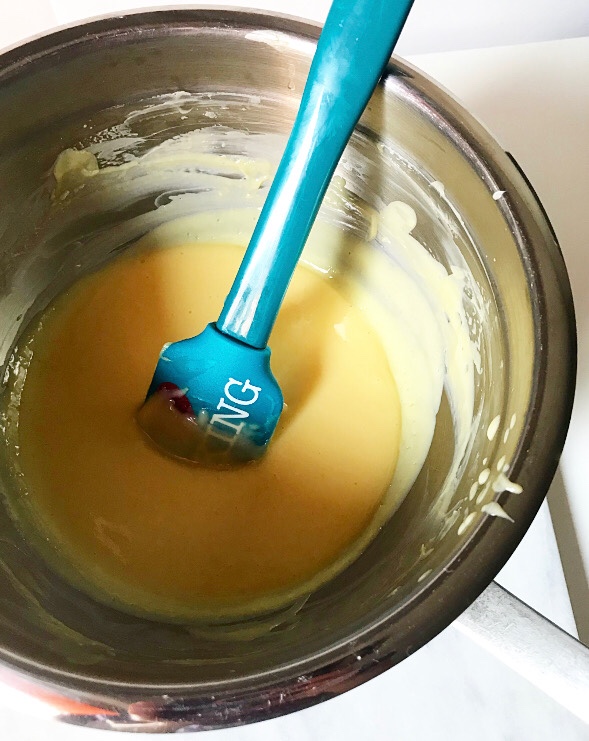
 This is an easy three-ingredient, two-step recipe. Whisk together some fresh lemon juice, two egg yolks and a can of sweetened condensed milk. Heat that mixture over a double boiler, stirring if/when you think about it, until it thickens slightly, which takes fifteen minutes. That’s literally it.
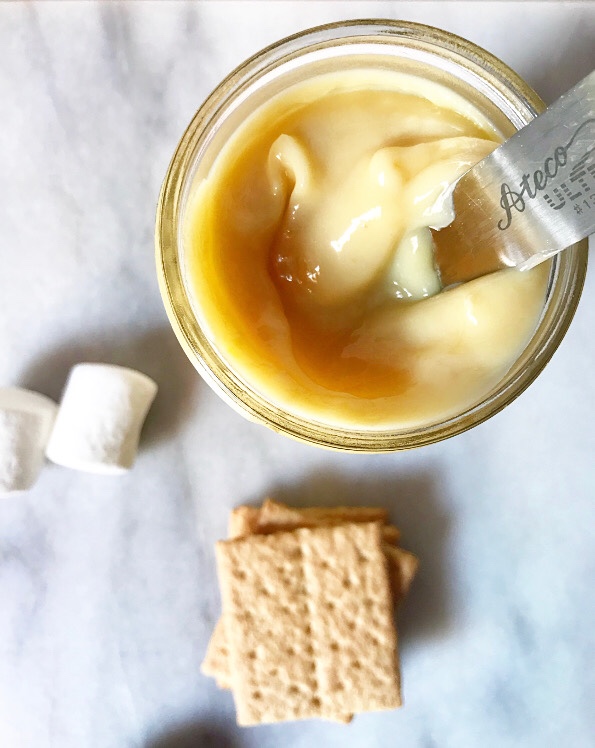
 If this recipe looks familiar, that’s because it is. Lazy Lemon Curd is just a sunny lemon spin on the filling for my
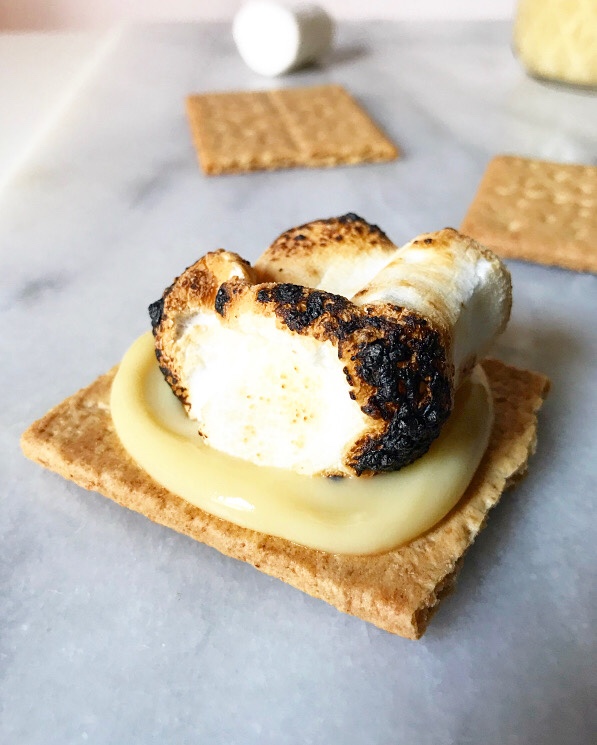
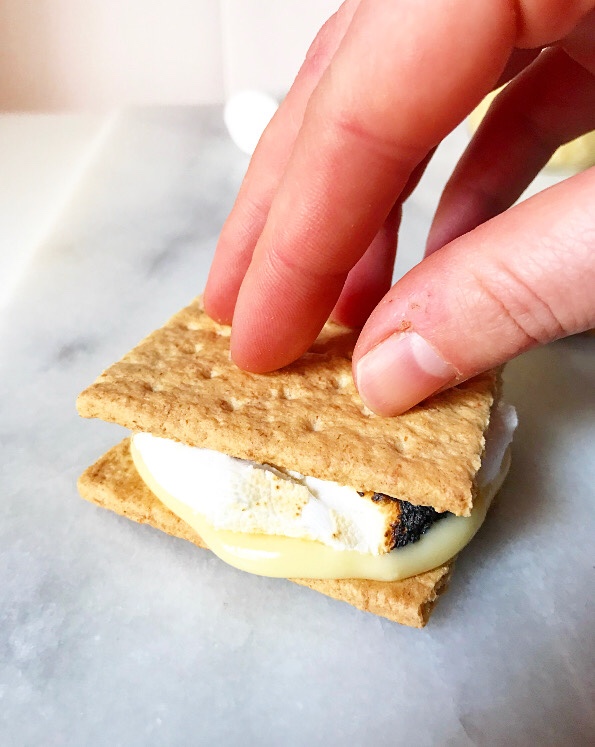
  Once your Lazy Lemon Curd has cooled a bit, make yourself some s’mores! Slather a little of the curd on a graham cracker, top it with a toasted marshmallow and sandwich it all with another graham cracker. And then repeat that process because you’re going to want two of these toasty, gooey, lemony treats. And because this stuff keeps well in the fridge, you can make Lemon Meringue S’mores all summer long. That’s something worth celebrating.