 I first came across a granita recipe in the summer of 2009 and thought “That looks easy and delicious. I’m going to make that.” And then ten years passed.
But I did make granita, and it was/is easy and delicious, and now I’m here to tell you to do the same. Maybe skip the ten years of procrastination though.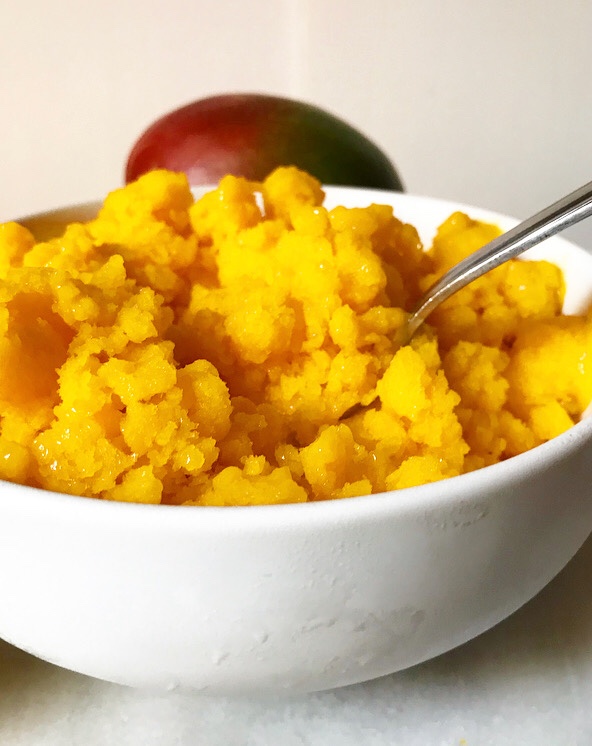
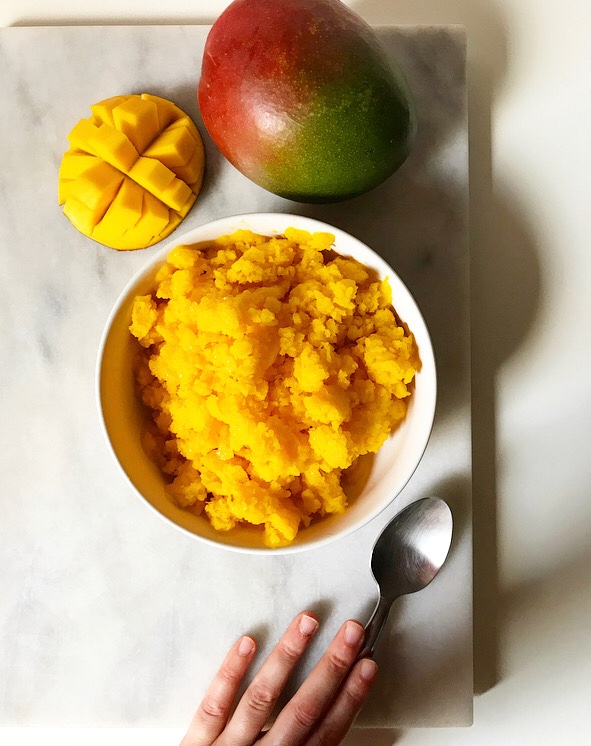
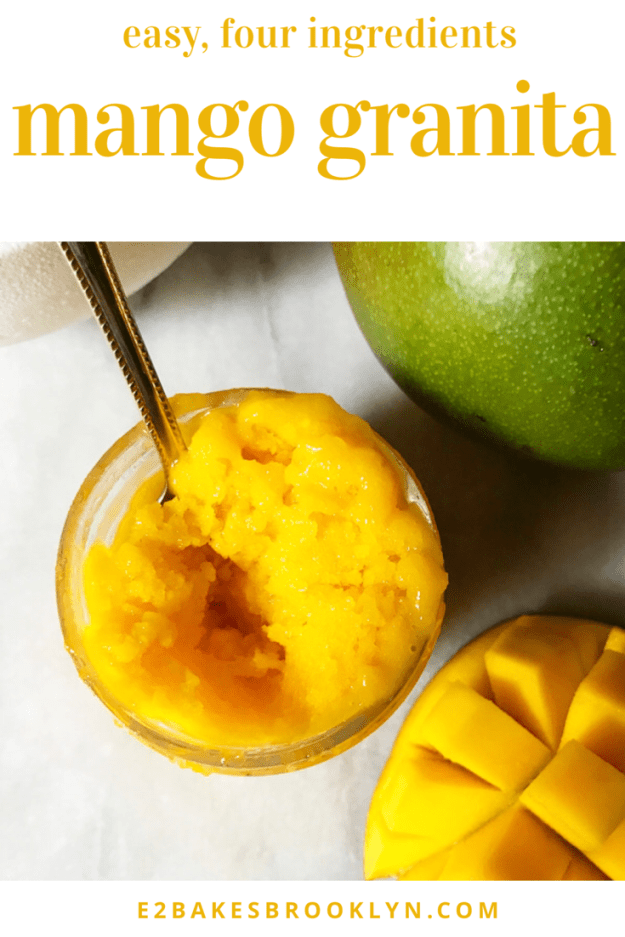
 If you are wondering what the heck I’m talking about, granita is a semi-frozen Sicilian dessert–basically a classy snow cone. The texture is fluffy and snowy, but instead of being ice flavored with brightly-colored syrup, it’s made from real fruit with very limited added sugar, and you don’t need a special machine to make it.
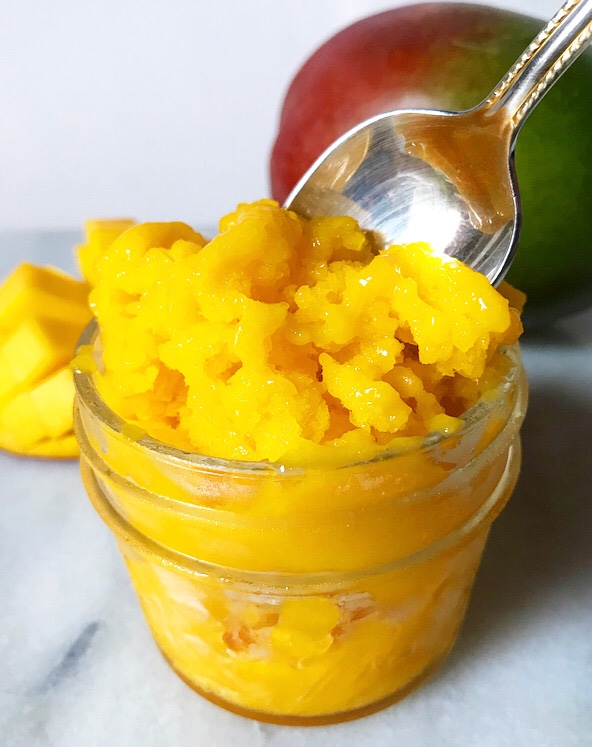 To make this Mango Granita, you’ll need:
- a few pounds of fresh mango. You could probably use thawed frozen if that’s all you can find.
- lime juice for brightness. Lime and mango are great together.
- the tiniest amount of sugar to round things out. Yes, ripe mango is already very sweet, but cold temperatures mean that flavor doesn’t always shine through the way it does at room temperature. I like to add two tablespoons of sugar to the entire recipe. That small amount makes a big difference!
- a pinch of salt for balance. You can leave this out if you want to, but salt is rarely a bad idea.
- a blender (or food processor), a dish, a fork, and time.
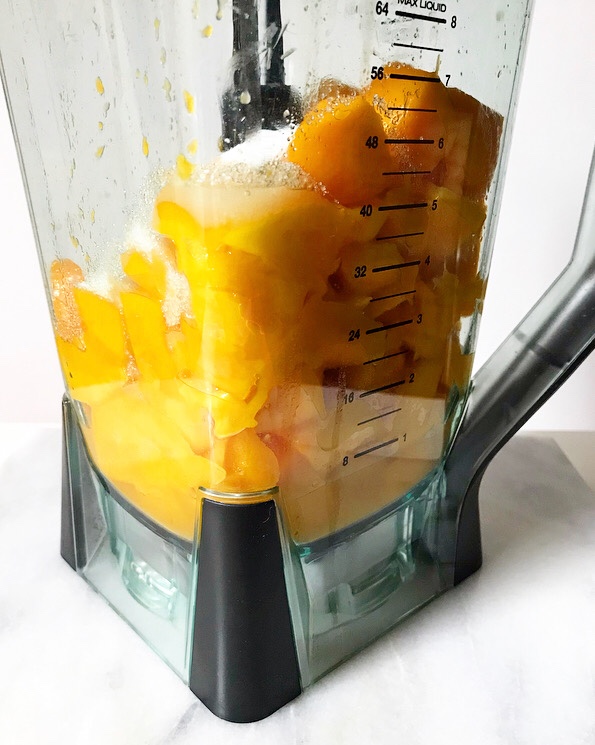
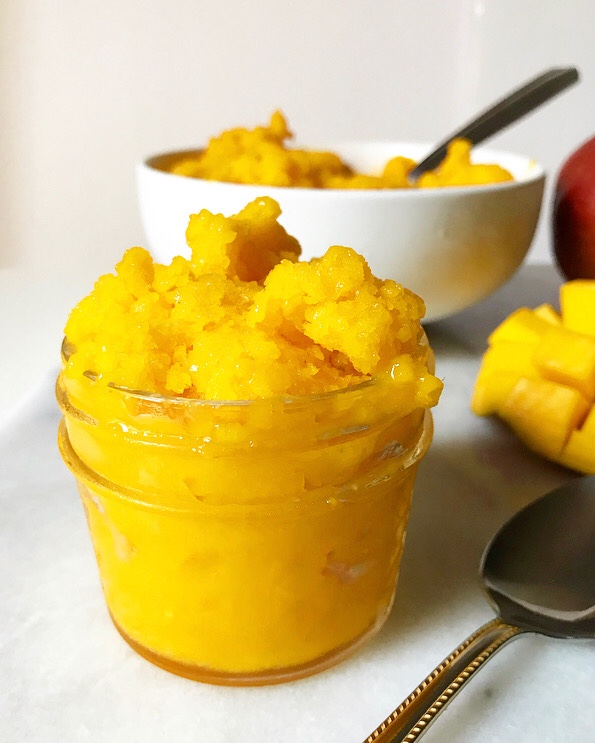
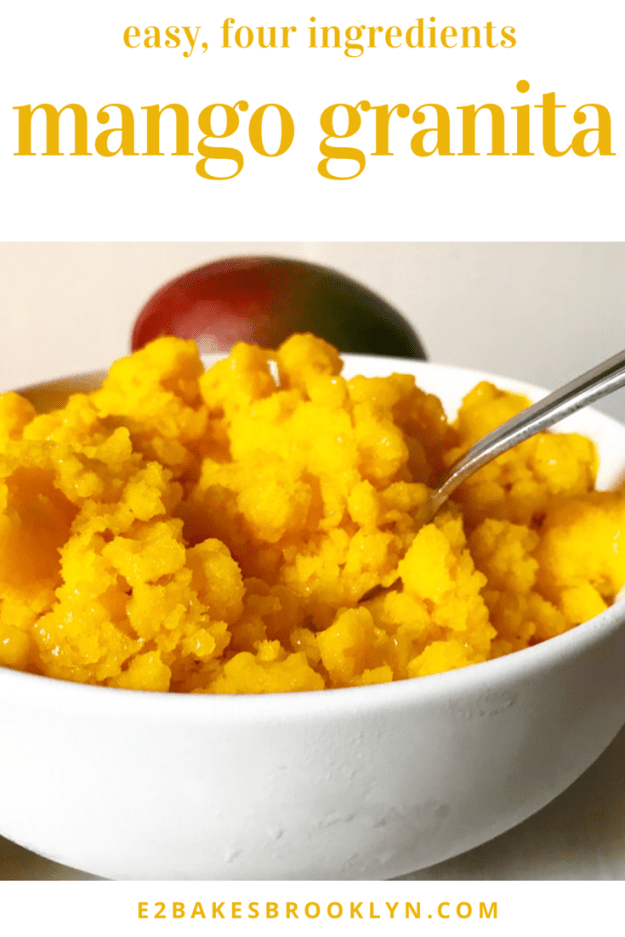
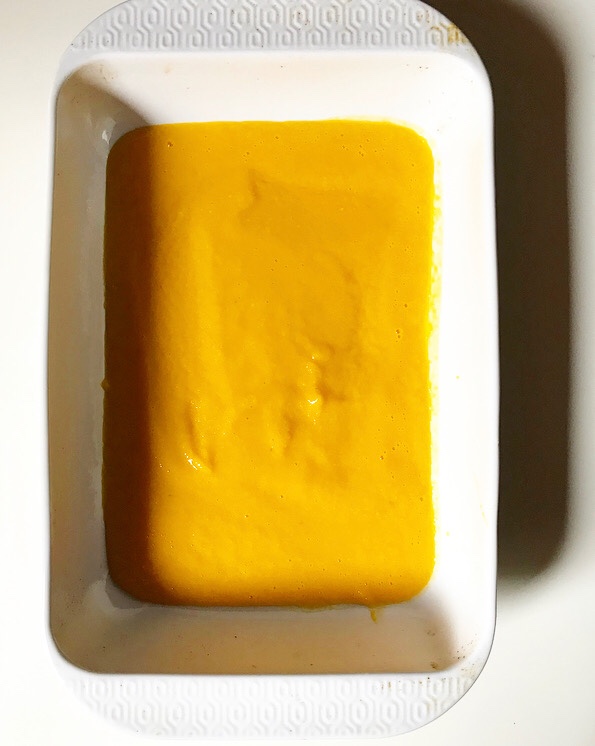 The process is simple. Blitz all the ingredients in a blender until smooth, then pour the purée into a large dish and put it in the freezer for an hour.
 When that time is up, remove the dish from the freezer. Starting at the outer edge, use a fork to drag the frozen purée into the looser center. This will begin the process of making fluffy, snowy ice crystals. At first, you may feel like you’re dragging a fork through soup, but an hour later, it’ll be a different story.
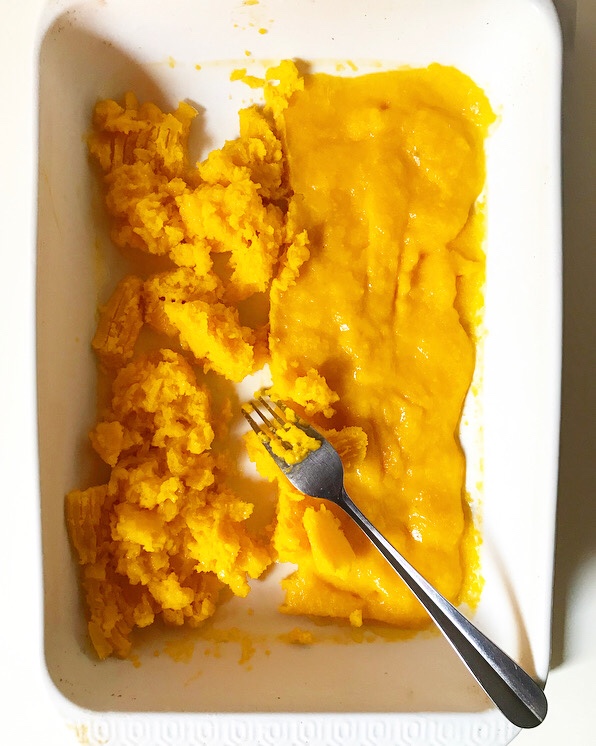 And then, thirty more minutes will go by and crystals will really begin to form! The grainy texture is the “gran-” in granita.
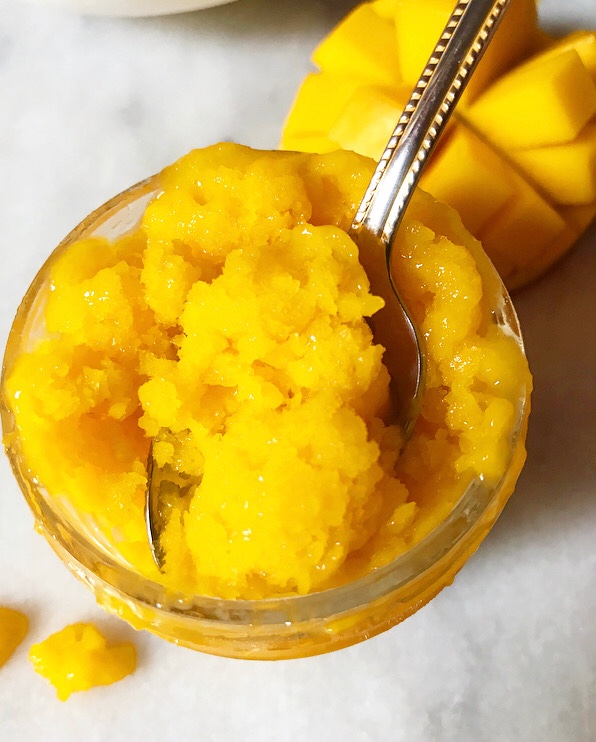
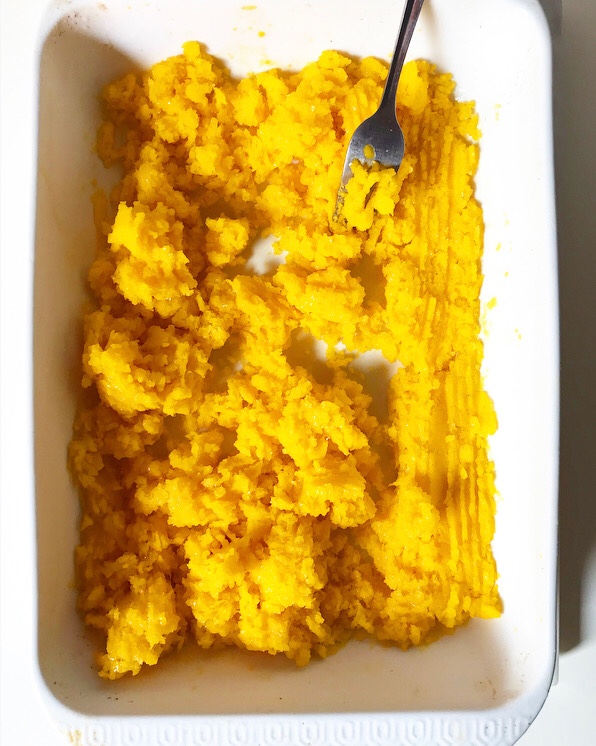 You’ll know it’s ready when it looks like this:
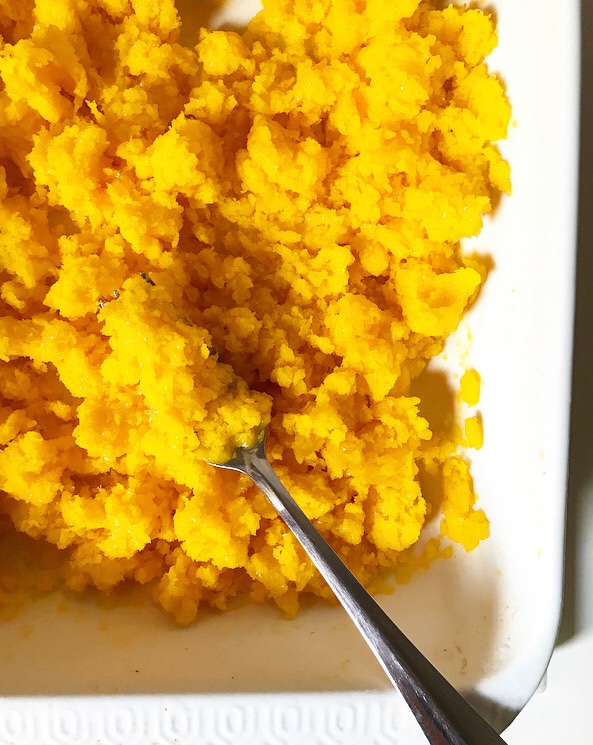
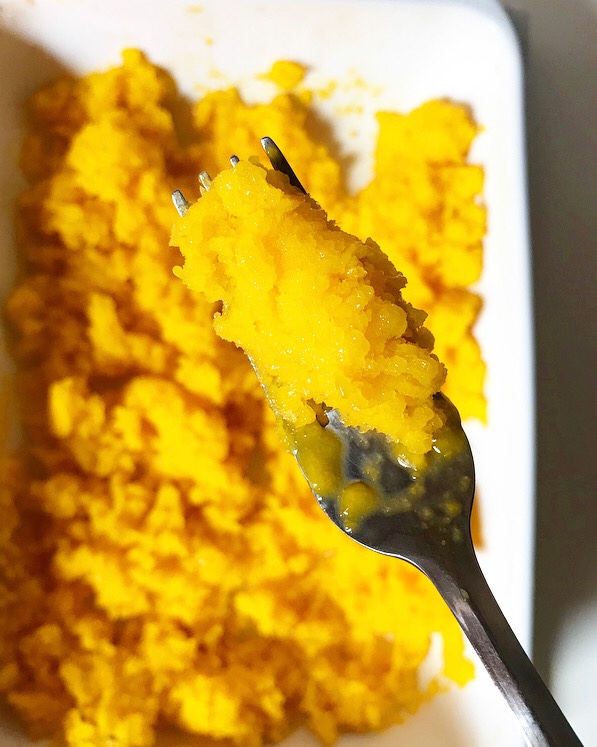
 Mango Granita is as delicious as it is beautiful—light and refreshing and perfect for these sweltering last few weeks of summer! The texture is somewhere between a snow cone and a sorbet. Where you might think this would be icy, it’s super smooth and surprisingly creamy. This is the sort of dessert that is great for any occasion from watching Netflix in your PJs to a cookout to a dinner party. It’s vegan, nut-free, low calorie and low sugar–a wonderful option for a crowd!
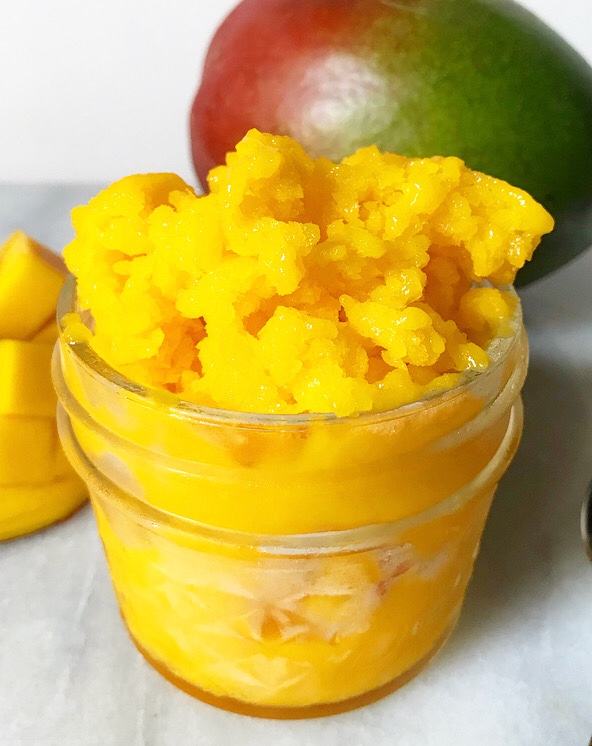
 Before I get to the recipe, here are a few more tips for granita success:
- use the largest dish you can. The shallower the layer of purée, the faster it will freeze.
- you can use any fruit you like! I love mango, but peaches, melon or berries would be magnificent here!
- make granita on a day you’ll be spending a lot of time at home. This recipe is low maintenance, but the ice crystals need to be scraped every hour at first and then every half-hour. Give ‘em one final scrape before serving.
- for the love of everything, don’t wait ten years to make this. Ideally, you should make Mango Granita as soon as possible. Like tomorrow.
Have a great weekend, y’all!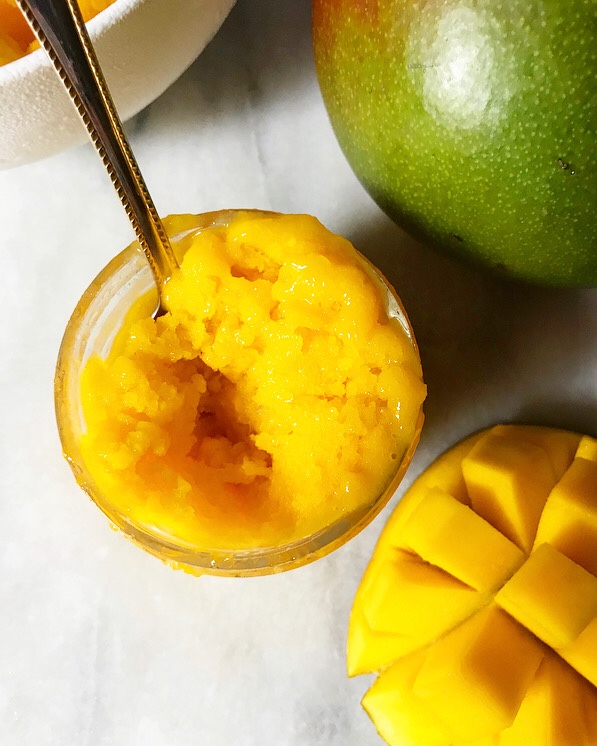
Mango Granita
makes about a quart
3 large ripe mangoes (about 3 pounds), pits & skin removed, sliced
1/4 cup fresh lime juice (about 2 limes)
2 tablespoons granulated sugar
pinch of Kosher or sea salt
Combine mango, lime juice, sugar and salt in a high-powered blender and blitz until smooth. Pour into a large shallow dish (I used a 9×13-inch casserole). Freeze for 60 minutes.
Remove cold mixture from freezer. Starting at the outer edge, use a fork to scrape/drag the icier edges of the mixture into the center of the dish. Mixture will still be quite loose. Return dish to the freezer for 45-60 minutes before repeating scraping. Continue to scrape every 30 minutes for the next 1-2 hours, or until the texture is fluffy and snow-like.
Freeze until ready to serve. Give one last scrape before serving in small bowls.
Leftover granita will keep in the freezer for about a week. Scrape before serving.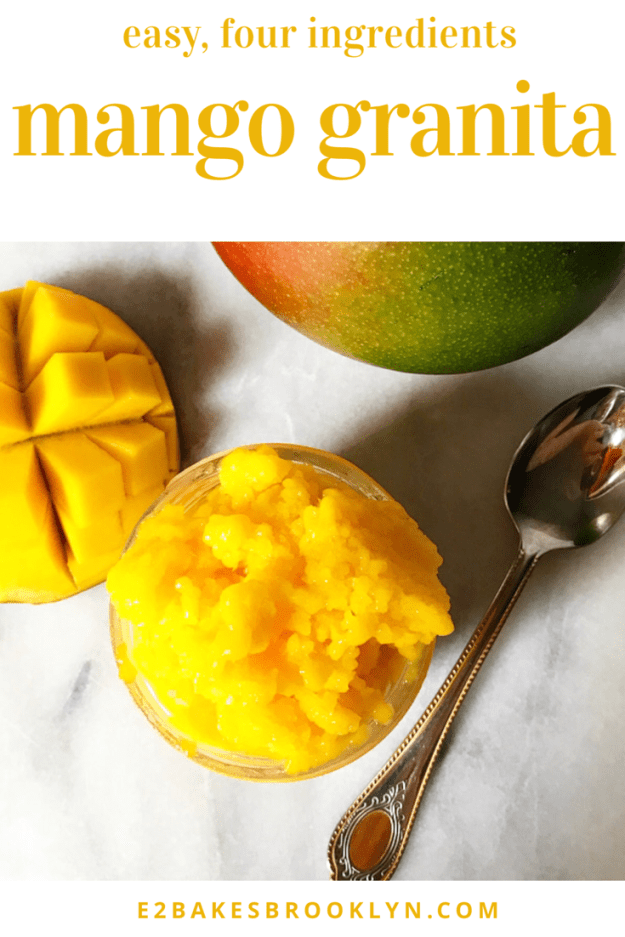
 This is the last
 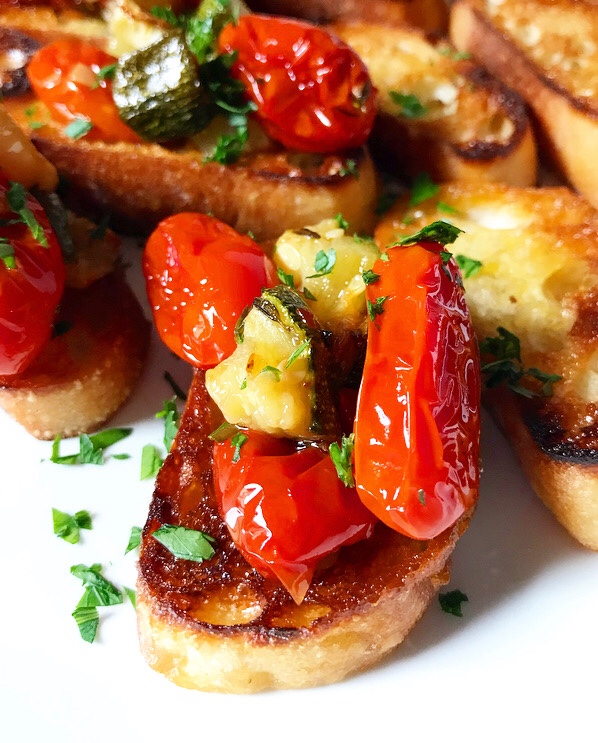 Unlike the
 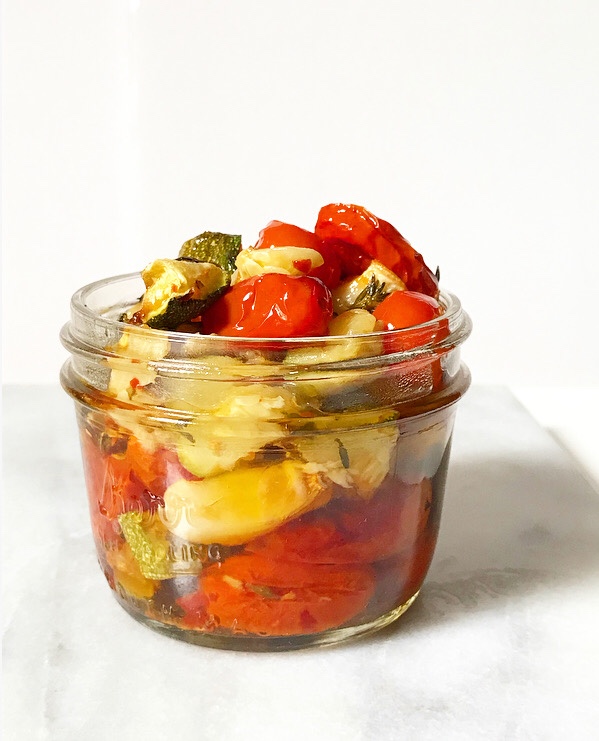 Now, you’ve almost certainly heard of confit, most likely in association with duck. The word itself comes from the
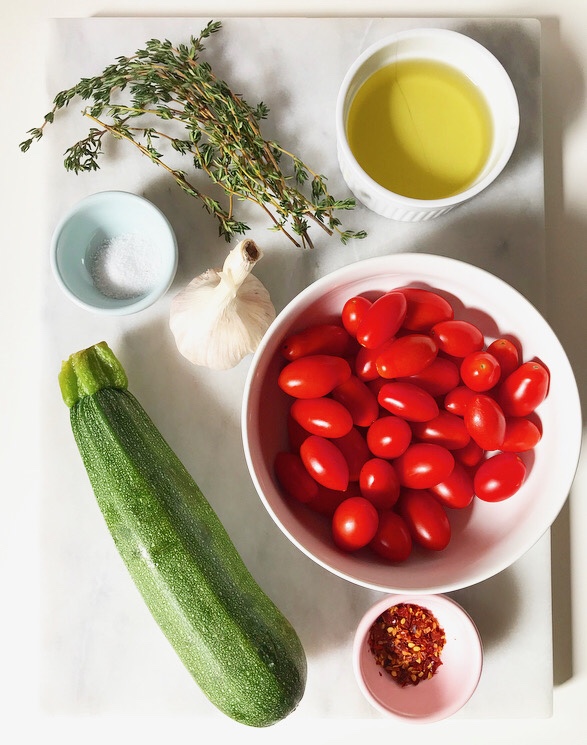
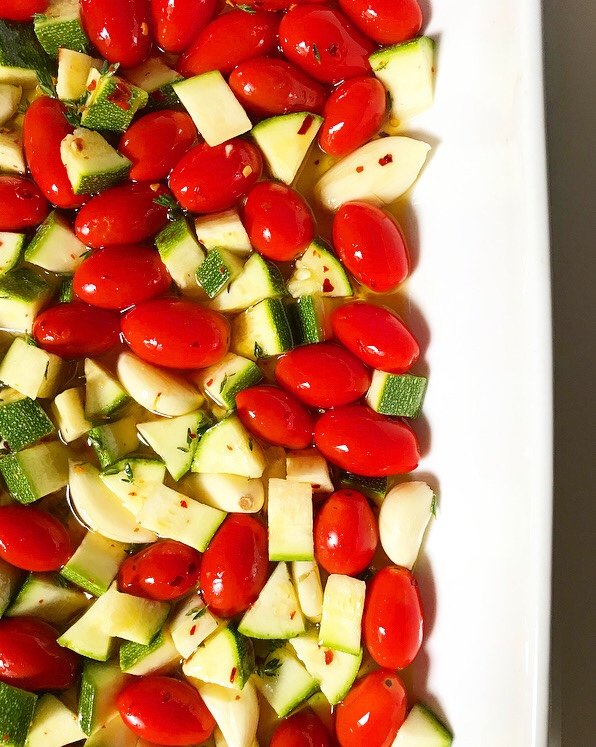
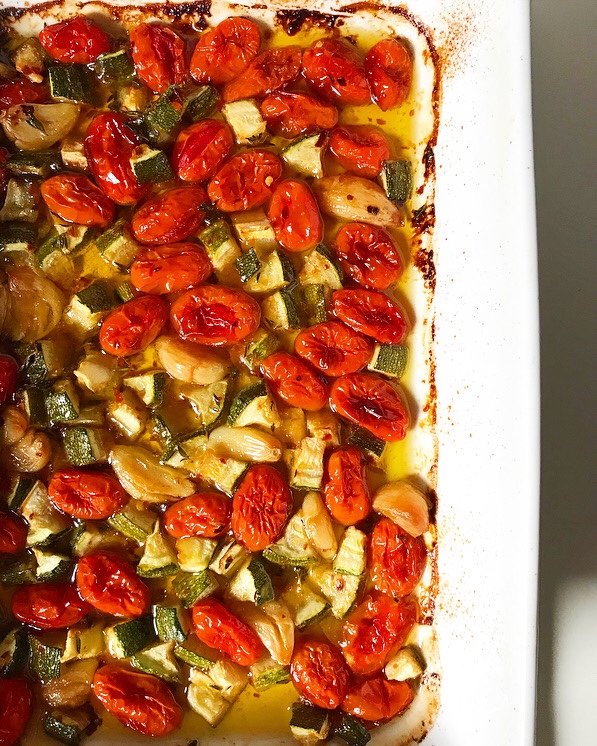 Making this confit couldn’t be simpler. Start by tipping a pint of grape tomatoes, some diced zucchini and an entire head’s-worth of garlic cloves into a casserole dish. Season them with thyme, red pepper flakes and salt. Stir in 3/4 cup of olive oil and slow-roast until it’s all soft, caramelized, and fragrant. That’s it.
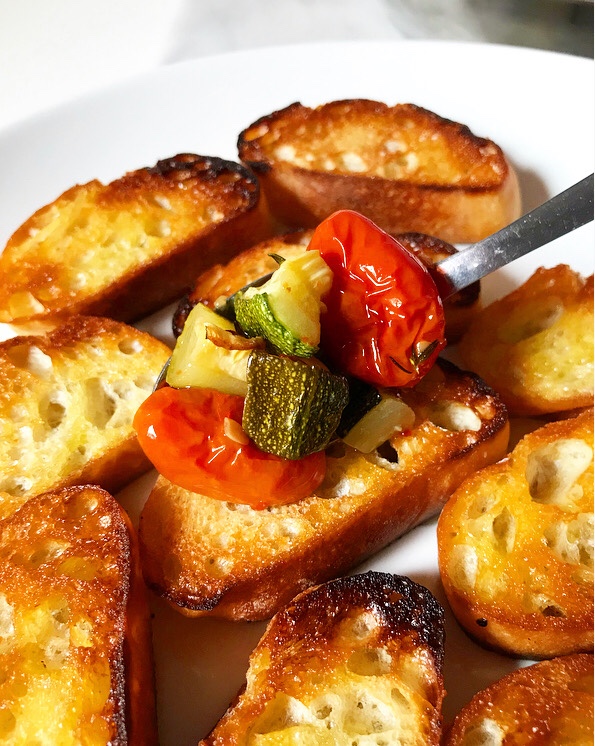 The sky’s the limit on applications. Tomato & Zucchini Confit can be stirred into pasta , grains or beans for a quick meal, or used to garnish chicken or fish. For this post, I just spooned it onto some baguette slices that were toasted in olive oil and called it crostini. Really, put this on anything that could use a touch of herby, savory, garlicky tomato & zucchini. (I think you’ll find that that’s most things.)
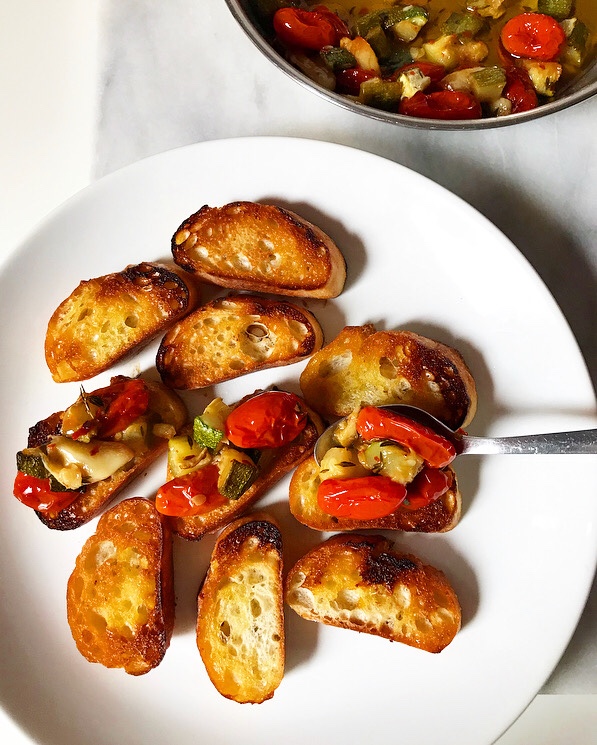 I’ve written this recipe so that the oven is at 300F and the confit cooks for about an hour, but you can go even lower and slower (think 250F for 2 or even 3 hours) for greater depth of flavor. I think it’s pretty wonderful as is though.
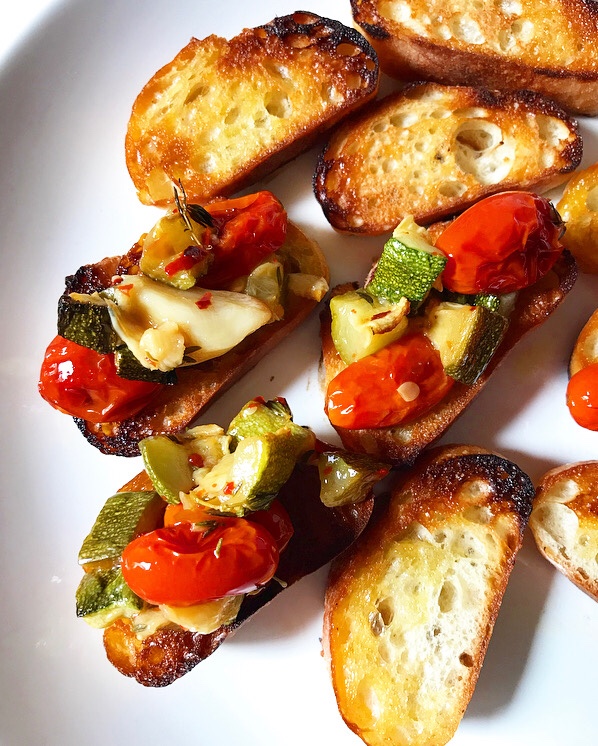 Tomato & Zucchini Confit is great the day it’s made, but since it’s a preserve, one batch can last a while. Once it has cooled, just pile it into a jar, top it off with olive oil so that none of the tomato, zucchini or garlic is exposed, and store it in the fridge. When you’re ready to serve it, bring the confit back to room temperature. When you’ve had your fill, top the leftovers with more oil and refrigerate the jar again for up to two weeks. If you’re anything like me though, it won’t be around longer than a few days.
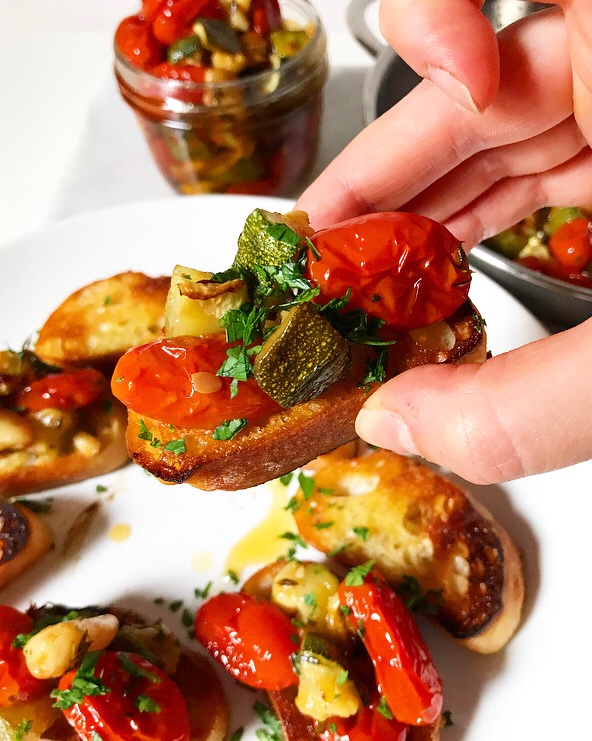


 The last morning on
  But it’s also time for one last good breakfast. Since
 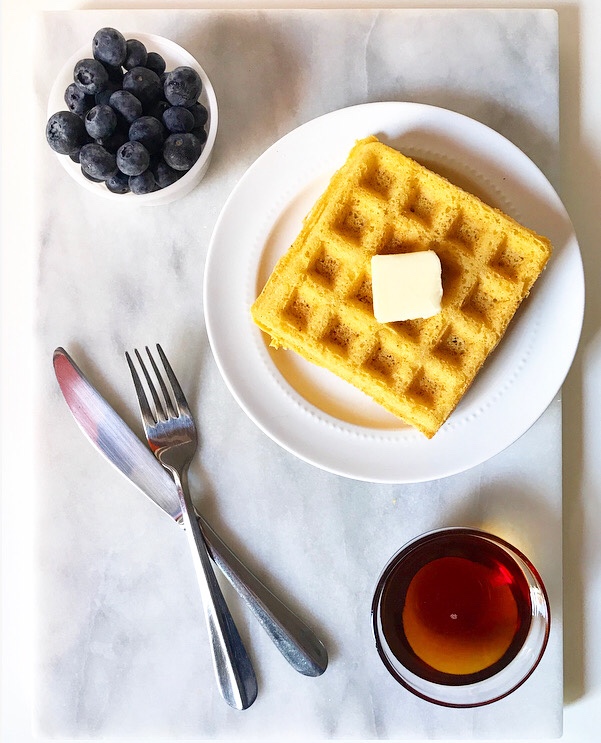 Initially, she may have regretted this. I had it in my head that my
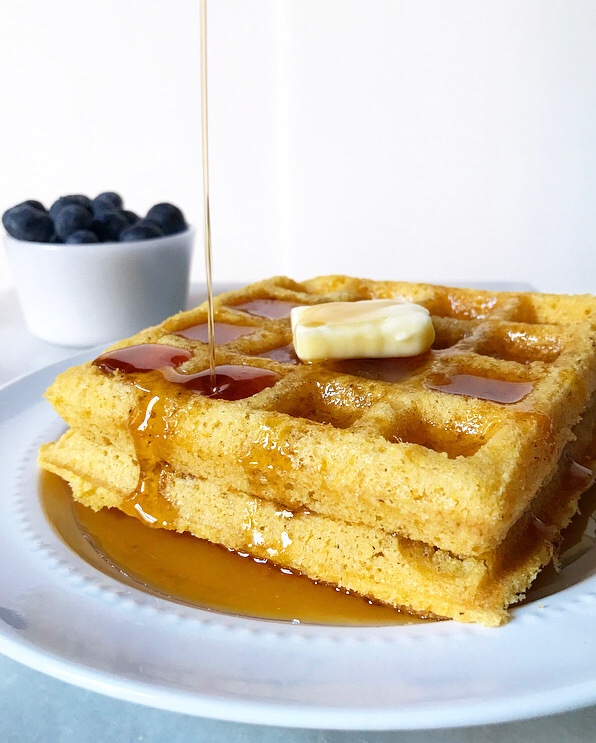
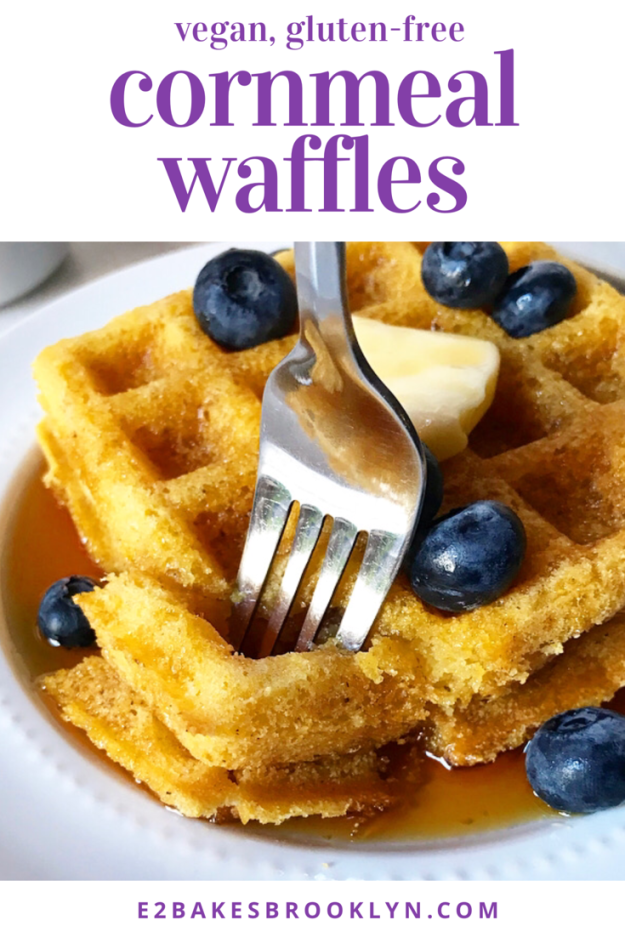
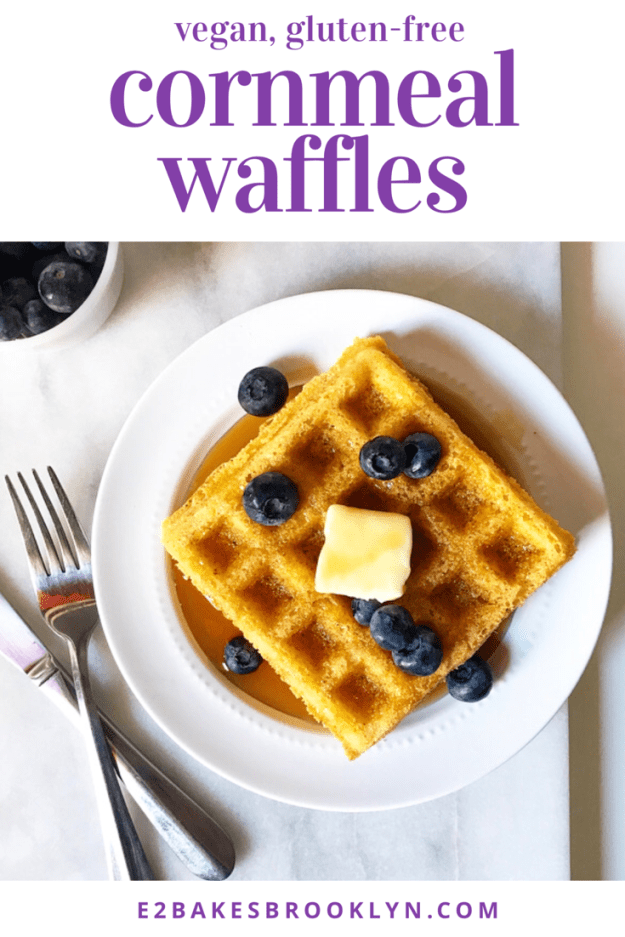
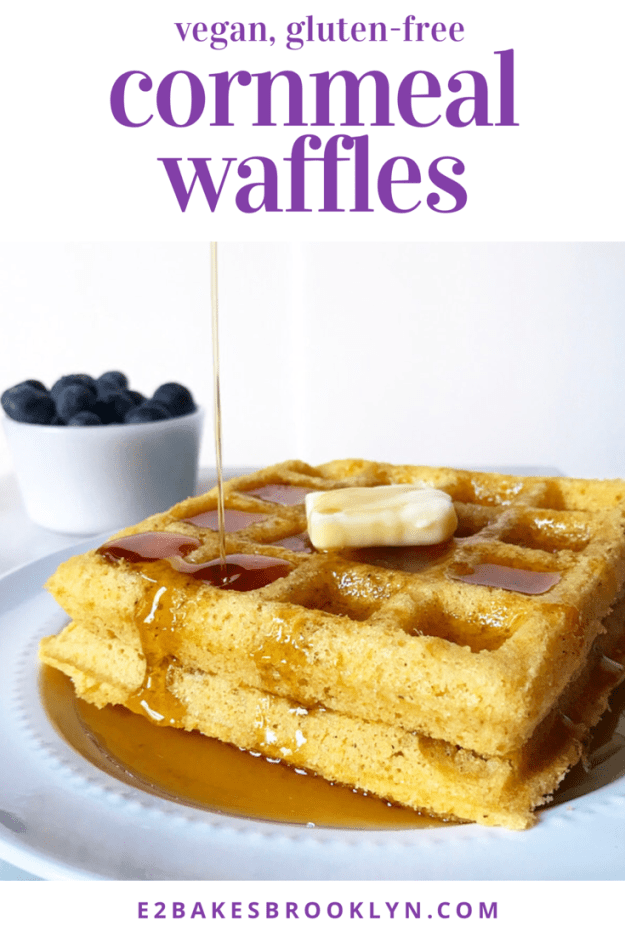
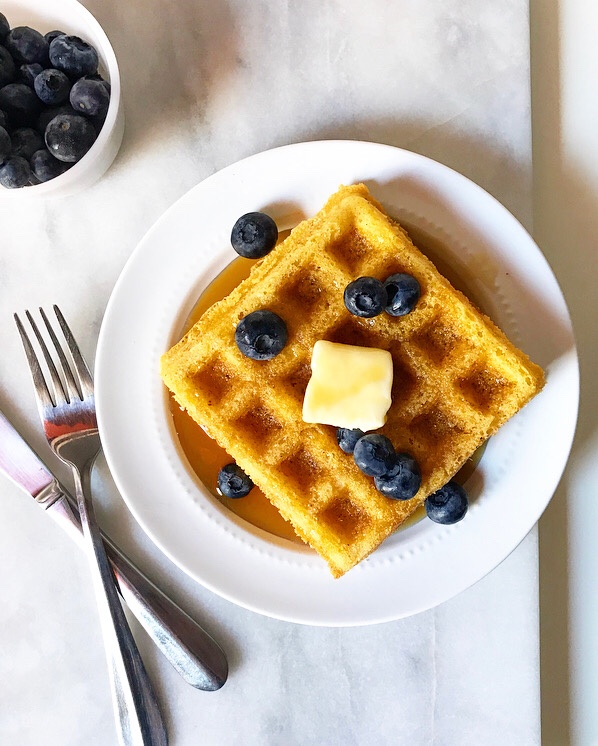 You can see where this is going—the first round was akin to cornmeal styrofoam. Turns out, waffle batter generally needs to be thinner than pancake batter, lest the final product be tough, dry and heavy. We ate the waffles anyway (bad waffles are still waffles), but it took two days and neither of us was particularly jazzed about it. Needless to say, I was a little disheartened, and spent a couple of days writing and rewriting the recipe until I was ready to try again on the final morning.
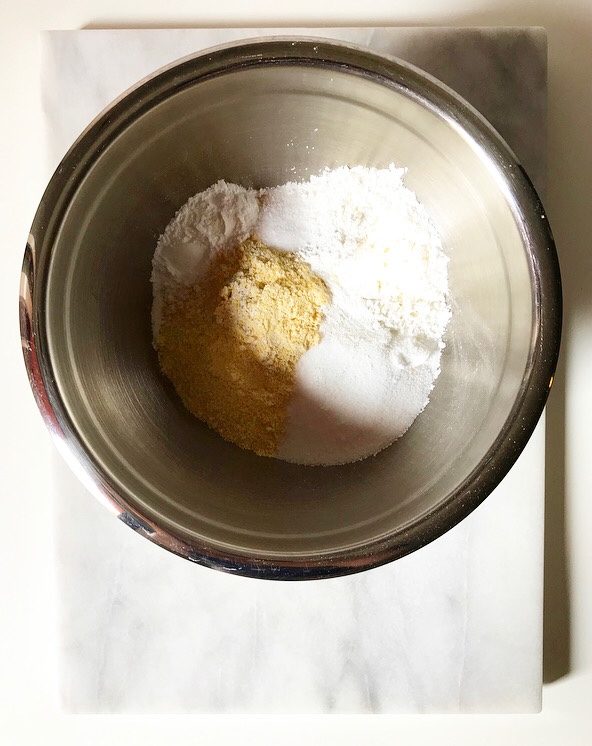
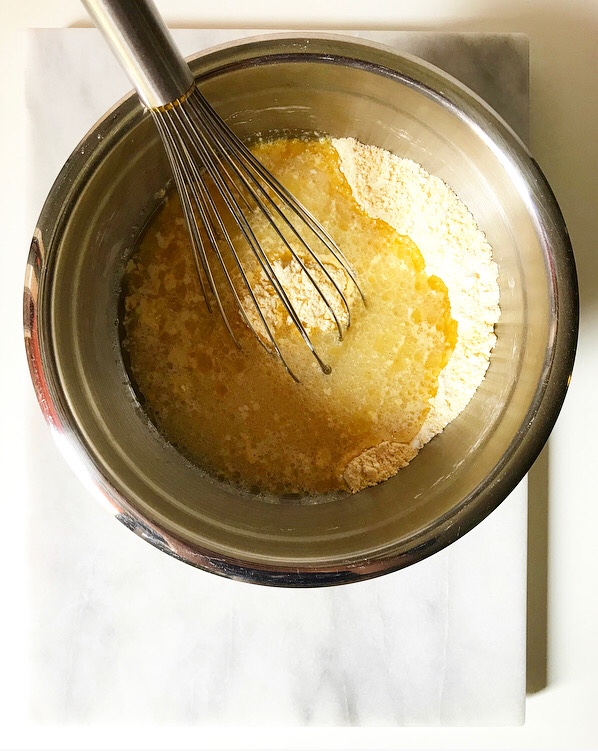
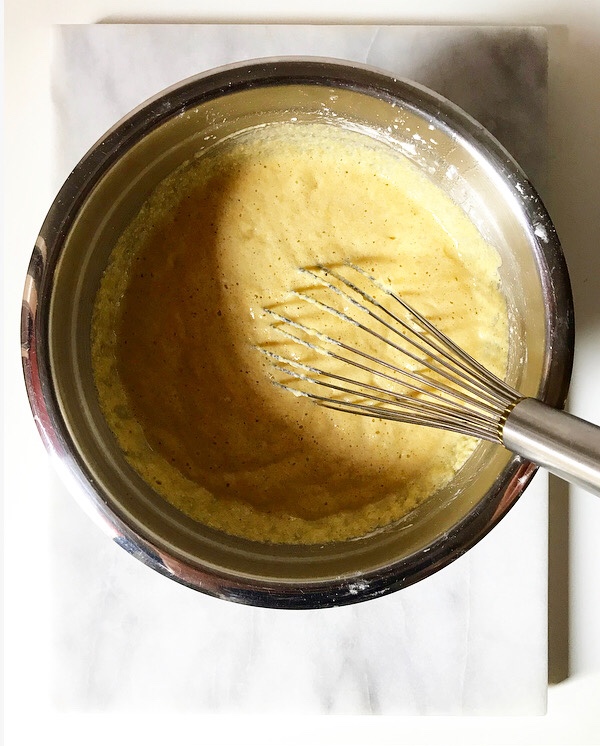 As I began mixing together dry ingredients and measuring out aquafaba and oil, I started to worry that round two would be disastrous too, but I ladled the batter into the iron anyway. VJ and I had an unspoken agreement that we would eat the results, no matter how awful.
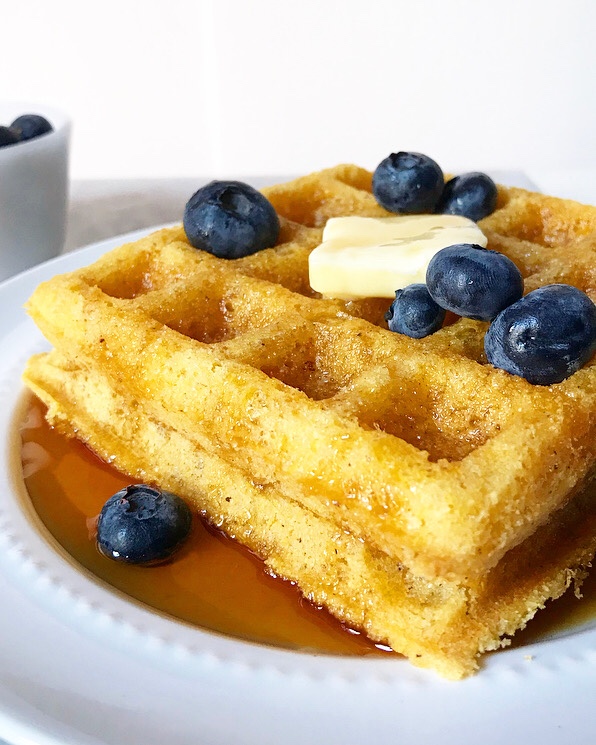
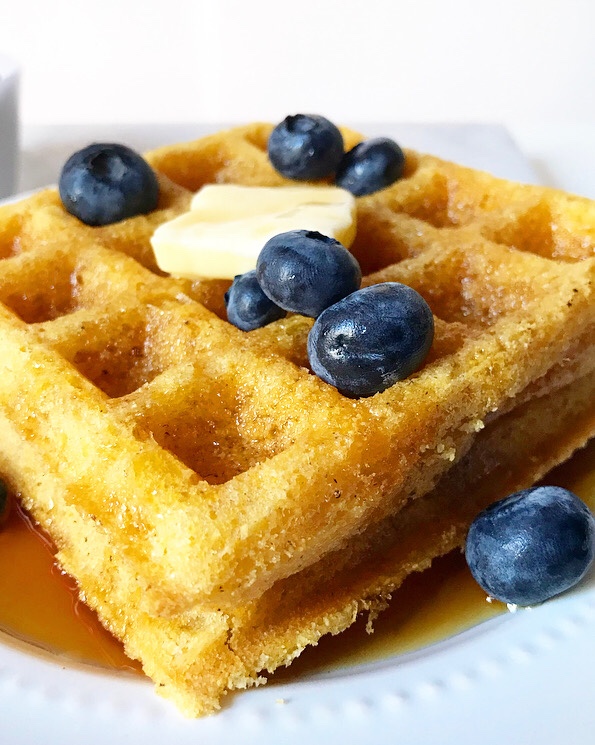 But we were pleasantly surprised. My adjustments—reducing the cornmeal and doubling the aquafaba (chickpea canning liquid/egg substitute)—had worked, producing lighter, softer waffles with crisp edges and a good corn flavor. We finished them in one sitting. No arduous styrofoam-esque breakfasts here!
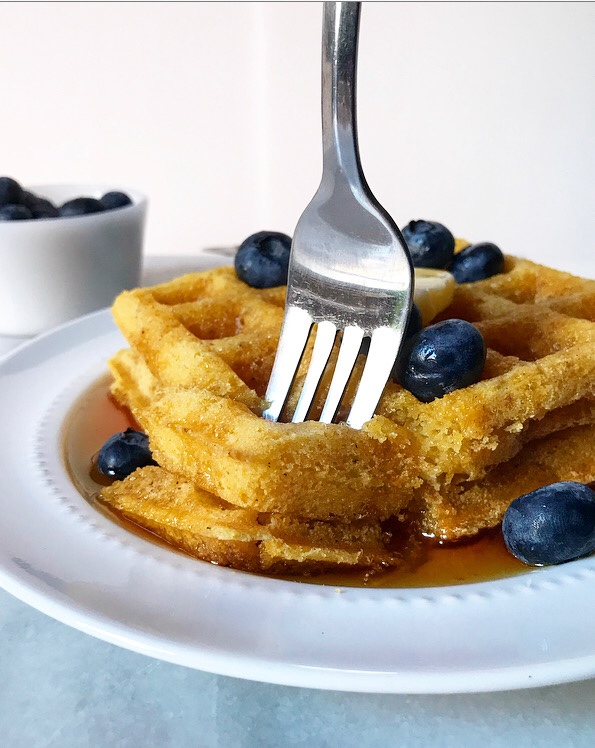
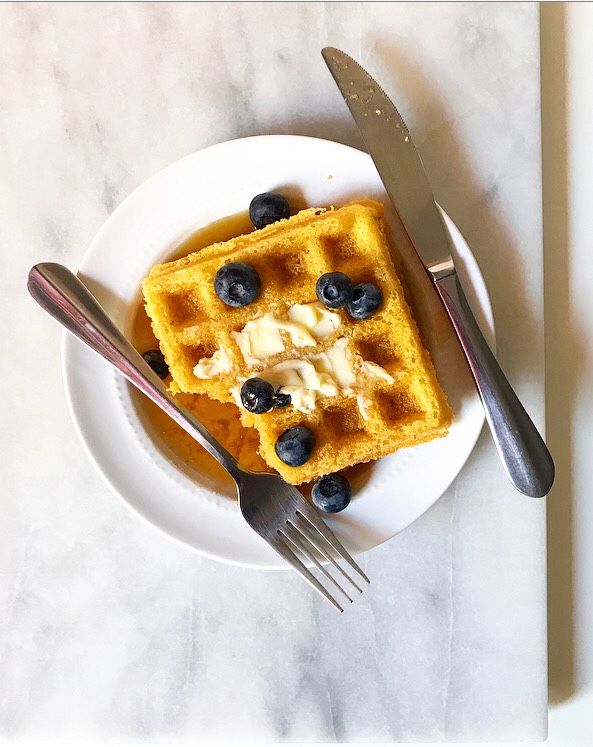 Long story short, in addition to my haul from the vintage stores, this vacation also resulted in my purchase of a waffle maker. I’ve been home for about six days now and have already gotten a good return on my investment: I’ve made this recipe
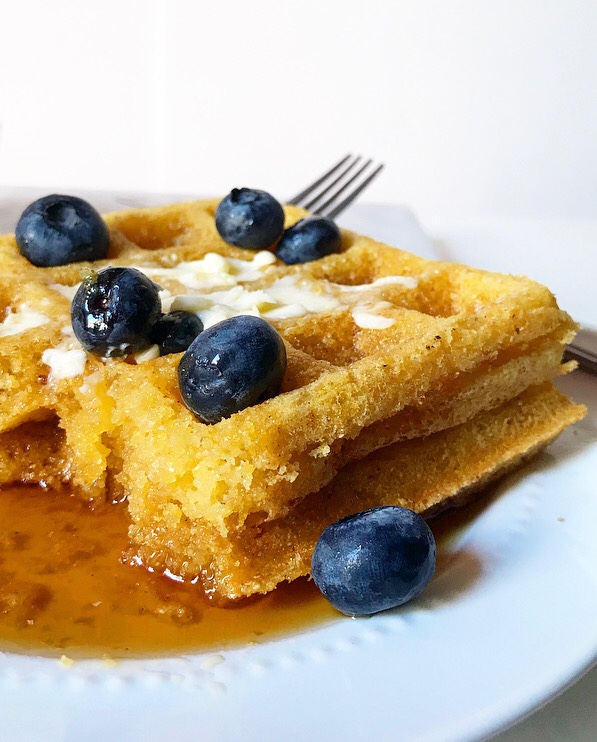

 Hi there! Long time, no blog.
 That doesn’t mean I didn’t cook though. Vacationing on a remote island means spending time in the kitchen is a necessity, and for me,
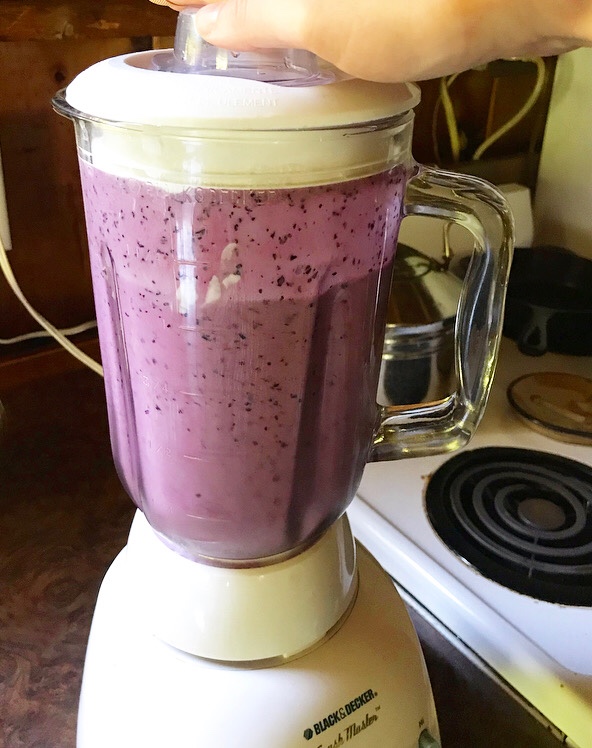
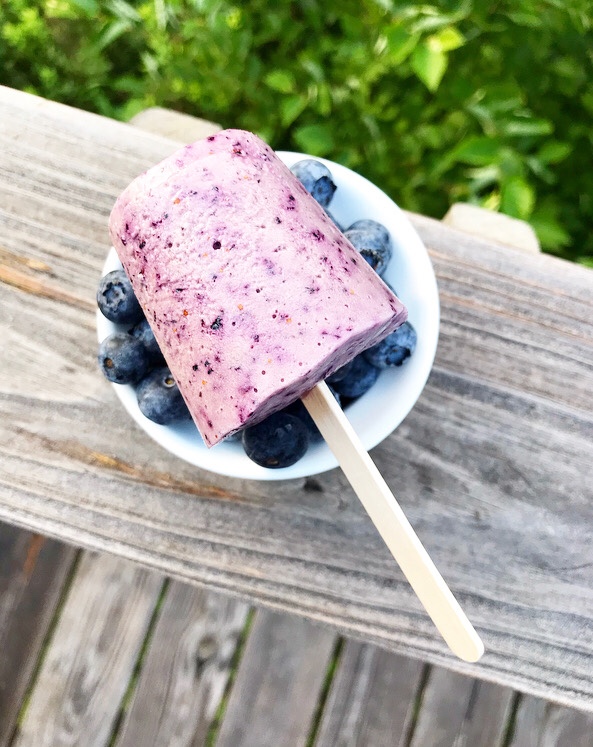
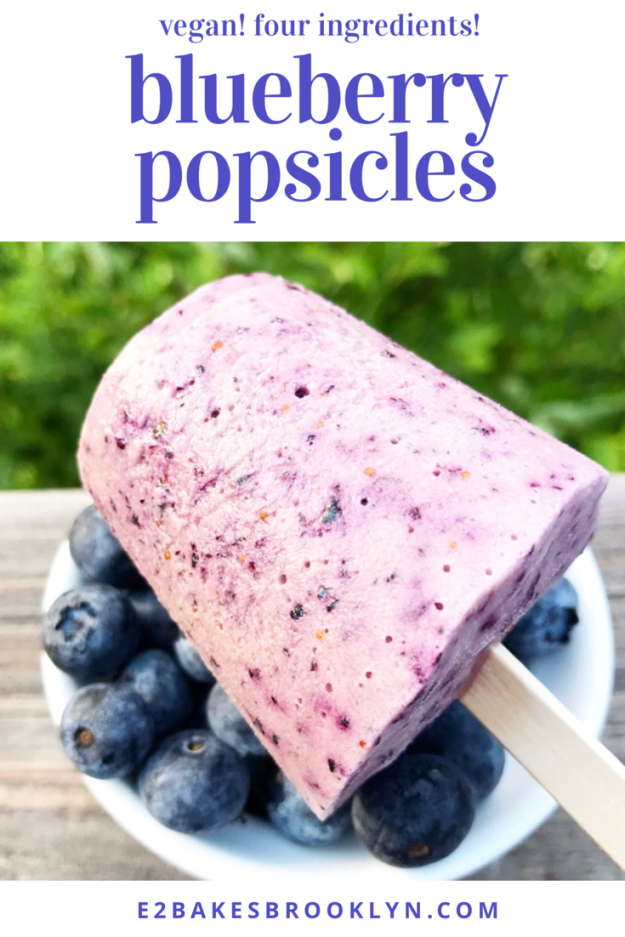
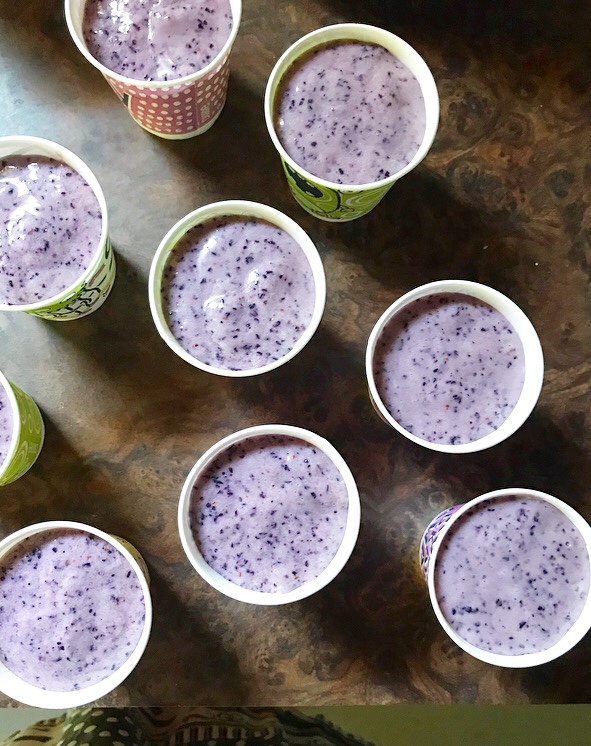 This time around, we already had blueberries (because Maine), maple syrup (because waffles), and vanilla (because I’m a baker) on the list, and I had packed a blender (because
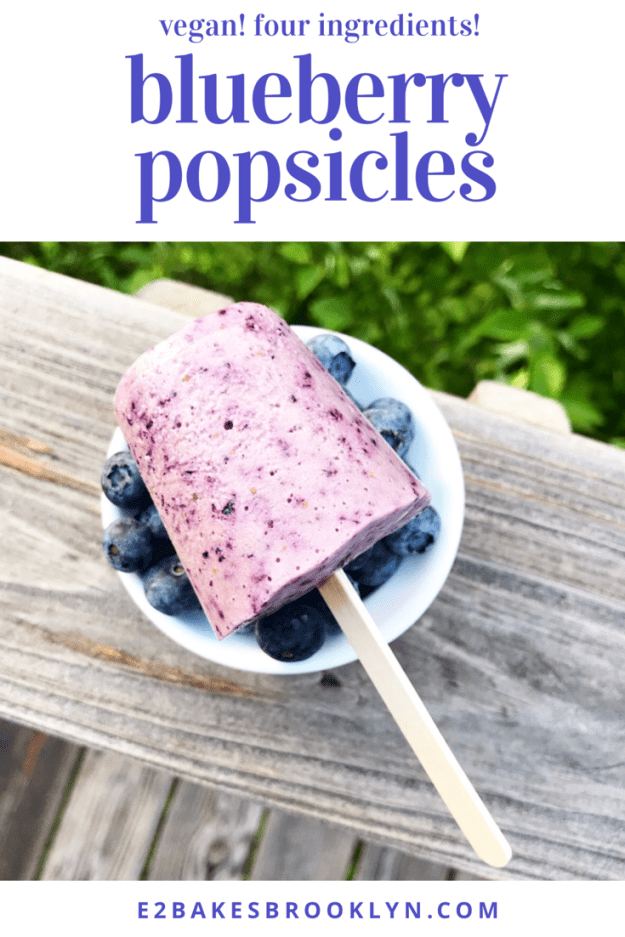
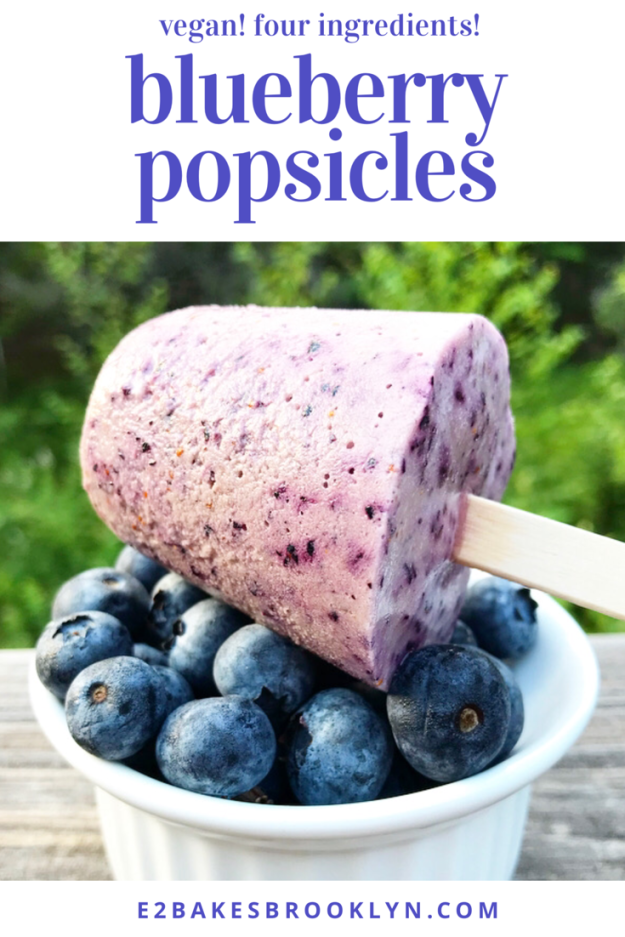
 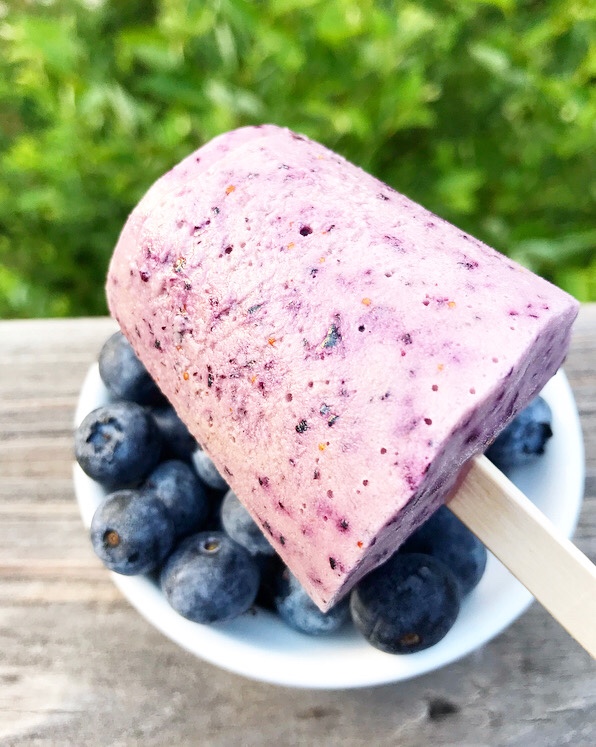 These are the perfect easy summer dessert! They require the bare minimum of effort and ingredients, but deliver big-time on icy texture and creamy blueberry flavor. Oh, and they’re vegan, so your gluten-free vegan co-traveler can enjoy them too.
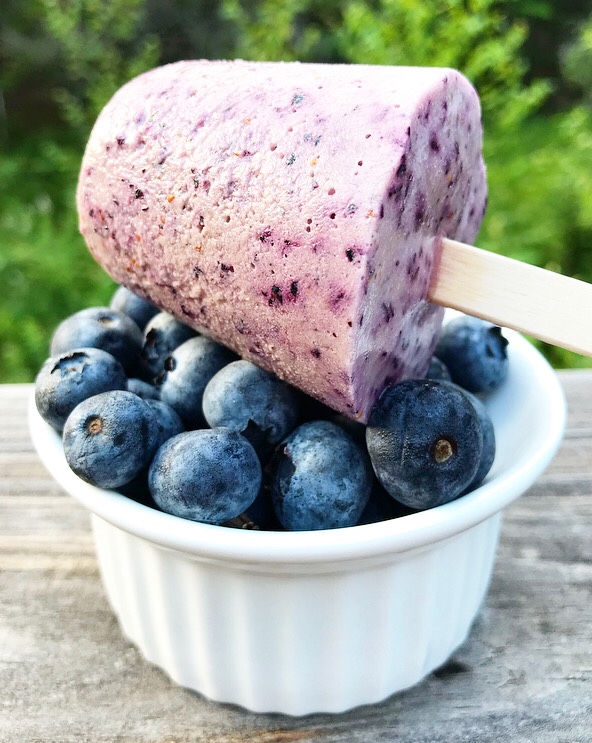 There are four steps to making Blueberry Popsicles:
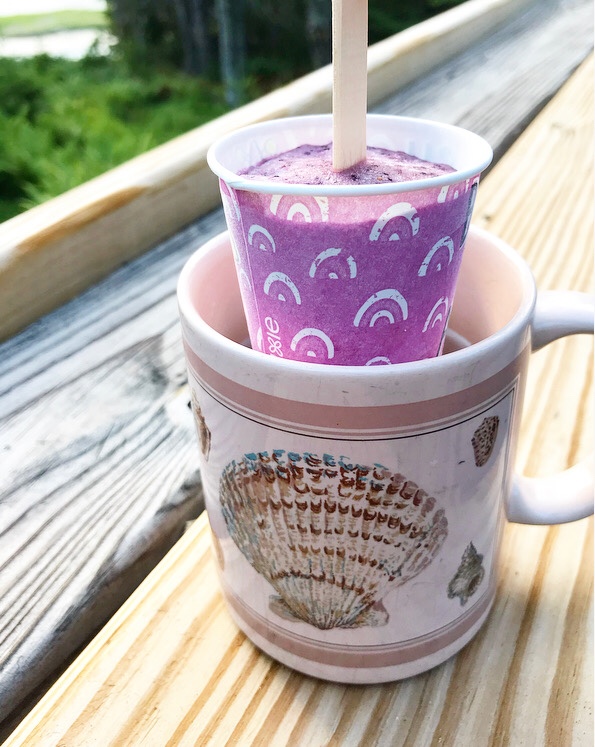
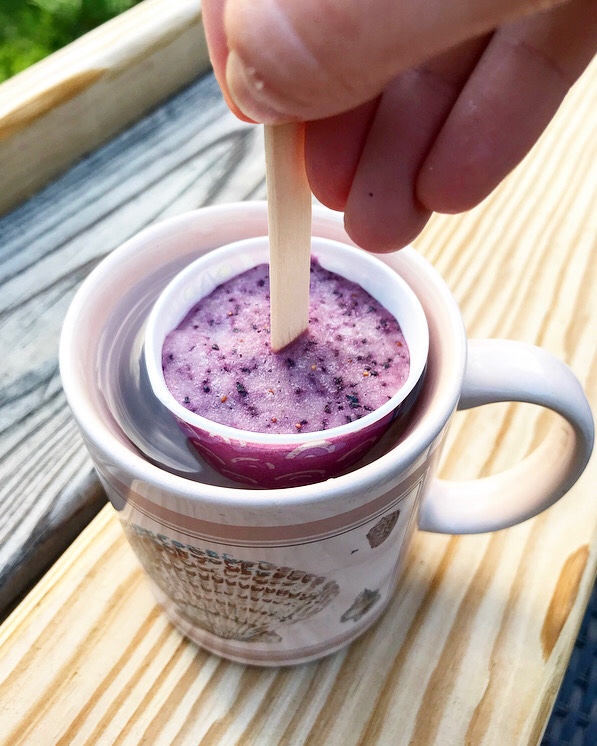 All that’s left to do is unmold and enjoy them on a patio in
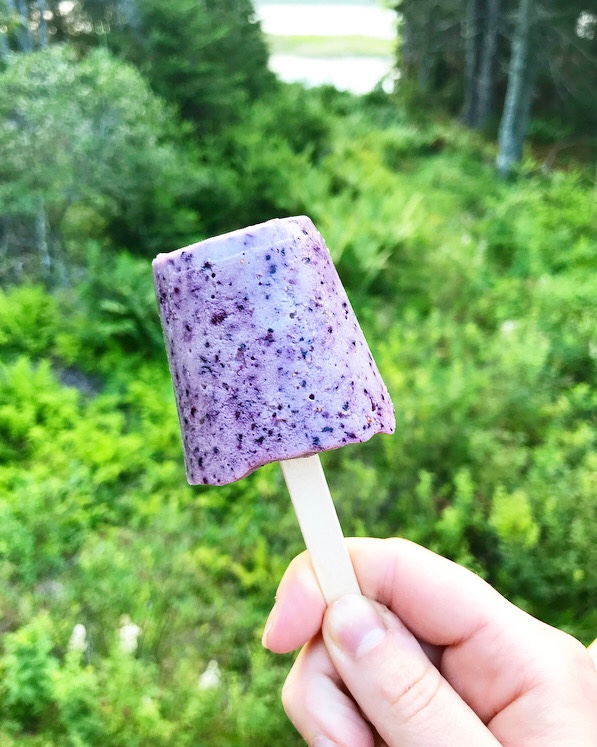
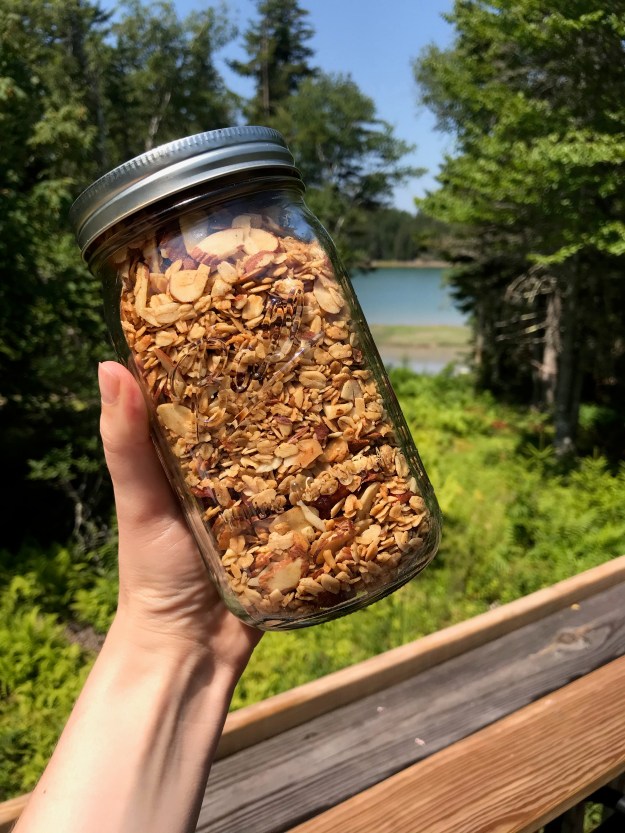
 Hello from

 I am only doing things that I want to do this week, which have thus far included thrifting, reading an actual book, re-seasoning our cottage’s abused cast iron, going to another island to see whale bones, and eating waffles twice because my friend/co-traveler/fellow Swan’s Island enthusiast, VJ, thought to bring her waffle iron and has been kind enough to let me mess with it.
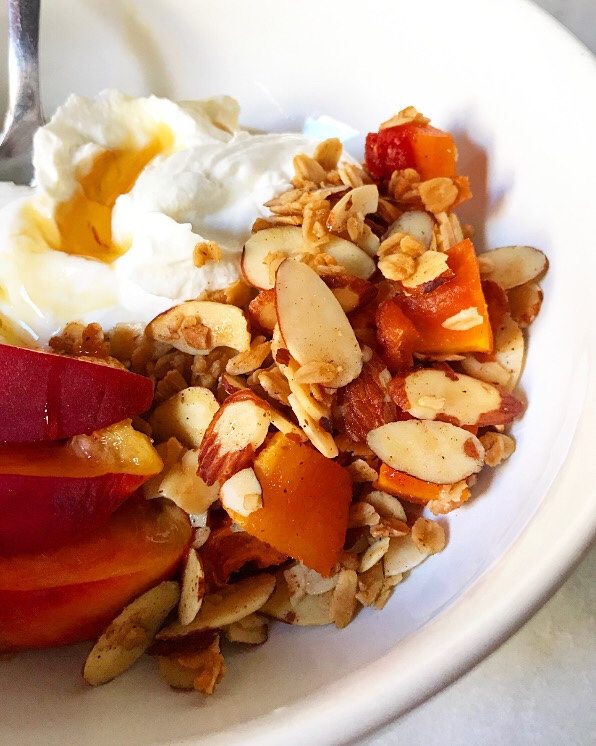 I, however, am the Granola Queen. In an effort over the last few years to create a breakfast item that we could both enjoy, I’ve created three granola recipes in anticipation of our trips to Maine. They’re all vegan and gluten-free (aka
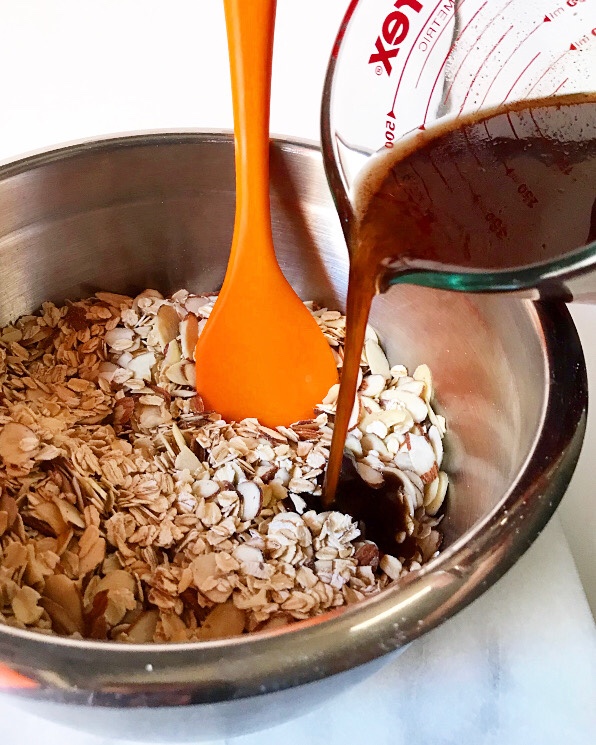
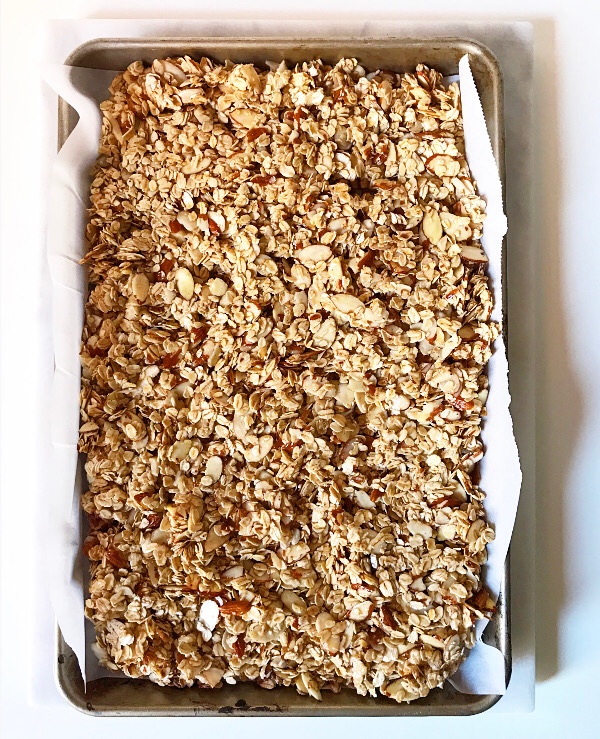
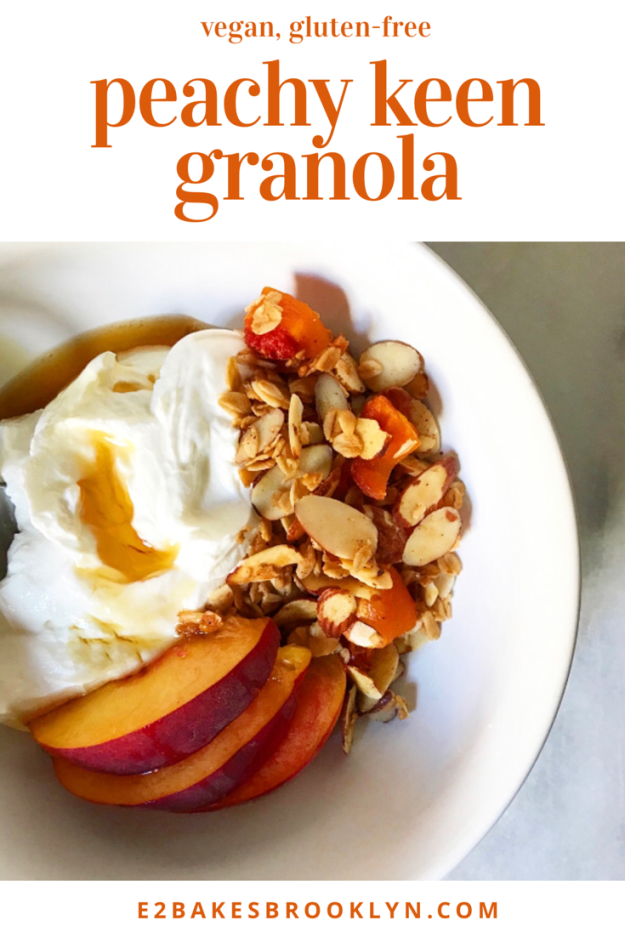
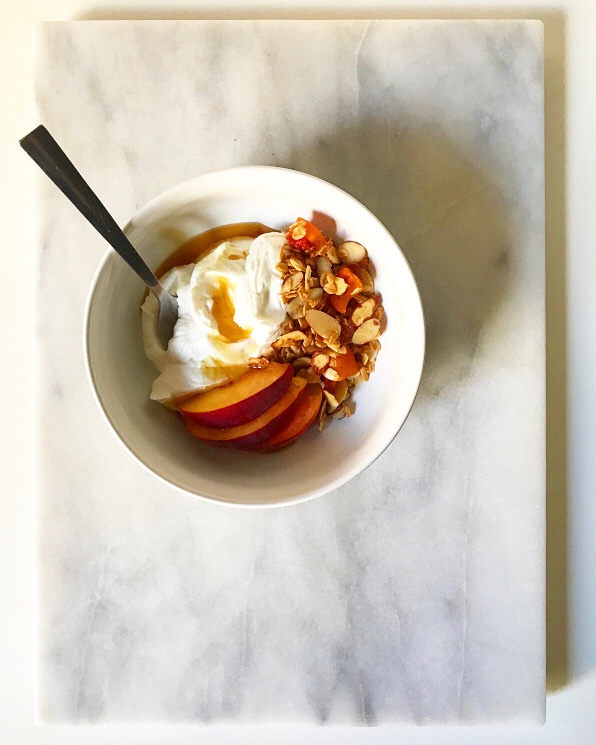
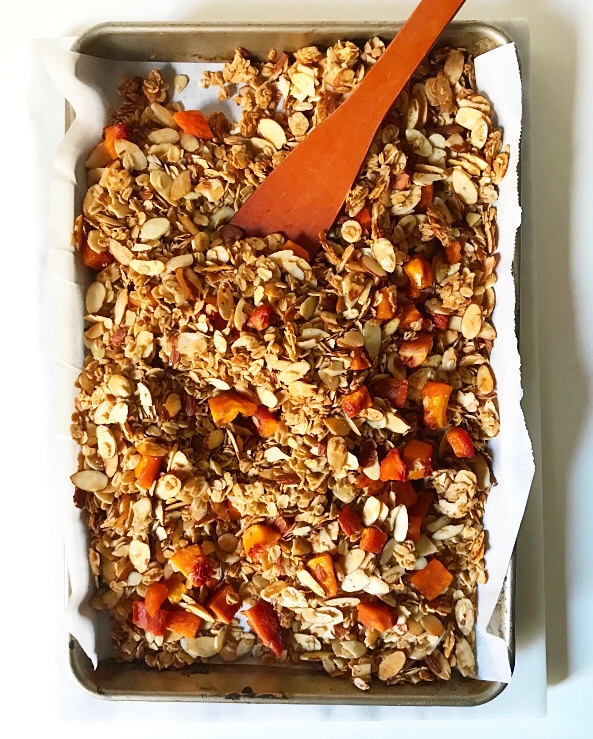 I will not apologize for the cutesy name, or this granola for that matter. It’s my first new variation in
 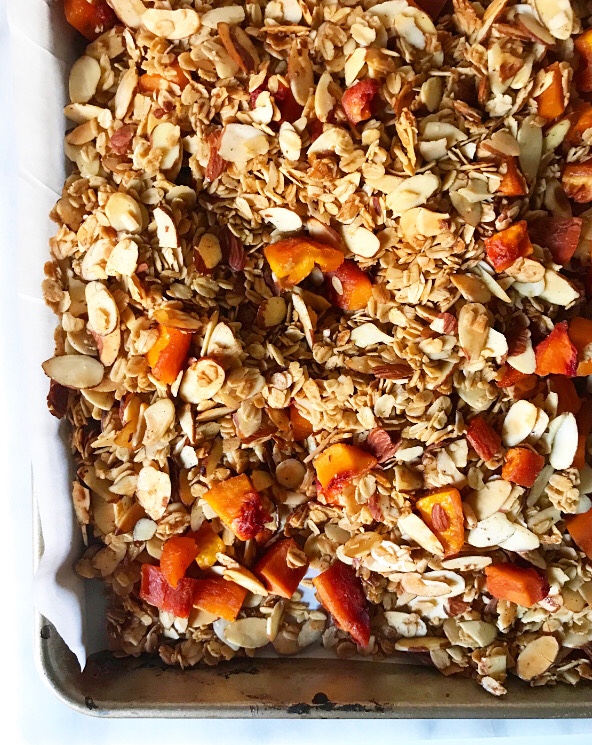 Made with dried peaches, almond extract and pie spices in addition to the usual oats, nuts, maple syrup and olive oil, this is the stuff my summer breakfast dreams are made of.
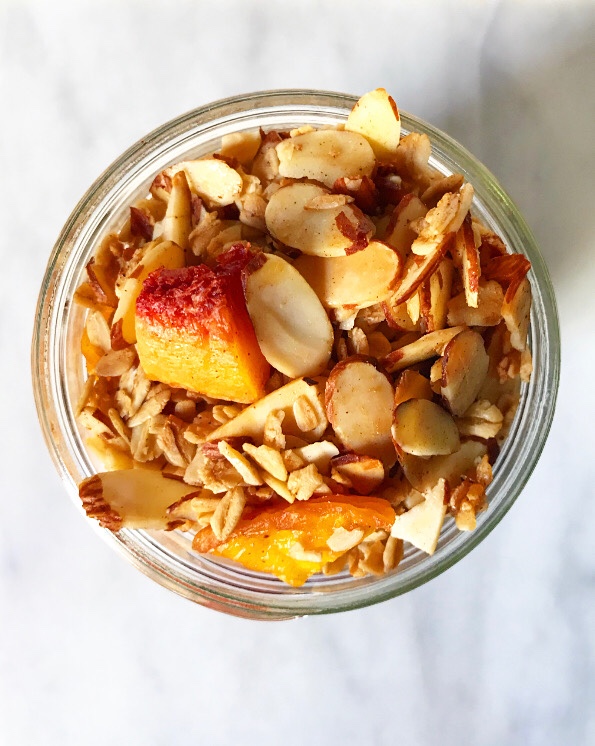 That goes double when eaten in my own personal paradise. Peachy keen, indeed.