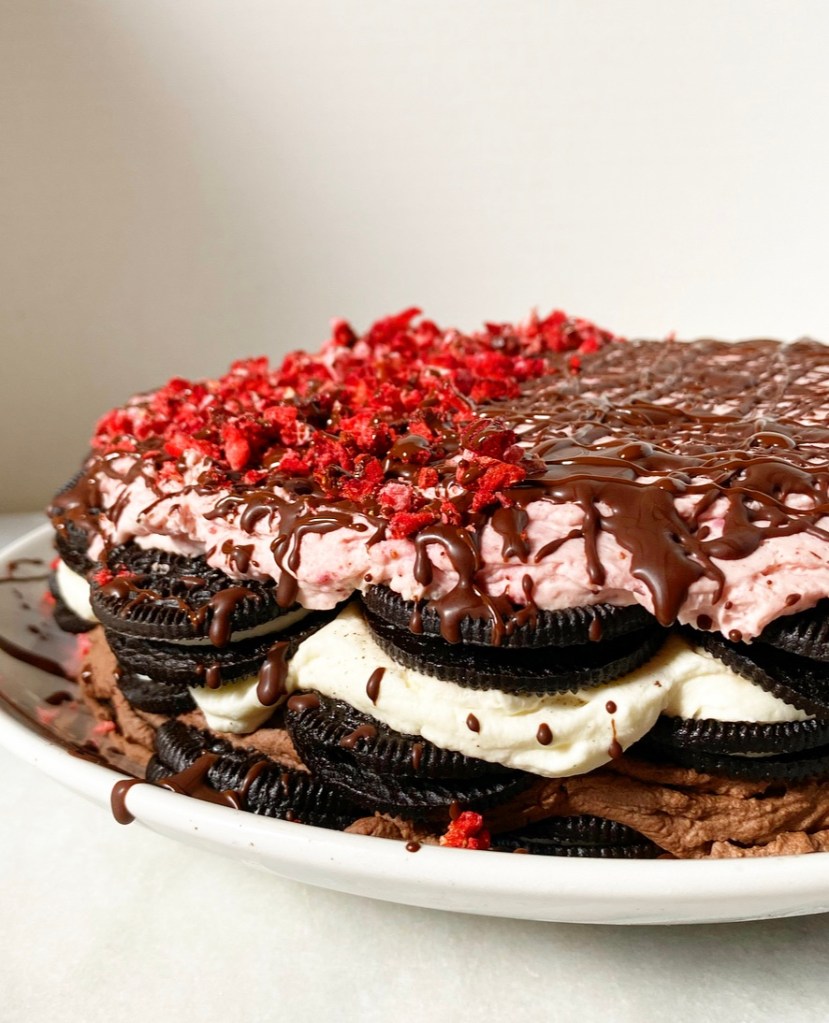
Beautifully baked, elaborately frosted layer cakes are all fine and good, but have you ever skipped the oven entirely, stacked Oreos with three different flavors of whipped cream, let the whole thing set up in the fridge and called it a cake?
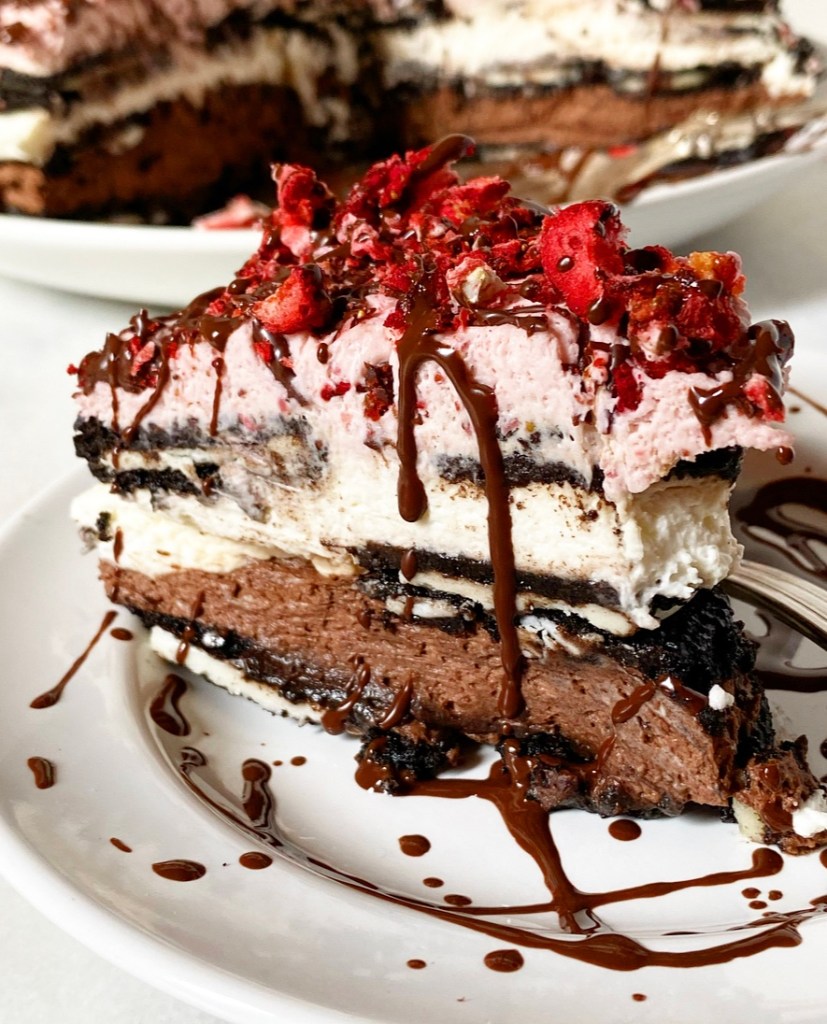
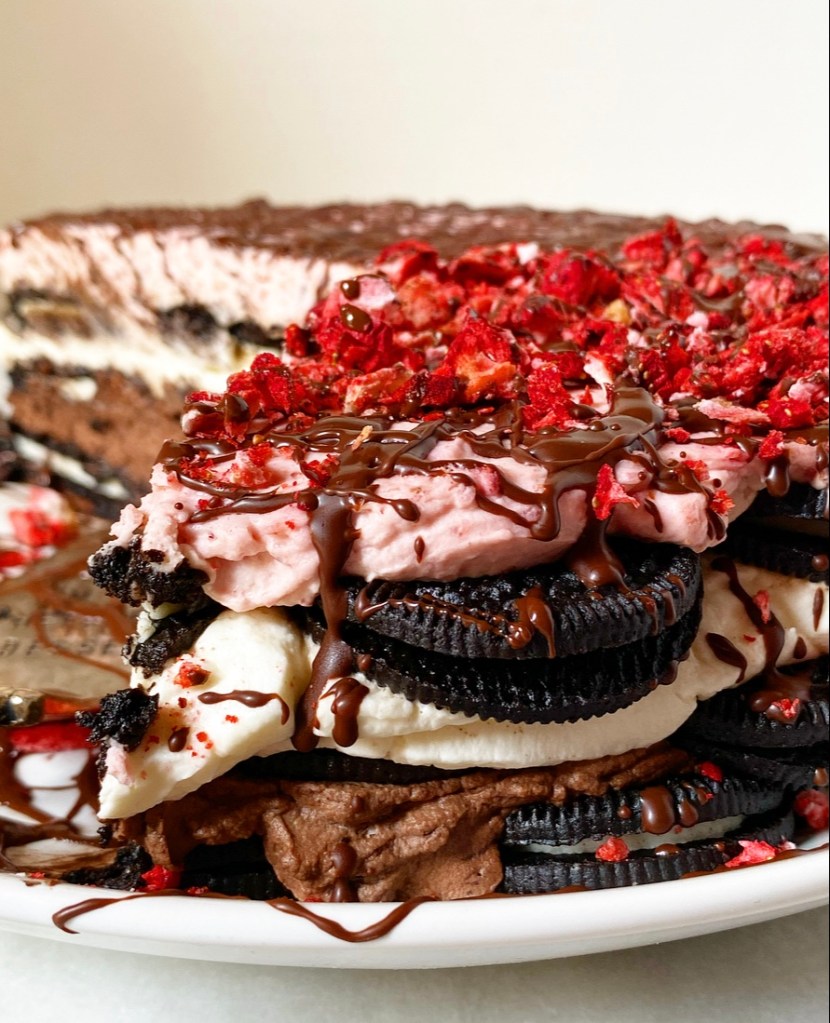
Oh yes, Neapolitan Icebox Cake is where it’s at. This triple-layered, triple-flavored no-bake cake hits all the buttons you want in a summer dessert, including keeping the kitchen cool. Even mixing vanilla, chocolate, and strawberry whipped creams, it takes less than 45 minutes to assemble and slide into the fridge to set up.
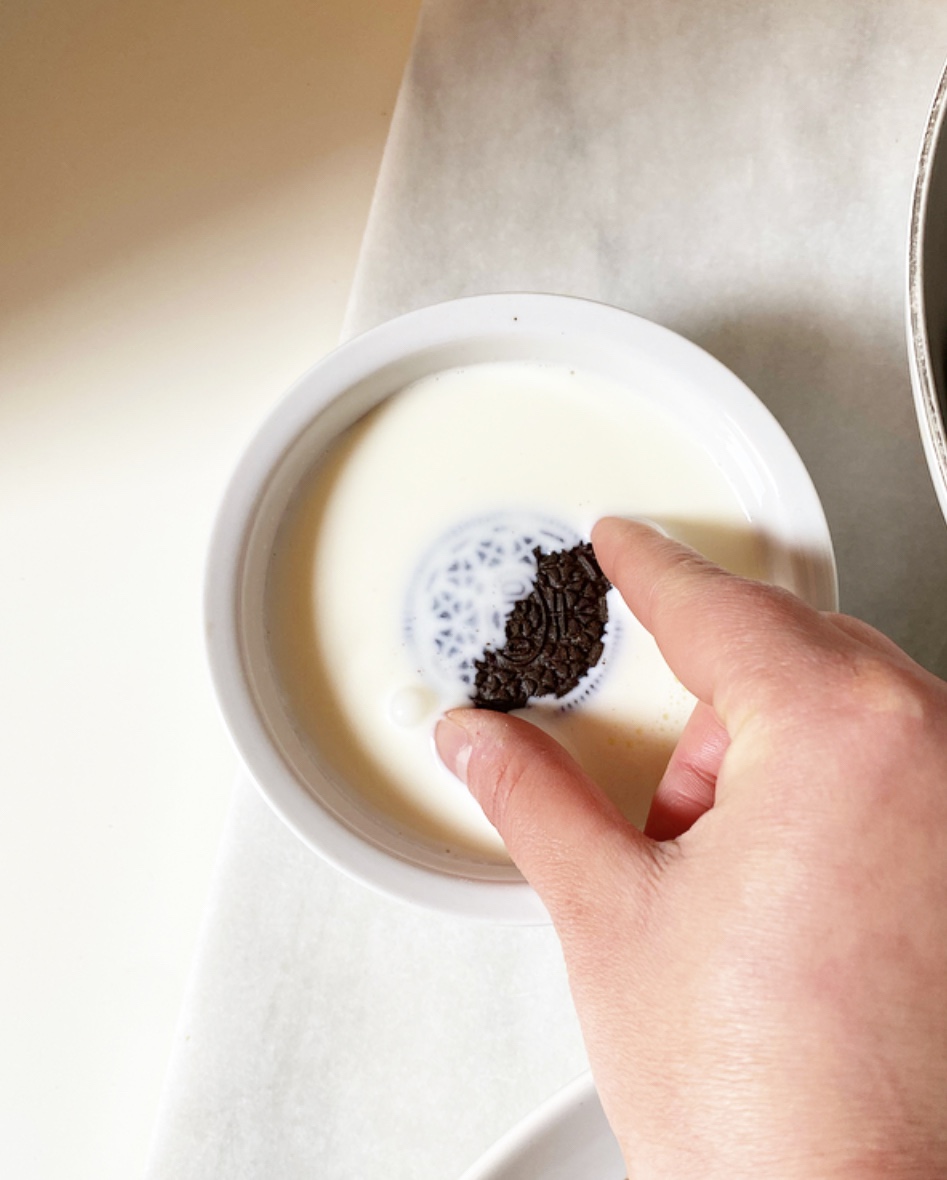

There are two secrets to perfecting this icebox cake. The first is dipping each Oreo in milk before assembling the cake. This allows the cookies to soften all the way through by adding moisture to the creme centers. If you skip the dipping, you will still be able to slice the cake, but the areas near the Oreos’ creme filling will stay a bit tough instead of softening to a cake-like texture.
As with all icebox cakes, the second secret is time! Though it only takes minutes to assemble, this cake has to be refrigerated for at least 8 hours before serving. Luckily, we here at E2 Bakes love a make-ahead recipe almost as much as we love cake. And that’s really saying something because we love cake a lot.
Neapolitan Icebox Cake
makes one cake ~9 inch cake
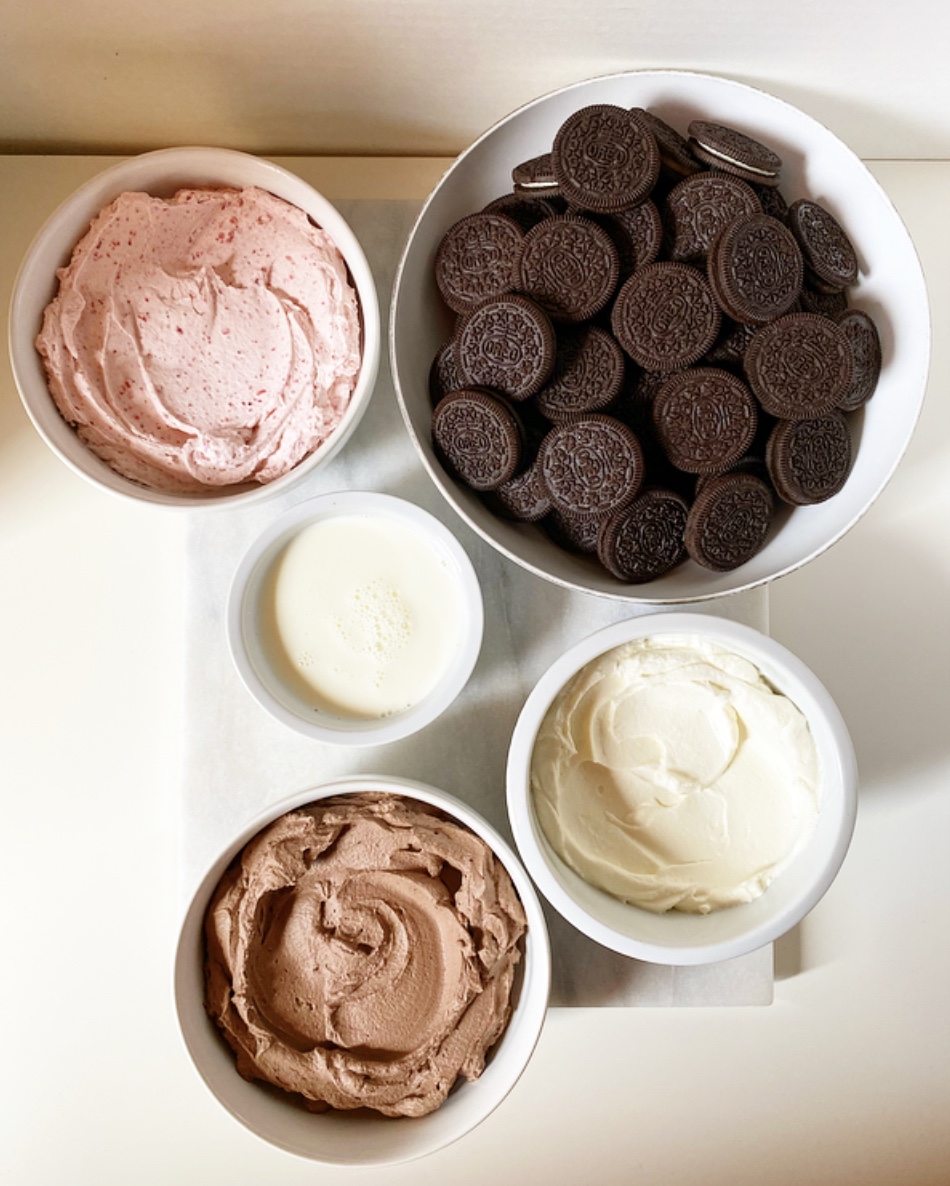
1 batch chocolate whipped cream (recipe below)
55-60 regular Oreos, divided (I used 57)
~1 cup milk
1 batch vanilla whipped cream (recipe below)
1 batch strawberry whipped cream
For garnish (optional):
Chocolate Shell
crushed freeze dried strawberries
crushed Oreos
Use an offset icing spatula to smear a thin layer of chocolate whipped cream onto a 11-12 inch round plate or platter.
Create the first Oreo layer. Take one Oreo, dunk it in milk, then place it in the center of the plate. Repeat this process, arranging the Oreos so that they are touching and make a vaguely circular shape (mine is technically a hexagon). I used 19 Oreos per layer.
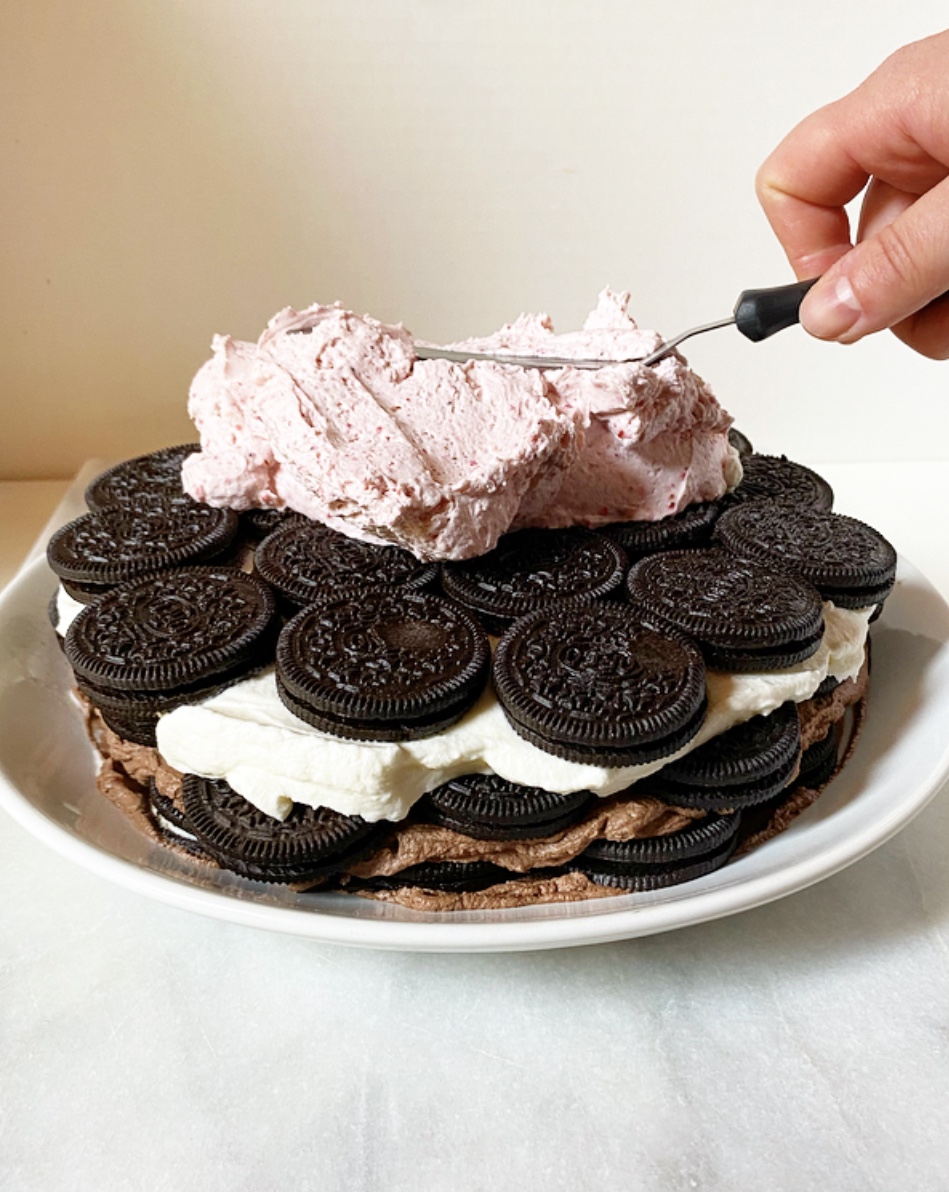
Top the first layer with the chocolate whipped cream, spreading it all the way to the edges.
Repeat the Oreo dunking and arranging process. Top with the vanilla whipped cream. Repeat the Oreo dunking and arranging one more time, then top with the strawberry whipped cream.
Refrigerate the cake uncovered for 2 hours. Then, gently cover the cake with plastic wrap and let refrigerate for 6-20 more hours, until ready to serve.
About 30 minutes before serving, gently remove and discard the plastic wrap. Drizzle the cake with chocolate shell and other toppings, if desired. Refrigerate the cake for 10 more minutes to ensure a hard shell.
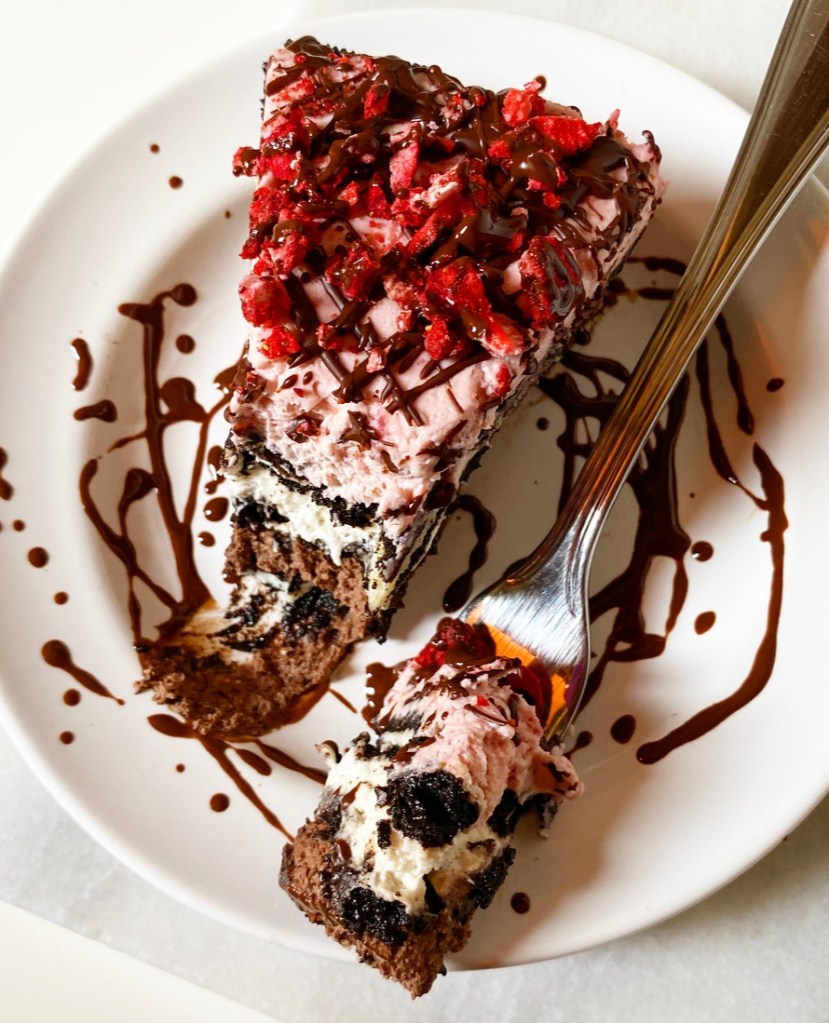
To serve, cut slices with a large, sharp chef’s knife, wiping it clean between cuts. Leftovers will keep covered in the refrigerator for up to 48 hours. The freeze dried strawberry garnish will soften over time.
Chocolate Whipped Cream
1 1/3 cup heavy cream, very cold
2 tablespoons natural unsweetened cocoa powder
1/3 cup confectioner’s sugar
In a medium-large mixing bowl, combine heavy cream, cocoa powder and confectioner’s sugar. Use an electric mixer to whip cream until stiff peaks form. Do not over whip (but if you do, just add a little more cream). Store in the refrigerator until needed for cake assembly.
Vanilla Whipped Cream
1 1/3 cup heavy cream
1 teaspoon pure vanilla extract
1/3 confectioner’s sugar
In a medium-large mixing bowl, combine heavy cream, vanilla, and confectioner’s sugar. Use an electric mixer to whip cream until stiff peaks form. Do not over whip (but if you do, just add a little more cream). Store in the refrigerator until needed for cake assembly.
Strawberry Whipped Cream
~2/3 cup freeze dried strawberries
1 1/3 cup heavy cream, very cold
1/2 teaspoon pure vanilla extract
1/4 cup confectioner’s sugar
Place freeze dried strawberries in a food processor and process until they are powder, about 45-60 seconds. Alternatively, place the berries in a sealed zip-top bag and crush well with a rolling pin or other heavy object.
In a medium-large mixing bowl, combine heavy cream, vanilla, confectioner’s sugar, and pulverized berries. Use an electric mixer to whip cream until stiff peaks form. Do not over whip (but if you do, just add a little more cream). Store in the refrigerator until needed for cake assembly.