Category Archives: Chocolate

Chocolate-Covered Strawberry Mousse Cake

Chocolate-Covered Strawberry Mousse Cake​

I am not a fan of strawberry desserts in February. They make exactly zero sense. We’ve got months before fresh berries are worth eating! That doesn’t seem to stop everyone from wanting them for Valentine’s Day though.

As a blogger, I can either resist or lean into situations like this. It’s safe to say that, in the case of this Chocolate-Covered Strawberry Mousse Cake, I’m leaning all the way in—all the way. With my favorite flourless chocolate cake base, a thick layer of strawberry mousse in the middle and a rich ganache topping, this is a Valentine’s Day dessert even I can’t resist!

Chocolate-Covered Strawberry Mousse Cake​

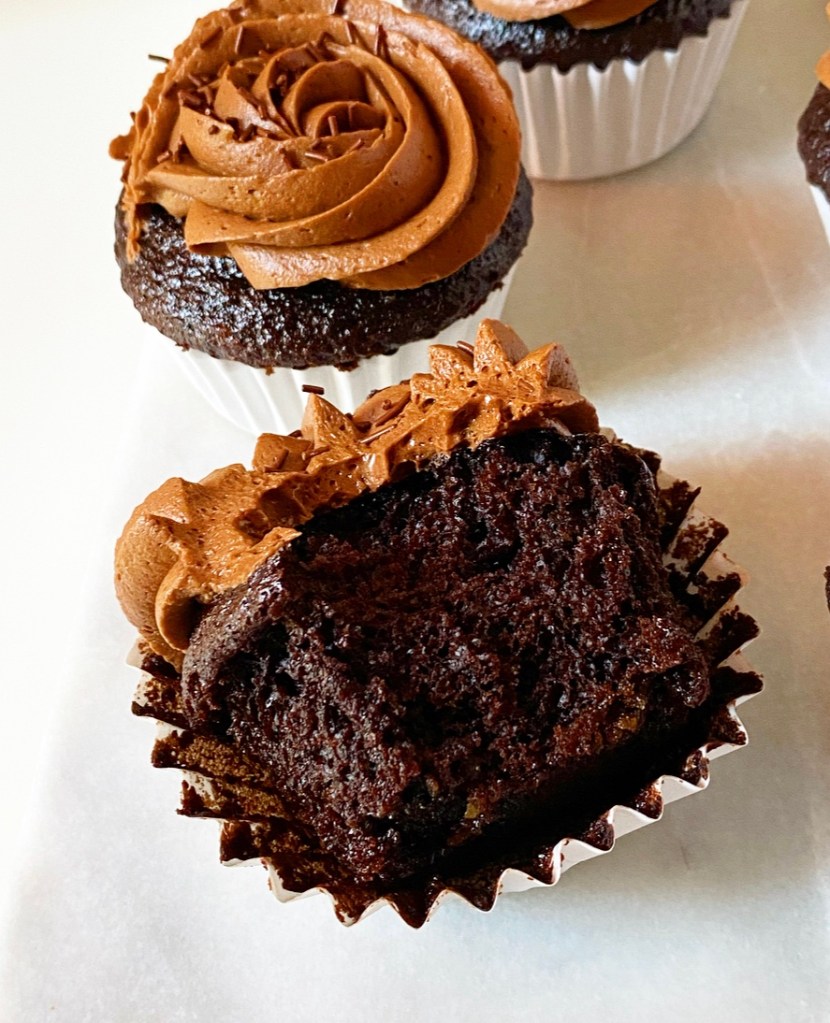
This recipe looks fancy, but is actually very simple. The flourless chocolate cake base is a one-bowl whisk & bake situation that turns out fudgy and decadent every time. With a texture somewhere between an excellent brownie and the center of a chocolate truffle, this cake is fantastic all on its own, but today, it’s just the beginning.

Next up: the strawberry mousse—the star of the show! It’s airy and creamy, but still stable enough to layer thanks to a tiny bit of cream cheese and a whole lot of pulverized freeze dried strawberries. Why freeze dried? Because unlike February strawberries, they have a super-concentrated flavor and are delicious year-round. I buy mine at Trader Joe’s and Target, but I am sure there are plenty of places to procure them online.

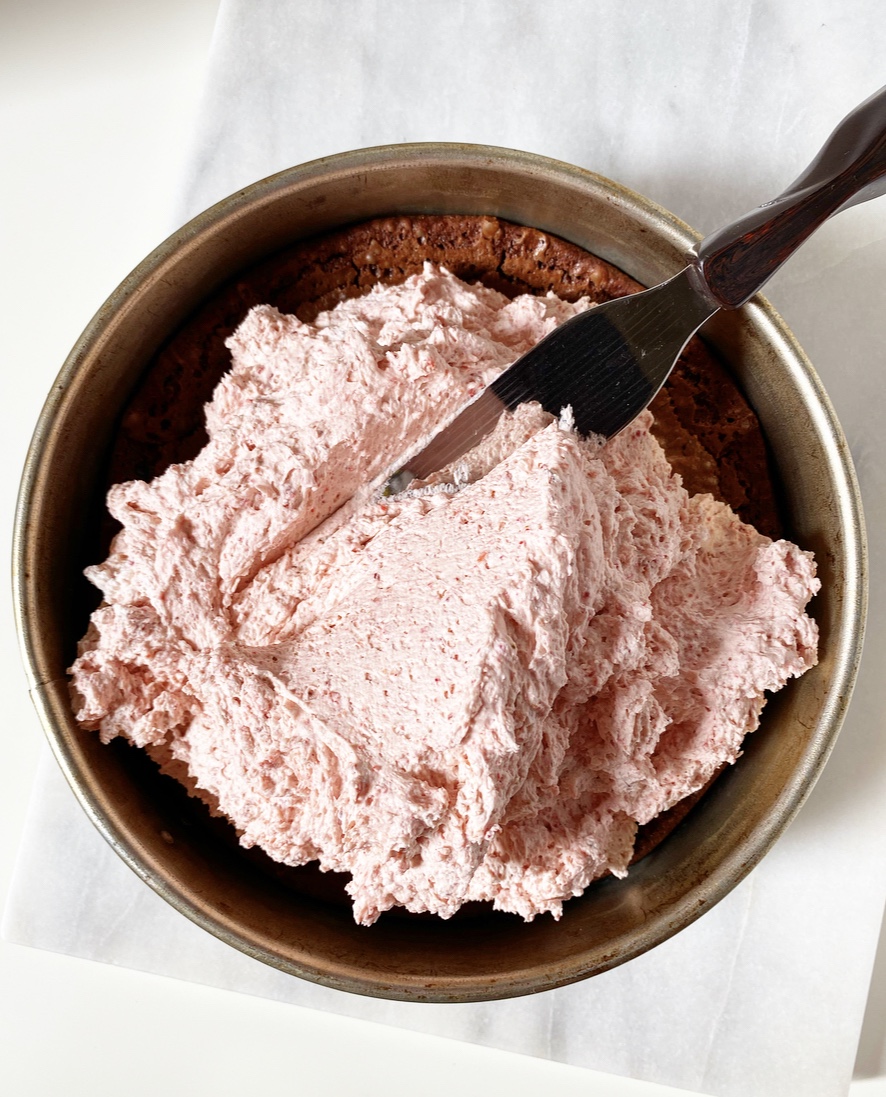
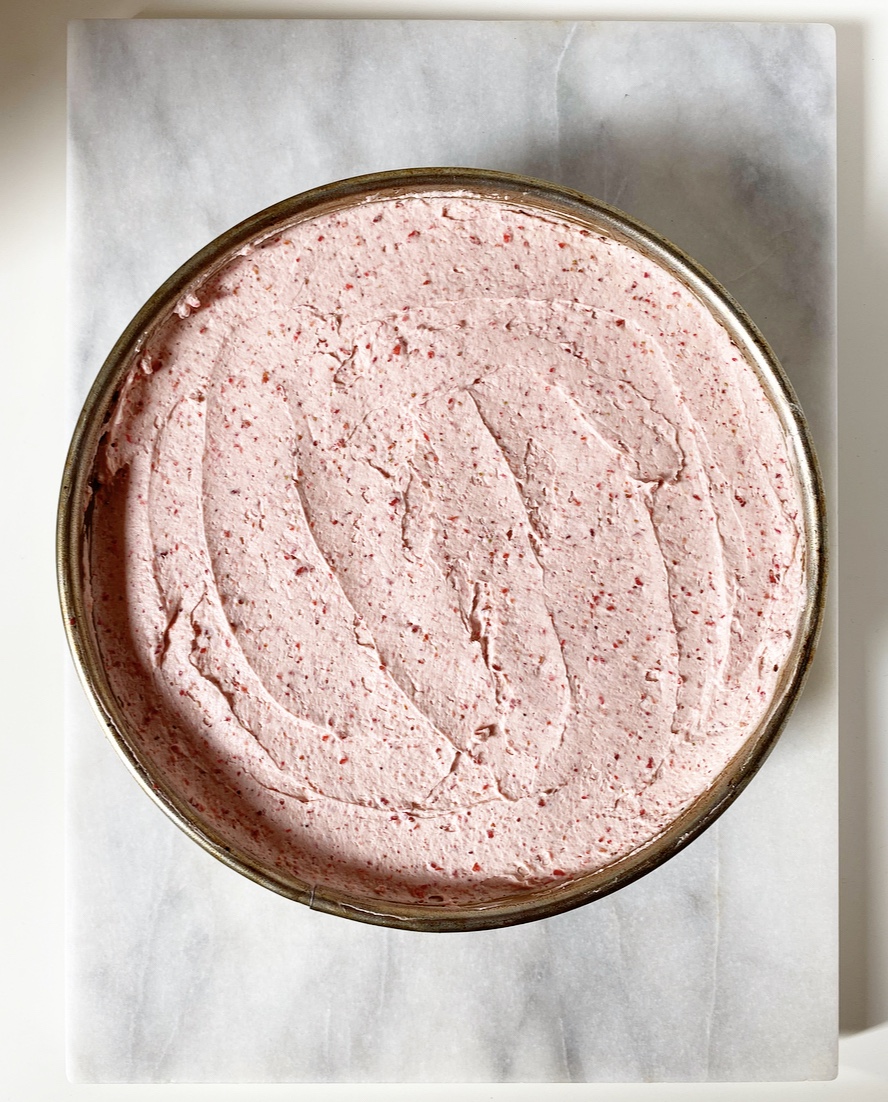
You’ll notice that I introduce heavy cream into the mousse in two phases. First, I add a cup of liquid cream to the strawberries and cream cheese to help them become one mass. Then, I whip two more cups of cream and gently fold them into the strawberry mixture until it’s mousse. This may seem like a lot of fuss, but it results in a super light texture, which is exactly what we want. Layer the mousse on top of the cake, smooth it to the edges of the pan, and refrigerate for a few hours to set.

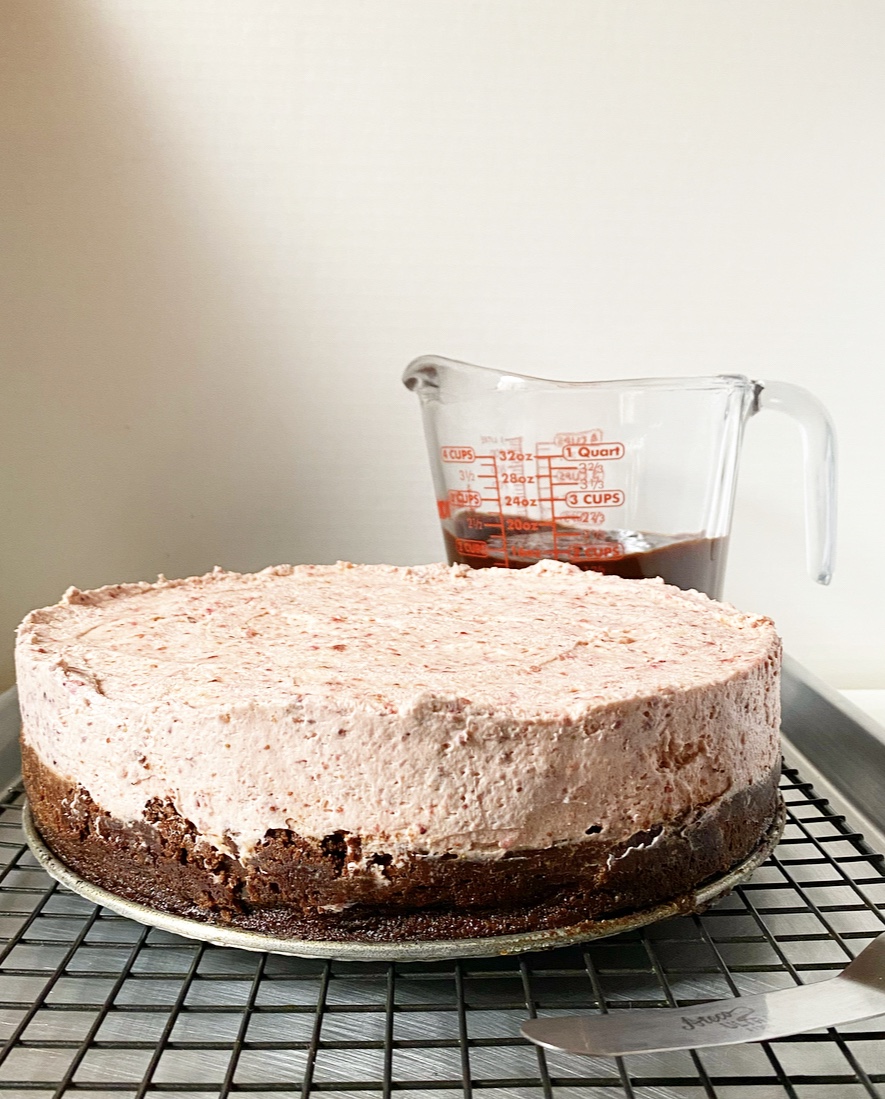
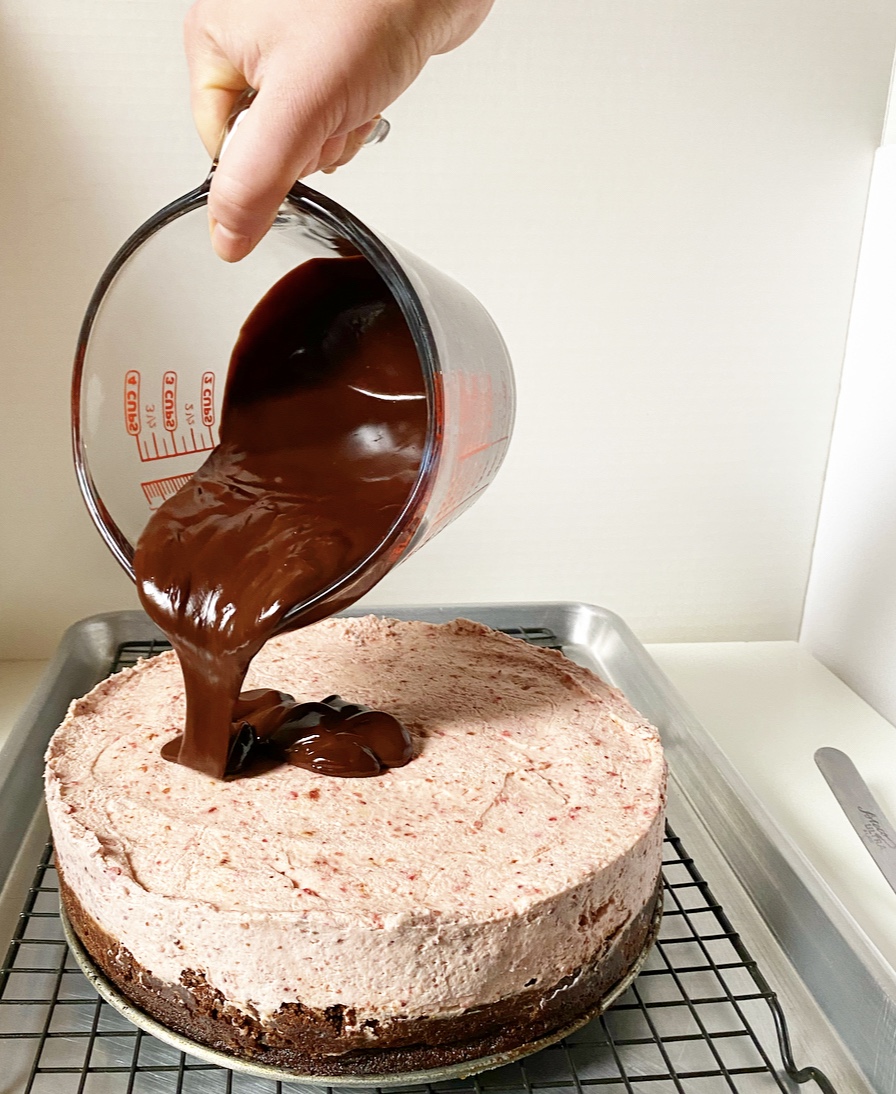
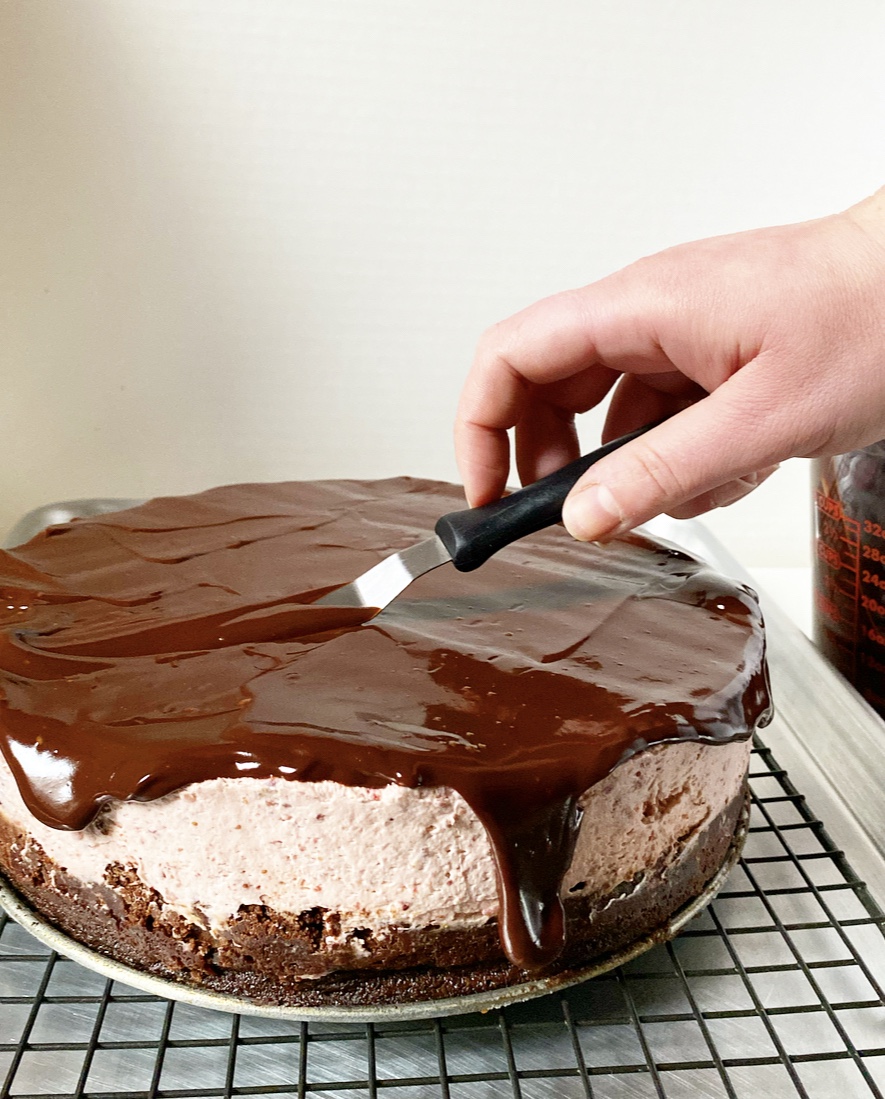
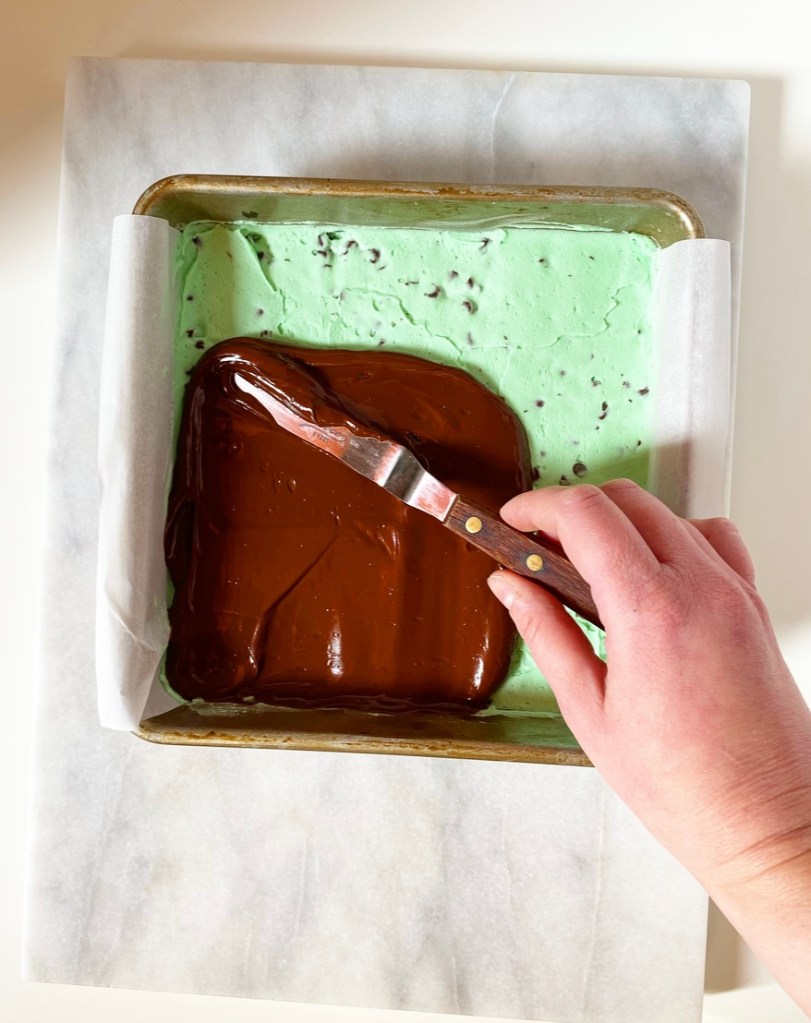
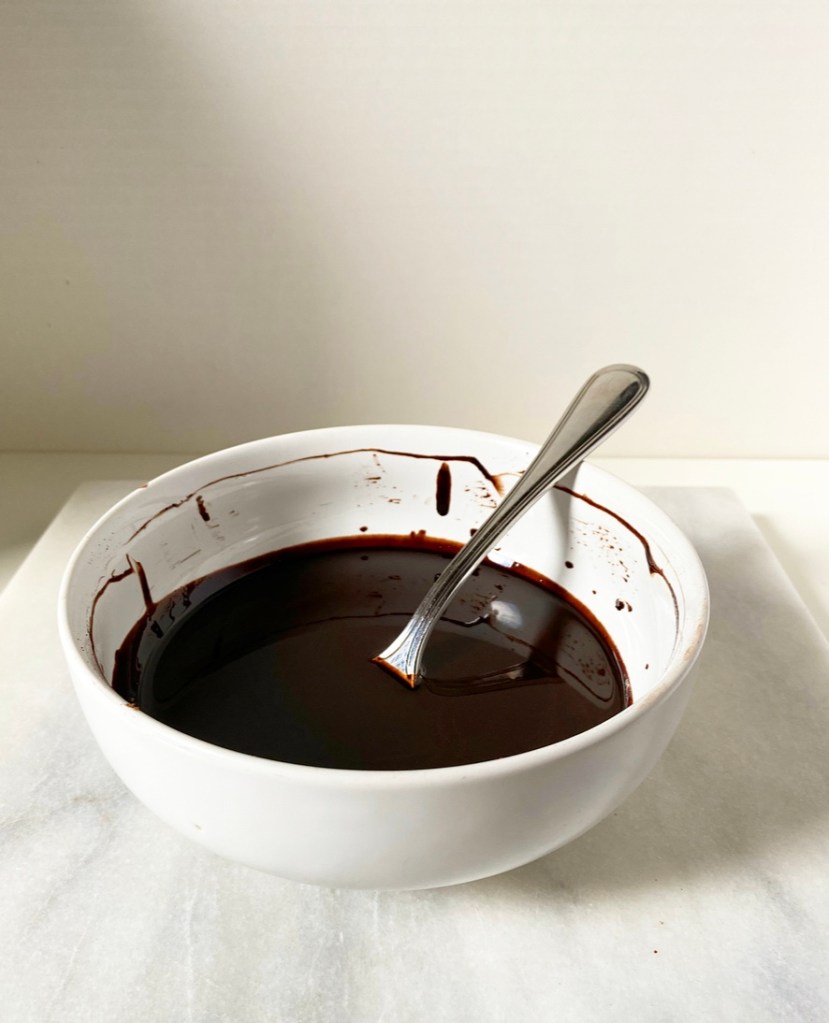
The last step in making Chocolate-Covered Strawberry Mousse Cake? Making the chocolate covering, of course! In this case, it’s just a soft ganache (mix of dark chocolate and heavy cream) that is poured over the mousse, then coaxed over the edges so that it drips down to the cake layer. I am sure there is some very fancy and precise way to do this, but I like it a little irregular.

Once fully assembled, the cake needs to be refrigerated just a little longer so that it slices well. I threw some styrofoam-flavored February strawberries on mine for flair, but feel free to decorate (or not) however you like. This thing is going to look gorgeous and taste like chocolate-strawberry magic no matter what.

Chocolate-Covered Strawberry Mousse Cake​

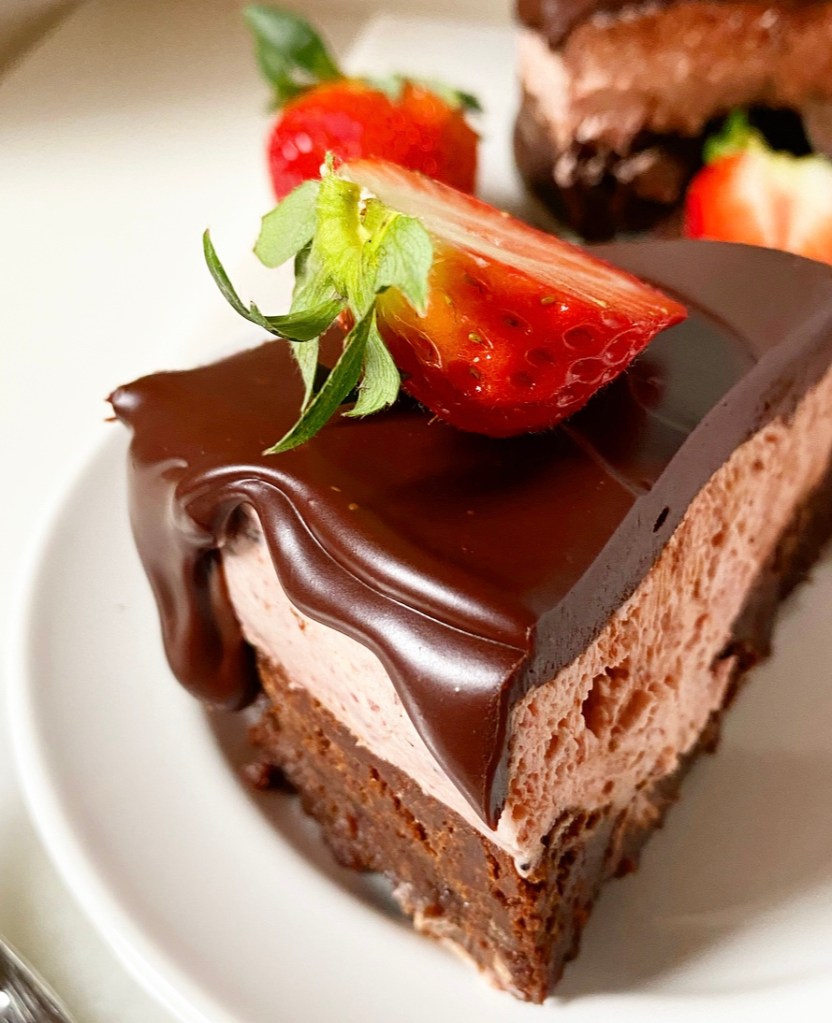
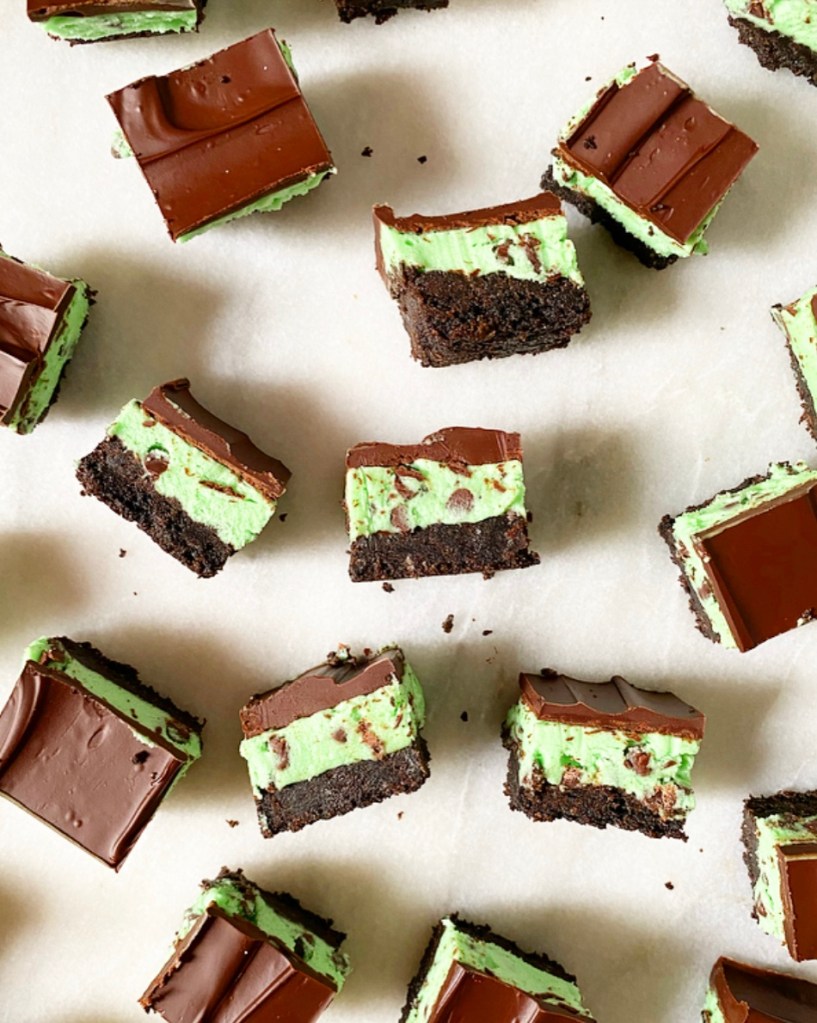
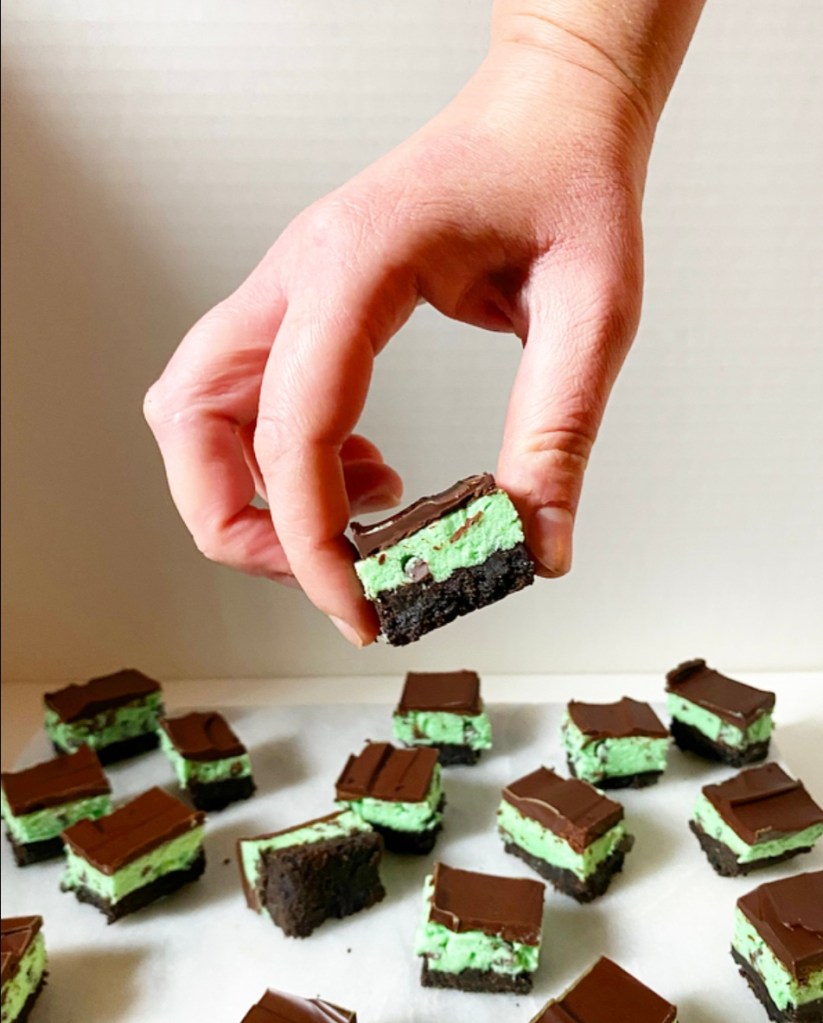
Would you look at those layers? They’re a thing of beauty! And that’s to say nothing of the flavor, which is outstanding. The rich chocolate and creamy strawberry mousse balance each other perfectly, and are truly irresistible. And that’s coming from someone who doesn’t like fruit with chocolate anytime of year.

Yeah, I know. I’m no fun. But I’m leaning in.

Chocolate-Covered Strawberry Mousse Cake​
Chocolate-Covered Strawberry Mousse Cake
makes one 9-inch round cake

Cake:
7 ounces bittersweet chocolate, chopped
7 ounces unsalted European-style butter*, cut into small pieces
1 1/3 cups granulated sugar
5 large eggs, room temperature
1/2 teaspoon pure vanilla extract
1 tablespoon cocoa powder (natural or Dutch process)
1/2 teaspoon Kosher or sea salt

Mousse:
2 ounces (1/4 brick) full-fat brick-style cream cheese
2 1.2-ounce packages freeze dried strawberries, pulverized
1 1/3 cups confectioner’s sugar
2 teaspoons pure vanilla extract
3 cups heavy cream, very cold, divided

Ganache:
8 ounces dark chocolate, finely chopped
1 cup heavy cream

Garnish:
fresh strawberries, if desired

READ THE ENTIRE RECIPE BEFORE PROCEEDING.

Make the cake. Preheat oven to 375F. Grease a 9-inch springform pan with butter. Set aside.

In a double boiler or the microwave, melt dark chocolate and butter together, stirring occasionally, until smooth. Whisk in sugar. Allow to cool slightly.

Whisk in one egg at a time, combining completely after each addition. Stir in vanilla. Whisk in cocoa powder and salt, scraping down the bowl as necessary. Pour batter into prepared pan. Bake for 20-25 minutes, until the center jiggles just slightly when the pan is jostled. Let cool completely in the pan on a rack, about 90 minutes to 2 hours. Do not remove the springform. Cake may be made up to a day in advance.

Make the mousse. In a medium mixing bowl, use an electric mixer to beat cream cheese until fluffy (1-2 minutes). Add pulverized strawberries, confectioner’s sugar and salt, and mix again. It will be very powdery. Add 1 cup heavy cream and mix on high until combined.

In a separate mixing bowl, use an electric mixer to whip 2 cups heavy cream on low for 30 seconds before whipping on high for 1-2 minutes, until stiff peaks form.

Stir 1/4 of the whipped cream into the strawberry mixture. Working with 1/4 at a time, gently fold remaining whipped cream into the strawberry mixture, until very fluffy with no white streaks remaining.

Pile the mousse on top of the cooled cake (still in the pan). Spread it into an even layer and tap the pan on the counter a few times to release any large air bubbles. Stick a layer of plastic wrap to the surface of the mousse. Refrigerate for at least 3 hours or overnight.

Remove cake from the refrigerator. Remove plastic wrap. Run a thin, flexible knife dipped in warm water around the edge of the pan before removing the springform. Smooth the sides of the released cake as needed. Refrigerate if not topping immediately.

Make the ganache. Place bittersweet chocolate in a small bowl. Pour heavy cream into a small saucepan over medium heat. When it just barely starts to boil, remove it from the heat and pour the cream over the chocolate. Once the chocolate looks soft (2-3 minutes), stir it together with a fork until you have a smooth chocolate sauce. Let cool 10 minutes.

Place a cooling rack over a rimmed sheet pan. Top with the cake. Gently pour ganache over the top of the cake, then use an offset icing spatula (or the back of a spoon) to coax the chocolate over the edges.

Lift the cake off the cooling rack and refrigerate for at least 1 hour before serving. Garnish with fresh strawberries, if desired. Serve cake.

For clean slices, dip the knife in warm water and wipe dry between cuts. Leftovers will keep for up to 4 days in the refrigerator, though fresh strawberries may degrade over time.

Mint Chip Buttercream Bars

Mint Chip​ Buttercream Bars

It seems impossible, but we’ve reached the last recipe of the year.

With three days to go until Christmas, I wanted this one to be easy enough that you could add it to your menu at the last second, but not so in-your-face Christmasy that you couldn’t make it for New Year’s Eve or any other time. These Mint Chip Buttercream Bars certainly fit that bill. With just ten minutes of actual baking, a flavor that’s universally beloved, and a high yield, they’re exactly the sort of recipe you want to have in your back pocket during the holidays.

Mint Chip​ Buttercream Bars

Oh, they look fancy with their three layer presentation, but they’re dead easy. The thick Oreo crust is the only thing that requires baking; the creamy mint chip buttercream and chocolate topping are simply whipped up and layered on.

Mint Chip​ Buttercream Bars

You can make these all in one go or do them in steps, making the crust one day and applying the other layers a day or two later. Once assembled, put them in the fridge for a couple of hours for optimal sliceability, and that’s it!

Mint Chip​ Buttercream Bars

I like to cut these really small, because they pack a wallop. With layers of crumbly Oreo crust, chocolate chip studded mint buttercream and glossy chocolate, they’ve got texture and flavor all over the place. I only need a bite or two to be satisfied—that doesn’t stop me from going back for more though!

Mint Chip​ Buttercream Bars

Happy Holidays! Merry Christmas to those who celebrate! I am taking Christmas Eve off, but will be back next week with some end of year wrap up stuff.

Mint Chip Buttercream Bars
makes 2-2.5 dozen depending how small you cut them

Oreo Crust:
24 Oreos
4 tablespoons unsalted butter, melted

Mint Chip Buttercream:
1/2 cup (1 sticks) unsalted butter, softened to room temperature
2 cups confectioner's sugar
pinch of Kosher or sea salt
1 teaspoon pure vanilla extrac
1/4-1/2 teaspoon peppermint extract
2-3 tablespoons heavy cream
2-3 drops green food coloring (I used gel)
6 tablespoons mini chocolate chips

Chocolate Topping:
6 ounces dark chocolate, chopped
2 tablespoons unsalted butter, cut into pieces

Preheat oven to 350F. Grease an 8- or 9-inch square pan with butter. Line with parchment, leaving overhang on two sides for removal. Grease again. Set aside.

Make the crust. Place Oreos in the bowl of a food processor and blitz until they are crumbs. Add melted butter and pulse until the mixture can be pinched together. Press it into the bottom of the prepared pan. Bake 10 minutes to set. Let cool completely. At this point, the pan and crust may be wrapped with plastic wrap and stored for a day at room temperature.

Make the mint chip buttercream. In a large mixing bowl, use an electric mixer to beat butter until light and fluffy, about 2 minutes. Beat in confectioner's sugar in two installments, scraping down the bowl as necessary. Beat in salt, vanilla and 1/4 teaspoon peppermint extract. Add in heavy cream until desired consistency is reached. Add 1-2 drops gel food coloring (or a few drops of liquid) and use your electric mixer to beat until combined. Adjust color as necessary. Fold in mini chocolate chips.

Spread mint chip buttercream over the crust, smoothing into an even layer. Refrigerate at least 30 minutes.


Make the chocolate topping. Combine chopped chocolate and butter in a small microwave-safe bowl. Microwave in 15 second increments, stirring in between, just until melted. Drop chocolate over filling one spoonful at a time. Use a small offset icing knife (or a silicone spatula) to carefully spread it over a section of the filling. Continue dropping and spreading chocolate until it’s all used. Freeze until chocolate has hardened, about 15 minutes.

Use parchment overhang to remove bars to a cutting board. Carefully peel off and discard parchment. Use a lightly-greased sharp chef’s knife to slice bars (mine are 1x1 1/2-inch). pieces).

Bars may be kept in an airtight container in the refrigerator for up to a week (check the date on your heavy cream). Layer them with parchment if they are to be stacked.

Vegan Chocolate Cream Pie

Hey there! I put all my Thanksgiving recipes on their own page for maximum convenience. Just click the menu at the top of the page and then go to “Thanksgiving Recipes.”

Vegan Chocolate Cream Pie​

It’s funny how recipes sometimes just hit me out of nowhere. Like this past September I was in Maine making Vegan Chocolate Pudding for dessert, and I accidentally made it just a little too stiff. While it worked for a no-frills vacation treat, I knew that I needed to make adjustments for a better pudding consistency, but I also knew I had just made a perfect Vegan Chocolate Cream Pie filling.

Vegan Chocolate Cream Pie​

And I do mean perfect. Sliceable, but not bouncy. Rich and chocolaty, but completely devoid of dairy and eggs. I had a vision of it sitting in a chocolate cookie crust with a whisper of vegan whipped cream on top, and two months later, here we are.

As with my traditional Chocolate Cream Pie, this vegan version is nearly no-bake and very simple to make. The crust is just crushed Oreos (I used gluten-free) and vegan butter that are mixed together and baked just to set. The filling is made by whisking things together in a certain order, as all pudding is. No need to sieve this one though—no eggs means no worrying about solids! To assemble, just pour the filling into the crust and refrigerate until very, very cold.

Oh yes, this cold, creamy crowd pleaser of a pie is an all-out winner. I mean, who doesn’t love delicious Chocolate Cream Pie and food everyone can eat and enjoy? Dessert and inclusivity are two of my favorite things!

Vegan Chocolate Cream Pie​

Before serving, top the pie with some vegan whipped cream! I went with an easy coconut cream-based recipe by Minimalist Baker, and it’s outrageously good. If you’re not up to making your own vegan whipped cream, Reddi Wip makes a good coconut whipped cream in a can that you can find in most grocery stores. Just put a little on each slice immediately before serving (and then spray the rest in your mouth because you’re a grown-up and you can).

Vegan Chocolate Cream Pie​

Speaking of slices, can we discuss how beautiful this is? Defined layers! Gorgeous chocolaty filling! And it’s gluten-free and vegan? I think it’s safe to say we have a Thanksgiving showstopper on our hands.

Vegan Chocolate Cream Pie​
Vegan Chocolate Cream Pie
makes 1 pie

Crust:
24 regular or gluten-free Oreos (original or Double Stuf)
5 tablespoons vegan butter, melted

Filling:
5 tablespoons cornstarch
2/3 cup granulated sugar
1/2 cup natural unsweetened cocoa powder
pinch of Kosher or sea salt
3 cups unsweetened non-dairy milk (I used almond milk)
1 teaspoon pure vanilla extract
5 ounces dark chocolate, chopped
1 tablespoon vegan butter

Topping:
Vegan Whipped Cream (I made it with Thai Kitchen Coconut Cream)
finely chopped dark chocolate

Make the crust. Place Oreos in the bowl of a food processor and blitz until they are crumbs. Add melted butter and pulse until the mixture can be pinched together. Press it into the bottom and up the sides of the pie plate (I find that a 1/4 cup measuring cup works for this). Bake the crust for 10 minutes and then let it cool for 20 (or until you can handle the pie plate).

Make the filling. In a medium pot, whisk together cornstarch, sugar, cocoa powder and salt. Whisk in half the non-dairy milk, followed by the remainder.

Place pot over medium heat. Whisking continuously throughout cooking, cook pudding until it has boiled for 1 minute. This process should take 8-10 minutes from start to finish.

Pour filling into the crust. Tap the full pan on the counter a few times to release large bubbles. Press plastic wrap to the surface. Refrigerate for 6 hours or overnight, until cold.

When ready to serve pudding, peel off and discard plastic wrap. Top with vegan whipped cream of choice and finish with chopped dark chocolate. Refrigerate until ready to slice and serve.

Leftover pie will keep covered in the fridge for 3-4 days.

Black Bottom Caramel Oatmeal Pie

Black Bottom Caramel Oatmeal ​Pie

Just before I started my blog, Brooklyn’s favorite pie shop, Four & Twenty Blackbirds, released a recipe for their Black Bottom Oatmeal Pie and everyone in the food world lost their minds over it. And for good reason. That pie is an old fashioned favorite: essentially a pecan pie with toasted oats instead of nuts, all suspended over a puddle of dark chocolate ganache—a triumph, if you ask me.

Black Bottom Caramel Oatmeal ​Pie

But, as you have probably noticed, I cannot leave well enough alone. I can’t just leave a recipe the way it is. I can’t! I’ve been looking at this perfect pie for six Thanksgivings thinking “but what if you made it with caramel?”

Well, I finally got myself together and did just that. I made the pie with luxurious homemade caramel instead of the usual invert sugars, adjusting for time and texture, and it came out magnificently. Now I just wish I hadn’t waited six whole freaking years to experience this rich, buttery, oat-studded caramel & dark chocolate masterpiece. I mean, I know I’ve made lots of other delicious things, but my goodness, I need to make up for lost time with this one.

As with so many pies, this one isn’t complicated, but it has a bunch of steps and does take time. You’ve got to partially blind bake the crust, and then there’s the whole making a caramel oatmeal filling and layering it over chocolate bit, but I promise you these are all simple steps, and if you follow them one by one and give yourself some grace and time, you will be rewarded. Oh, will you ever.

The balance of chocolate and caramel and chewy oats and flaky crust? It’s a triumph, if you ask me.

Black Bottom Caramel Oatmeal Pie
adapted from Four & Twenty Blackbirds
makes 1 pie

Crust:
1/2 batch All-Butter Pie Dough (or other good single crust recipe)

Caramel Oatmeal Filling:
1 1/2 cups rolled oats (toast)
1 cup granulated sugar
1 teaspoon Kosher or sea salt
1/2 cup (1 stick) unsalted butter, cut into pieces
1 cup heavy cream, divided
2 tablespoons light corn syrup (or maple syrup or mild honey)
1 teaspoon pure vanilla extract
1 teaspoon apple cider vinegar
2 large eggs, lightly beaten, room temperature

Dark Chocolate Ganache (Black Bottom):
5 ounces bittersweet chocolate, chopped
5 tablespoons heavy cream

For Garnish:
confectioner’s sugar, if desired

Place oven racks in the upper and lower positions. Preheat oven to 375F.

Partially blind bake the pie crust. On a floured surface, roll out pie dough to a 12" diameter. Fit into a deep 9-inch pie plate and trim the overhang to 1/2-inch. Crimp the edges and freeze for 30 minutes or refrigerate for an hour.

Remove pie crust from the freezer. Line frozen crust with a big piece of parchment. Fill the center with pie weights (or dried beans or rice).

Place the prepared pie crust on a rimmed baking sheet and bake for 20-25 minutes, or until pie crust has “set” and is starting to turn golden in places, but is far from done. Use parchment to lift out pie weights. Prick the bottom several times with the tines of a fork. Return crust to the oven for 10 minutes.

Make the caramel oatmeal filling. Place oats on a dry rimmed sheet pan. Toast in the oven for 5-7 minutes, until fragrant. Remove and let cool.

Make the caramel. Place a medium heavy-bottomed pot on the stove. Add sugar, salt, butter, 1/2 cup cream, and corn syrup to the pot. Do not stir or jostle in any way! Bring to a boil over medium heat and let cook for 10 minutes, until dark all over but not burnt. Remove from heat and *carefully* whisk in remaining 1/2 cup cream, followed by vanilla and vinegar. Let caramel cool 20 minutes.

Add oats to a mixing bowl and pour caramel over the top. Stir together. Whisk in eggs. Set aside.

Make the dark chocolate ganache (black bottom). Place bittersweet chocolate in a small bowl. Pour heavy cream into a small saucepan over medium heat. When it just barely starts to boil, remove it from the heat and pour the cream over the chocolate. Once the chocolate looks soft, stir it together with a fork until you have a smooth chocolate sauce.

Spread ganache into the bottom of the pie crust. Top with caramel oatmeal filling. Bake pie on the bottom rack for 25 minutes, then move to the top rack for another 20-25 minutes, until puffed and slightly jiggly in the center. If crust is darkening too quickly at any point, tent with foil.

Let pie cool completely before serving, with a dusting of confectioner’s sugar, if desired.

Leftover pie will keep covered at room temperature for up to two days or in the refrigerator for three.

Chocolate Cupcakes {Six Year Anniversary!}

Chocolate Cupcakes

E2 Bakes turned six years old yesterday. While some things have stayed consistent over the last 634 posts—namely that I keep on posting—one of bigger changes in the last year is that I have finally started to appreciate the art of the cupcake.

Oh, I had cupcake recipes before this year—of course I did—but not many. Making cupcakes takes more time than making layer cakes (the dividing of batter alone…) and, contrary to popular belief, they’re not as simple as divvying up a layer cake recipe into a lot of little bits. Really great cupcakes are a bit more nuanced than that. But nuance doesn’t equal difficulty, and my best ever Chocolate Cupcakes are proof positive of that.

One surefire way to have great cupcakes every time? Don’t overfill the pans. Just don’t. Bigger is not better here—if you want bigger cake, make a layer cake. Lest I need to say it again: cupcakes are their own thing. Once your batter is prepared, fill each well 1/2-2/3 full and absolutely no more. You’ll think “this isn’t enough batter,” but it absolutely is. You can thank me when you pull 20+ soft, tender, perfectly domed little cakes from the oven. None with flat, spread-out tops for me, thanks!

The batter is a simple whisking situation, but there is a secret to getting the most chocolate flavor out of your ingredients: blooming the cocoa powder! Blooming is simply combining cocoa with a warm liquid ingredient to bring out its natural depth. I have bloomed cocoa many times on this blog, including my first post ever, wherein I melted butter, cocoa and sugar together for perfect chewy Cocoa Brownies. I’ve also done it by adding hot coffee to layer cakes and warming the butter and cocoa in my chocolate cookies. Here, the cocoa is stirred into warmed (not hot!) oil before being combined with dry ingredients and buttermilk.

Chocolate Cupcakes

While the recipe will still produce cupcakes if you skip the blooming, they will be oddly unremarkable. Not bad—nothing with a giant plume of chocolate buttercream on top could ever be bad. They just won’t be great. And I don’t know about you, but after six years of baking on here, I think we all deserve great cupcakes.

Chocolate Cupcakes
Chocolate Cupcakes 
makes 20-22 cupcakes

1/2 cup vegetable oil
2/3 cup natural unsweetened cocoa powder
1 1/3 cups all-purpose flour
1 teaspoon espresso granules (optional)
3/4 teaspoon baking powder
3/4 teaspoon baking soda
1/2 teaspoon Kosher or sea salt
2/3 cup granulated sugar
2/3 cup light brown sugar, packed
2 large eggs, room temperature
2 teaspoons pure vanilla extract
1 cup buttermilk, room temperature

For decorating:
Chocolate Buttercream (recipe below)
chocolate sprinkles (optional)

Preheat oven to 350F. Line 20-22 cups in muffin/cupcake pans with liners. Set aside.

Bloom the cocoa. Pour oil into a small microwave safe bowl. Microwave 20-25 seconds or until warm (but not hot). This step may also be done in a pot on the stove.

Add cocoa to oil and whisk with a fork to combine. Let sit while you prepare the other ingredients.

In a medium mixing bowl, whisk together flour, espresso granules, baking powder, baking soda, salt, sugar and brown sugar. In a liquid measuring cup or small bowl, whisk together eggs, vanilla and buttermilk.

Whisk half the bloomed cocoa into the dry ingredients, followed by half the buttermilk. Add the remaining bloomed cocoa followed by the remaining buttermilk.

Divide batter among the liners, ensuring that they are only 1/2-2/3 full. Tap full pans on the counter 5 times to release large air bubbles, then bake cupcakes 18-19 minutes, or until slightly domed. A toothpick inserted in the center should come out clean.

Let cupcakes cool in their pans for 5 minutes before removing to racks to cool completely.

Spread or pipe chocolate buttercream on cooled cupcakes. Finish with sprinkles. Serve.

Leftover cupcakes will keep covered at room temperature for a few days or in the refrigerator for up to a week.


Chocolate Buttercream
makes enough for 1 batch of cupcakes

1 cup (2 sticks) unsalted butter, softened to room temperature
2 1/2 cups confectioners sugar
3/4 cup natural unsweetened cocoa powder
pinch of Kosher or sea salt
2 teaspoons pure vanilla extract
6 tablespoons heavy cream

In a large mixing bowl, use an electric mixer to beat butter until light and fluffy (about two minutes). Beat in confectioner's sugar, followed by cocoa powder and salt, scraping down the bowl as necessary. Add in vanilla and heavy cream. Beat on high for 1-2 minutes, until very fluffy.

Load into a piping bag fitted with a tip (I used a star tip here), or spread with an offset icing knife.