 A few years ago, I put out a call for holiday cookie ideas and got a list ten miles long out of the deal. I have slowly worked my way through it for the last several Christmases and am getting close to the end now…and what’s down there? Oh! It’s white chocolate macadamia nut cookies.
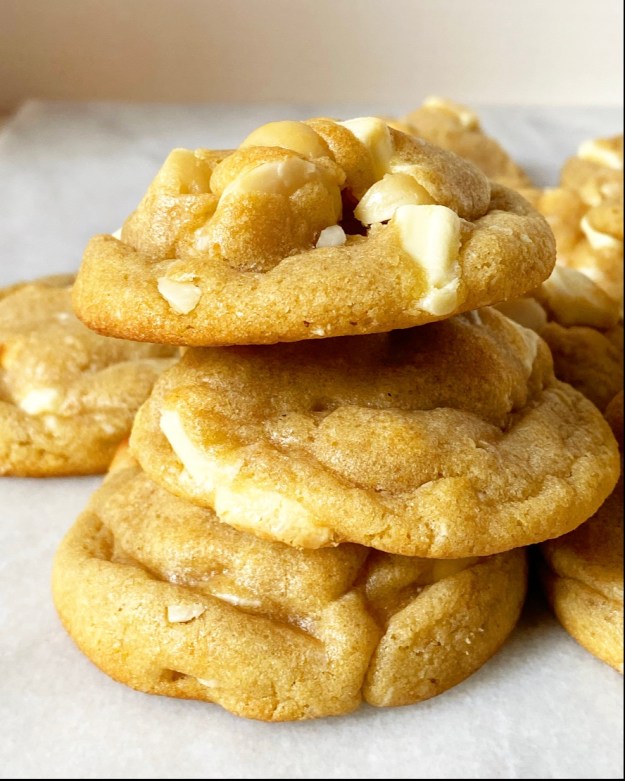 You might be thinking “are white chocolate macadamia nut cookies a holiday cookie?” To that I say…sure, why not?! If someone puts them out at the holidays, I think they’re a holiday cookie. Just because a recipe doesn’t match our own personal experience and nostalgia doesn’t mean it doesn’t align with someone else’s.
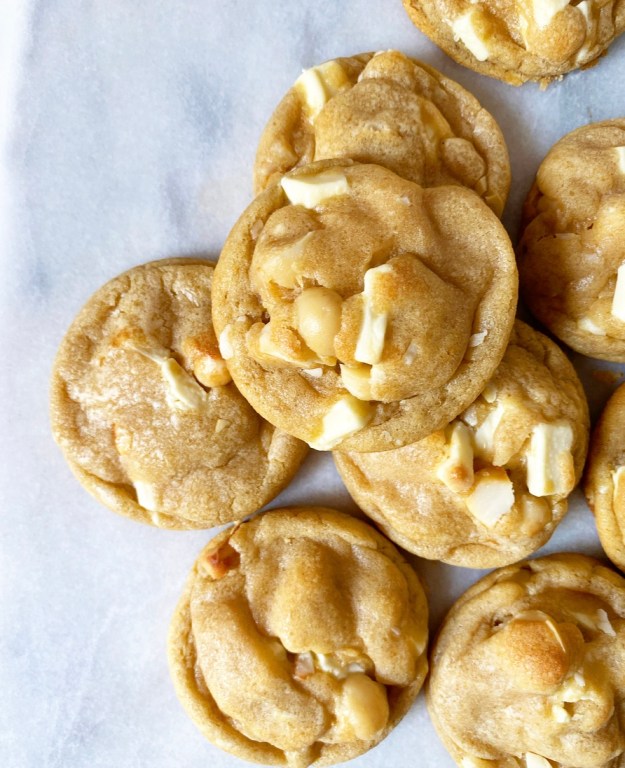
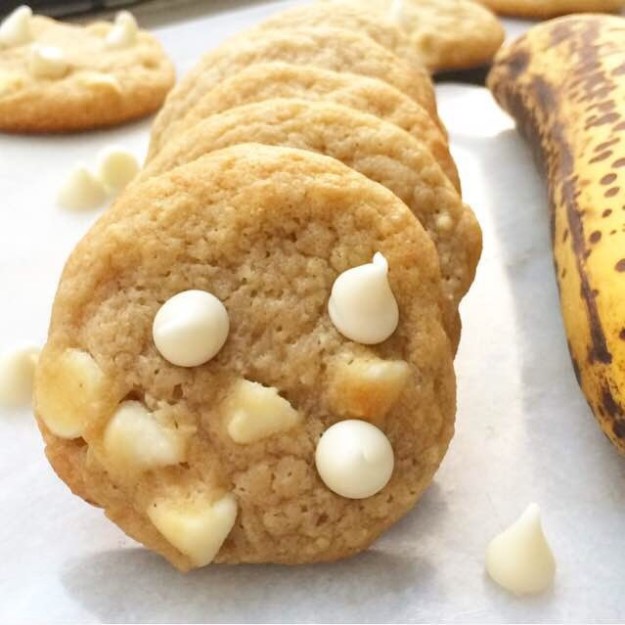
To that end, most of my personal experience with white chocolate macadamia nut cookies has not been holiday-related, but instead in shopping mall food courts and some Otis Spunkmeyer set-ups that my school’s PTO had. That said, I firmly believe than any cookie can be a holiday cookie with a little belief (Christmas spirit?), some brown butter, and maybe a decorative plate, if you’re a little more organized than I am. So, here we are with my second holiday cookie of the season: Brown Butter White Chocolate Macadamia Nut Cookies. Yes, that name is seven words long but it is #worthit—brown butter takes this chewy, nutty classic cookie recipe from good to WOW! Like, why have we not been doing this all along?
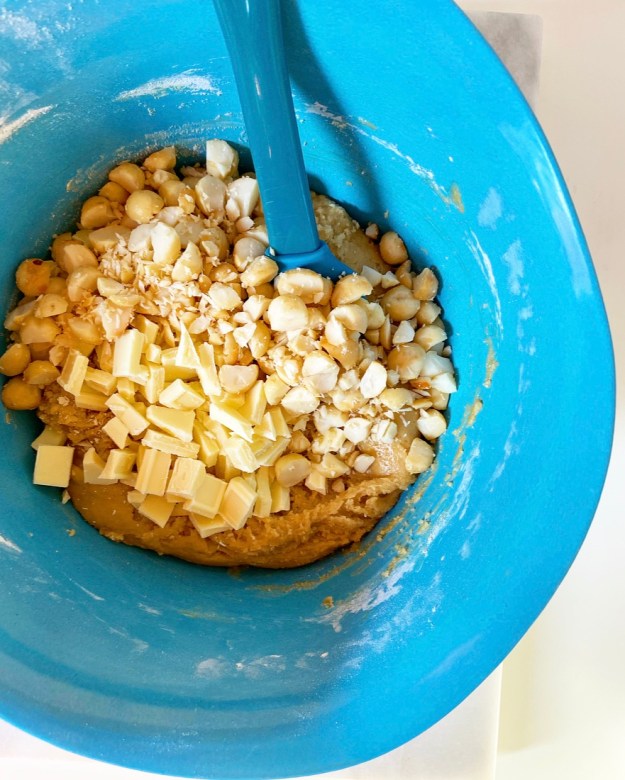 The cookie dough is straightforward and doesn’t require a mixer or anything fancy. I’ve made these with both white chocolate chips (about a cup) and chopped white chocolate, and prefer the chopped stuff every time. It has more cocoa butter, fewer stabilizers, and it just tastes better, period. As for the macadamia nuts, you can use roasted-salted or raw. I love control and have access to raw macadamias through Sahadi’s, so those are what I used here. If you are using roasted-salted, just skip the roasting step and reduce the salt to 1/2 teaspoon (unless you like very salty cookies). As with most of my cookie doughs, this one requires a chill, but it’s pretty short. Once your dough has rested, just scoop/roll/bake/cool/eat eat eat.
 And maybe, just maybe, share a few and spread a little holiday cheer.
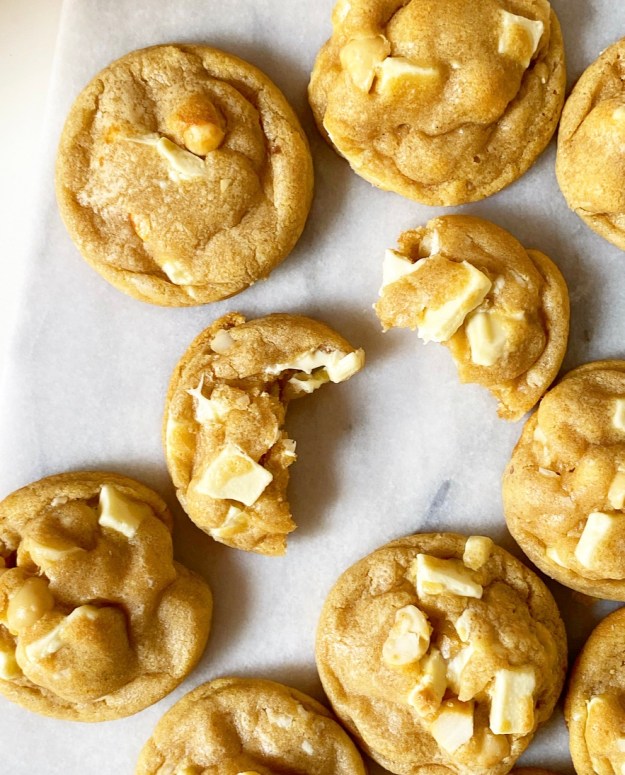
Brown Butter White Chocolate Macadamia Nut Cookies
makes about 2.5 dozen cookies
1 cup (2 sticks) unsalted butter
1 cup macadamia nuts (I used raw)
2 1/2 cups all-purpose flour
1 tablespoon cornstarch
1 teaspoon baking soda
3/4 teaspoon Kosher or sea salt
1 cup light brown sugar, packed
1/2 cup granulated sugar
2 large eggs, room temperature
2 teaspoons pure vanilla extract
6 ounces white chocolate, chopped (I used Ghirardelli)
If using roasted salted macadamia nuts, skip the first step. Chop them before beginning the recipe at “Brown the butter.” Also reduce the salt to 1/2 teaspoon.
Preheat oven to 350F. Scatter pecan halves on a dry rimmed baking sheet and roast 5-7 minutes, or until fragrant. Do not burn. Let cool completely and give them a rough chop.
Brown the butter. Place butter in a light-colored saucepan over medium heat. Let butter melt. Butter will bubble and crackle as the water content evaporates. Swirl the pan frequently for 5-7 minutes, keeping an eye on the color. When the solids are turning brown and the butter is nutty and fragrant, remove the pot from the heat and immediately pour the brown butter into a large mixing bowl and let cool 5 minutes.
Meanwhile, whisk together flour, cornstarch, baking powder, baking soda, and salt together in a medium mixing bowl. Set aside.
Retrieve the large mixing bowl full with the brown butter. Whisk in light brown and granulated sugars. Mix in eggs one at a time, followed by vanilla. Add dry ingredients in two installments, mixing until combined. Use a silicone spatula or wooden spoon to fold in white chocolate, followed by chopped macadamia nuts. Cover dough with plastic wrap and chill for at least 90 minutes, or up to 3 days.
Place oven racks in the central positions. Preheat oven to 350F. Line two baking sheets with parchment. Set aside.
Scoop chilled dough in 2 tablespoon increments, and roll into balls. Place dough balls at least two inches apart on prepared baking sheets. Bake cookies 9-10 minutes, until puffy. Let cool on baking sheets for five minutes before removing to a rack to cool completely. Repeat process with any remaining dough, letting the baking sheets come back to room temperature between batches.
Cookies will keep well in an airtight container at room temperature for up to a week.


 I’ve been a bit lost trying to decide what to make for Christmas this year. In the past, I’ve really gone for it with elaborately
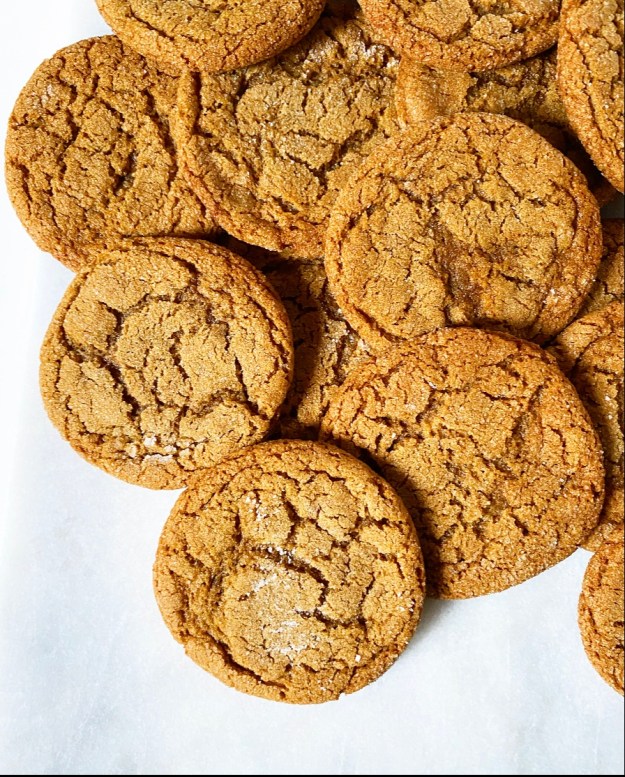
 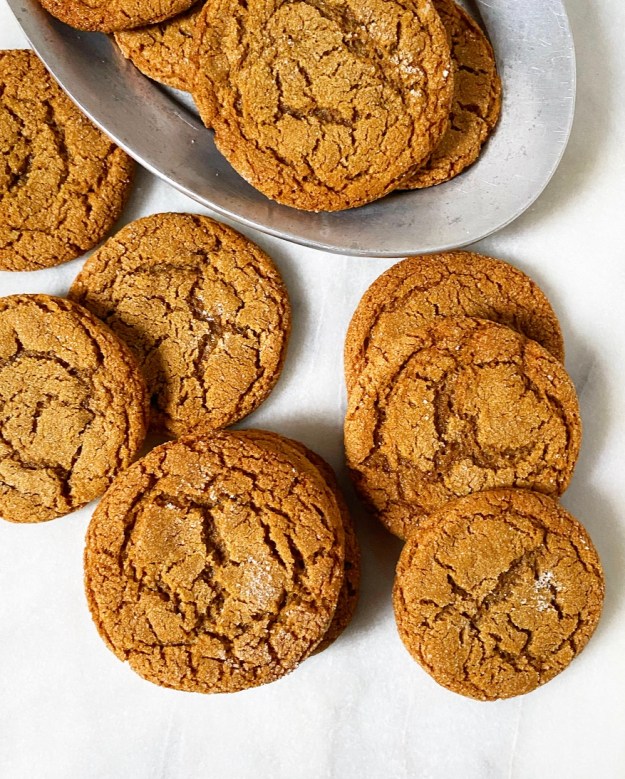 Anyway, this Christmas is going to be simpler around here. I’m not saying there won’t be sprinkles or a buttercream flourish—I’m still me, duh. It just may be a month of less…involved…holiday sweets.
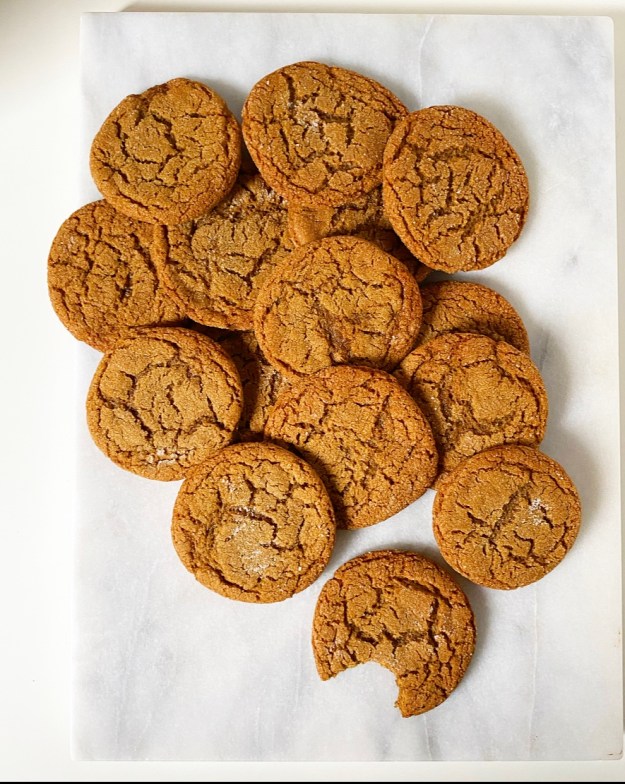 As far as the recipe goes, my path to chewy Molasses Crinkle glory is pretty straightforward. I used my
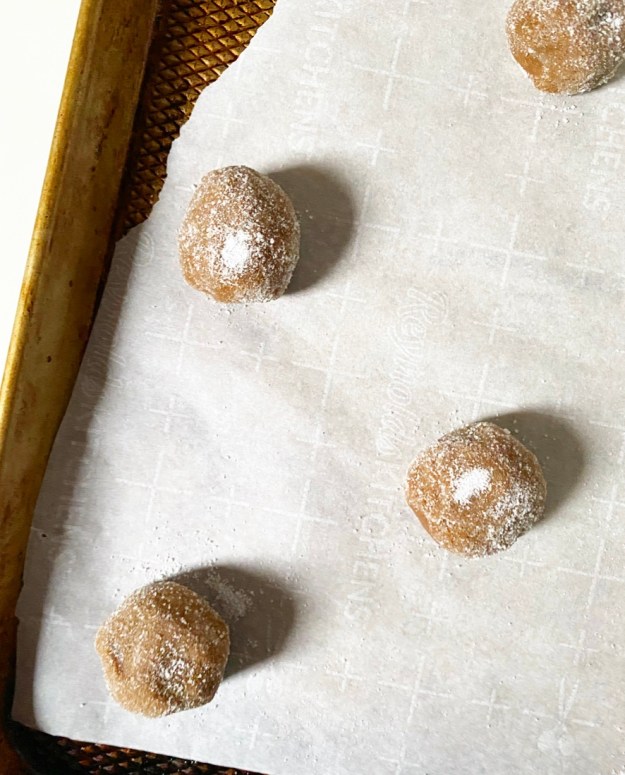
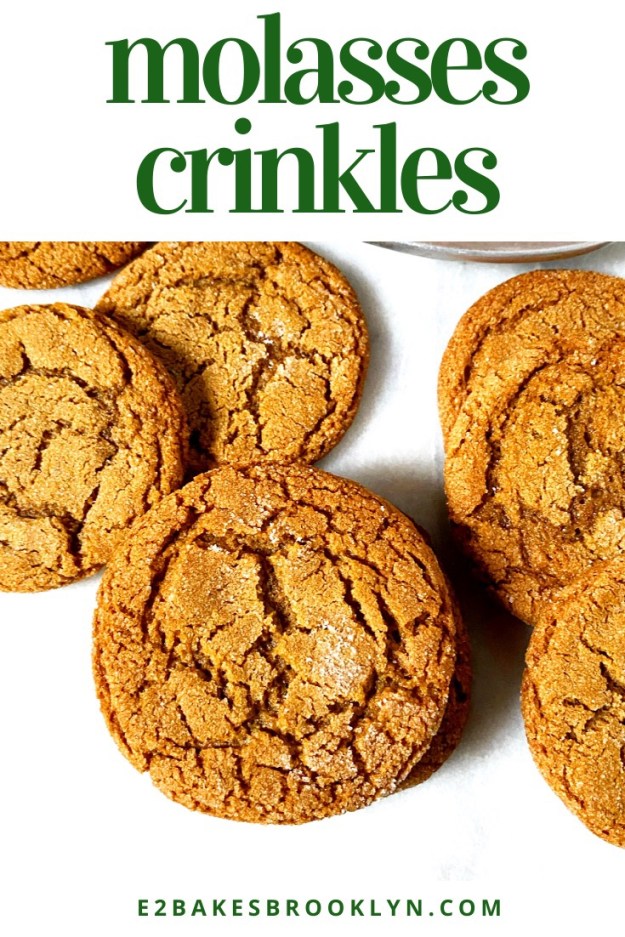
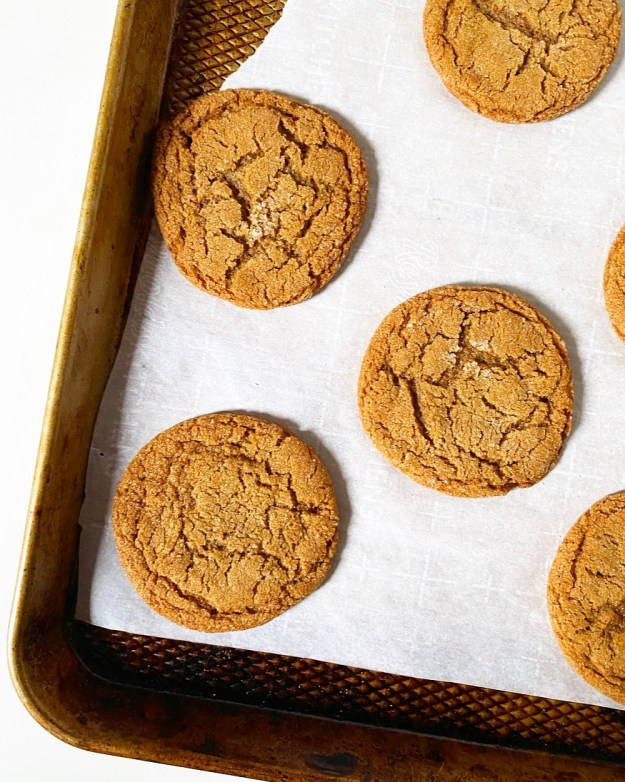 Mix your dough in a pot on the stove and let it relax at room temperature while your oven warms; this will give the gluten time to develop for extra-chewy results! Scoop the dough into balls and roll them in sugar (granulated or a mix of granulated and coarse) before baking for ten minutes. The big crinkles will begin to form during the last two or so minutes of baking, when the dough has spread pretty dramatically and puffs to the point that it breaks the sugar coating. Then, just when you remove the hot cookies from the oven, give the pan a good thwack on the counter and…bam. Crinkle city.
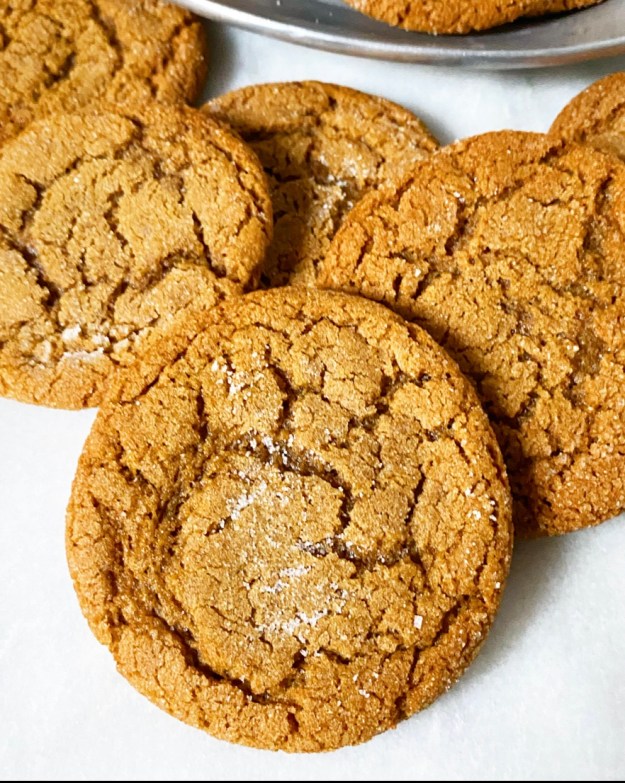 These cookies, y’all. They’re on the thin side, but have tons of surface area and chewy texture and crinkles and a crisp coating, and that’s to say nothing of the molasses and ginger and cinnamon! And make no mistake, these are molasses cookies. Sure, the ginger and cinnamon are quality background flavors, but sticky, bittersweet molasses? She’s the star of this show.
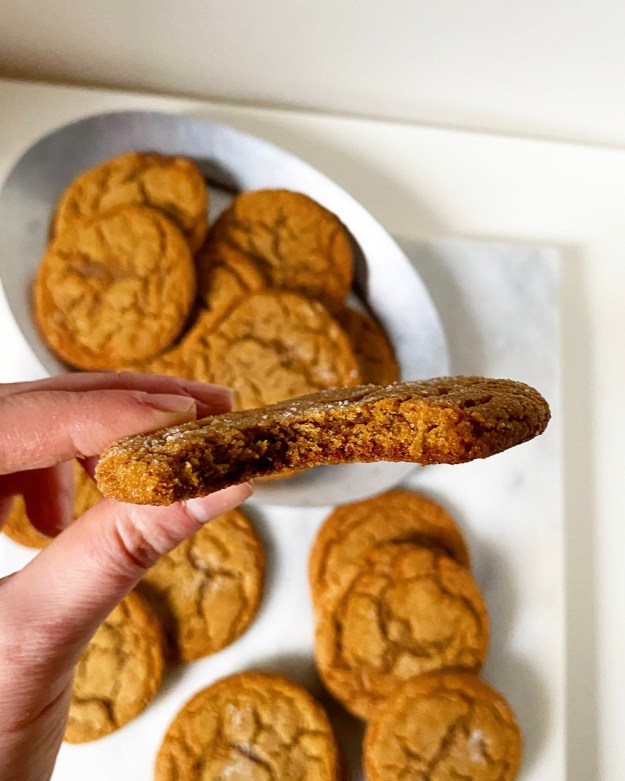 I’ve made three batches of Molasses Crinkles since Thanksgiving, and I’m here to tell you that they keep like a dang dream. Seriously. I keep thinking I’m going to reach into a bag to discover a bunch of molasses frisbees, but nope—chewy as ever.
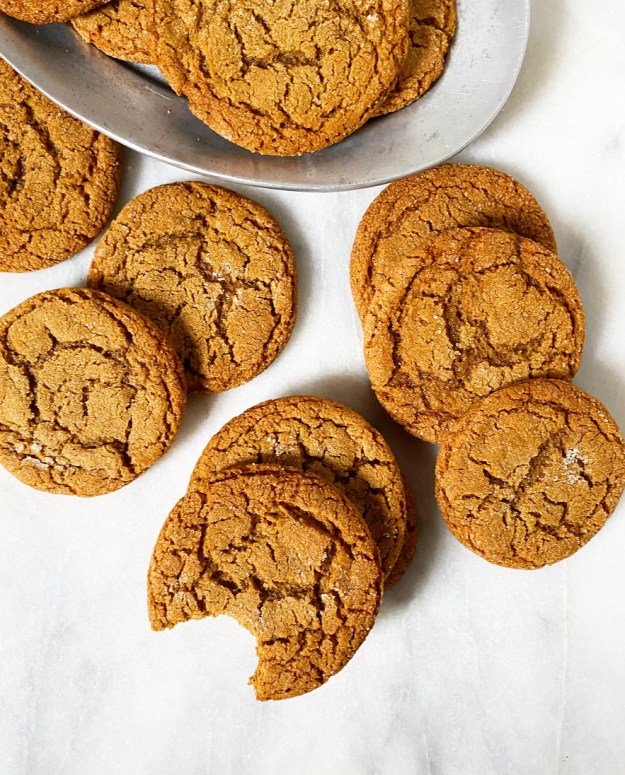

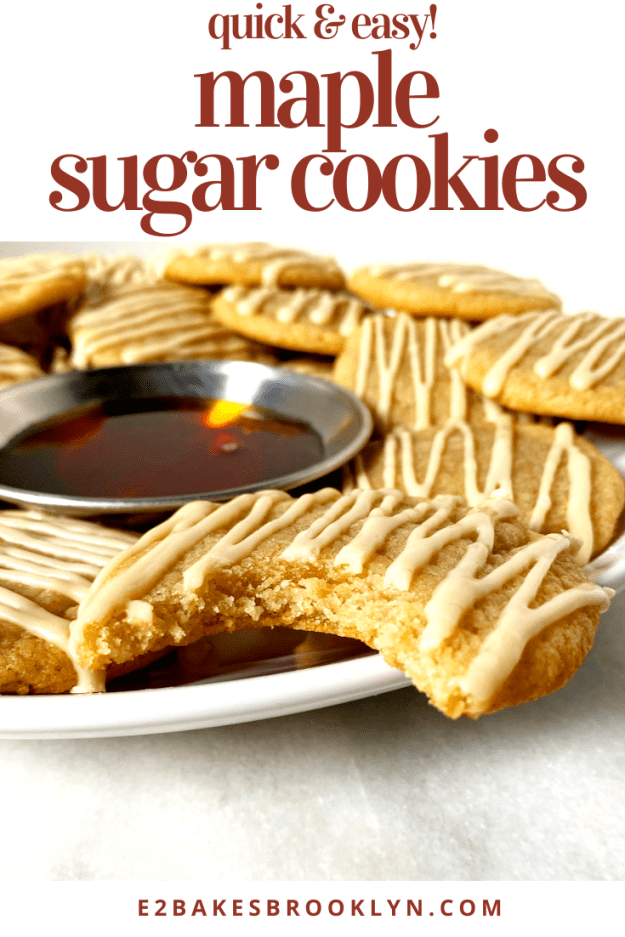
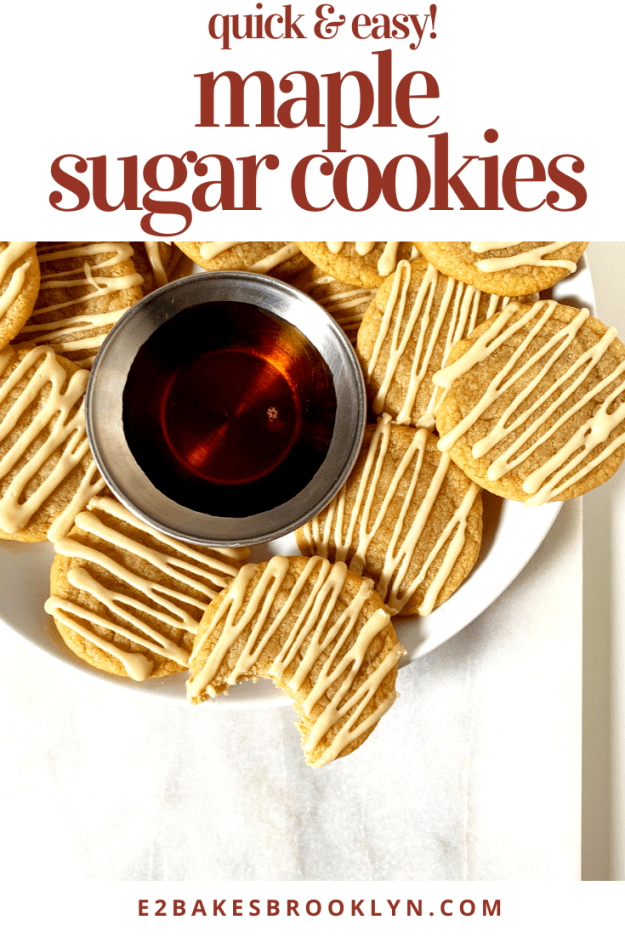
 Y’all, please believe me when I tell you these are *the* best and easiest Maple Sugar Cookies out there. They are so, so good. Throughout the pandemic, I’ve agonized over how best to distribute my blogging leftovers, but these? I kept them all to myself. I didn’t even give one to my roommate.
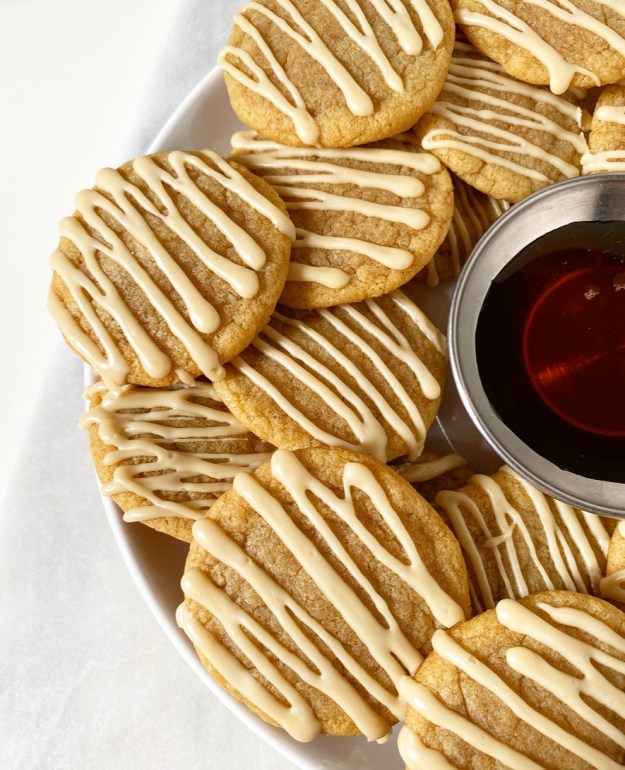
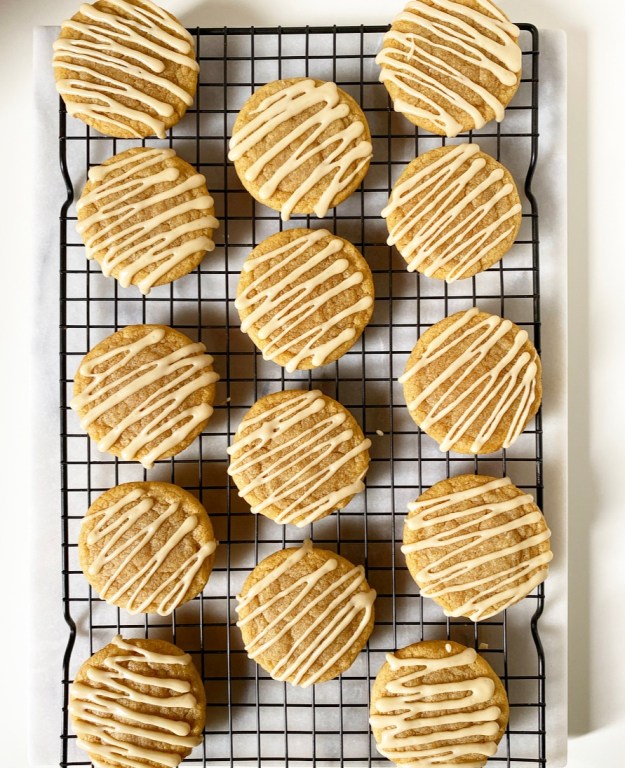 So, what makes these Maple Sugar Cookies the best? Well, to start with, they’re chewy sugar cookies with big maple flavor–you can’t go wrong with that combo! In addition to maple syrup in both the dough and the glaze, these cookies are filled with a bunch of other very delicious things like nutty brown butter, light brown sugar, vanilla, and a pinch of nutmeg that really makes the flavors sing. Basically, there’s no way these were ever going to be anything but great.
 Heck, you don’t even need a bowl for this recipe! Nope, the dough comes together in a pot on the stove. I was inspired to try this method after seeing Lauren Brennan’s
 To make Maple Sugar Cookies, start by browning the butter. Just when the milk solids turn golden, remove the pan from the heat and stir in the sugars and maple syrup. Let the mix cool about ten minutes before adding an egg, two teaspoons of vanilla and the dry ingredients. Then let the dough rest for ten more minutes before scooping, rolling and baking.
 While these cookies are delicious enough that they don’t need adornment, you know I love a glaze. This one is just confectioner’s sugar, maple syrup and a pinch of salt. Whirl it up and drizzle it on the finished cookies. You may drizzle with a fork, or follow my lead and use a piping bag with the tiniest corner snipped off. Hello, I am a control freak.
 The last step in making Maple Sugar Cookies? Wait, but not for long. Just for like an hour or so. As with many baked goods, the flavors need this time to meld and settle. Will your cookies be bad if you eat them right away? Of course not—they’re cookies!—but the maple flavor won’t shine through the way it will sixty minutes later. Trust me when I tell you that, after an hour, you will be rewarded for your patience with perfect chewy, mapley cookies with hints of brown butter and brown sugar. And while the batch makes plenty to share, I won’t blame you one bit if you hoard them all to yourself.

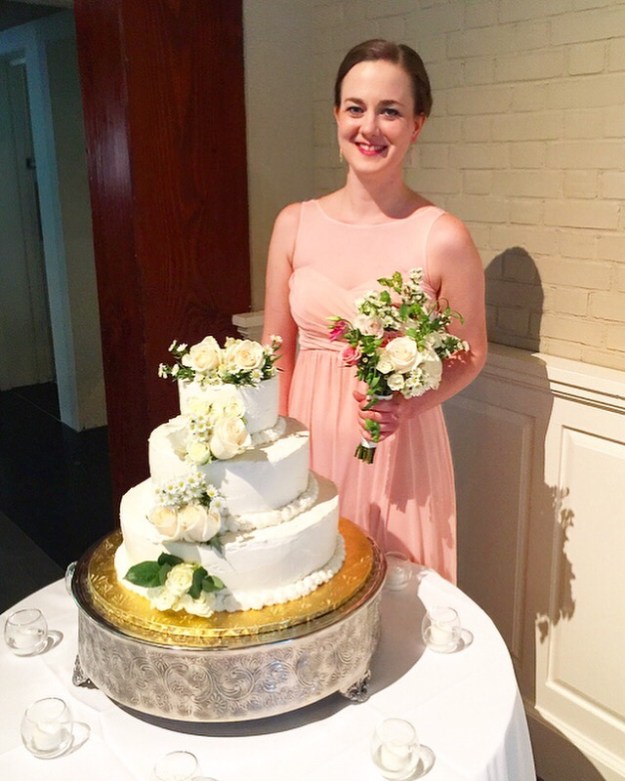 Wedding Cake Trilogy {

 This is just to let you know that if, on the second night of
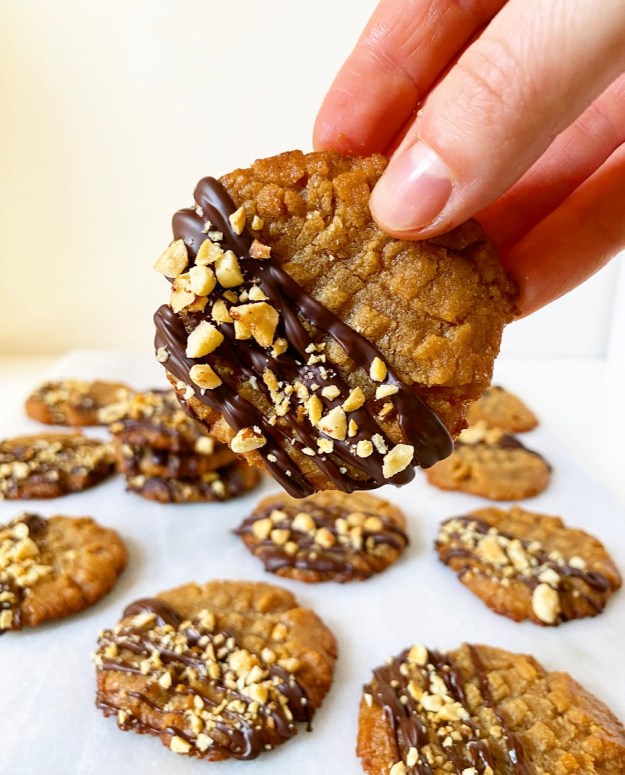
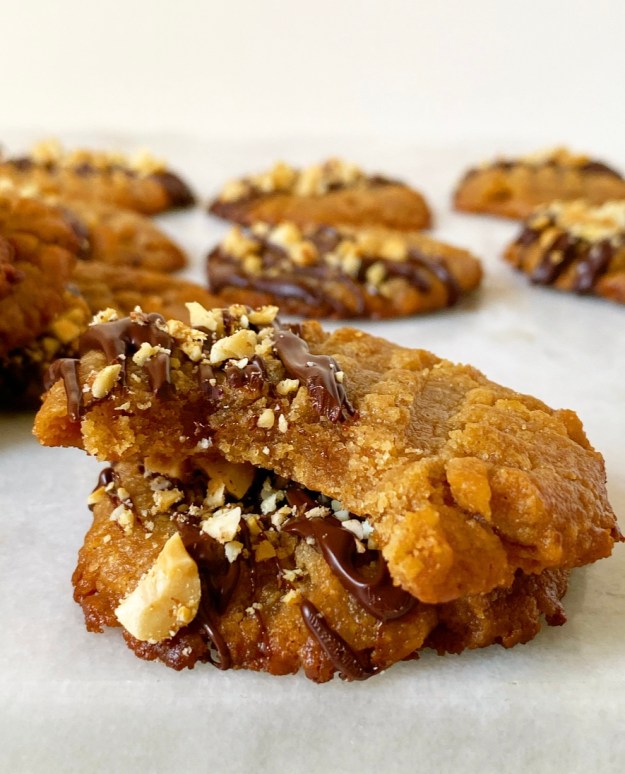
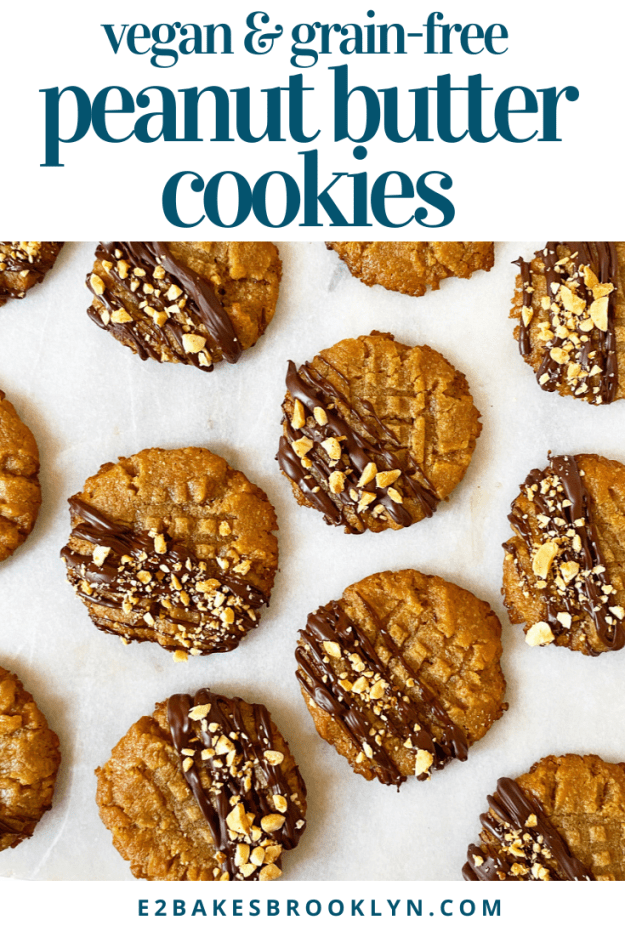
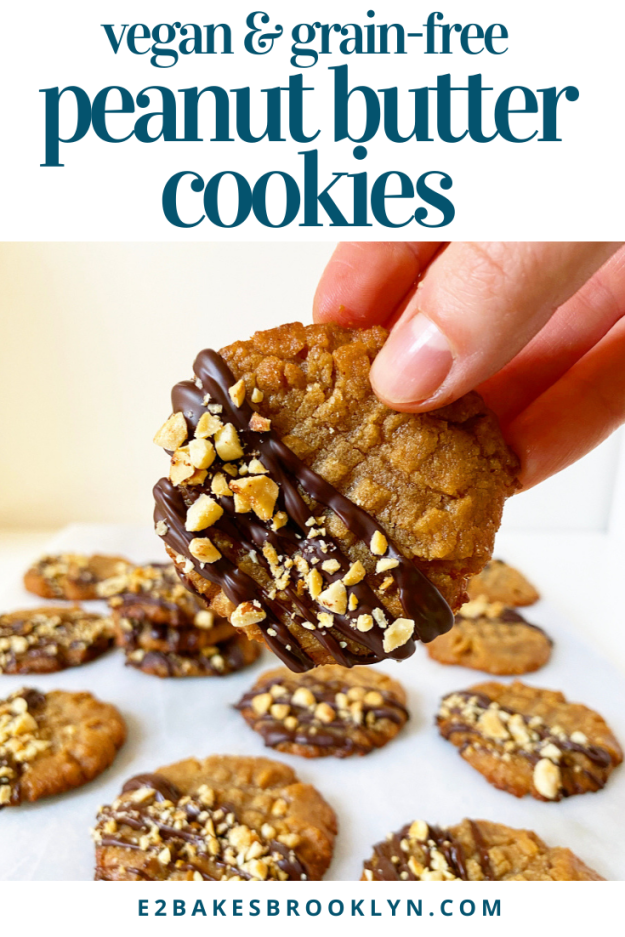
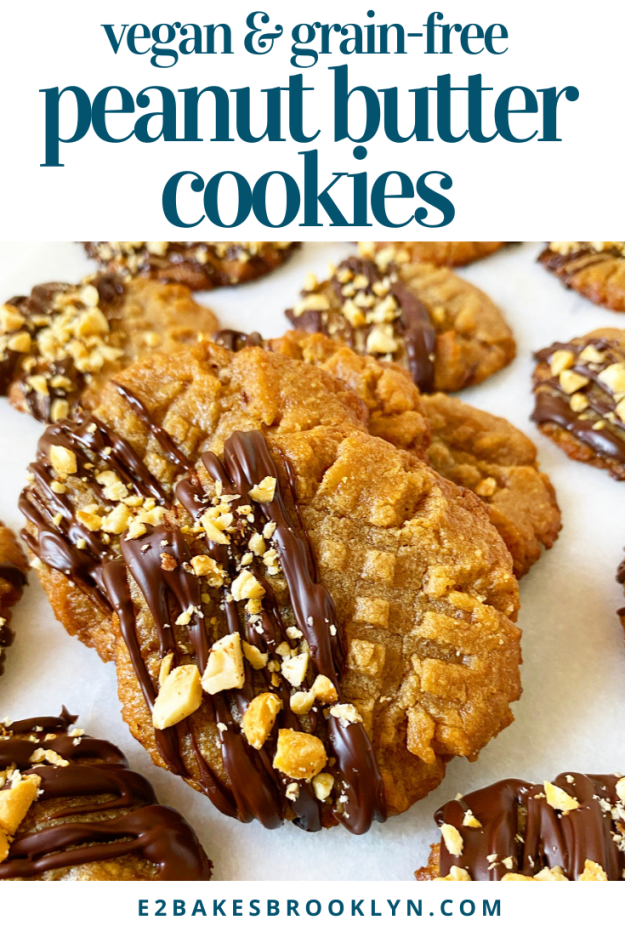
 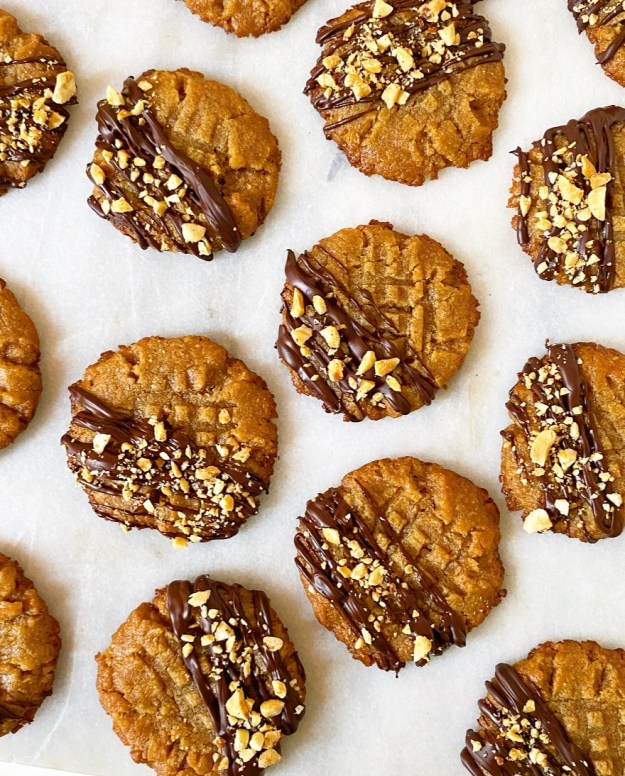 Did I mention that they’re vegan and grain-free? Because they are. This recipe is the lightest twist on the classic
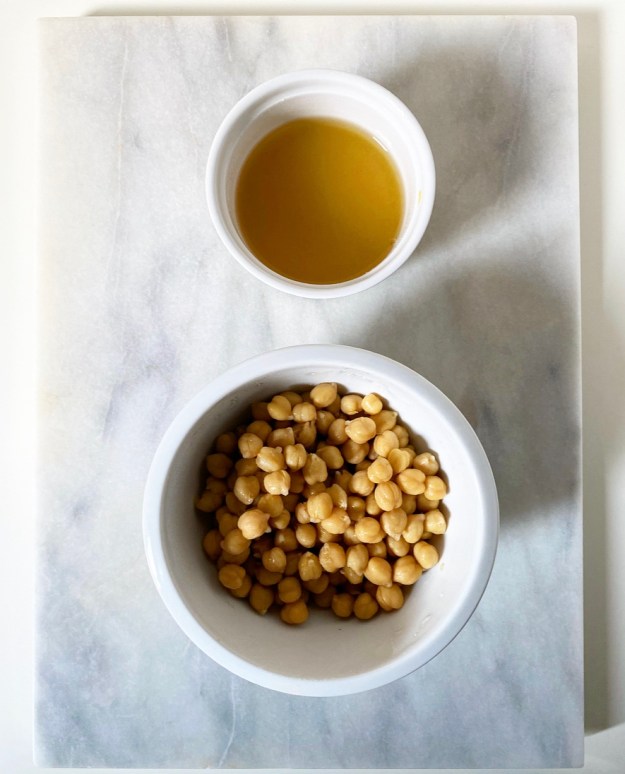
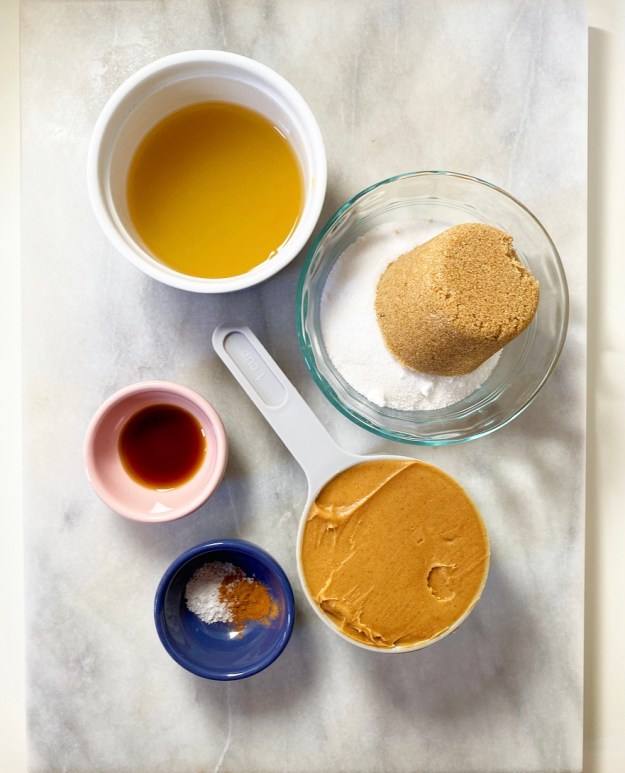 Here, I’ve kept it pretty traditional. I added a few extra ingredients like brown sugar, a dash of cinnamon, some salt and vanilla, but the dough still comes together in moments. In order to keep the cookies vegan, I swapped the egg for an equal volume of
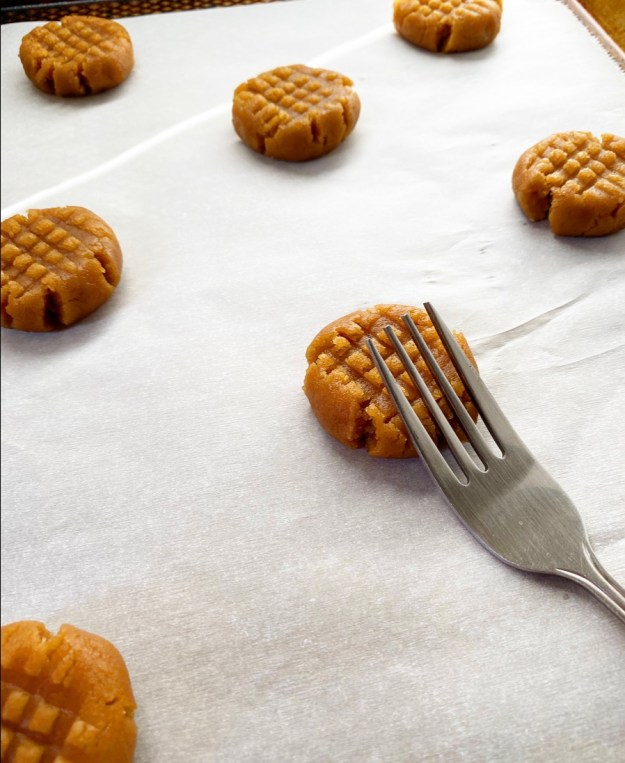
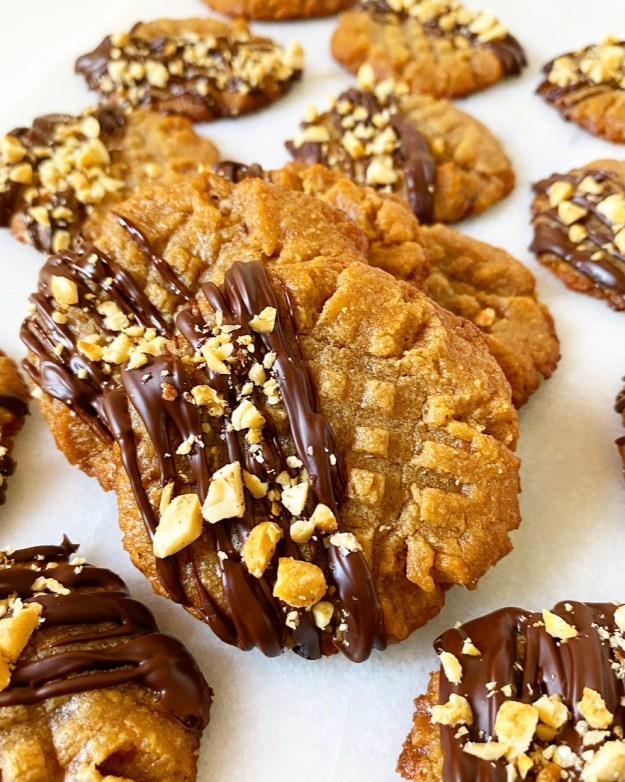
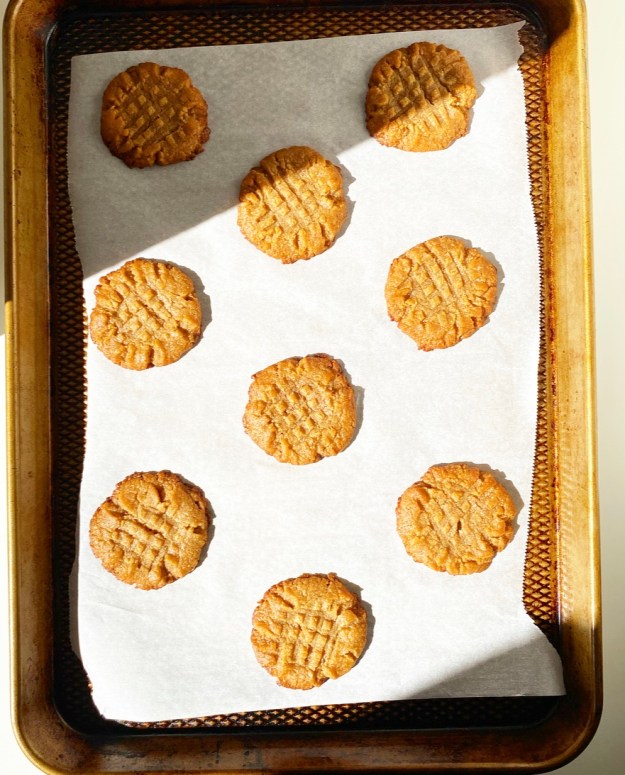 I’ve also added a short twenty-minute chill to this recipe, but it’s not strictly necessary and your cookies will work without it. They’ll just be a little thinner than mine. Whatever you do, don’t skip crosshatching the tops of your cookies with a fork. I don’t know where this started or why we do this to peanut butter cookies, but I’m pretty sure it’s the law.
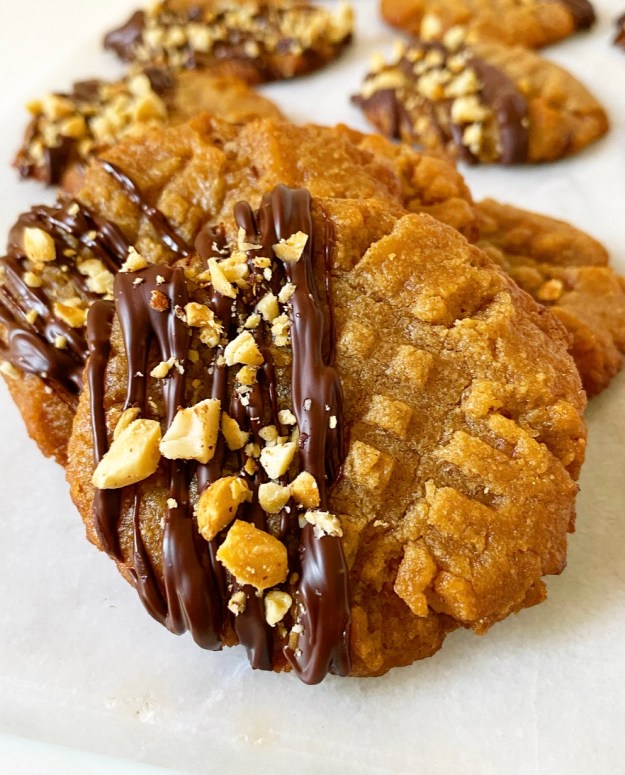 What? I don’t make the rules. I just break ‘em. Like finishing these Peanut Butter Cookies off with the easiest chocolate-peanut butter drizzle and some chopped peanuts. Is this necessary? No. But it’s pretty and freaking delicious. And really, when it comes to