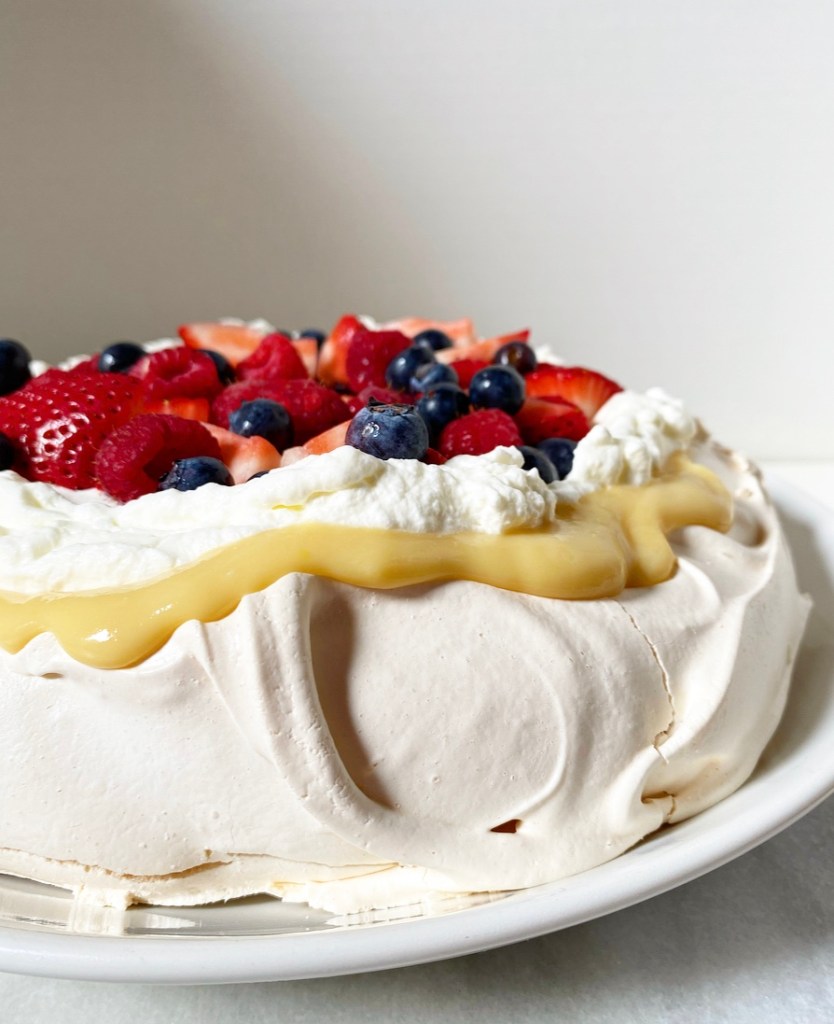
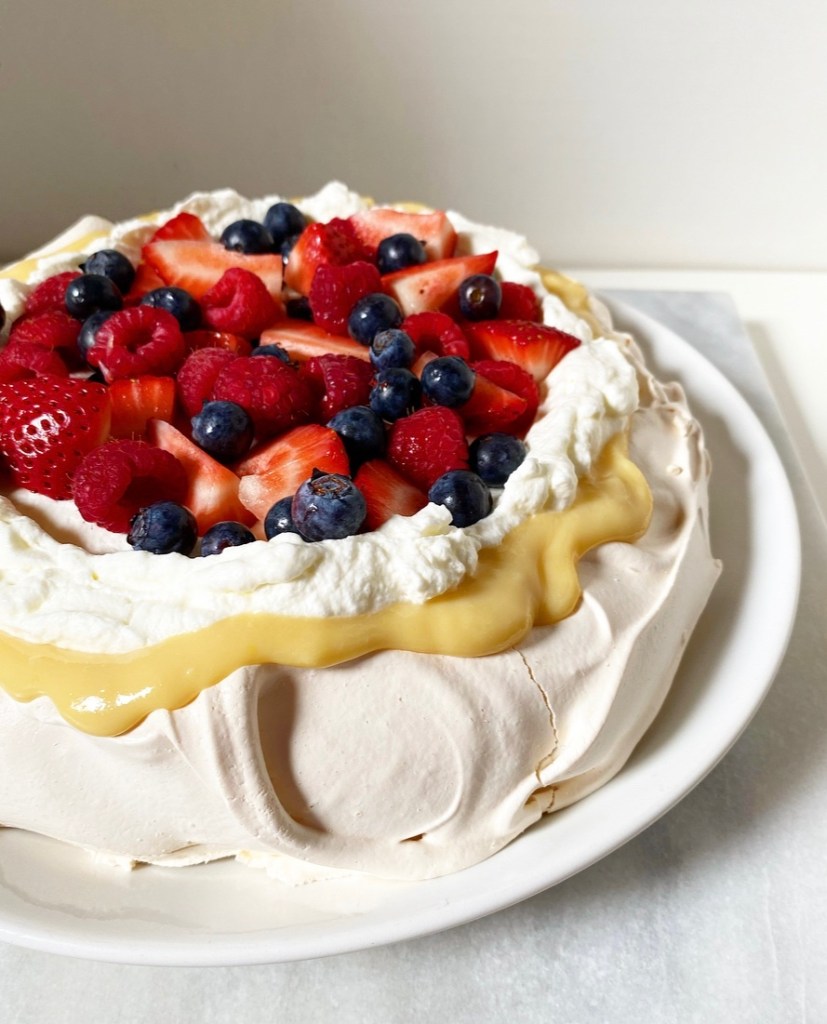
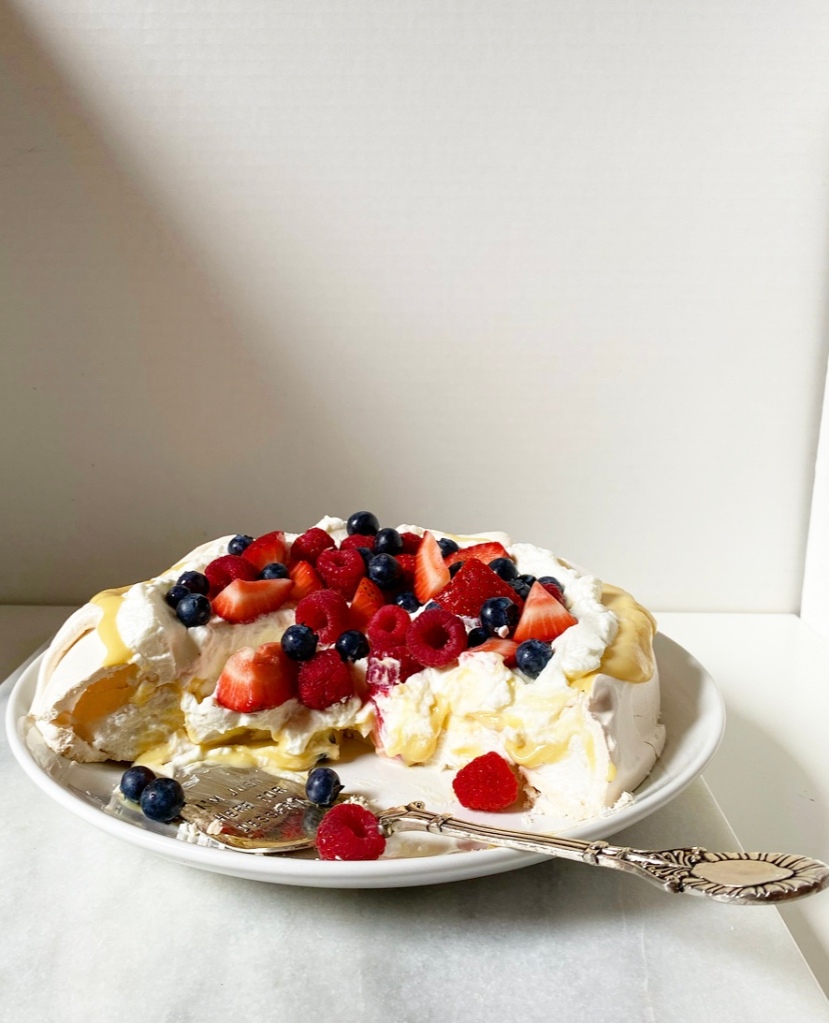
If you’ve never had pavlova, your life summer dessert game might be about to change. This naturally gluten-free meringue cake has a crisp, glossy exterior and marshmallow-soft interior, and is a vehicle for all sorts of good things, including but not limited to whipped cream, lemon curd and fresh summer berries. It’s a perfect rustic-but-classy dessert to have in your warm weather recipe arsenal. I don’t have a roof deck or a backyard, but one day when I do, I’m going to have friends over for mocktails and pavlova all summer long, just because I can. In fact, my maternal grandparents’ backyard is the first place I ever remember eating pavlova.
You might be wondering “Is pavlova popular in North Texas?” The answer is a hard “no.” To tell you the truth, I don’t know how my grandma learned about it, aside from the part where she just *knew* how to throw together simple dinner party foods. If she ever told me, I’ve forgotten…probably because I was trying to get a whole bunch of fruit, whipped cream and meringue in my face as efficiently as possible. My best guess is our friends-who-are-family from Australia taught her about it during one of their visits.
So how did I go from eating pavlova exactly once during my Texan childhood to making it thirty-odd years later? Well, the answer is simple. I had leftover egg whites, a fresh jar of Lazy Lemon Curd, got a little over-ambitious with my berry purchasing, and I always have heavy cream. When life gives you those things, make Pavlova with Lemon Curd & Berries.

Like most things that rely whipped egg whites and sugar for structure, pavlova is incredibly simple to make. The most important step in the whole process is ensuring that your mixing bowl and mixer attachment are super clean and dry so that you end up with airy results and not sad egg white soup.
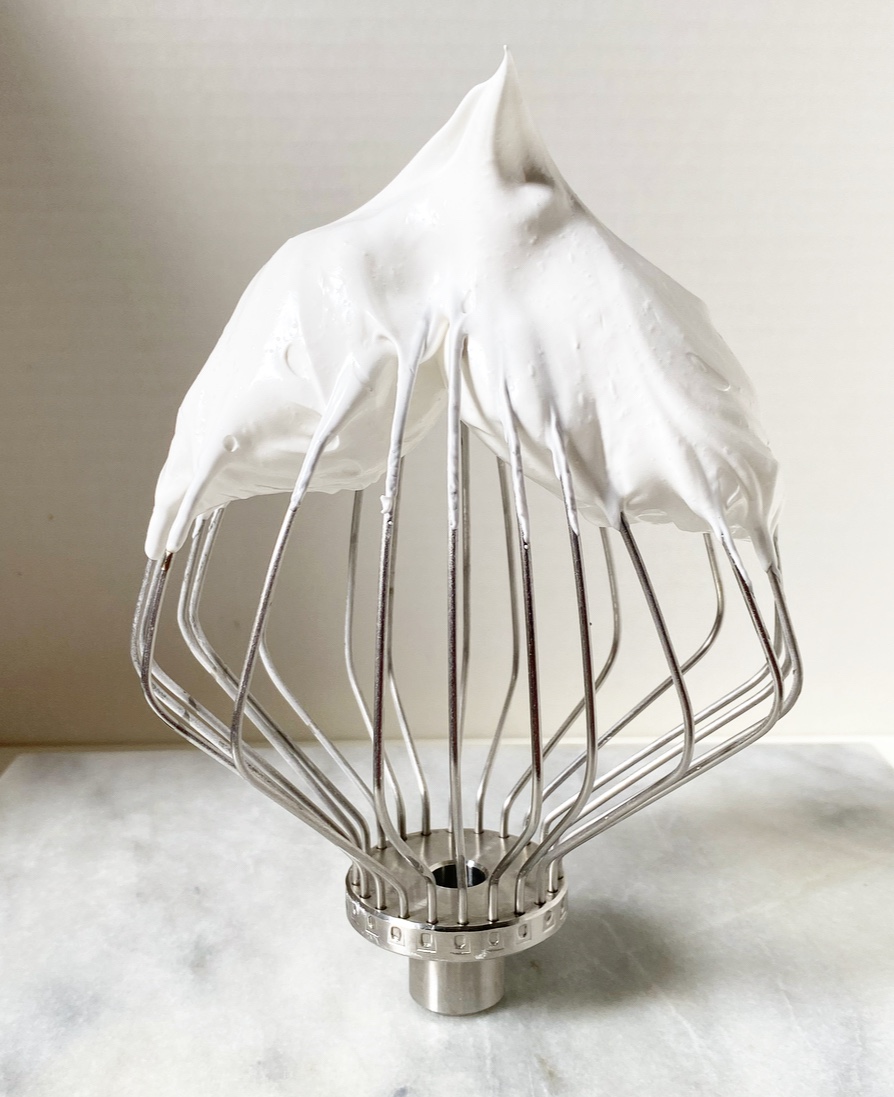
The actual work of making meringue is just gradually combining egg whites, salt, sugar, cornstarch, vanilla and vinegar while your mixer works overtime to create stiff peaks. After that, form your meringue into a cake on a parchment-lined sheet pan and bake it very low and slow before letting it cool completely in the oven.

Now, I have good news and bad news. The good news is that baked, cooled pavlova meringue can be made up to three days before you serve it. The bad news is that once you start piling toppings on it, your pavlova isn’t long for this world. Glossy, crisp, marshmallowy meringue is fleeting, so don’t assemble your pavlova until right before you want to serve it. But then, do it up!

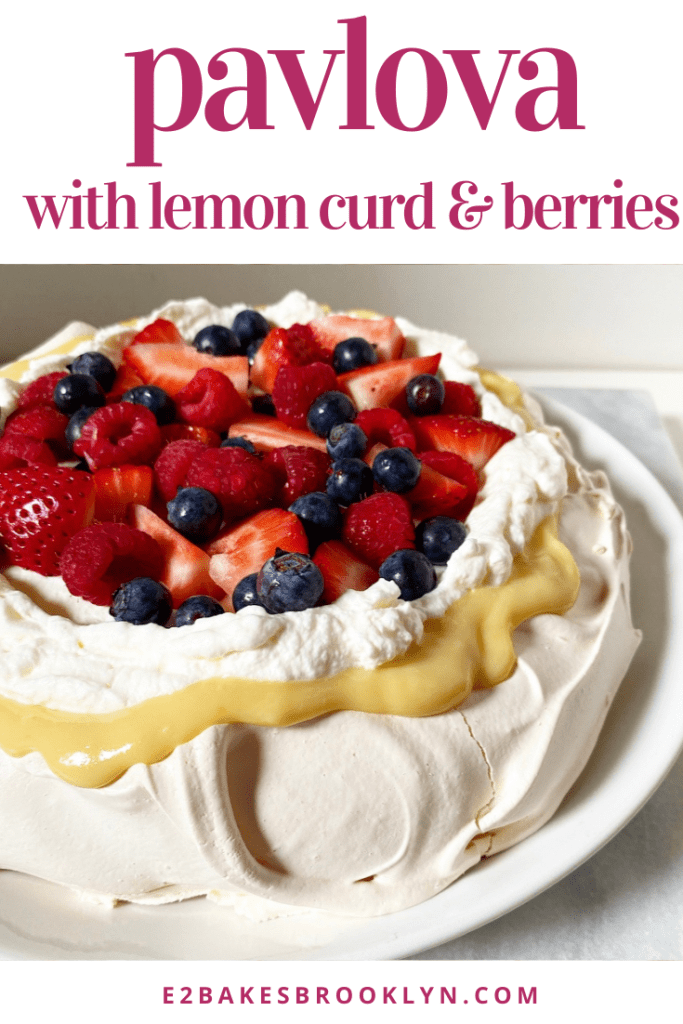
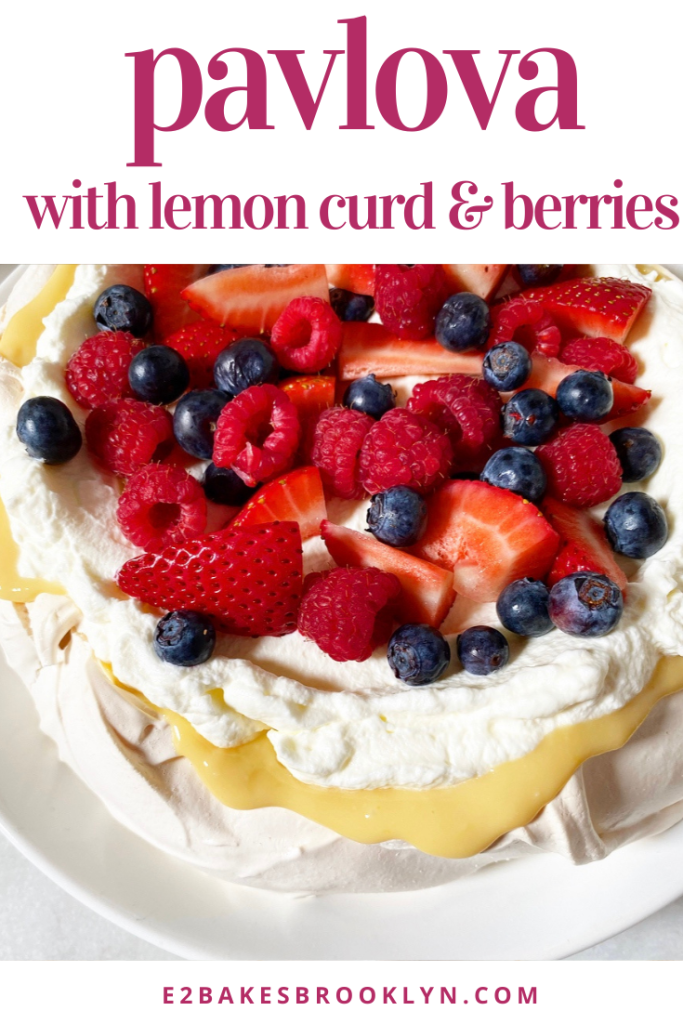
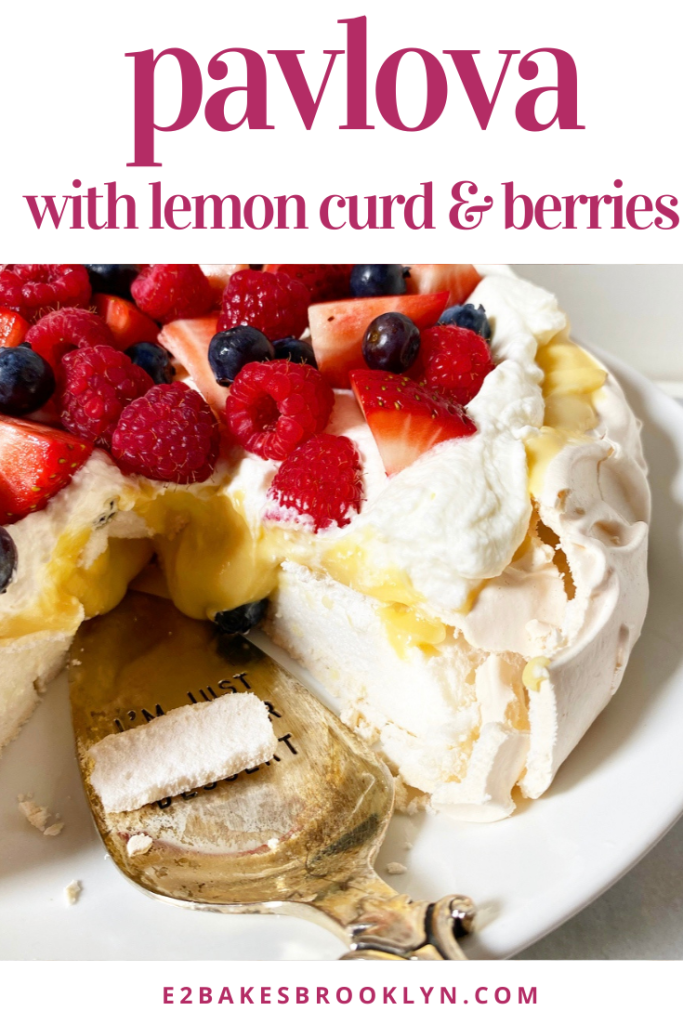
Obviously, I went the lemon curd/whipped cream/fresh berries route here, but feel free to go wild with your pavlova toppings. Change the fruit to mango, pineapple, cherries or peaches! Grate on chocolate! Scatter toasted coconut over the top! Use key lime curd in place of lemon and sprinkle crushed graham crackers on there. Key Lime Pie-vlova, anyone?!
But back to the point, which is, as always, to take my recipe and make it yours. Like I said, your life summer dessert game might be about to change.
Pavlova with Lemon Curd & Berries
makes one pavlova, about 8 servings
Pavlova:
1 cup granulated sugar
2 teaspoons cornstarch
1 teaspoon pure vanilla extract
1 teaspoon white or apple cider vinegar
4 large egg whites, room temperature
1/4 teaspoon Kosher or sea salt
Whipped Cream:
1 cup heavy cream, very cold
2 tablespoons confectioner’s sugar
For Assembly:
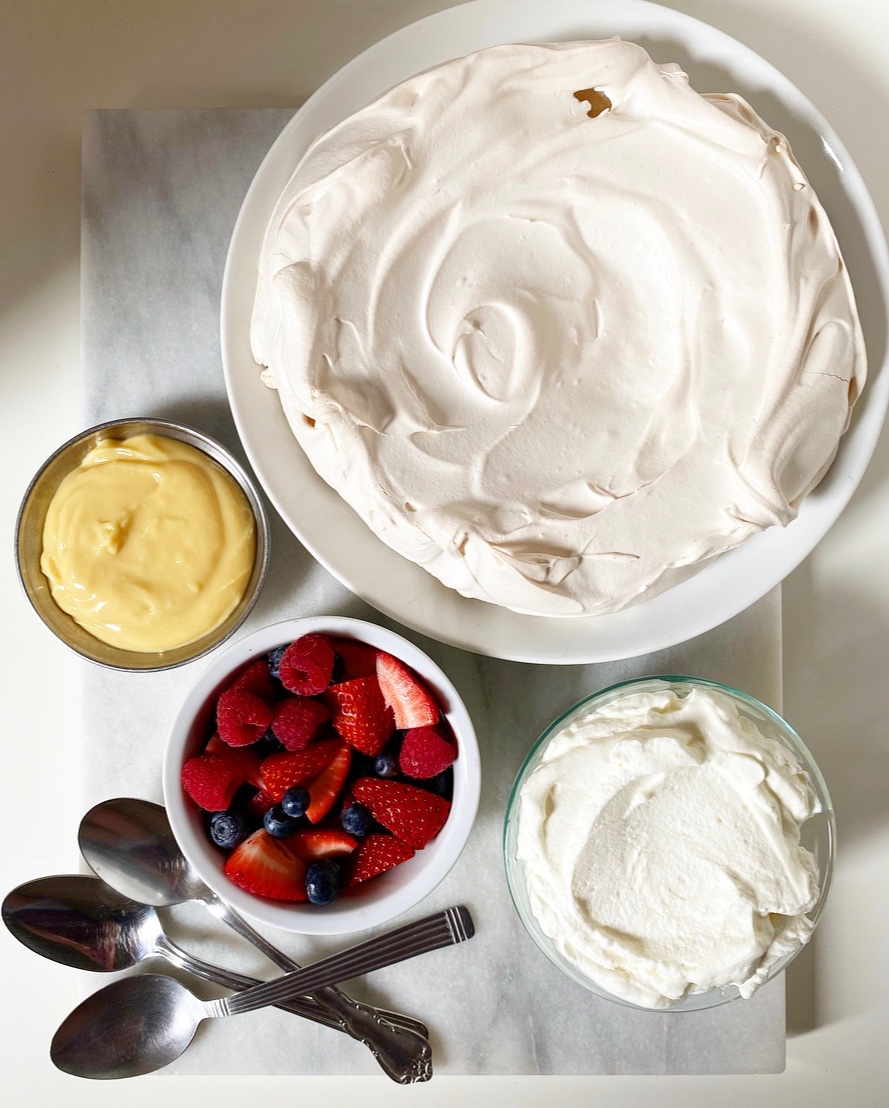
1 cup Lazy Lemon Curd or other lemon curd
2-3 cups fresh berries of choice (I used strawberries, raspberries & blueberries)
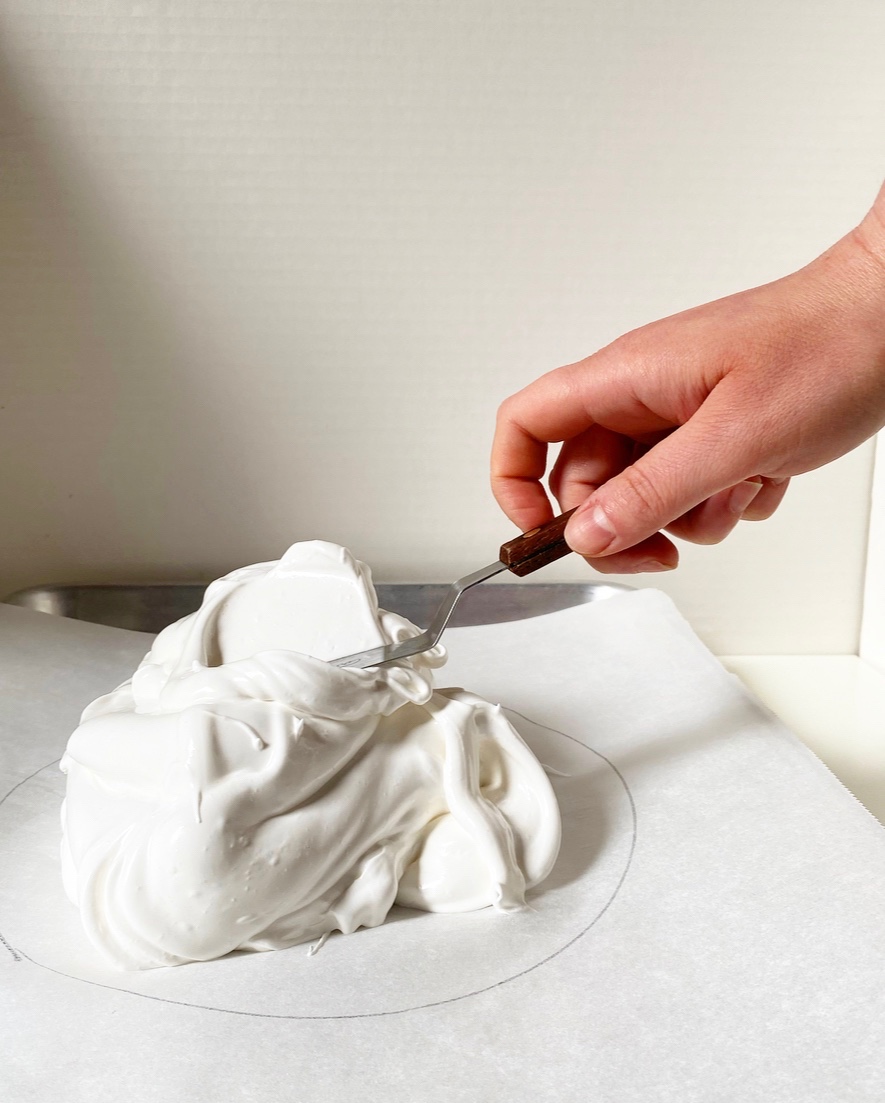
Preheat oven to 250F. Draw an 8-inch circle on a sheet of parchment big enough for a rimmed sheet pan. Turn the parchment over (so the drawn circle side is facing down) and place on the pan. Set aside.
In a small bowl, use a fork to whisk together sugar and cornstarch. Set aside.
In a separate very small bowl, combine vanilla and vinegar. Set aside.
Add egg whites and salt to a very clean, dry mixing bowl. Starting at the lowest setting and gradually ramping up to medium-high, use an electric mixer to beat egg whites until foamy (about 2-3 minutes). With the mixer running, add sugar-cornstarch mixture a tablespoon at a time until incorporated. Then add the vanilla-vinegar mixture. Turn the speed up to high and whip until stiff peaks form (about 5 minutes).
Turn the mixture (now a meringue) out onto the prepared baking sheet, using an offset spatula or the back of a spoon to gently spread it to the edges of the circle. Make it taller at the edges than the center so you have a logical place for the toppings.
Place pavlova in the oven and bake for 75 minutes (1:15) until puffed, glossy, and slightly cream-colored. Turn off the oven and wedge a wooden spoon in the door to keep it slightly ajar. Let the pavlova cool completely in the oven (a couple of hours or overnight).
If not using immediately, carefully remove the pavlova from the parchment and double wrap with plastic wrap. Keep at room temperature for up to three days.
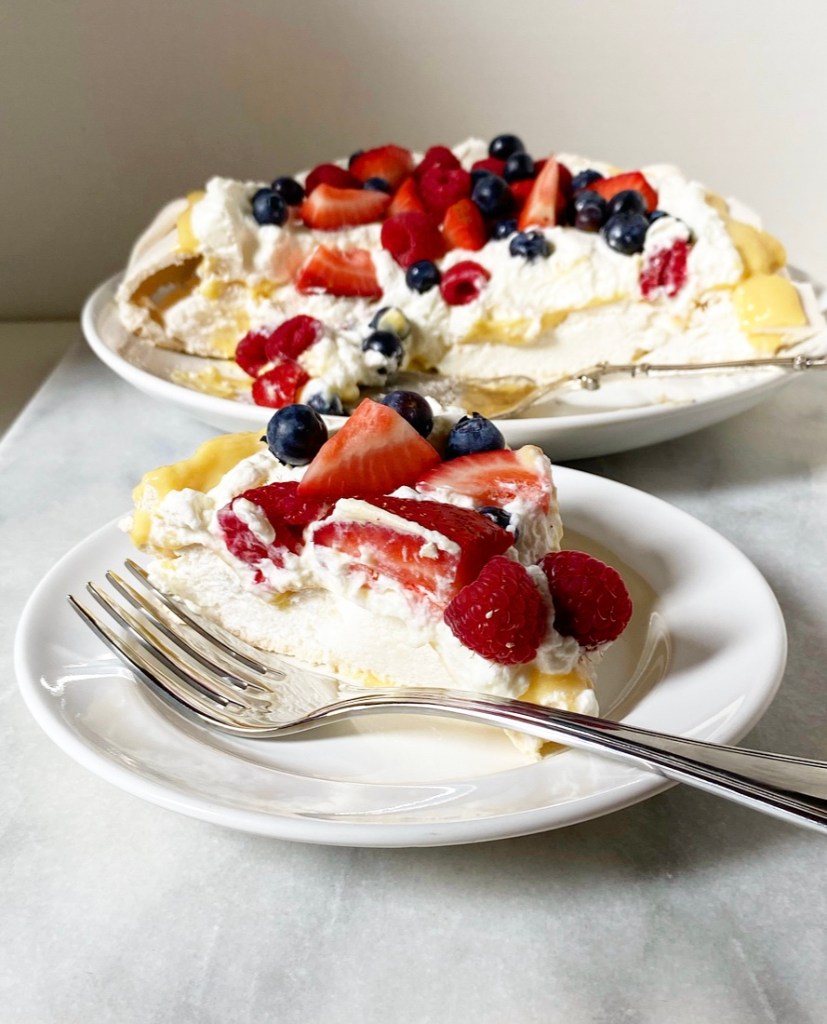
Assemble the pavlova immediately before serving. If wrapped, gently remove and discard plastic wrap. Place pavlova on a serving plate.
Make whipped cream topping. In a medium-large mixing bowl, combine heavy cream and confectioner’s sugar. Use an electric mixer to whip cream until stiff peaks form.
Spread the top of the pavlova with lemon curd. Spoon/spread whipped cream over the top. Finish with berries of choice. Serve immediately.
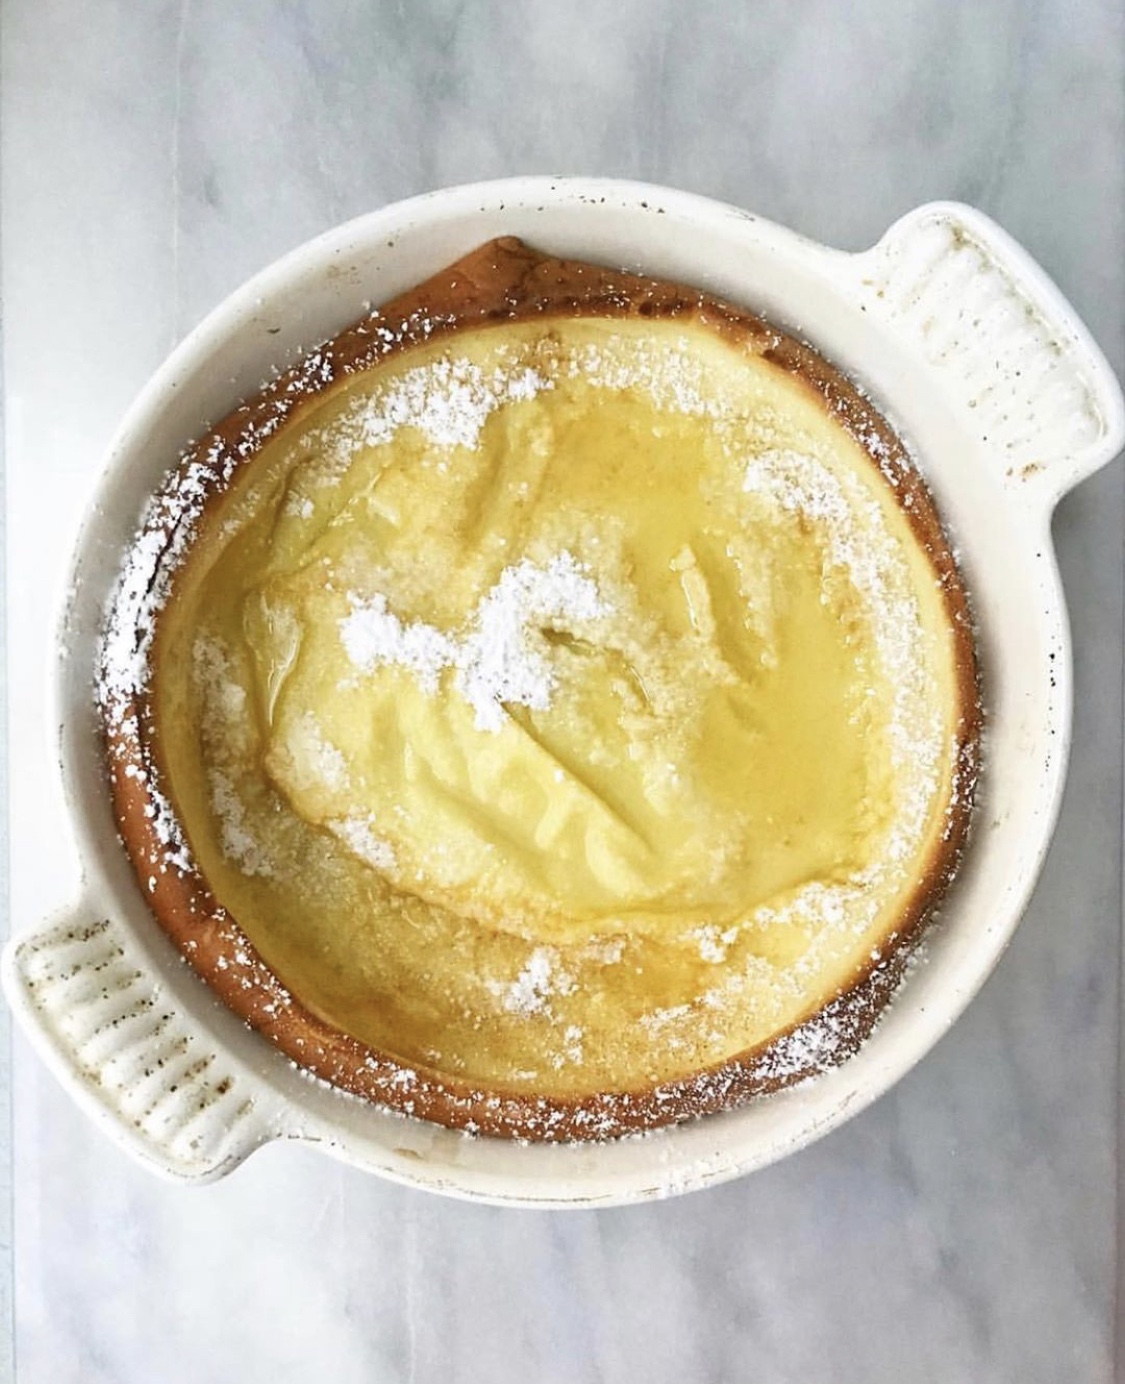


 You know how sometimes you test
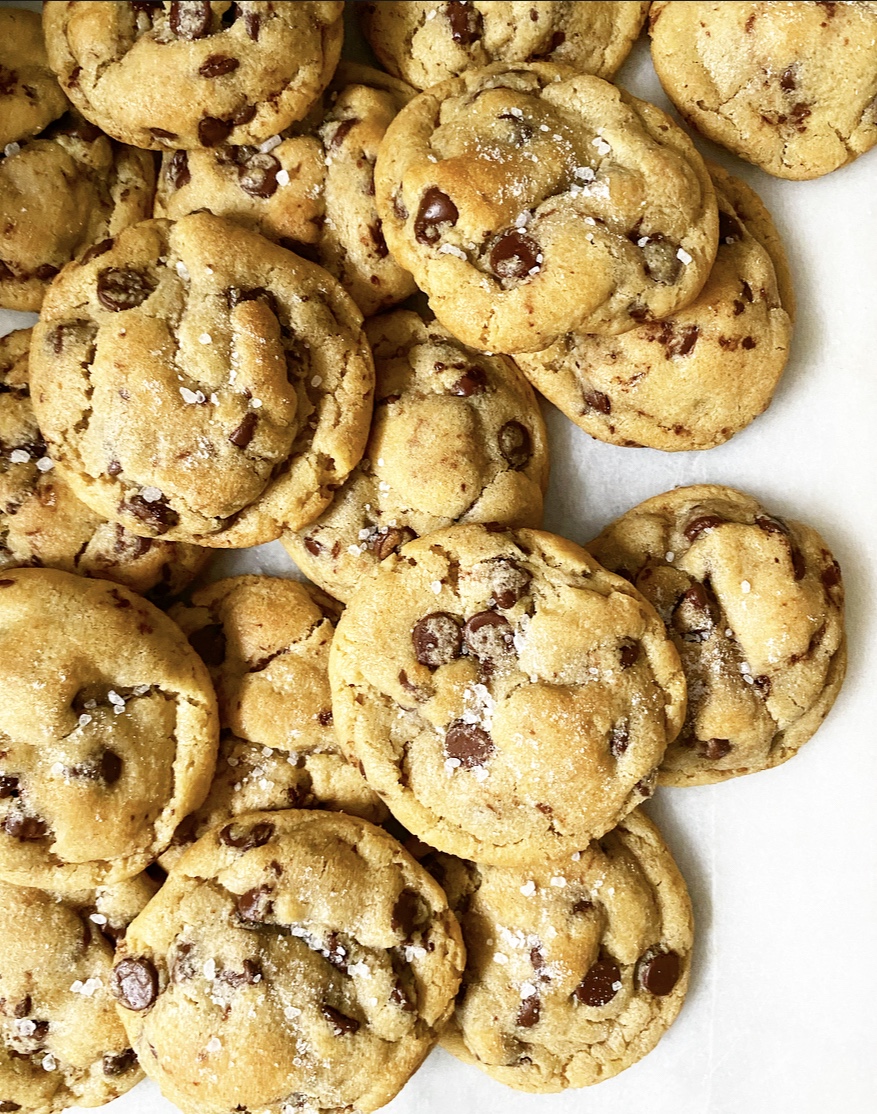
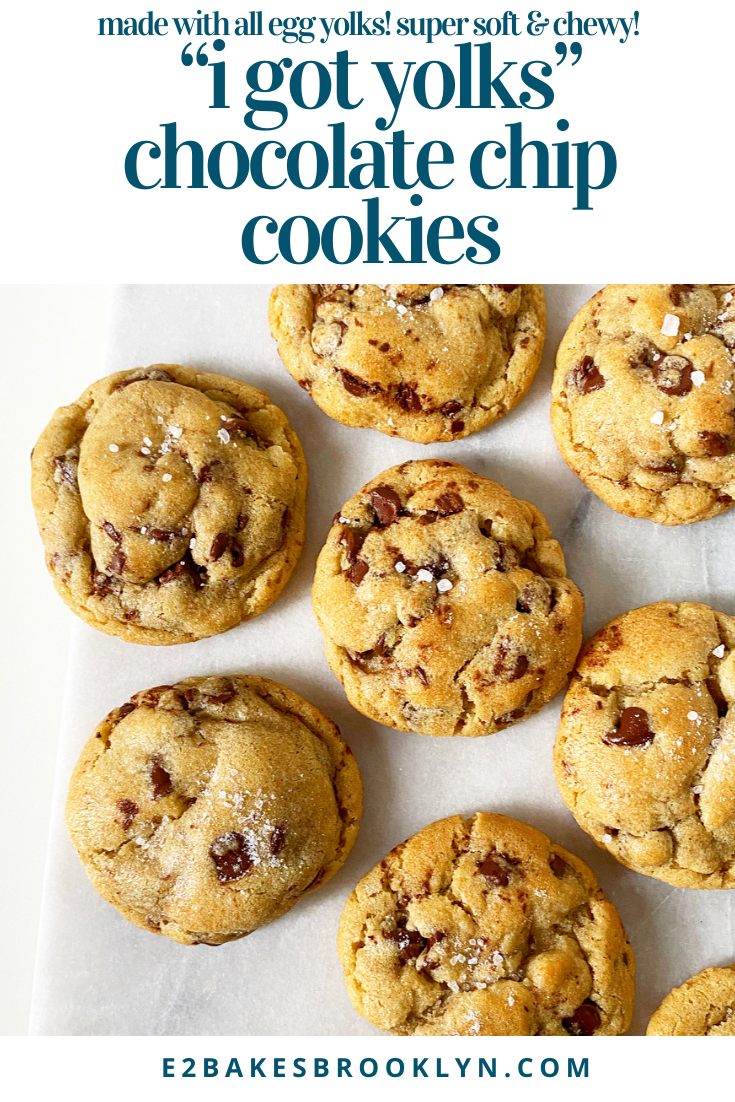
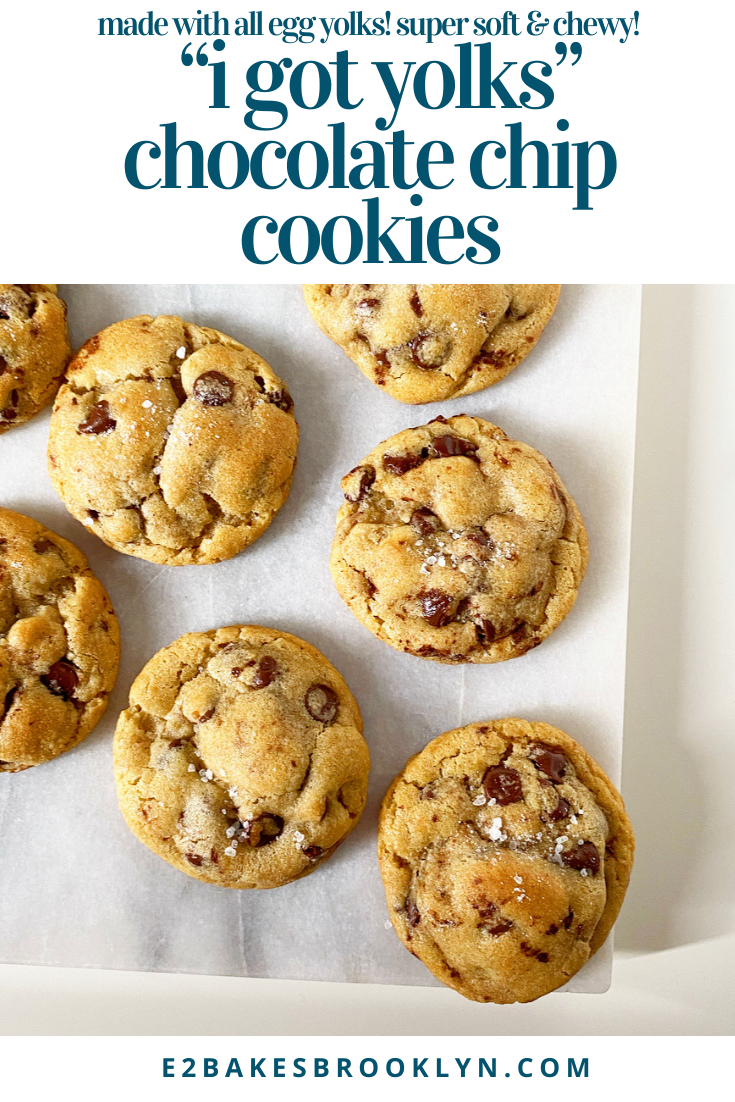
 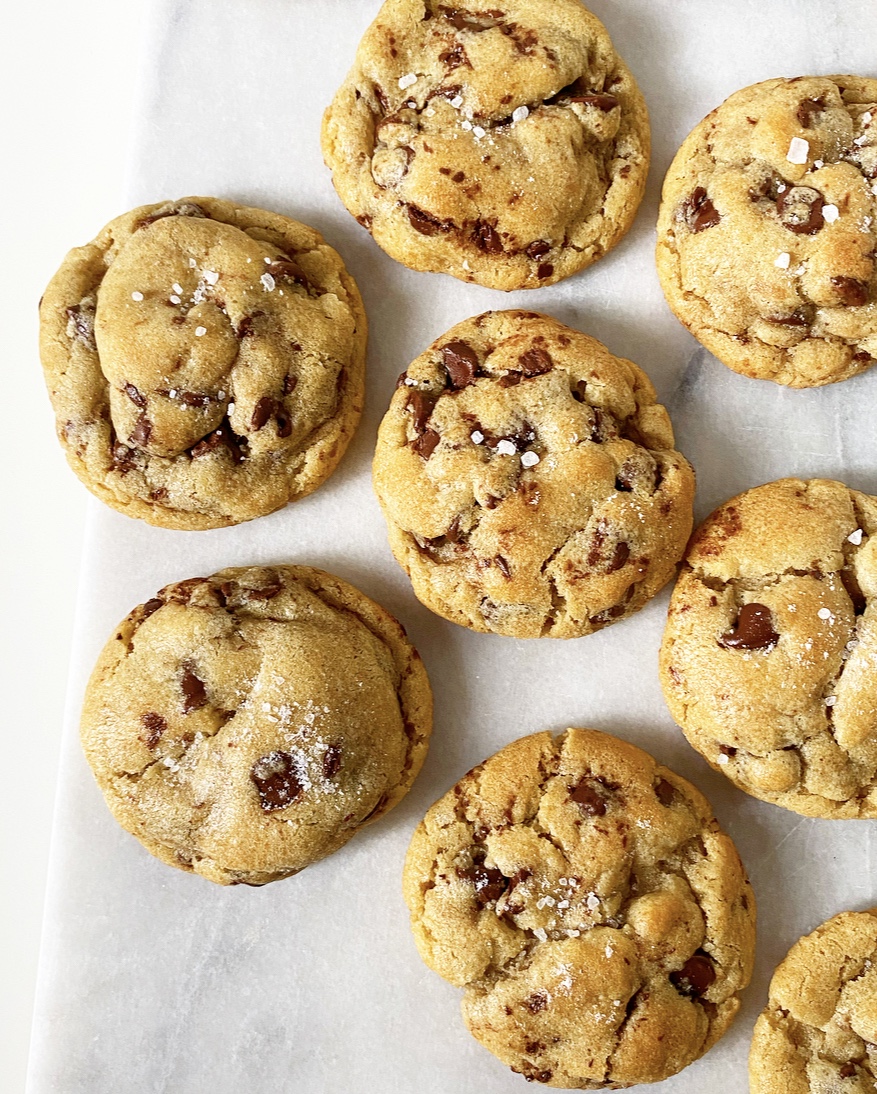 Well, here is something to do with them: “I Got Yolks” Chocolate Chip Cookies!
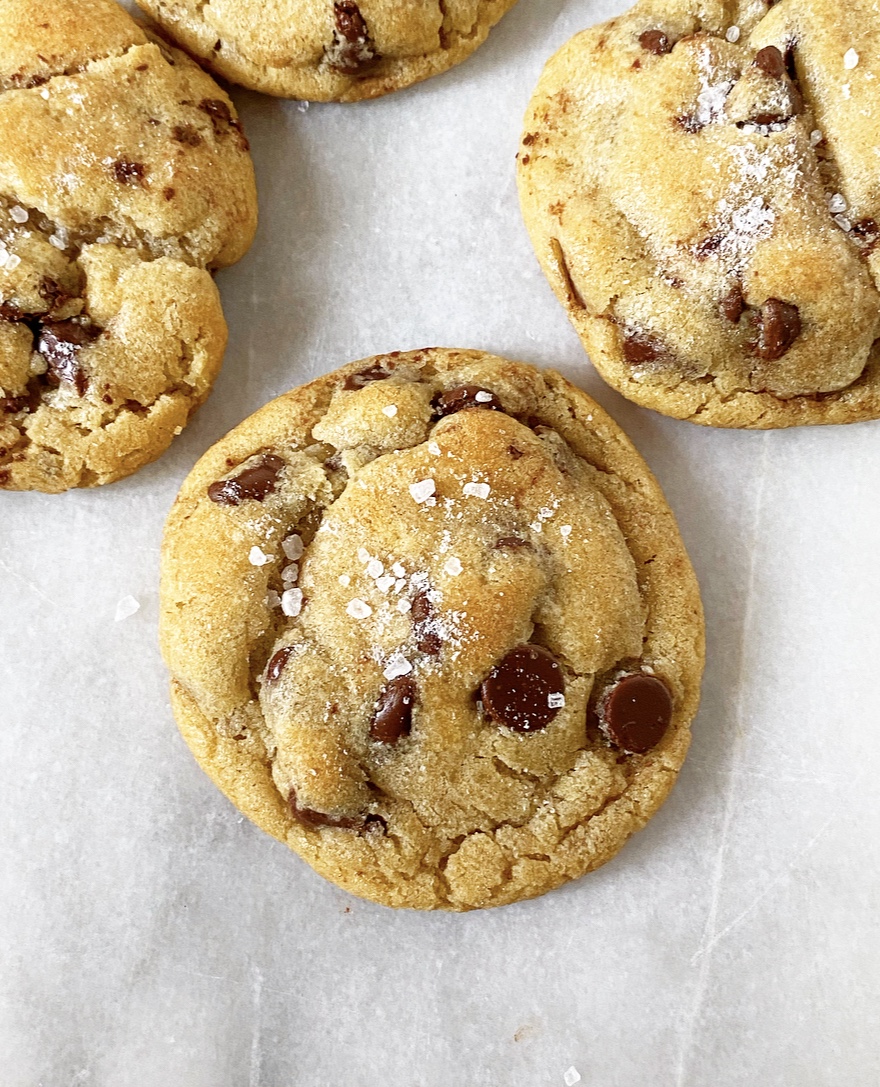 Anyway…this is a recipe born of necessity. Namely, the necessity to not waste good ingredients. Also, the necessity for something that can be eaten immediately or frozen for later or left on your friends’ front steps for a socially distanced surprise. Trust me, they’ll be beyond thrilled with a bag of these.
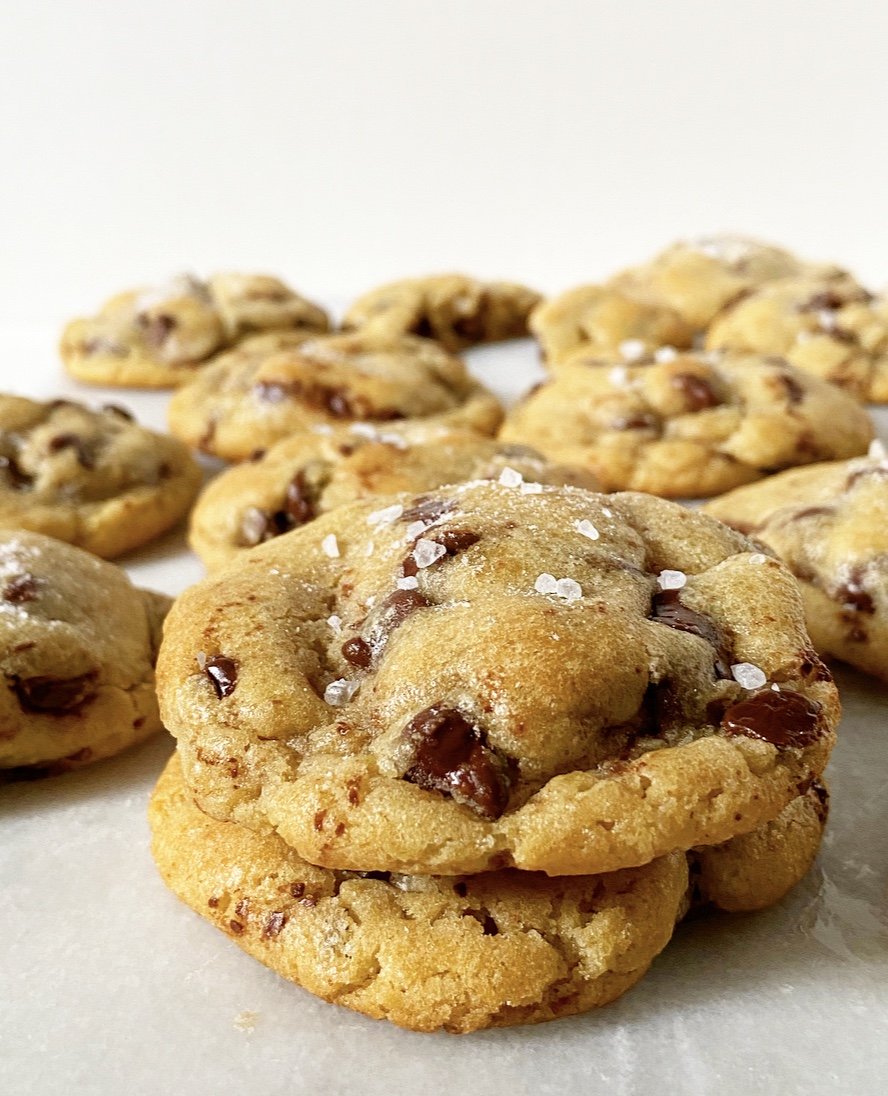 “I Got Yolks” Chocolate Chip Cookies are, in a word, spectacular. They’re super rich and chewy from three large egg yolks, melted butter, and brown sugar, and incredibly tender thanks to the addition of confectioners sugar. I threw the confectioner’s sugar in the first batch on a whim just to see what would happen and, well, it won’t be the last time. The sweetness, structure and texture it provides are really something—like the
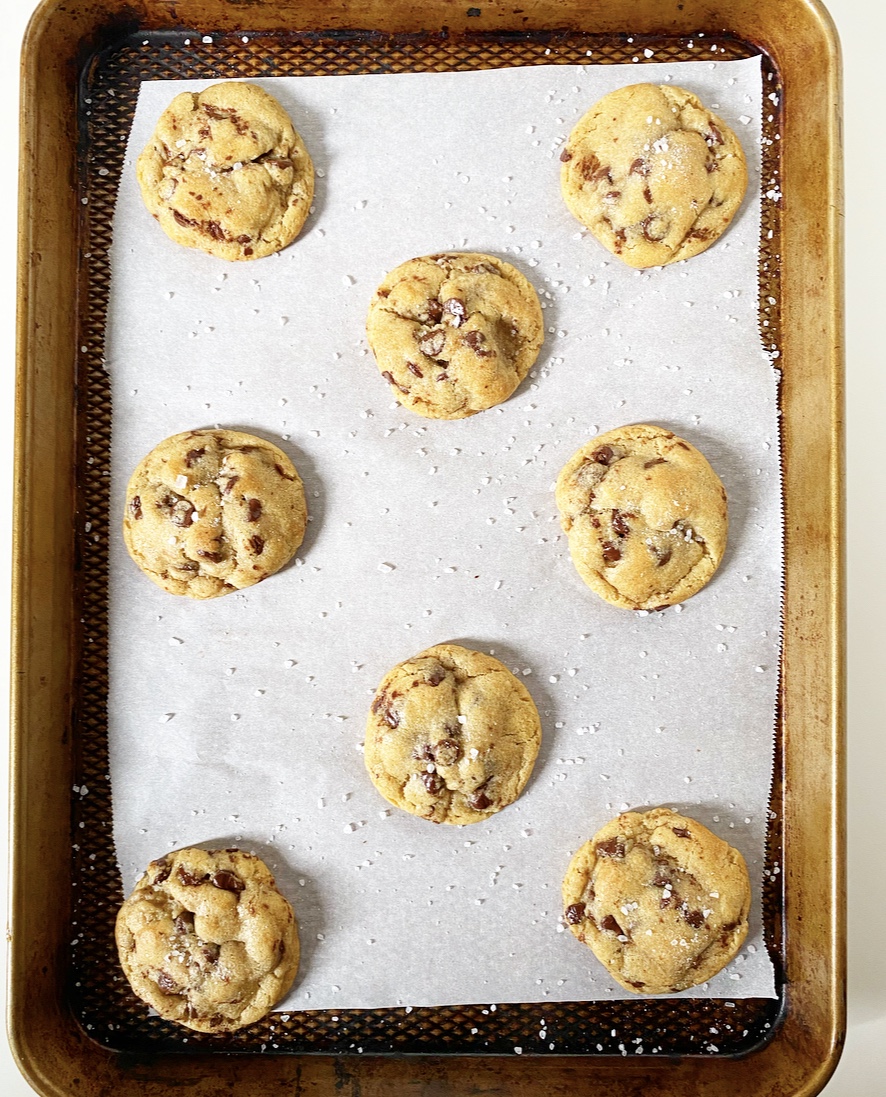
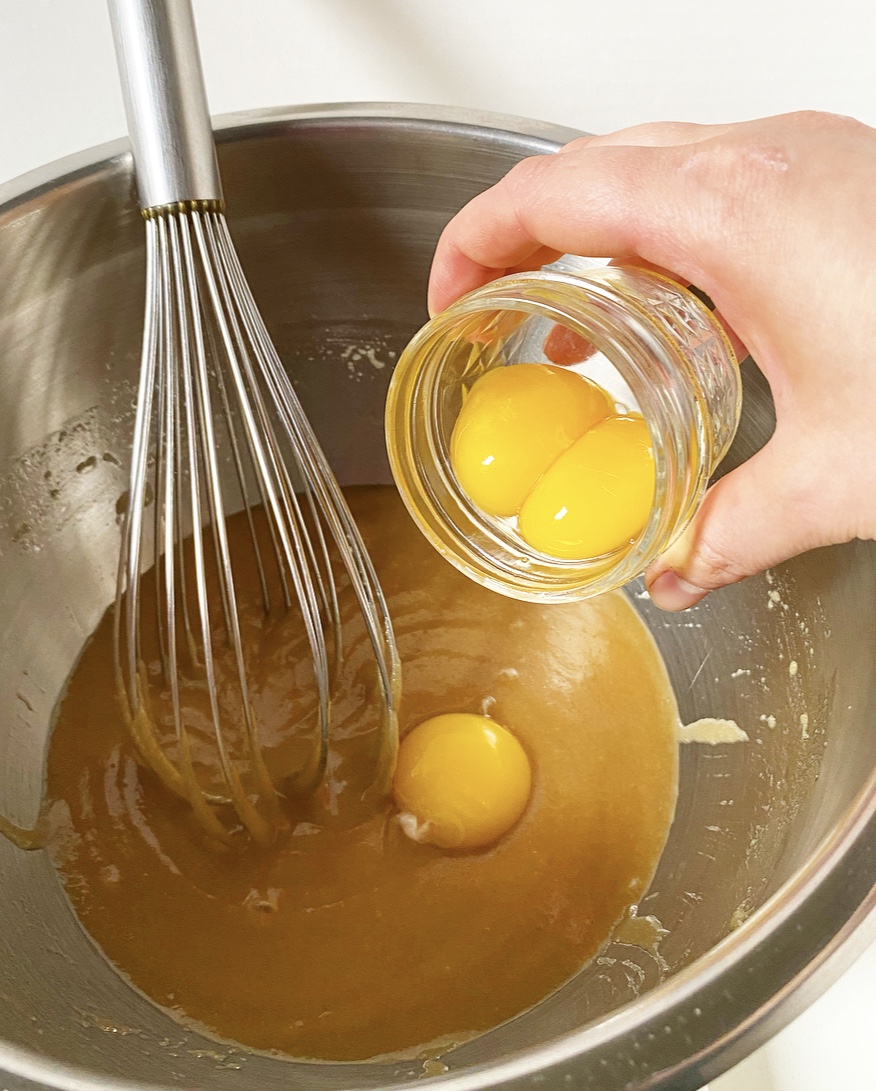

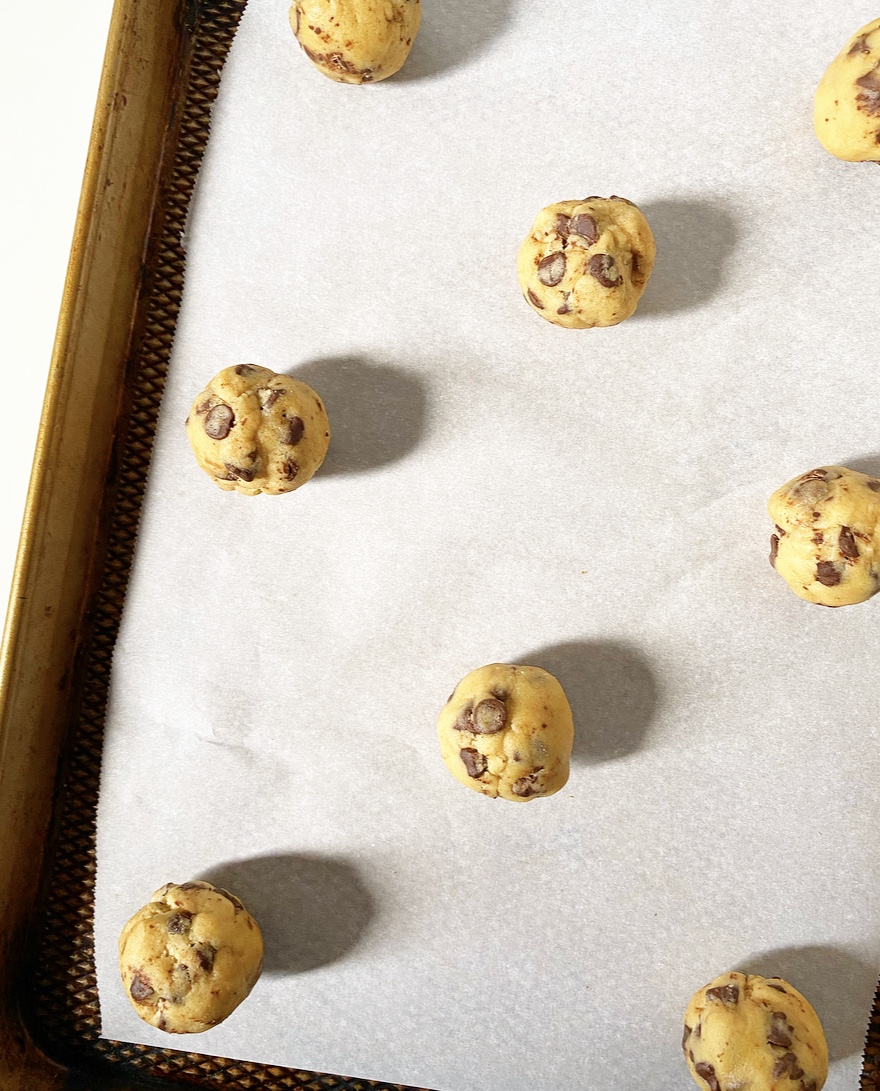
 The cookie dough comes together the same way most
 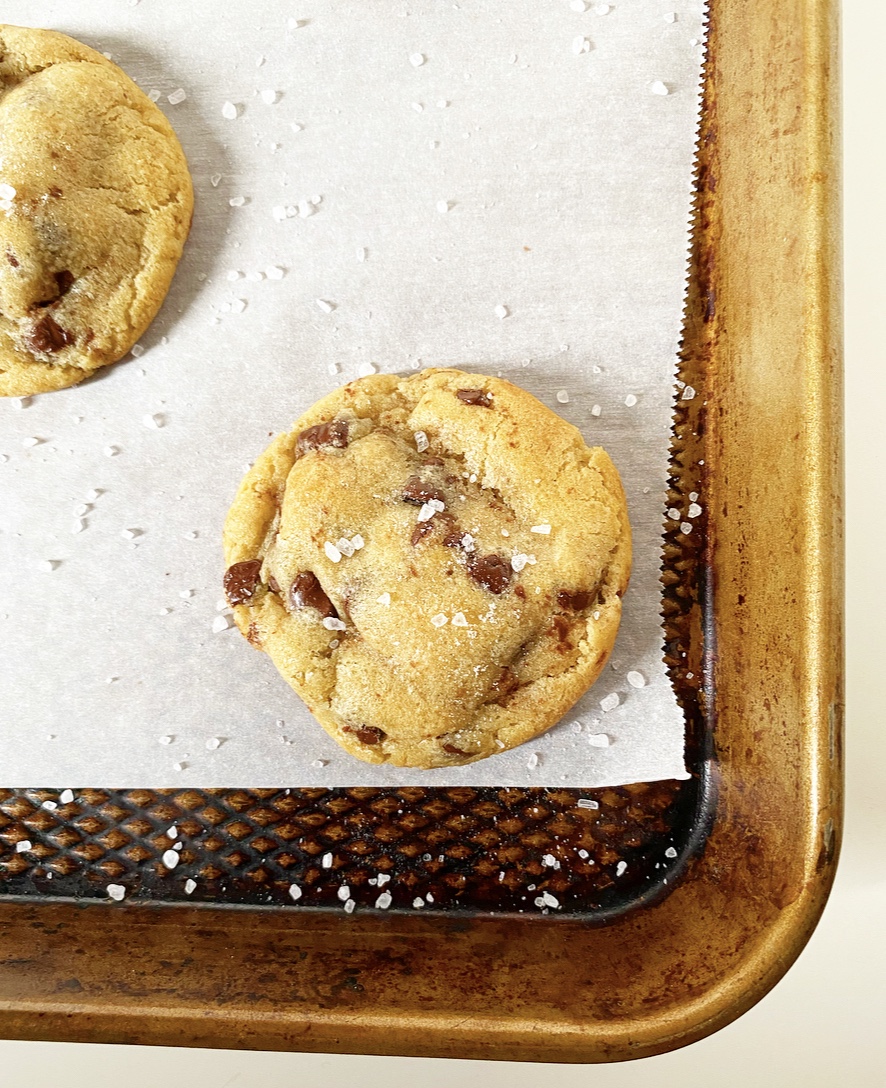 These are not only my current favorite way to use up egg yolks, but also my current favorite chocolate chip cookies. They are nice and thick, with crisp exteriors, soft centers, a rich caramel flavor and the perfect amount of chocolate chips. The confectioner’s sugar in the dough gives them an extra-smooth quality and has the added benefit of keeping them soft for days. That’s saying something—I’m a total diva about day-old cookies.
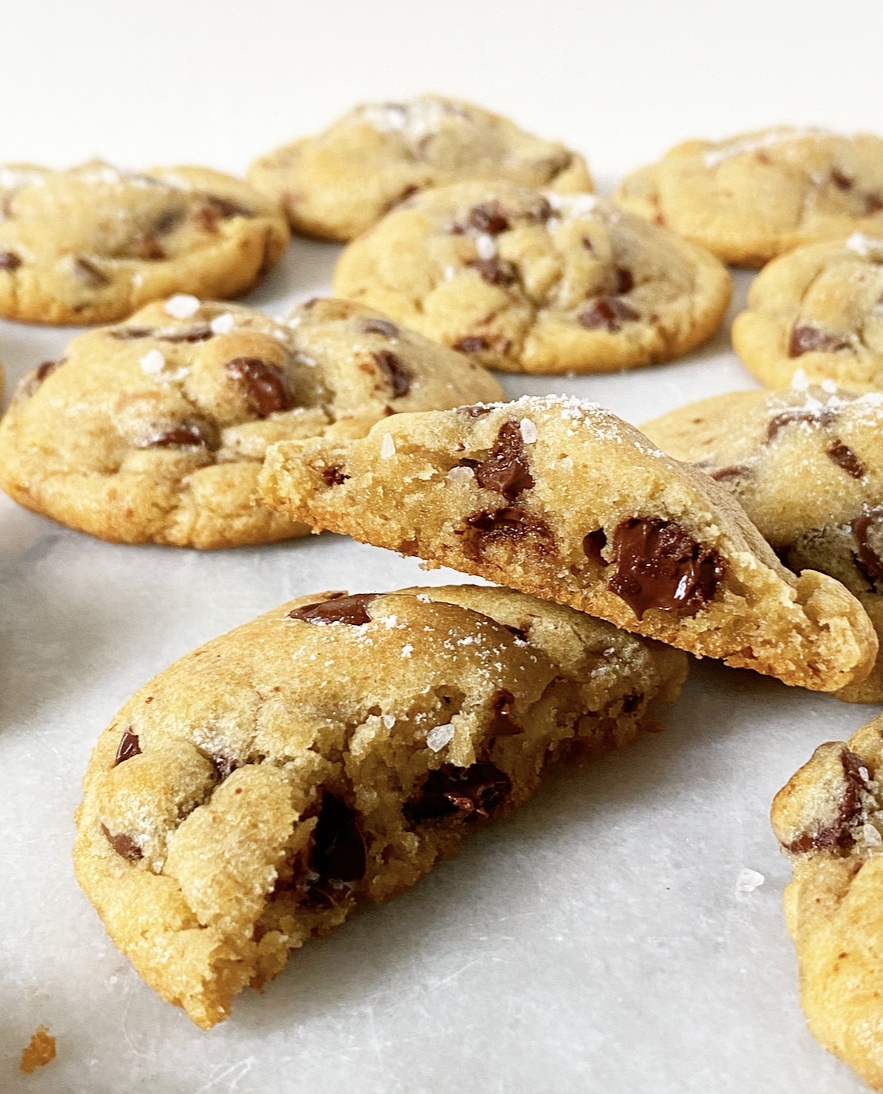 One more great thing about this recipe is that you can age the dough. I suppose you can age any cookie dough, actually, but I rarely have the fridge space. If you’ve never tried it, aging is as simple as keeping the dough in the fridge for up to a week before rolling and baking. By letting it sit for an extended period, you’re allowing the flavors to deepen in a really wonderful way. The exteriors get a light sheen after baking and the brown sugar flavor really sings. Try it. You’ll like it.
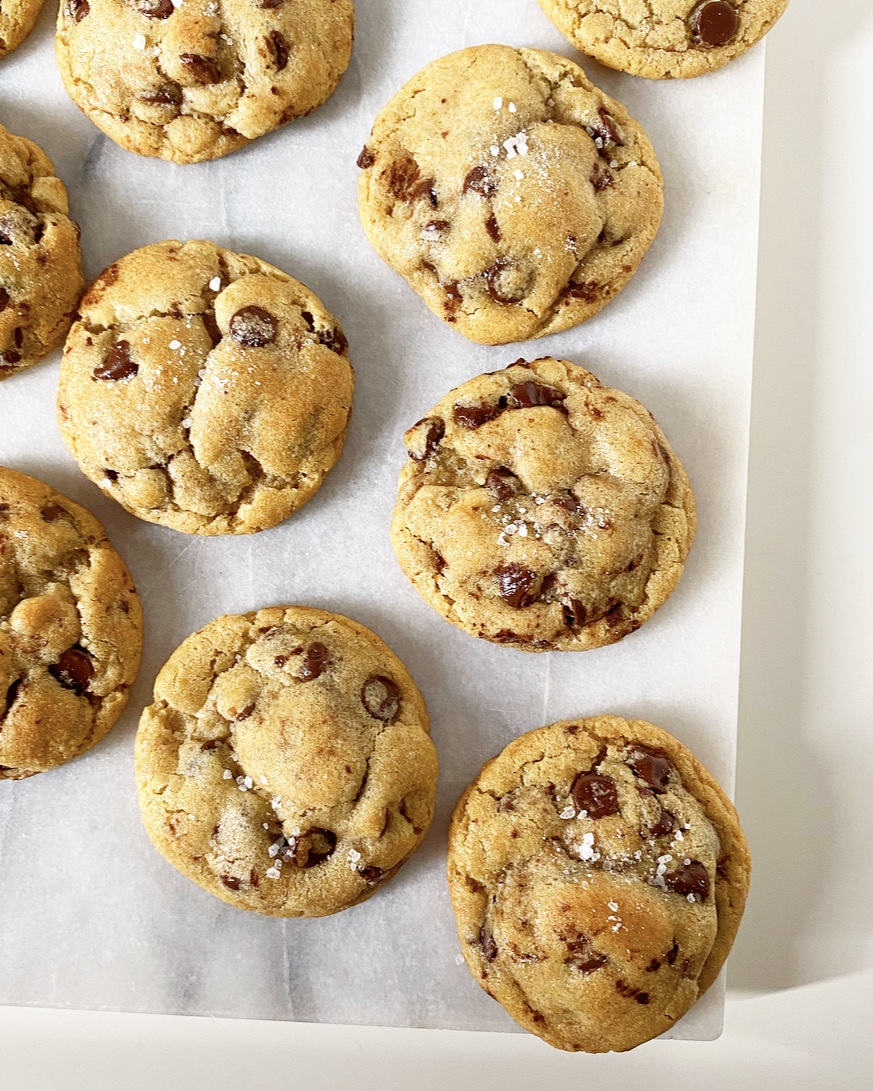

 Aaaaand we’re back! As is my January blogging tradition, this month will be less about dessert and more about savory foods and weeknight meals—the “normal” stuff. One cannot live on holiday cookies alone (but lord knows I’ve tried).
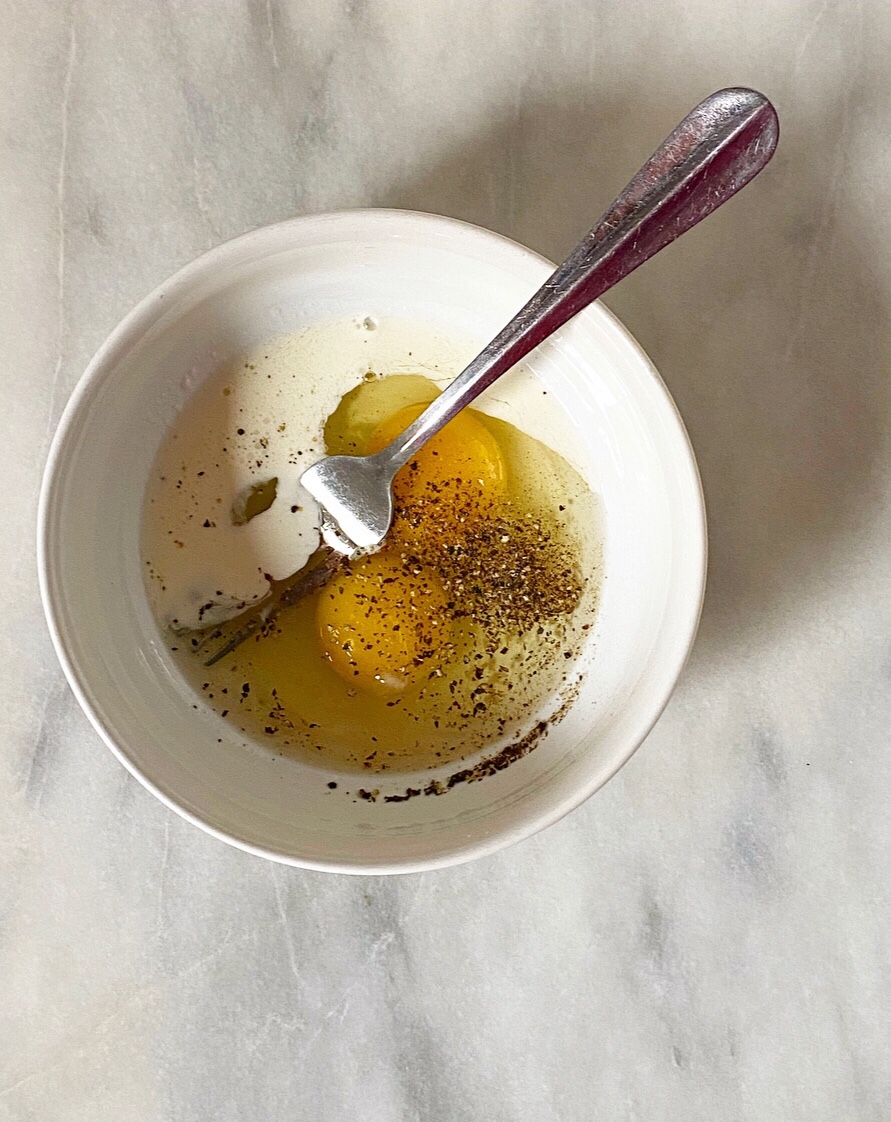

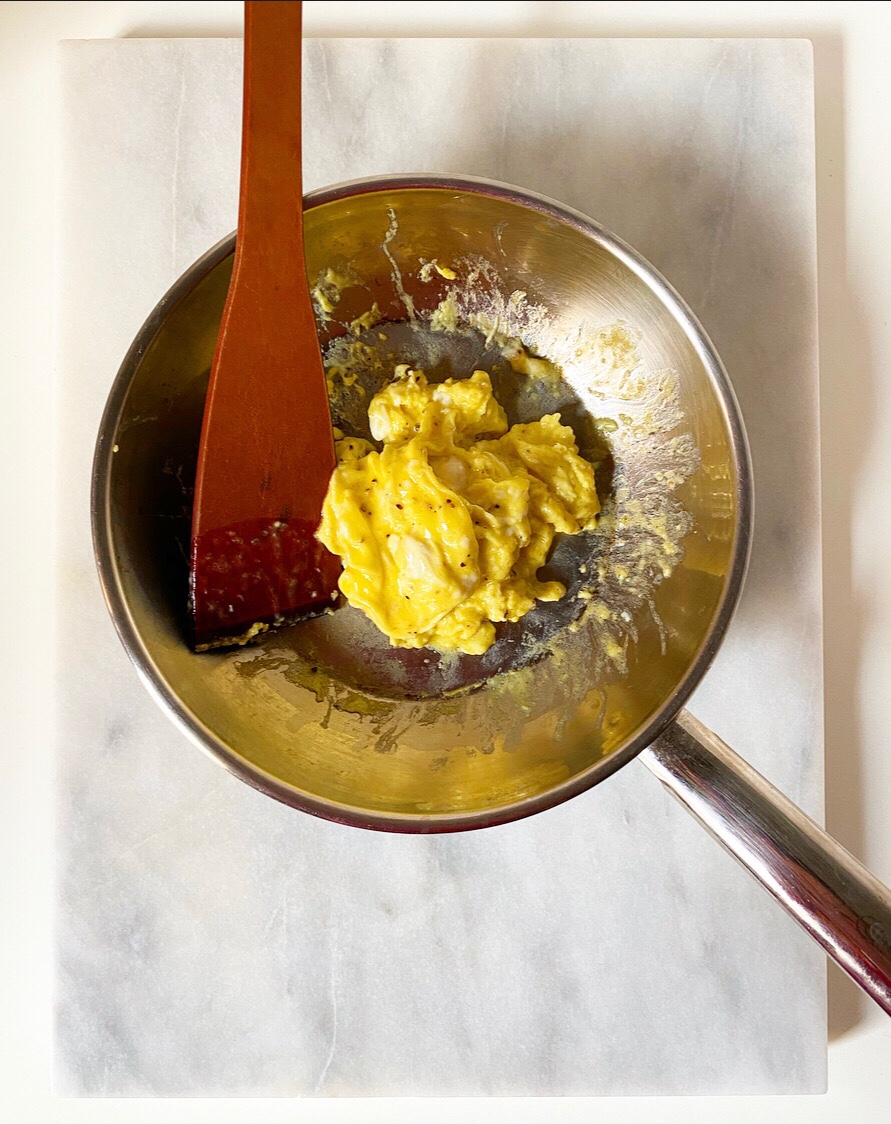
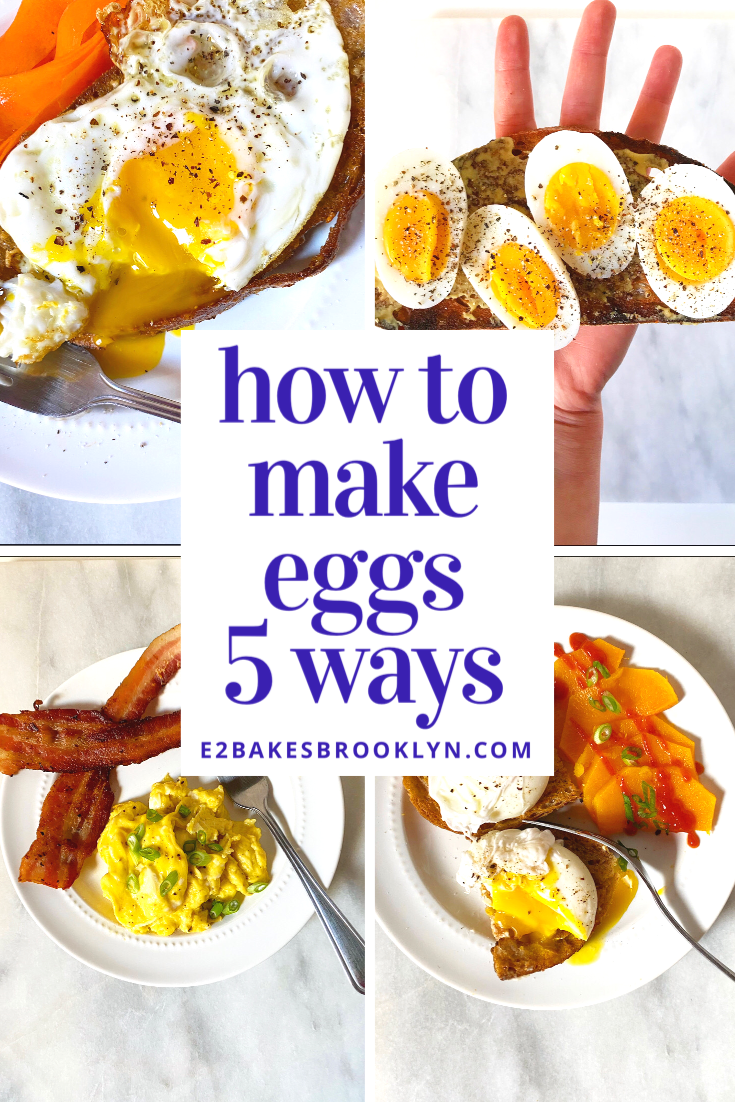
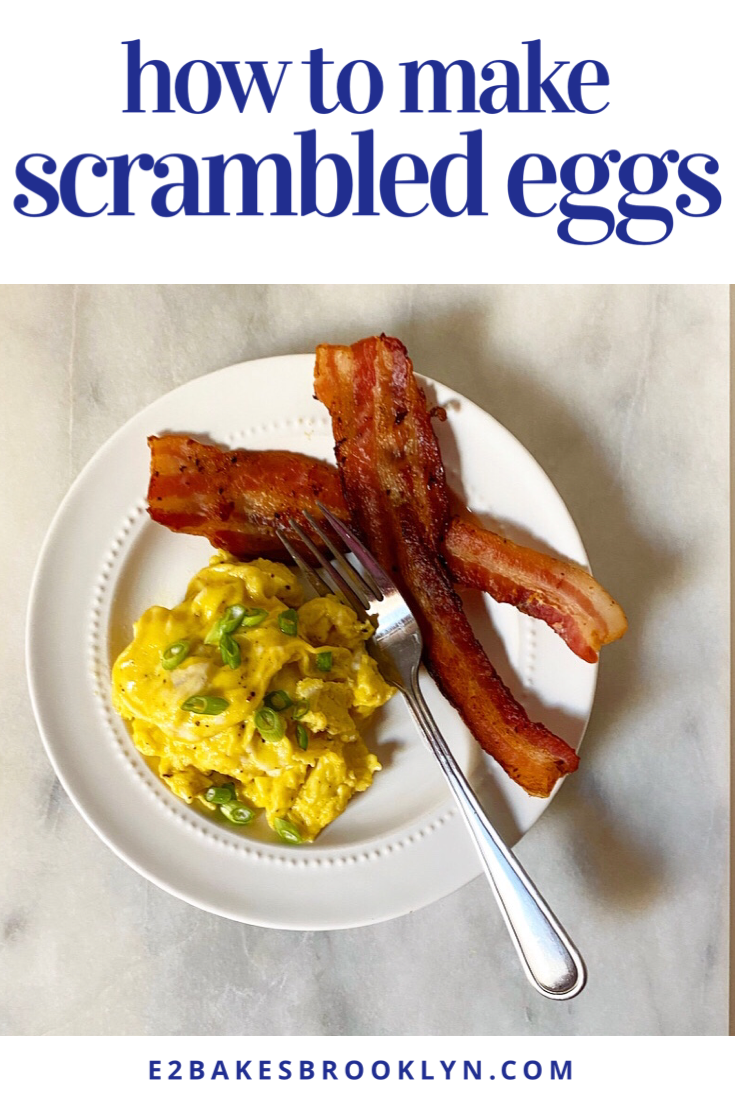
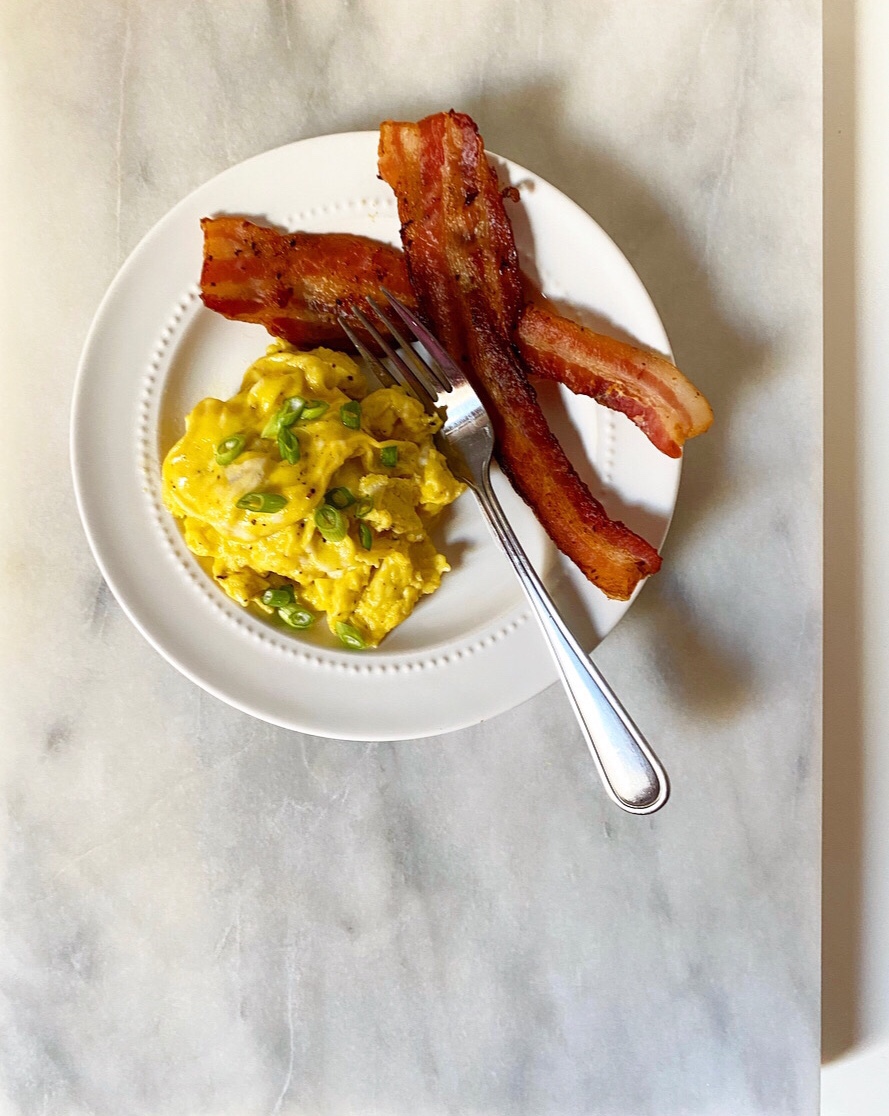
 Scrambled Eggs
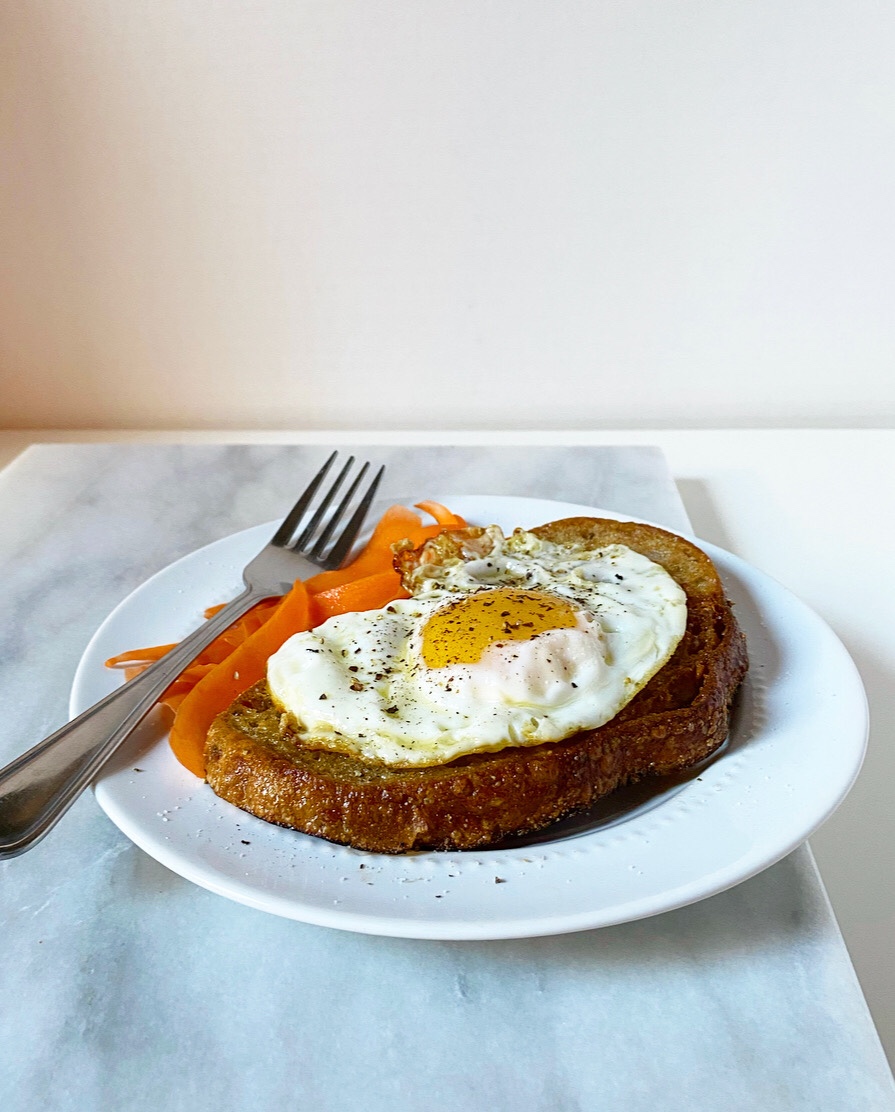
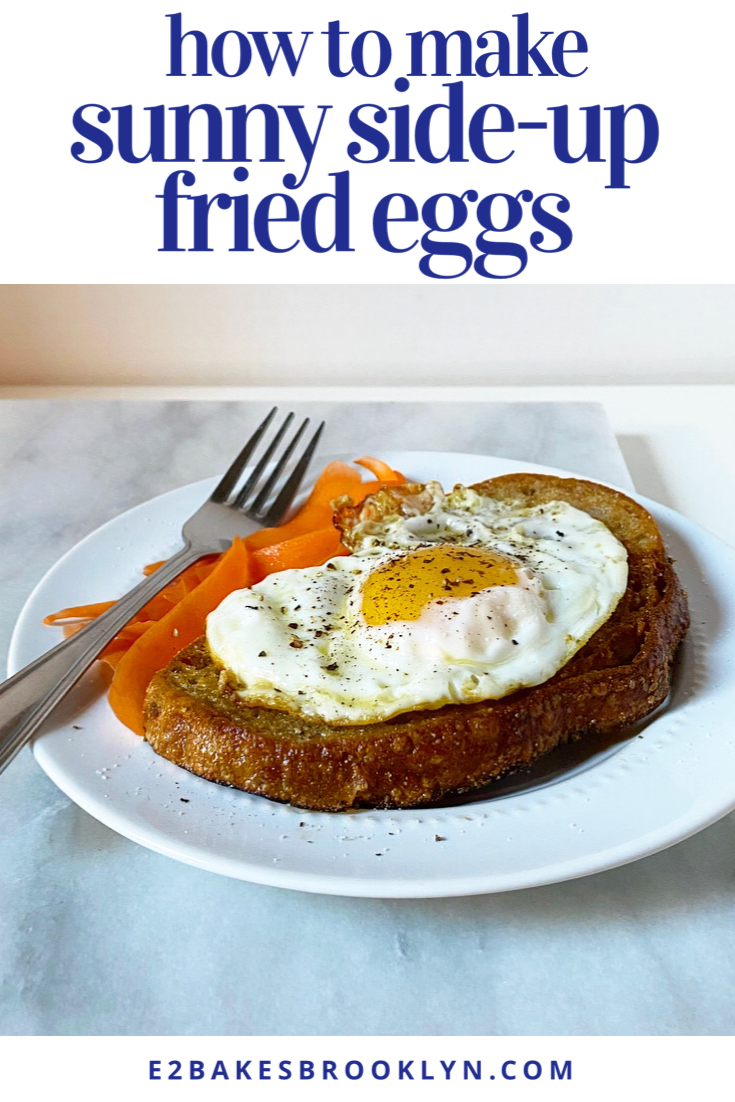
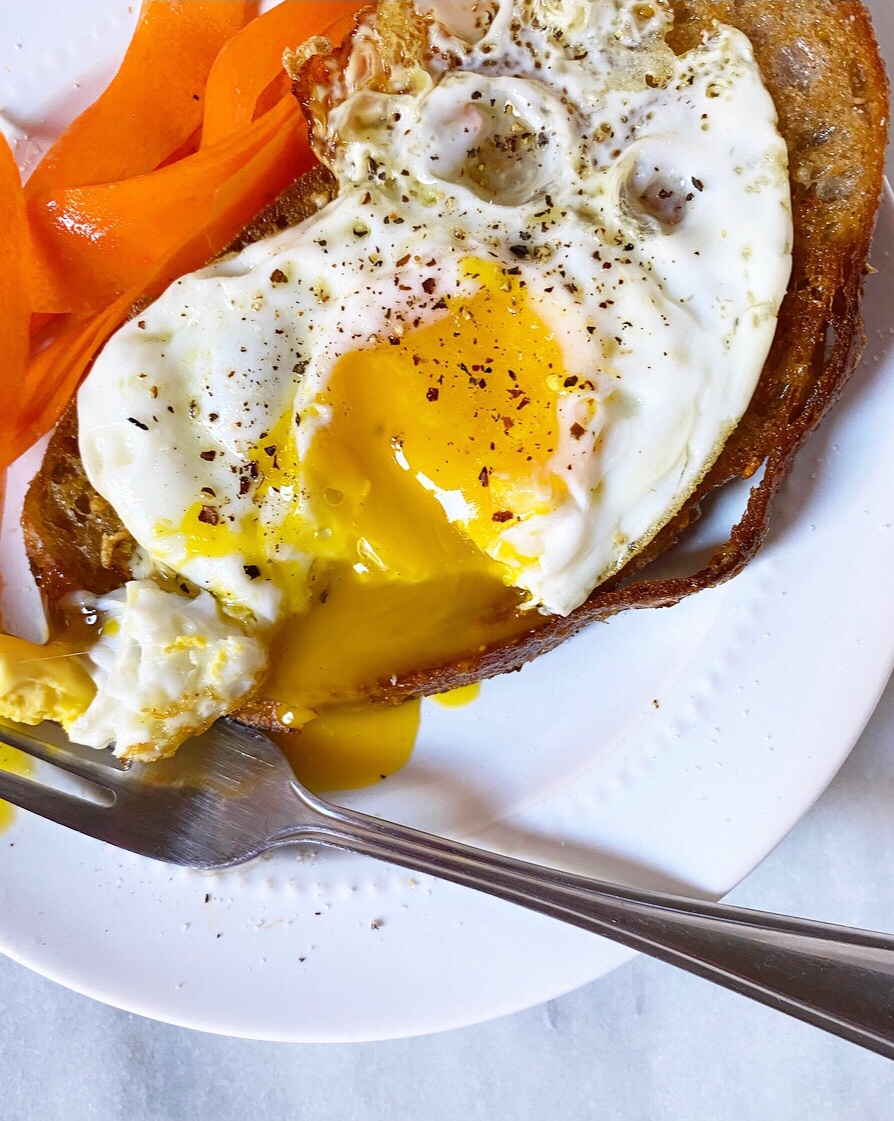 Sunny Side-Up Fried Eggs
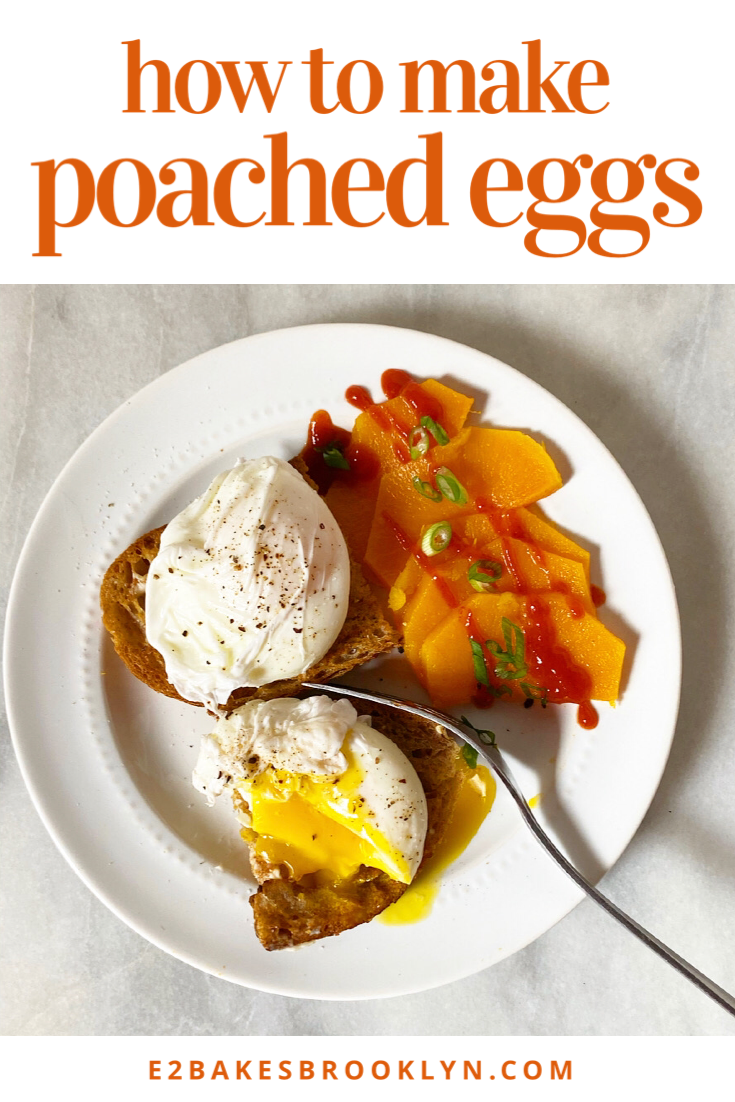
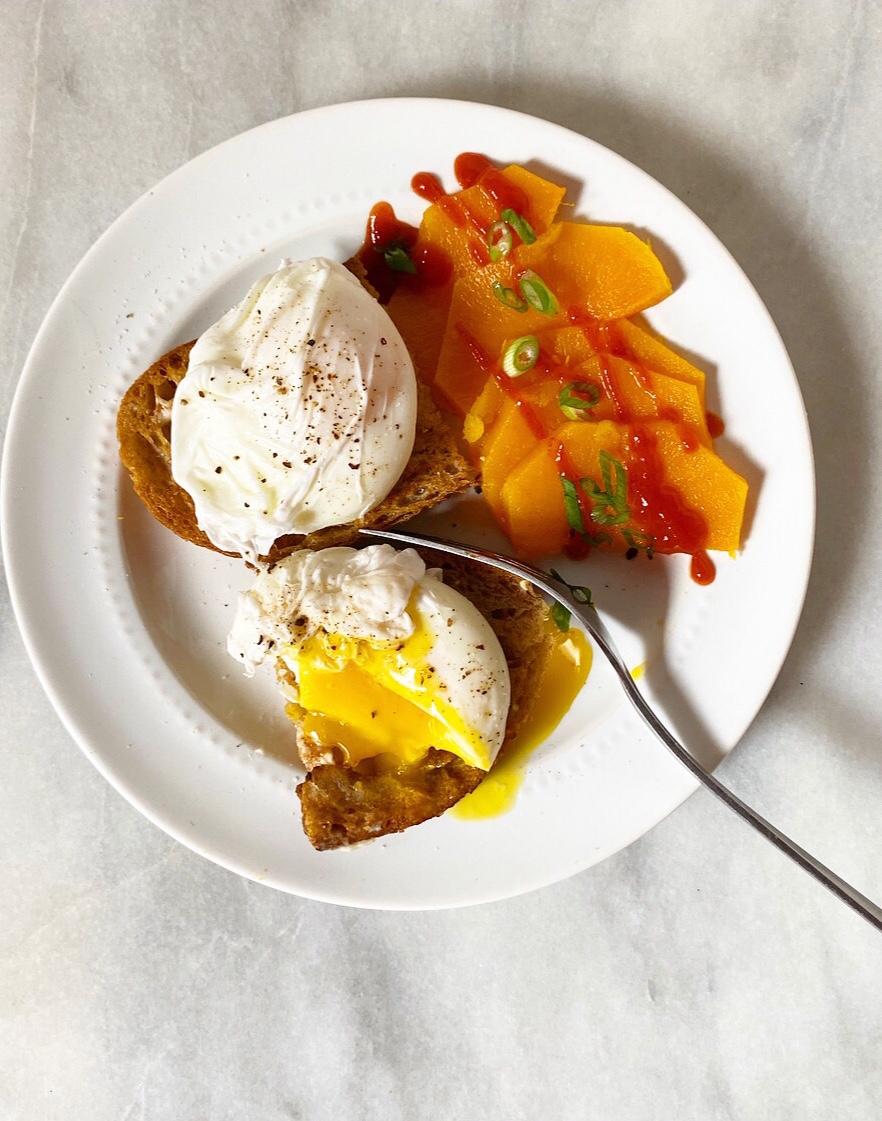
 Poached Eggs
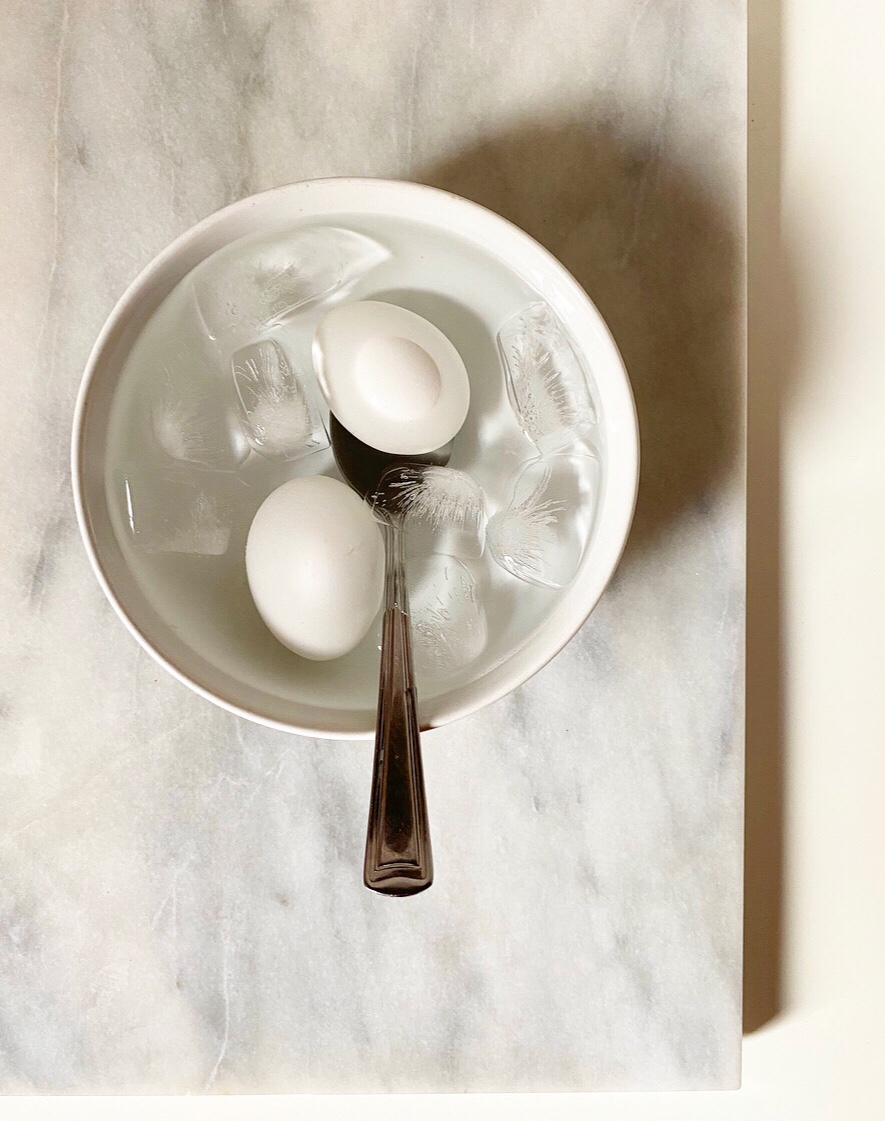
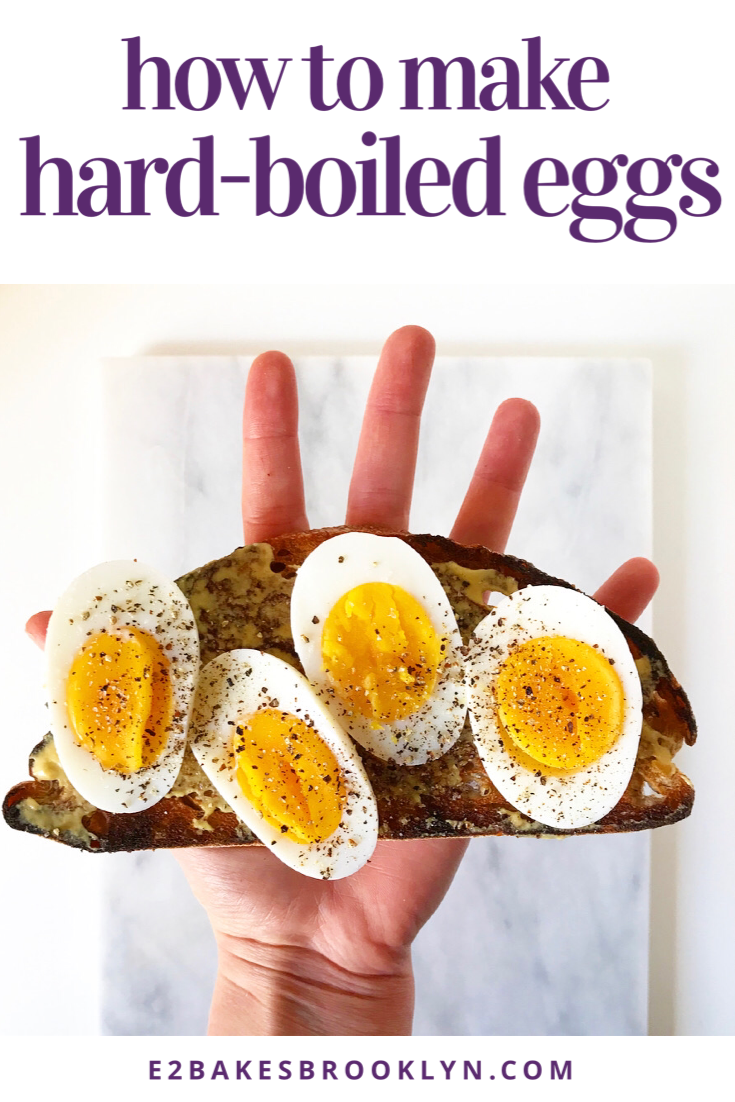
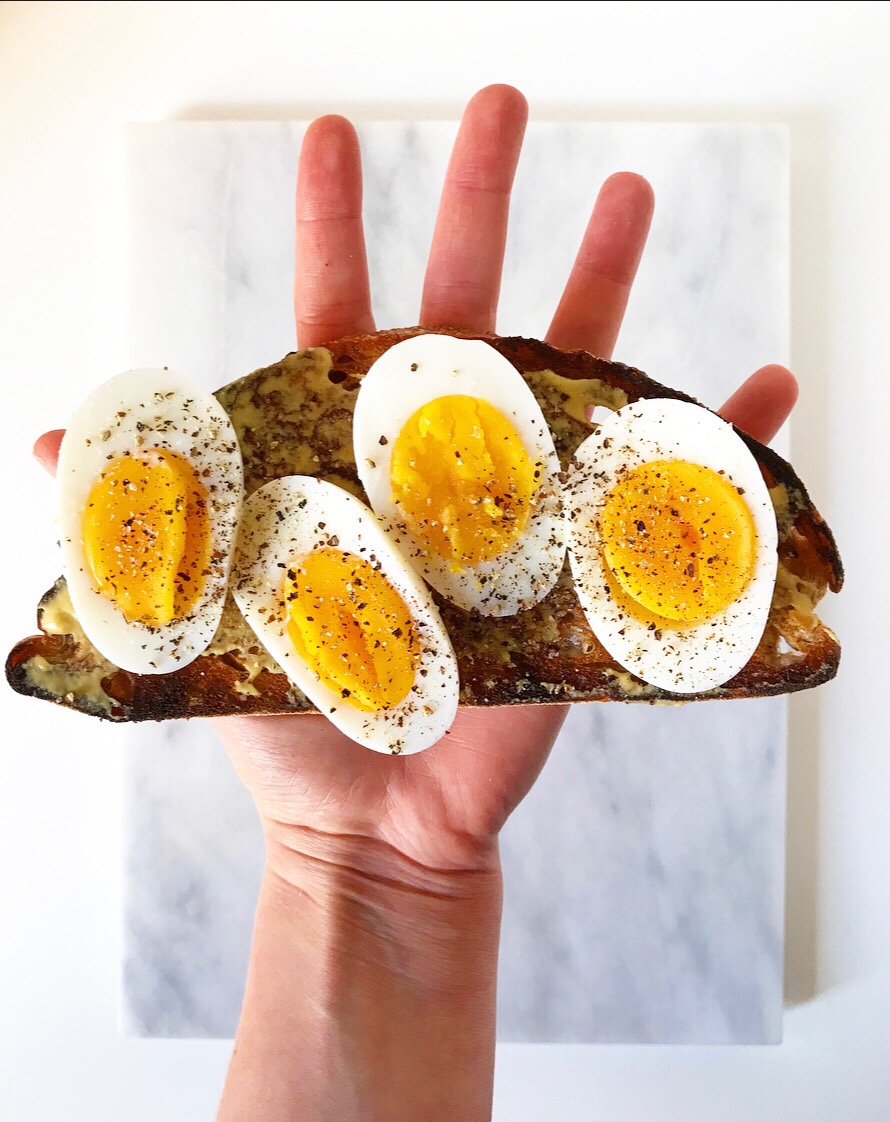 Hard-Boiled Eggs
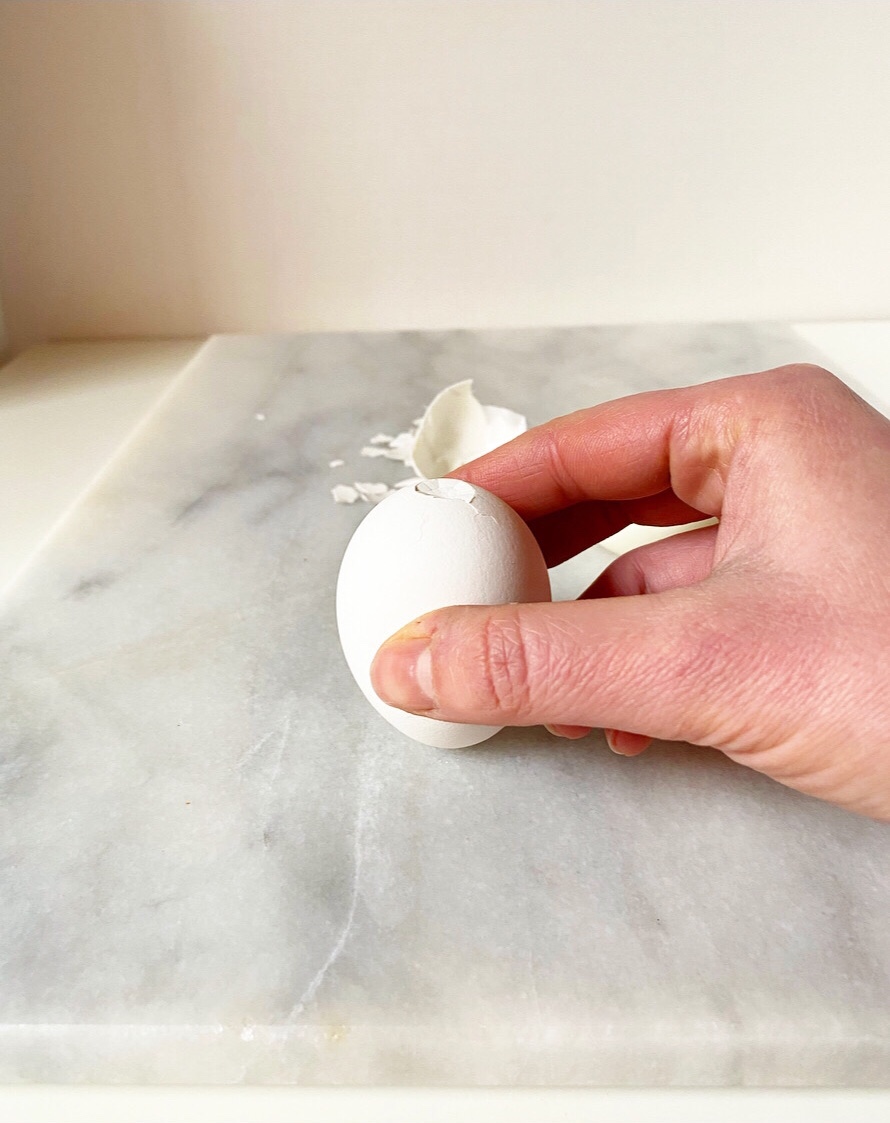
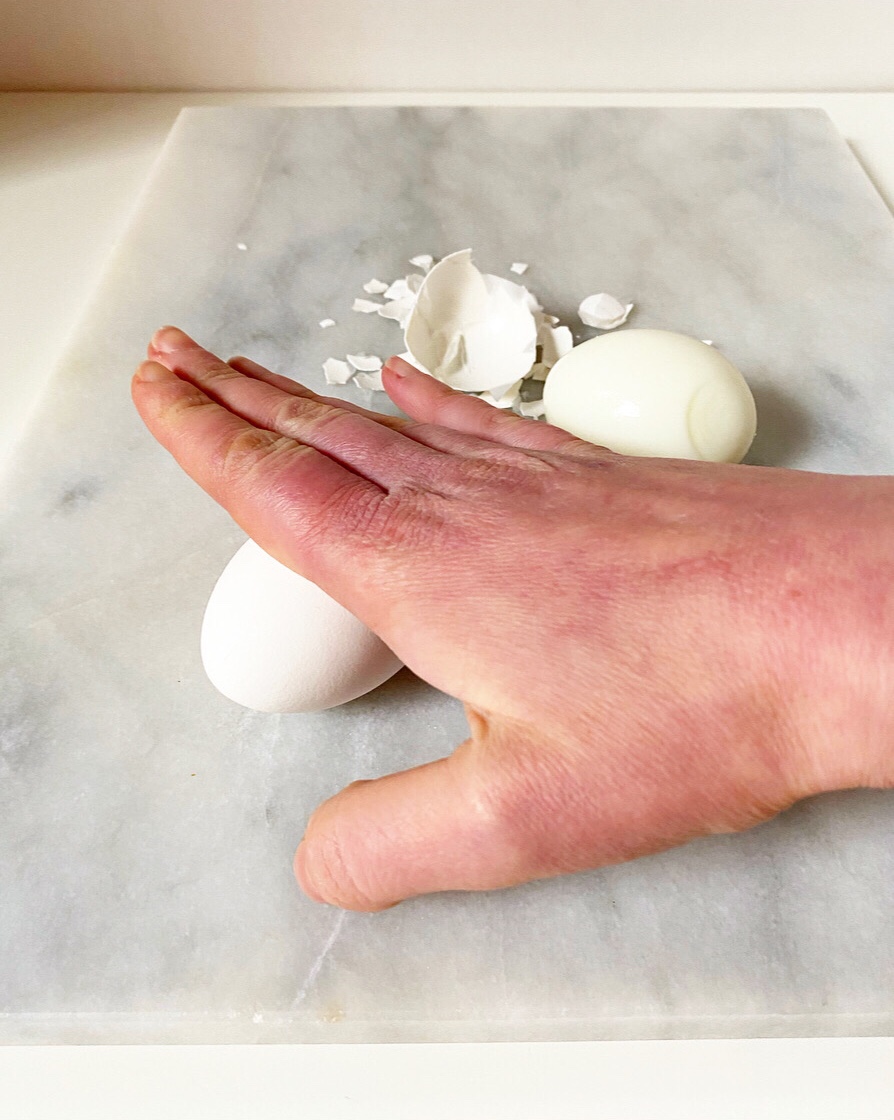
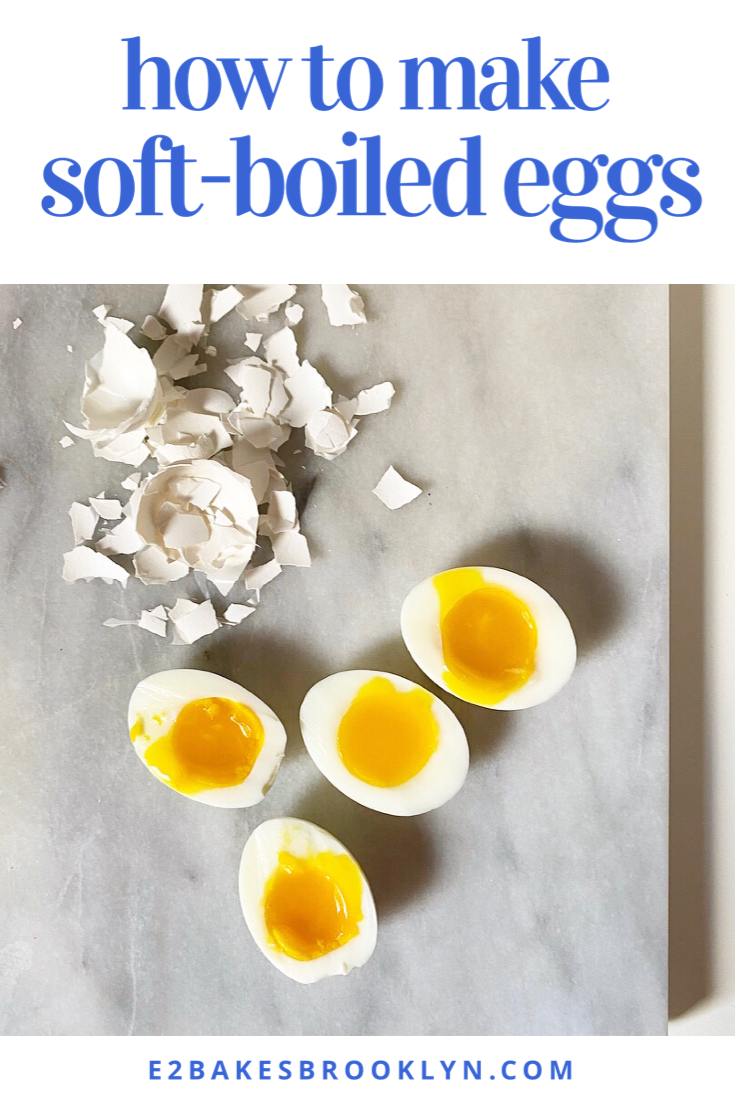
 Soft-Boiled Eggs