Category Archives: Entertaining

Blood Orange Chess Pie

 This upcoming Monday, March 14th, is Pi Day, y’all! It’s the day when we celebrate math (Pi = 3.14) by eating pie! And while I don’t so much care about math, I really like pie.

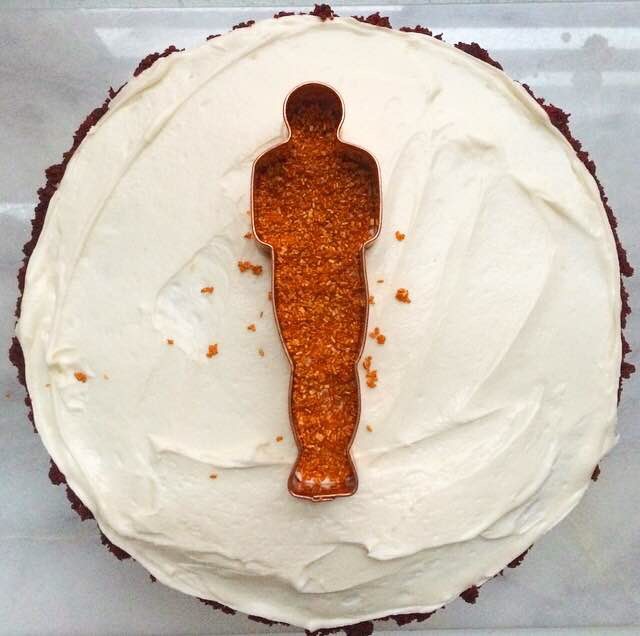
But I make hideous pies. Oh, do I ever.

Maybe one day I will be a grandma, and then I’ll make pretty pies. But today, I am thirty and make stupendously ugly ones.

You should know that I made a second one at 2am in an attempt to have something more beautiful to post, but instead, I somehow made it even more hideous! 

But the good thing about ugly pie is that it’s still pie. It doesn’t really matter how it looks, as long as it tastes good. And while this pie is not going to win any beauty contests, it is still really fun to make, and totally delicious. 

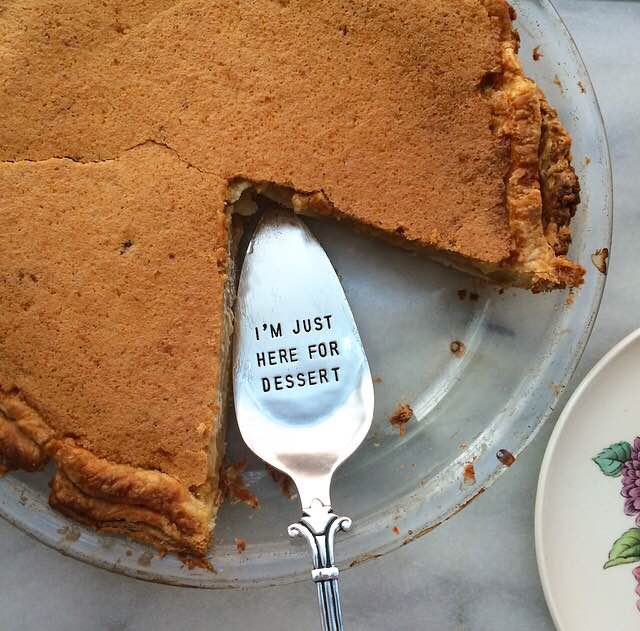
 This Blood Orange Chess Pie is a new favorite. Now, you know what blood oranges are, but why is it called chess pie? Well, the short answer is that nobody really knows. Chess Pie is from the southern U.S. by way of England, so there are a lot of theories. Some say it’s because it can be kept at room temperature in a pie chest (“chess”) due to the high sugar content. Others say it’s a southern take on the word “just,” i.e. “It’s jes’ pie.” The most widely believed is that since this pie is like a cheesecake without the cream cheese, the word “cheese” somehow became “chess.” All I know is that it has nothing to do with the board game.

But really, who cares where the name came from? It’s pie and it’s delicious. 

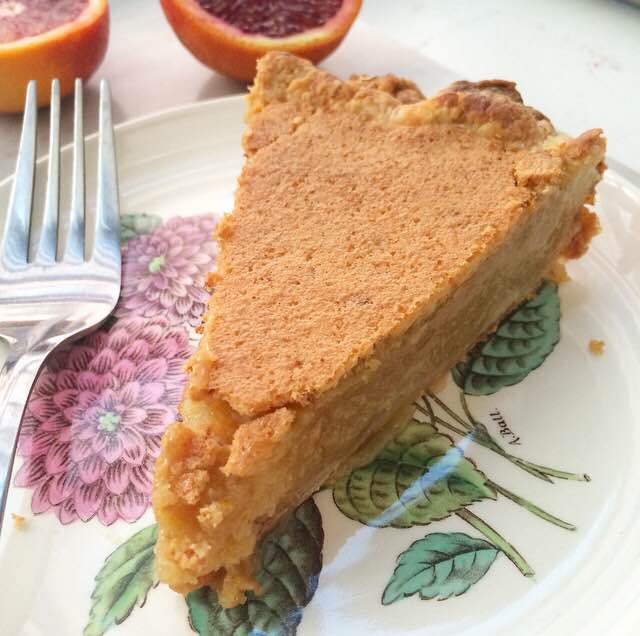
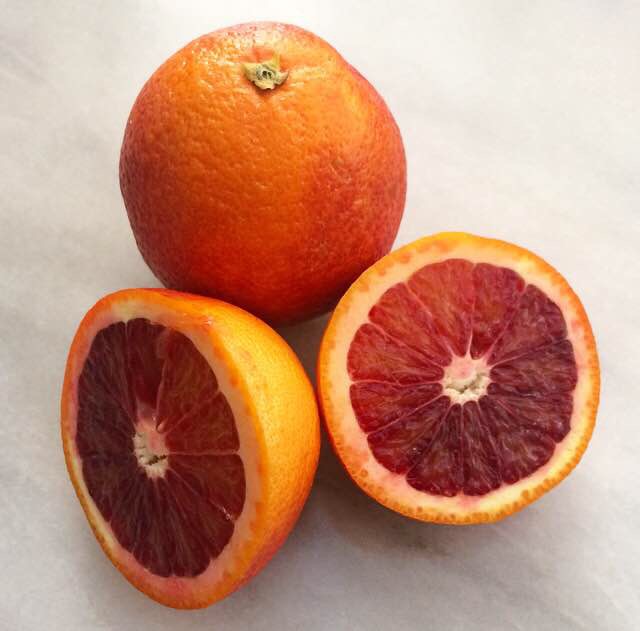
This chess pie is made with blood orange juice and zest, so the soft, custardy filling is perfumed with all sorts of orange goodness. I so hoped the interior would be some shade of pink or red, but the pigment of blood oranges dissipates with heat. But it doesn’t matter when it’s so simple and so good. If you really want a red or pink color though, I suppose you could add a few drops of food coloring, but I don’t think it needs it.

Blood Orange Chess Pie is a snap to put together. Make the crust (I like this one), fit it in the pan, and crimp the edges. Put that in the fridge to chill while you make the filling. Use your fingers to rub blood orange zest into some granulated sugar. This releases the oils in the blood orange peel and starts to melt the sugar. Whisk in four eggs and two egg yolks until everything is really thick and frothy. Make sure your eggs are room temperature–this will help them to fully incorporate into the filling. Slowly whisk in some melted butter. Don’t go too quickly or use piping hot butter, or you’ll get scrambled eggs. Next comes some whole milk and fresh-squeezed blood orange juice. Lastly, whisk in a couple of tablespoons of cornmeal and some salt. The cornmeal acts as our thickener, and the salt helps to offset all that sugar. 

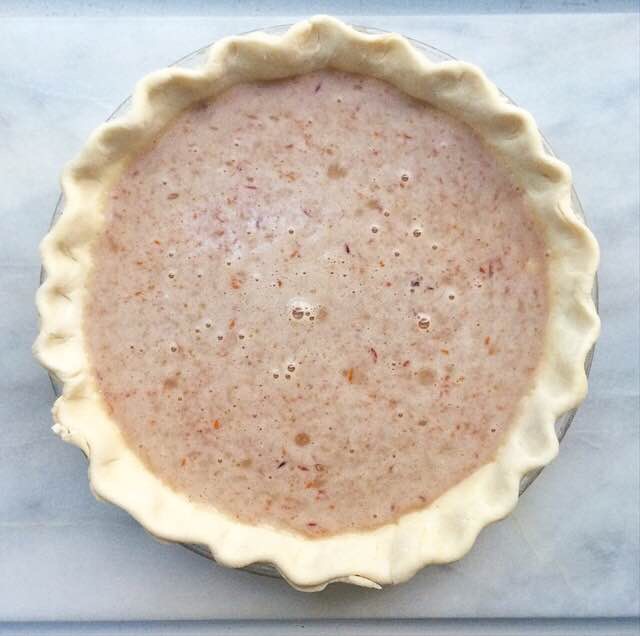
Pour the filling (which will be thin) into the pie crust and bake for 45-55 minutes at 350F, until the filling is firm. If the filling wobbles at all when the pan is jostled, keep baking or you’ll have soup. Everything will get puffy in the oven, but it’ll settle down while it cools.

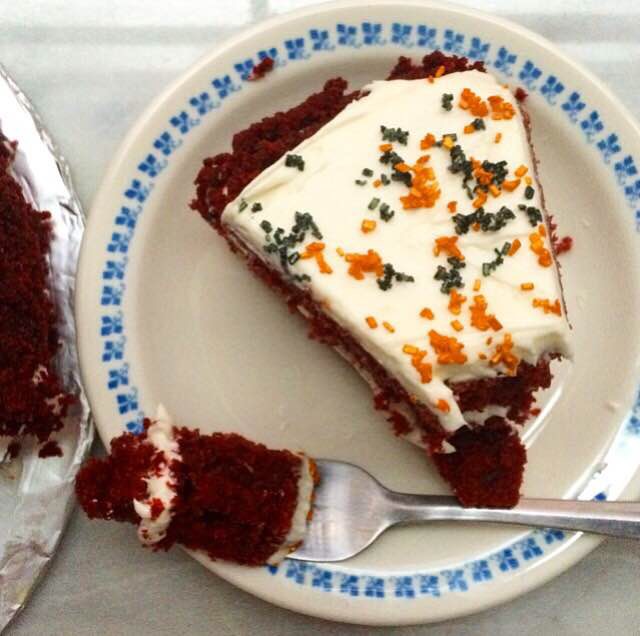
This pie is best served in small slices with coffee or tea to offset the sweetness. I like it room temperature, but love it straight from the fridge. The top gets crackly, and the interior stays soft and smooth. And it’s full of orange flavor, but not overwhelming at all. Oh, and there’s buttery, flaky pie crust. Yum.

Are you going to make pie this Pi Day? 

 Blood Orange Chess Pie
filling heavily adapted from Southern Style Lemon Chess Pie Filling
makes 1 standard 9″ pie

1/2 recipe Cream Cheese Pie Dough or other good crust
3 tablespoons freshly-grated blood orange zest*
2 cups granulated sugar
4 large eggs + 2 large egg yolks, room temperature*
4 tablespoons unsalted butter, melted and cooled slightly
1/4 cup whole milk
1/4 cup fresh-squeezed blood orange juice
2 tablespoons cornmeal
1/2 teaspoon Kosher or sea salt

Roll out the pie dough, and fit it in a standard 9-inch pie plate. Cut it to 1/2-inch of overhang, then fold the excess under and crimp. Place the prepared crust in the refrigerator while you make the filling.

Preheat the oven to 350F.

In a large mixing bowl, combine the blood orange zest and granulated sugar. Using your fingertips, rub the zest into the sugar until well-combined. Add eggs one by one, whisking after each addition. After all the eggs have been added, whisk the mixture vigorously for two minutes, until frothy and lighter in color. Slowly whisk in melted butter, followed by whole milk and blood orange juice. Mix in cornmeal and salt. Let filling sit for five minutes so large air bubbles can be released.

Pour filling into prepared crust. Bake 45-55 minutes, or until filling is firm when the pan is jostled.

Let pie cool completely on a rack. Blood Orange Chess Pie may be served at room temperature or cold. Pie will keep covered at room temperature for up to three days, or in the refrigerator for up to five days.

Notes:

1. I buy two pound bags of blood oranges at Trader Joe’s. If you do not have or want to use blood oranges, you may use any oranges you like.
2. Eggs may be brought to room temperature quickly by setting whole eggs in a bowl of warm tap water for 5-10 minutes.
3. This recipe requires whole milk. Do not substitute 1%, 2%, fat free, or skim milk.

Overnight Raspberry Cheesecake-Stuffed French Toast Bake

There are two kinds of people in the world: those who love leftovers, and those who hate them.

I am the former, though I haven’t always been. I was raised by someone who will eat cold anything out of a Tupperware while checking phone messages, and that grosses me out completely. I am wary of leftover spaghetti to this day. But I love leftovers that can be repurposed: roast chicken or vegetables, a spare slice of cooked bacon, some extra marinara. I can use those to make soup or quiche or lasagna! It’s like hitting the kitchen lottery.

Imagine my surprise when I was gifted two artisan loaves of bread last week, one challah, one a rustic country bread. They were given to me at a ritual Friday night dinner by my friend, Phil, who, ironically, doesn’t eat gluten. He had stopped at a nearby bakery and coffee shop to get a little pick-me-up on the way to dinner. They were about to close for the night and were trying to get rid of any loaves they hadn’t sold that day. Being the great friend he is, he grabbed two and gave them to me 😊

By the time I got home from dinner Friday night, I had already decided to make some baked french toast. It’s a simple, sweet brunch dish that’s absolutely perfect for a crowd. Instead of flipping individual pieces, all the bread is placed in a baking dish and soaked with custard for several hours. All that’s left to do is bake it up, slice, and serve with maple syrup. And while that is great by itself, why not turn up the flavor a little by stuffing it all with a cheesecake filling and raspberries?!

If you’ve ever made baked french toast, you know that day-old bread is the way to go. Since it’s all dried out, it soaks up a ton of custard, and after a good half-day or so, bakes up to be absolutely divine.

This recipe requires one whole loaf of day-old challah. Italian or French bread would work, too; use something that has a tight structure and isn’t too crusty. Don’t go for regular sliced bread though–it will get too soft and goopy from soaking. Slice the bread in 3/4″ slices, and lay half of them in a buttered baking dish. Fill in any gaps by cutting other slices into smaller pieces and squishing them into the empty spaces. The bottom of the dish doesn’t have to be completely covered, but you shouldn’t have any large gaps. Cover that layer of bread with a simple custard mixture of eggs, whole milk, vanilla, granulated and brown sugars, cinnamon, and salt.

 Then comes the best part: the cheesecake filling and raspberries! To make the cheesecake mixture, cream an 8-ounce brick of softened cream cheese with an egg yolk. Mix in a little confectioner’s sugar and vanilla, and you’re ready to spread! Spoon the filling over the top of the soaking bread, and use a silicone spatula or offset knife to spread it all the way to the edges of the dish. Top that with a cup of raspberries–fresh or frozen work just fine. Then top the filling with another layer of bread slices and the rest of the custard. Wrap the pan tightly with plastic wrap and foil, pressing down to encourage the bread to soak up the custard.

Then just stick the pan in the refrigerator for 8-24 hours. The longer it sits, the better it gets. The french toast pictured was refrigerated for 20 hours, and was super smooth and rich 😊 Assemble it the night before you want to serve it, and it’ll be ready to go by morning!

 
 When it’s time to bake, take the pan out of the fridge to warm up a bit. While the oven is preheating, make a quick streusel. Mix together some flour, brown sugar, cinnamon, and salt, and then use a pastry blender or two forks to cut in four tablespoons of cold butter. Sprinkle the streusel over the top of the bread, and put it all in the oven for 30-35 minutes, until it starts to puff and is golden brown. Let it sit ten minutes before serving with maple syrup, a dusting of confectioner’s sugar, and more raspberries!

This Overnight Raspberry Cheesecake-Stuffed French Toast Bake is a divine sweet brunch. The streusel gets golden and crunchy, the french toast itself is super rich and soft, and the center is bursting with raspberries and cheesecake! The tang of the cream cheese and the tartness of the berries contrasts beautifully with the creamy, cinnamon-scented layers of french toast. And best of all, it’s easy! Make this baked french toast for your next big weekend brunch!

 Overnight Raspberry Cheesecake-Stuffed French Toast Bake
makes one 9×9″ pan, 9-12 servings

Cheesecake Filling:
8-ounces full-fat brick-style cream cheese
1 large egg yolk, room temperature
1/4 cup confectioner’s sugar
2 teaspoons pure vanilla extract

French Toast:
butter, for greasing the pan
4 large eggs, room temperature
1 1/2 cups whole milk
1 teaspoon pure vanilla extract
6 tablespoons granulated sugar
2 tablespoons light brown sugar, packed
3/4 teaspoon ground cinnamon
1/2 teaspoon Kosher or sea salt
1 loaf day-old challah, French, or Italian bread, sliced in 3/4″-1″ slices
1 cup fresh or frozen raspberries

Streusel:
1/2 cup all-purpose flour
1/4 cup light or dark brown sugar
1/2 teaspoon ground cinnamon
pinch of Kosher or sea salt
4 tablespoons unsalted butter, very cold

For Serving:
maple syrup
confectioner’s sugar
raspberries

Make the cheesecake filling. In a medium mixing bowl, use an electric mixer to beat cream cheese until fluffy, about one minute. Beat in egg yolk, followed by confectioner’s sugar and vanilla. Set aside.

Grease a 9×9″ inch pan with butter. Set aside.

Make the custard. In a small mixing bowl, whisk the eggs until combined and a bit frothy. Whisk in milk, followed by vanilla. Stir in sugars until well-distributed. Whisk in cinnamon and salt. Set aside.

Place slices of bread in the bottom of the prepared pan. Fill in any gaps by using small pieces. Pour half the custard mixture over the slices, coaxing it with a spoon so there aren’t any large dry spots. Drop spoonfuls of the cheesecake filling over the soaking bread. Spread it to the edges of the pan, covering the bread completely. Scatter raspberries over the cheesecake layer. Top with the rest of the sliced bread, and fill in the gaps accordingly. Pour the remainder of the custard mixture over the top layer of bread, using a spoon to make sure everything is saturated. Press plastic wrap onto the top layer of bread, followed by a layer of aluminum foil. Set an empty pan of the same size (or slightly smaller) on top of the foil. Press down lightly. Place filled, covered pan (with the second pan on top), in the refrigerator for 8-24 hours to chill.

Preheat the oven to 350F. Remove the pan from the refrigerator, and uncover it.

Make the streusel. Stir together the flour, brown sugar, cinnamon, and salt. Use a pastry blender, two forks, or clean, cool fingertips to cut the cold butter into the flour mixture, until the largest pieces are the size of small peas. Scatter the streusel over the top of the French toast. Bake for 30-35 minutes, until golden and starting to puff up.

Let cool for ten minutes before slicing and serving with maple syrup, confectioner’s sugar, and additional raspberries, if desired.

Overnight Cheesecake-Stuffed Raspberry French Toast Bake

Funfetti Cookie Dough Truffles

 The only thing better than freshly baked cookies is the dough itself, am I right?!

I’m still making my way through the No-Churn Mint Chocolate Chip Cookie Dough Ice Cream I made last week, and while I love the ice cream itself, it’s the edible mint chocolate chip cookie dough that’s the real star of the show. It’s got me totally obsessed with edible cookie dough! It’s so simple and quick, and it can be made in literally any flavor. I’ve thought of so many variations already! Chocolate chip, peanut butter, ginger spice–the possibilities are endless! It can be a dessert dip, cake filling (<–doing that ASAP), or thrown into ice cream. But my favorite way to eat it at the moment? In truffle form! And Funfetti, because sprinkles. 

These Funfetti Cookie Dough Truffles are a breeze to make. There’s no baking, and the candy coating is melted in the microwave, so you don’t even need to turn on a burner! If you manage your time wisely, these little truffles can be made start-to-finish in less than two hours.

But for all the ease of preparation, there are a few guidelines that make these little rainbow-colored confections both adorable and delicious.

First off, the flavor. How do we get that classic Funfetti cake flavor without using a boxed mix? With a combination of extracts! Here, we use a hefty dose of pure vanilla extract. Some Funfetti recipes use clear imitation vanilla, but to me it just tastes like chemicals. Really sweet chemicals. No, thanks. So use the real stuff. The other extract we use here is imitation butter extract. I know, I know. I just said how clear imitation vanilla tastes artificial to me. But hear me out. Imitation butter extract is used here in a very small dose–1/8 teaspoon. It serves as a background flavor to the vanilla, and gives the finished truffles that classic cake mix flavor. If you don’t have or don’t want to use imitation butter extract, you may leave it out without any negative effect on the flavor. 

Now, for the main event: sprinkles! On the left, you see nonpareils, the little ball-shaped ones. On the right, you see jimmies, the chewier cylindrical variety. Both are super fun, but they are not interchangeable in this recipe (or most Funfetti recipes). Once the eggless cookie dough base is prepared, mix in 1/3 cup of jimmies. These leave the dough speckled with cute pops of color! 

Do not use nonpareils in the dough. If you do, they will bleed their color into the dough, leaving everything a murky purple color. Even if you are really careful folding them in, this will happen. There’s no way around it. So, only use jimmies in the edible cookie dough. Use the nonpareils (or more jimmies) to decorate the coated truffles. 

Love those little clusters of color💗💗💗

As for the coating, these truffles require candy melts, which can be found at your local kitchen supply or craft store. They look a whole lot like big white chocolate chips, but the two are not interchangeable. If you use white chocolate chips to coat these, you will probably have issues. White chocolate (particularly in chip form) does not melt easily. In a double-boiler it can scorch in a second, leaving behind unattractive brown bits. I’ve done it many times–it’s very disheartening to waste perfectly good ingredients. If you put it in the microwave, it may not melt evenly, and look a little like cottage cheese. I tried it while testing this recipe because I didn’t want to make a trip to the kitchen supply for one thing. While I got the truffles coated, they weren’t smooth and pretty, and the white chocolate seized every time I dipped a ball of cookie dough. 

 So, I am here to tell you to take the special trip to the store. Candy melts do just that–melt. After about a minute and a half in the microwave and a quick stir with a fork, you’ll have smooth, beautiful candy coating ready for dipping.

And speaking of dipping, I tried two methods with these truffles. First, I tried toothpicks. I inserted a toothpick into a ball of dough, dipped it, let the excess coating drain off, and placed the coated truffle on a sheet of parchment. But when I tried to take the toothpick out, I was left with an annoying little hole. I tried to cover it with more candy coating and some sprinkles, but it was just too inefficient.  

  For dipping these truffles, I prefer to use a fork. I drop a cold ball of dough into the candy coating, and then use a fork to flip it around so it’s completely coated. Then I use the fork to lift the coated truffle out of the candy coating, let it drain for five to fifteen seconds (scraping the bottom of the fork on the side of the bowl seems to help), and turn the fork completely upside down to place the truffle on the parchment. As soon as the truffle is released from the fork, top it with additional sprinkles. Don’t wait–the cookie dough centers are cold, and the coating sets quickly as a result. By the time you finish coating and sprinkling all your truffles, the first few you dipped will be ready to eat! If your candy coating is taking a while to set for some reason, set the truffles in the fridge for a few minutes. That should do the trick. 

 These colorful confections are perfect for birthday parties, gifting, or even Easter! You could use pastel-colored candy melts–how adorable would that be?! No matter where you serve them, these Funfetti Cookie Dough Truffles are simple, delicious, and a whole lot of fun…fetti.

Sorry. Had to. 

 Funfetti Cookie Dough Truffles
makes about four dozen truffles

Edible Cookie Dough:
1/2 cup unsalted butter, softened to room temperature
3/4 cup granulated sugar
2 tablespoons milk of choice (dairy or non-dairy)
1 1/2 teaspoons pure vanilla extract
1/8 teaspoon imitation butter extract*,optional
1 1/4 cup all-purpose flour
1/2 teaspoon Kosher or sea salt
1/3 cup rainbow sprinkles (jimmies)

Coating:
2 cups white candy melts, melted
2 tablespoons rainbow sprinkles (jimmies or nonpareils)

Line a rimmed 9×9″ baking pan with wax paper.

In a medium mixing bowl, use an electric mixer to cream butter and granulated sugar together until light and fluffy. Add milk, vanilla, and optional imitation butter extract, and beat until combined. Mix in flour and salt, followed by jimmies. Scoop dough by the 1/2 tablespoon (1 1/2 teaspoons), and roll into balls. Set rolled dough balls on prepared pan. Freeze for 30 minutes.

Line a rimmed baking sheet with parchment paper. Set aside.

Melt candy melts in the microwave in 30 second increments until a stir with a fork yields a smooth coating. Take dough balls out of the freezer. Use a fork to coat frozen dough balls into melted candy melts. Drain briefly. Set on parchment-lined baking sheet. As soon as the freshly-dipped truffle is on the baking sheet, sprinkle with additional sprinkles. Repeat with all dough balls. Candy melts should set quickly at room temperature, but truffles may be refrigerated for 15 minutes to set.

Truffles are best served at cool room temperature. They keep well covered in the refrigerator for up to five days.

Note:

I use J.R. Watkins Imitation Butter Extract. It’s a huge bottle and will last you forever.

Red Velvet Cake

 We are officially two days from the 88th Annual Academy Awards! Everybody else in the country may look forward to Super Bowl Sunday, but this is *my* big Sunday.

My best pal, Tad, and I spend months preparing for Oscar Night. We start making predictions in October, but by the night of the actual awards show, we’ve changed our answers about fourteen times! We have a pretty solid track record of predicting the winners 😊 Tad and I met sophomore year of college at a failed screening of Shrek 2. The projector broke mid-movie, and while the techs tried to fix it, we got to talking. We quickly discovered that we love the Oscars equally, meaning that it’s all we ever talked about even though nobody else on campus cared that the ingenue is always poised to win Best Supporting Actress. Over the ensuing months, we met multiple times a week with books of statistics, former winners, and a deep, abiding passion for “Hollywood’s Biggest Night.” Let’s just say that if there’s ever a job opening for Oscar Historian, I know two people who would love the job.

Tad lives in San Francisco now, but still gets up to watch the nominations announcement with me, even though it airs at 5:30am in California. He’s that kind of friend. And as if we couldn’t be more perfect for each other, he also shares my borderline-obsessive love of Martin Scorsese–he didn’t even bat an eyelash when I decorated my half of our senior year duplex in a Scorsese theme. And don’t even get us started on Leonardo DiCaprio–fingers crossed that this is his year! 

Among our Oscar traditions is a meal. Back when we were sharing one kitchen with an entire dorm, I’d go down to the basement before the pre-show to put together pesto-mozzarella grilled cheeses on good country bread, and a spinach salad with mandarin oranges, thinly-sliced red onion, and balsamic vinaigrette. The pièce de résistance was always a red velvet cake with cream cheese frosting. I wasn’t any sort of baker yet, so both were courtesy of Betty Crocker, but it didn’t matter. The memory of that cake has stuck with both of us, and even now, Oscar Night doesn’t feel like Oscar Night without it…and our constant stream of text messages. 

These days, I make my Red Velvet Cake from scratch, and it is waaaaay better than Betty Crocker could ever hope to be. It’s the perfect combination of chocolate and vanilla flavors, and kept super tender thanks to the additions of cornstarch, oil, and buttermilk. And of course, it’s red, just like the red carpet! 


The frosting is the dreamiest, creamiest cream cheese frosting I’ve ever had. Many cream cheese frosting recipes use twice as much cream cheese as butter, and not enough confectioner’s sugar. In my experience, this results in frosting that tastes divine, but is somewhat soupy, and therefore difficult with which to work. Cream cheese simply does not whip as well as butter. But this recipe uses equal weights of both ingredients, so we get all the tang of cream cheese and the stability of butter. A full pound of confectioner’s sugar is beaten in, along with a pinch of salt and two teaspoons of vanilla extract. Once all the ingredients are combined, the frosting is beaten on high for two additional minutes, so it gets extra light and fluffy. It’s what makes this cake the stuff of dreams! 

 Once the frosting is made, use a serrated knife to even out the cakes so they stack evenly. Crumble the cake scraps into a small bowl–you can use these to decorate the frosted cake! 

  As you can see, I added an Oscar to mine, too! To do this, I used a fork to stir gold and black gel food coloring into sparkling sugar (found near the sprinkles at most well-stocked grocery stores). I added some gold luster dust to the gold-dyed sugar, just for some extra sheen. I used a mummy cookie cutter (like this one) for Oscar’s body, and went freehand for the rest of it. I think it turned out pretty cute!

This Red Velvet Cake is perfect for Oscar Night, but it’s great for birthday parties (or just dessert), too! With a tender red crumb, wonderful chocolate and vanilla flavor, and fluffy cream cheese frosting, it’ll be a winner all around 😊 

 Red Velvet Cake
makes one two-layer 9″ round cake or 28 cupcakes

For Greasing:
2 tablespoons all-purpose flour
2 tablespoons canola or vegetable oil

Cake:
2 1/2 cups all-purpose flour
1/2 cup natural unsweetened cocoa powder (not Dutch process)
1/3 cup cornstarch
2 cups granulated sugar
1 teaspoon baking soda
1 teaspoon Kosher or sea salt
1 cup canola or vegetable oil
3 large eggs + 1 large egg yolk, room temperature
2 teaspoons pure vanilla extract
1 teaspoon white vinegar*
2 cups buttermilk*
1/2-3 tablespoons liquid red food coloring*

Cream Cheese Frosting:
8 ounces full-fat brick-style cream cheese, softened to room temperature
1 cup (2 sticks) unsalted butter, softened to room temperature
1 pound confectioner’s sugar
pinch of Kosher or sea salt
2 teaspoons pure vanilla extract

For Decorating (optional):
reserved cake scraps, from trimming the layers
4 tablespoons sparkling sugar*, divided
gold gel food coloring
gold luster dust
black gel food coloring

Preheat oven to 350F.

In a small bowl, whisk together greasing mixture ingredients. Using a pastry brush, paint the mixture onto the entire insides of two 9-inch round cake pans. Set aside.

Make the cake. In a medium mixing bowl, sift together flour, cocoa powder, cornstarch, salt, baking soda, and salt. Whisk to combine. Set aside.

In a large mixing bowl, whisk together oil, eggs and yolk, vanilla, white vinegar, buttermilk, and red food coloring. Add dry ingredients in three installments, combining completely after each addition.

Divide batter evenly into prepared pans. Tap full pans lightly on the counter five times. Bake for 23-28 minutes, or until a toothpick inserted in the centers comes out clean. Let cool in the pans for ten minutes. Run a small thin knife around the edges of the pans before inverting the layers onto racks to cool completely. Once layers are cool, use a serrated knife to even the tops. Reserve the cake scraps.

Make the frosting. In a large mixing bowl, use an electric mixer to beat cream cheese and butter together until light and fluffy. Add confectioner’s sugar and salt in two installments, until completely combined. Beat in vanilla. Once combined, beat on high for two additional minutes, until light and fluffy.

Fill and frost cooled cakes. Crumble reserved cake scraps and use them to decorate the cake as desired.

If you want to decorate with sparkling sugar, place two tablespoons of the sugar into two small bowls. Add a small dab of gold gel food coloring to one bowl, and a small dab of black to the other. Use forks to stir the gel into the sugar until it’s completely dyed. Stir a touch of gold luster dust (less than 1/8 teaspoon) to the gold sugar. Decorate as desired.

Frosted cake will keep covered at room temperature for three days, or in the refrigerator for up to a week.

Notes:

1. For cupcakes, divide prepared batter into 24 standard muffin cups, filling them 2/3 of the way full. Bake at 350F for 16-18 minutes, or until a toothpick inserted in the center of a cupcake comes out clean.
2. Apple cider vinegar may be substituted.
3. If you don’t have buttermilk on hand, place 2 teaspoons of vinegar or lemon juice in the bottom of a liquid measuring cup. Pour milk up to the 2 cup mark. Stir. Let sit for five minutes before using. Do not use skim or fat free milk.
4. Add as much or as little red food coloring as needed to achieve your desired shade, keeping in mind that the color will darken as the cakes bake.
5. I use Wilton White Sparkling Sugar.

Everyday Cassoulet

Updated 12/28/2018: This post was edited to add (much) better photos.Everyday CassouletLiving far away from home means that when I get a call from friends or family, I “play the hits,” if you will. I tell them all about the big things going on in my life–a new apartment, the awesome kid I take care of, the brown and white spotted schnauzer I saw yesterday (I really love a schnauzer). But in all the fuss of sharing my life and hearing about theirs, I can let amazing things go by the wayside because they might seem mundane if the person on the other end of the phone call is not directly involved.Everyday Cassoulet
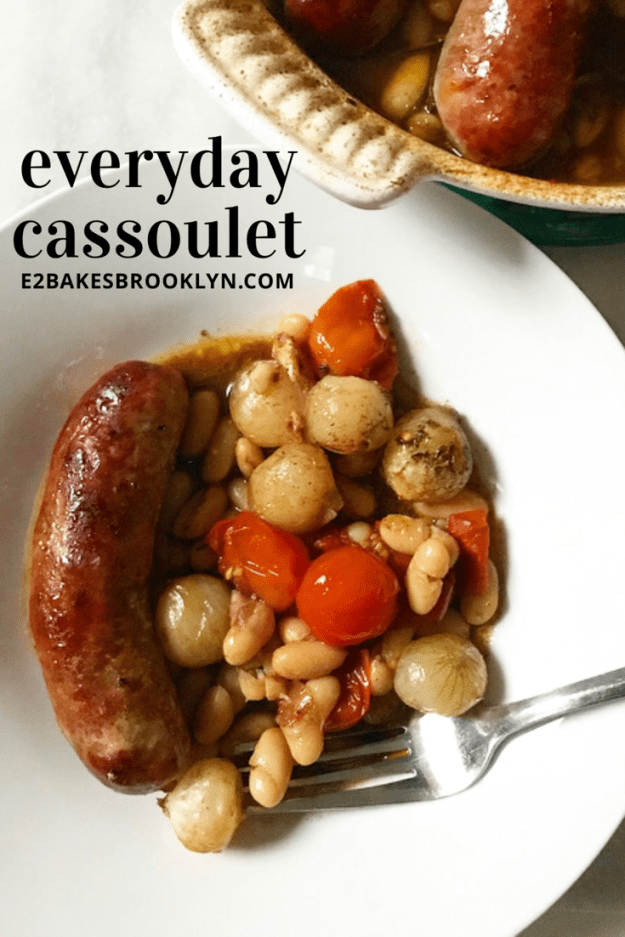
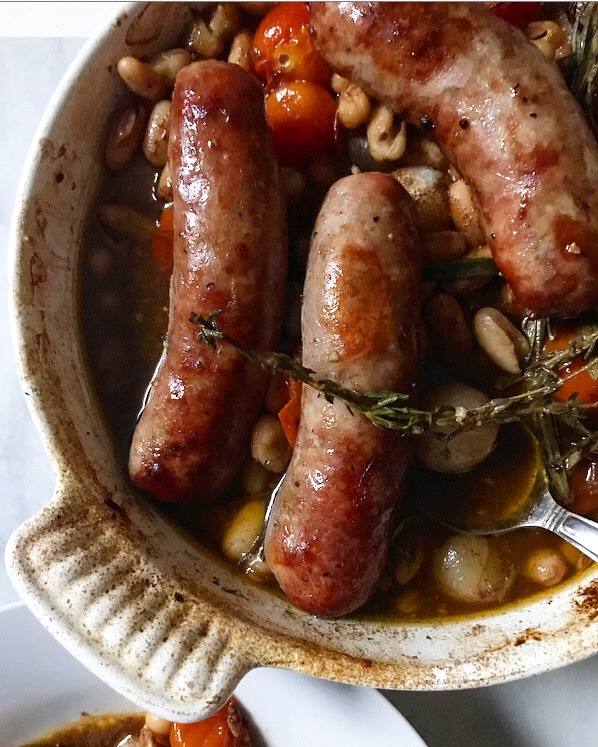
Take for example this Everyday Cassoulet. It’s rich and delicious and one of my favorite meals to make at home, but at the end of the day it’s *just* dinner. Everybody eats dinner. It’s not really a “call your mom down in Texas to tell her about it” kind of thing.Everyday Cassoulet
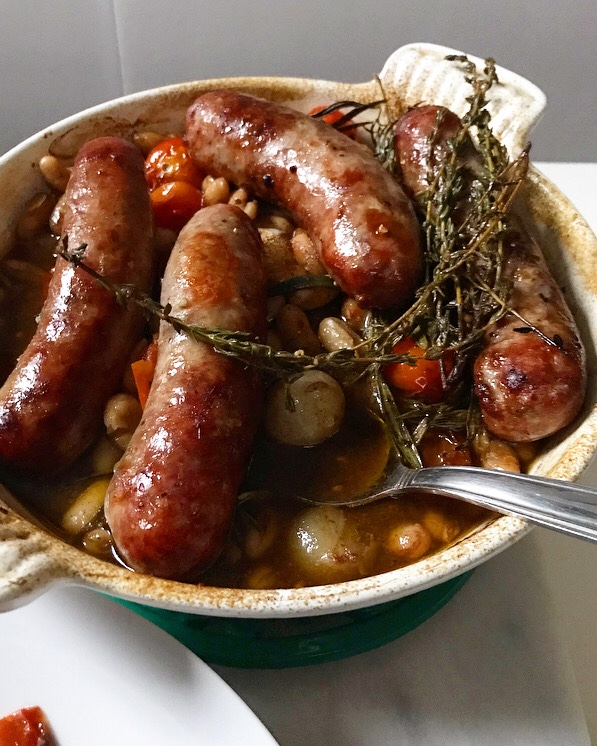
We all have our go-to meals though. My best friend, Emily, asked me a few months ago what I had been making for dinner lately, and this was the first thing I told her about. Mind you, I’ve been making this for five years. When I found the original recipe, I still lived in Manhattan! I was still working office jobs! The only thing I had ever baked from scratch were Ina Garten’s brownies! And while all of those things have changed, my go-to dinner has not.Everyday CassouletEveryday Cassoulet
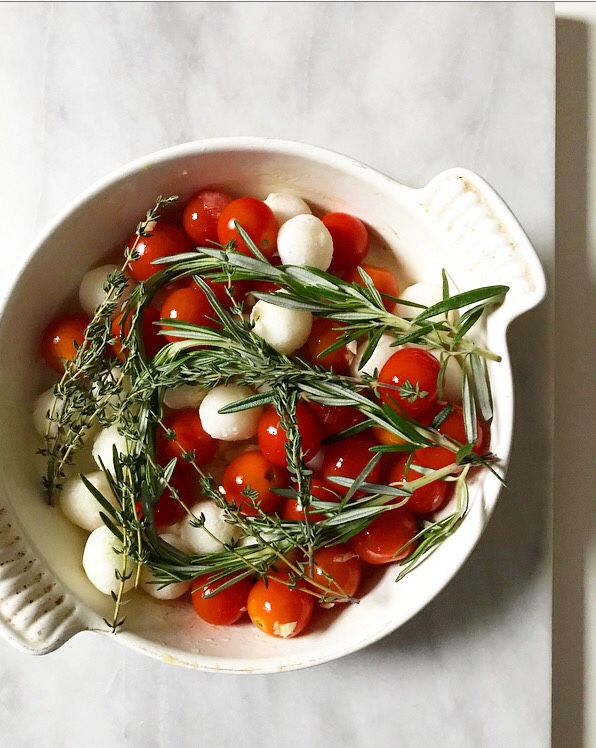
Some of you may be wondering: what is cassoulet? It’s a slow-cooked meat and white bean stew from the south of France. Cassoulet is traditionally baked in a dish called a cassole. The fanciest versions contain things like goose, lamb, and duck confit. But this is a weeknight version of the classic French dish, so it’s been pared down. Don’t worry though, it’s still every bit as good and comforting as the real deal!Everyday CassouletEveryday Cassoulet
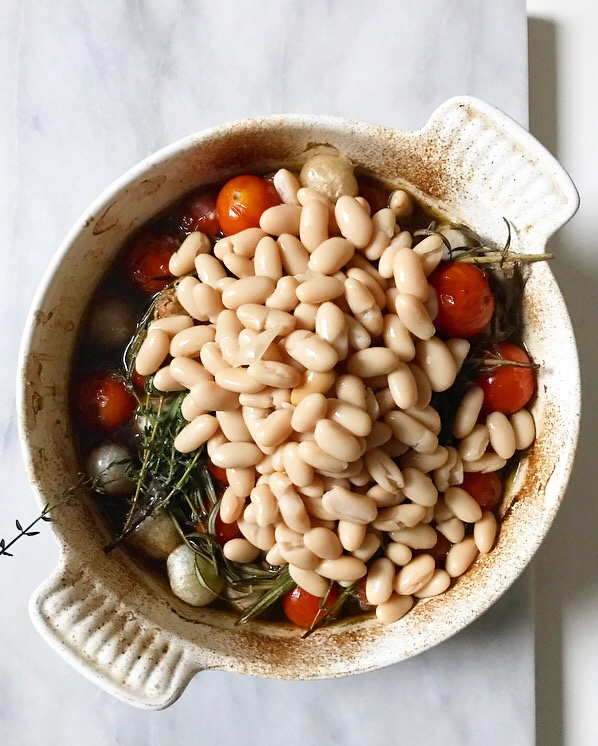
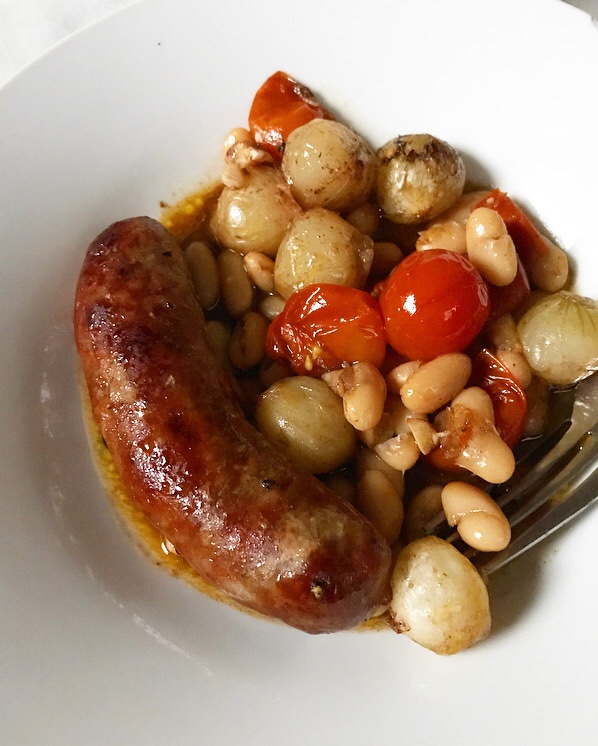
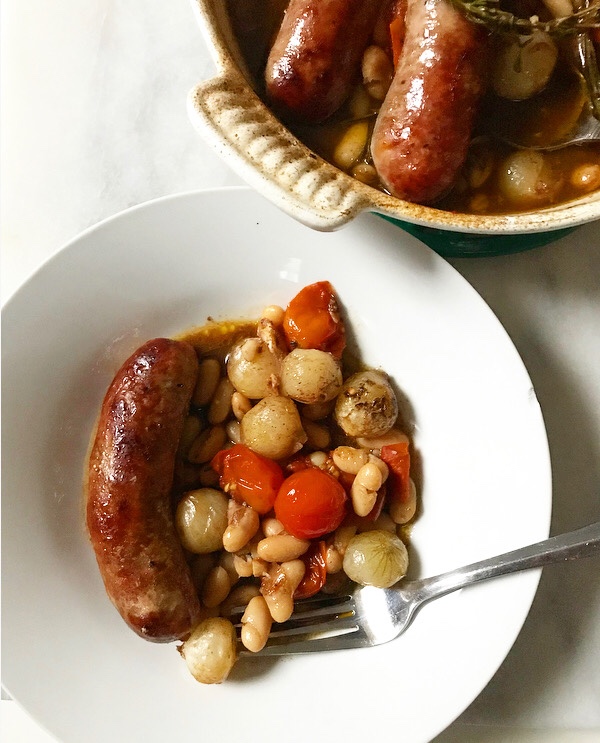
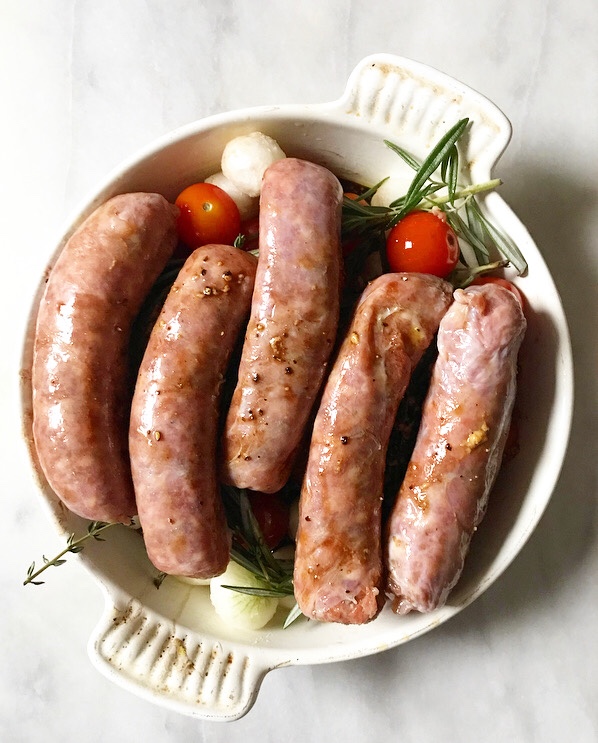
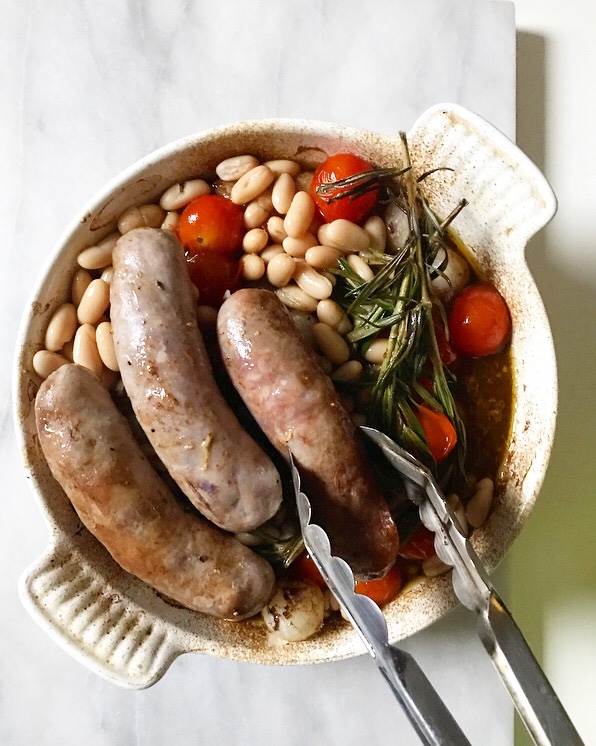
This Everyday Cassoulet is made with Italian sausages in place of any specialty meats. Traditional white beans are baked with grape or cherry tomatoes, pearl onions, crushed garlic, and fresh herbs. Nothing has to be sliced or diced–you only need a knife to crush the garlic! Everything is drizzled with a simple mixture of balsamic vinegar, olive oil, and Dijon mustard, and baked for an hour in a regular casserole pan–no need for specialty dishes here!Everyday Cassoulet
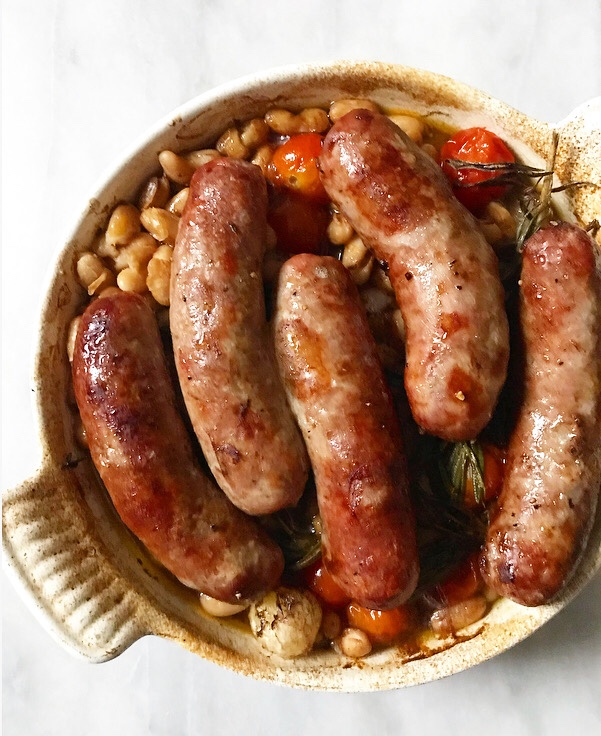
And oh my, is it delicious. The sausages get super crispy, and the tomatoes burst and create the most wonderful sauce with the balsamic mixture. The beans soak in all the flavors and get super tender. This is fantastic served with crusty bread. I forgot it when I took these photos, but trust me, you’ll need it.Everyday Cassoulet
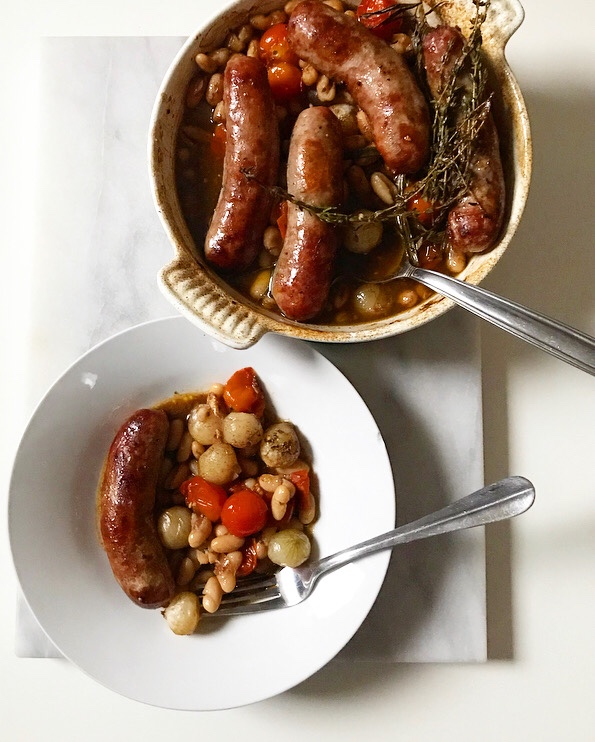
Put this Everyday Cassoulet on your list of weeknight dinners! It’s easy as can be, but sure doesn’t taste like it! Your family and friends will definitely ask for the recipe 🙂 Everyday Cassoulet

Everyday Cassoulet
adapted from Quick Cassoulet by Julie van Rosendaal
makes four servings*

3 tablespoons balsamic vinegar
3 tablespoons olive oil
1 teaspoon Dijon mustard
1/2 teaspoon Kosher or sea salt
1/4 teaspoon freshly ground black pepper
2-4 cloves garlic, crushed
1 pint cherry or grape tomatoes, rinsed
1 cup peeled pearl onions (fresh or frozen)*
2-3 sprigs fresh rosemary
5 sprigs fresh thyme
1 lb. raw Italian Sausages*
1 15-ounce can cannellini beans, drained and rinsed

Preheat oven to 425F.

In a small bowl, use a fork to whisk together balsamic vinegar, olive oil, Dijon mustard, salt, and pepper. Set aside.

In a small casserole dish, combine garlic cloves, tomatoes, and pearl onions. Top with rosemary and thyme sprigs, followed by sausages. Drizzle with balsamic vinegar mixture. Bake for 40 minutes.

Remove sausages to a plate. Stir cannellini beans into tomato mixture. Place sausages back on top of vegetables with the less-browned sides up . Bake for an additional 20 minutes.

Remove dish from oven. Let cool a few minutes before serving in shallow bowls.

Leftovers keep covered in the refrigerator for up to four days.

Notes:

1. This recipe doubles easily in a 9×13″ pan. The bake time is the same.
2. If you don’t care for onions or simply don’t want to use them, they may be omitted.
3. I used pork sausages, but I think chicken or turkey would work well here.
Everyday CassouletEveryday Cassoulet