For weeks, I have been eagerly waiting to share this recipe with you. I’d love to say that I feel this way with every single recipe in my archives, but that would be a lie. I only post recipes that I like and believe in, of course, but it’s rare that I get all kid-on-Christmas about one.
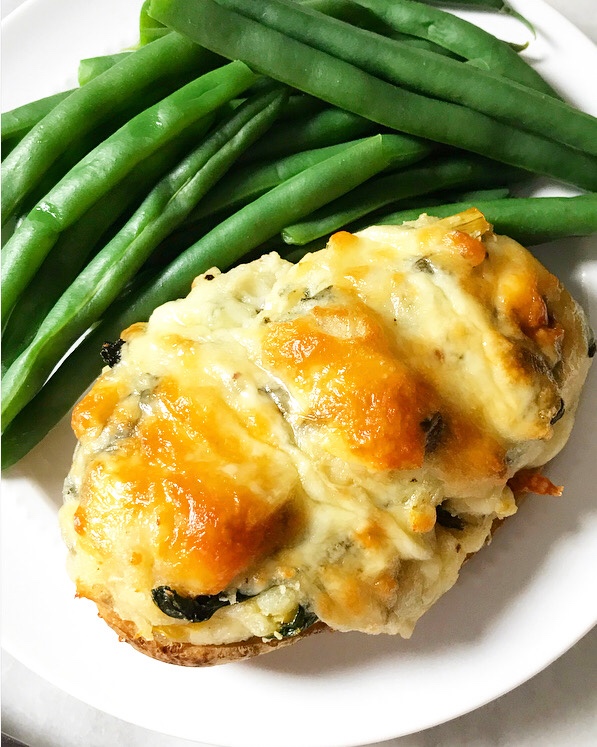 So, what’s so special about this recipe? Well, for one, it’s a vegetarian main (or hearty side), and I can never have too many of those. And two, it’s for twice-baked potatoes that are filled with the flavors of my favorite hot, cheesy dip. Need I say more?!
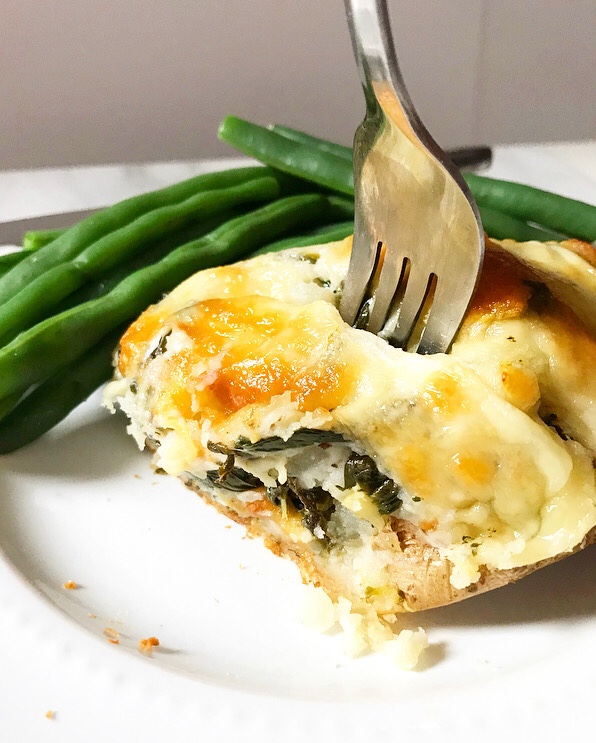
 These Spinach-Artichoke Twice-Baked Potatoes are so delicious, y’all. They’re soft and creamy on the inside and brown and crispy on the outside. Oh, and there’s melted cheese involved. And a serving of vegetables. Yesssss.
 If, by chance, you’ve never heard of or eaten a twice-baked potato…well, I’m sorry that you’ve been deprived for so long. Luckily, you can remedy that today! Let me give you a quick rundown.
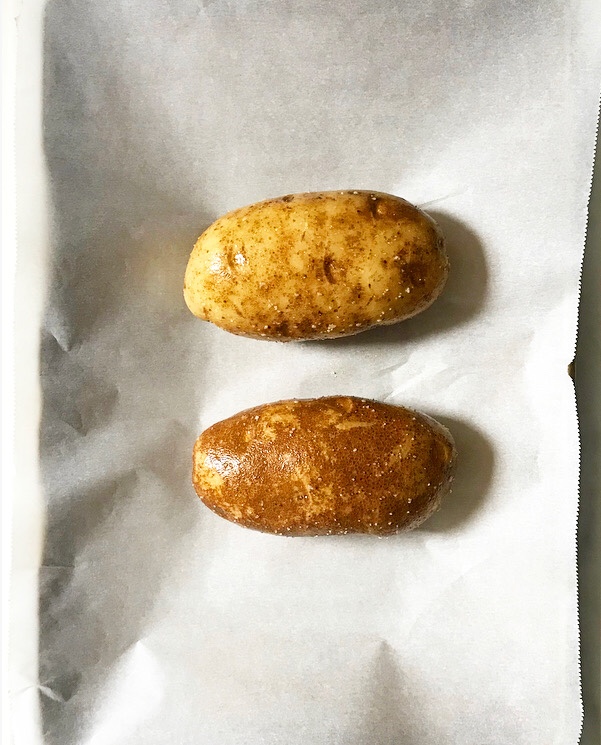

 As their name states, twice-baked potatoes are potatoes that have been baked two times. The first time, they are rubbed down with oil and salt and baked until tender.
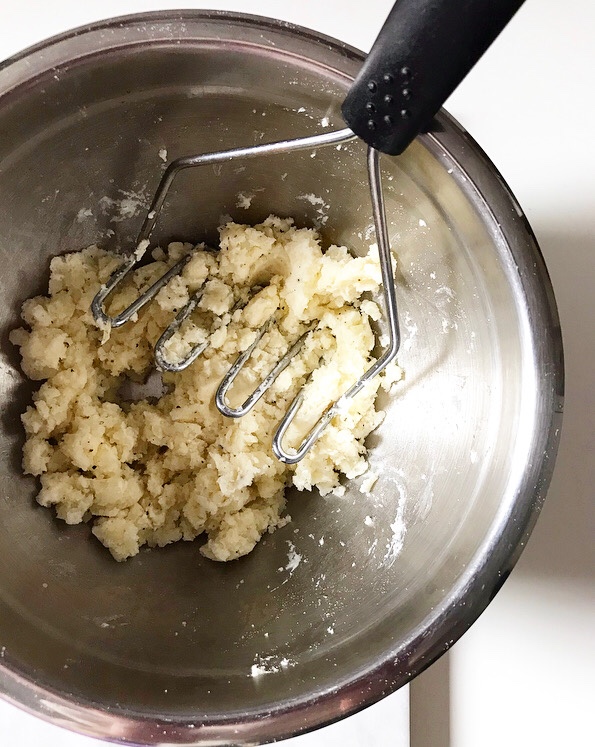 Next the potato innards are scooped out, leaving behind four potato skin “boats.” The potato flesh is mashed with other ingredients to create a filling.
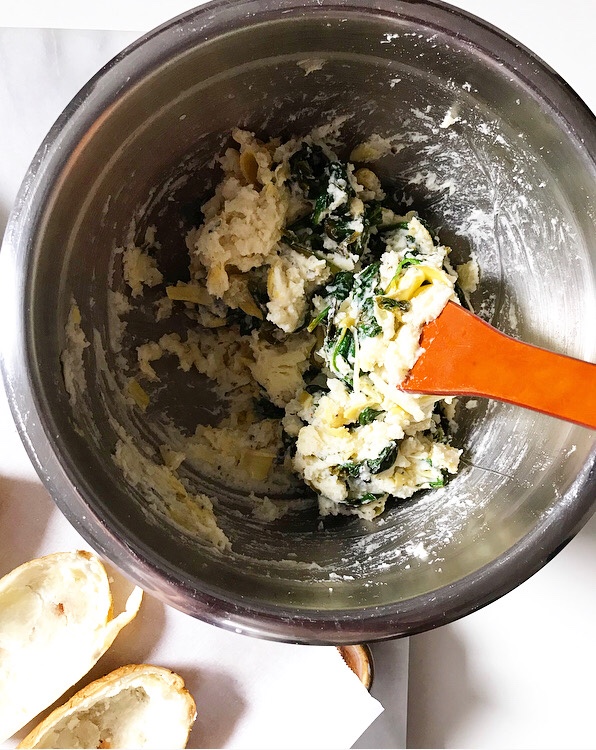 Traditionally, those include sour cream, bacon, cheddar, and scallions, but this recipe deviates from the norm in favor of lemony sautéed spinach, chopped artichoke hearts, butter, cream cheese, and monterey jack cheese. YUM.


 The filling is then spooned back into those potato skins, topped with more cheese, and baked a second time, until golden and a bit crispy ❤
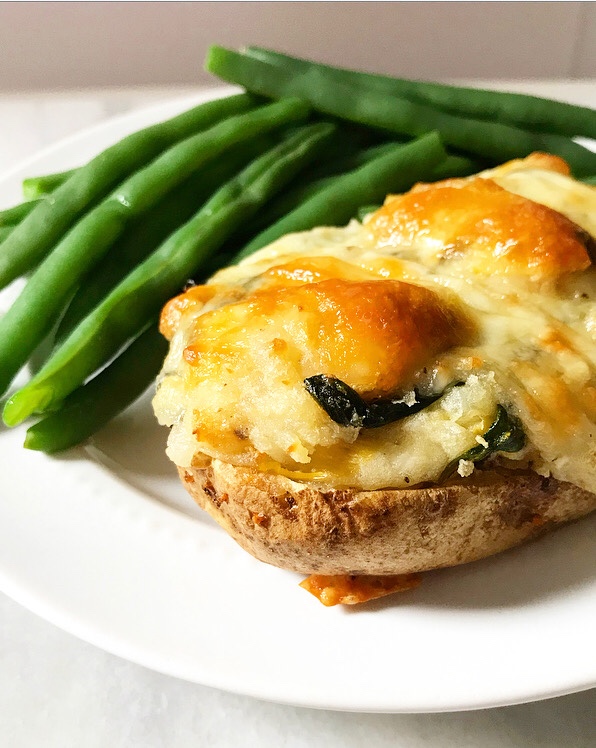
 I prefer to serve Spinach-Artichoke Twice-Baked Potatoes as a main, but they also work well alongside chicken or pork. However you serve these potatoes though, they’re guaranteed to leave you wishing you’d doubled the batch.
Spinach-Artichoke Twice-Baked Potatoes
makes 4 servings
2 medium-large russet potatoes (about 1 pound total)
1 1/2 teaspoons olive oil, divided
1 1/4 teaspoons Kosher salt, divided
5 ounces fresh baby spinach leaves
juice of 1/2 lemon
1/2 13.5 ounce can artichoke hearts in water, drained
2 ounces full-fat cream cheese (1/4 brick)
2 tablespoons unsalted butter
1/2 teaspoon freshly-cracked black pepper
1 cup (about 4 ounces) shredded Monterey Jack cheese, divided
Preheat oven to 400F. Line a baking sheet with parchment paper.
Scrub and dry potatoes. Prick each several times with a fork. Massage 1/2 teaspoon each olive oil and salt onto potato skins. Place on prepared pan and bake about 1 hour, or until I small knife meets no resistance when inserted. Let potatoes cool 7-10 minutes, or until they can be handled.
While potatoes are baking, prepare the filling ingredients. Heat 1 teaspoon olive oil in a skillet over medium heat. Add spinach by the handful, wilting it as you go so as not to overload the pan. Season with 1/4 teaspoon salt. When all spinach has wilted, remove pan from heat. Squeeze in lemon juice and give another stir. Set aside.
Use a large, sharp chef’s knife to cut artichoke hearts into a 1/2-inch dice. Set aside.
When you can handle the potatoes (they should still be very warm), remove them to a cutting board. Slice them in half lengthwise and use a spoon to scoop out the flesh, leaving behind the potato skin “boats.” Set the skins aside.
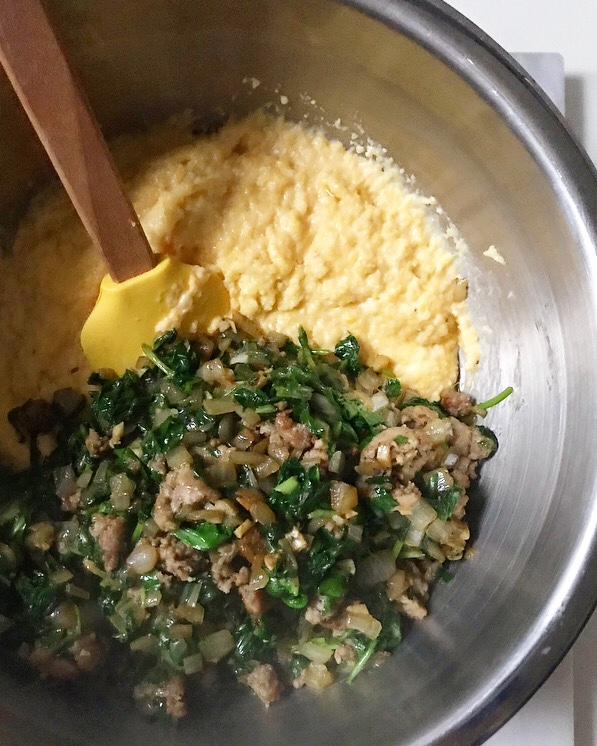
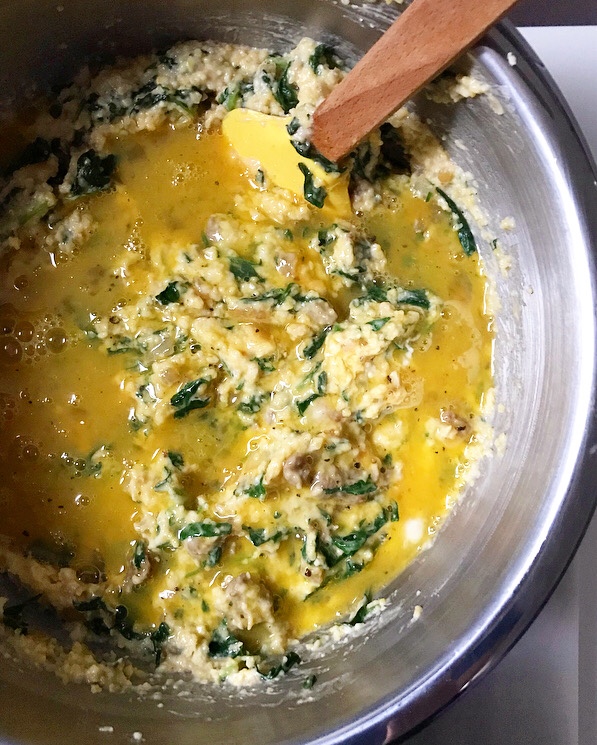
Make the filling. Place potato flesh in a medium mixing bowl. Use a potato masher (or two forks) to break up the large pieces. Add cream cheese, butter, 1/2 teaspoon salt and black pepper and continue to mash just until combined. Do not over-mash. Use a silicone spatula or wooden spoon to fold in spinach, artichokes, and 1/2 cup shredded Monterey Jack. Taste a small bite of filling and adjust seasoning as needed.
Place potato skins on a parchment-lined baking sheet. Divide filling mixture among skins (1/2-2/3 cup each); they will likely be heaping a bit. Top each with 2 tablespoons shredded Monterey Jack cheese. Bake for another 20-25 minutes at 400F, or until the cheese is browning in places. Let potatoes cool a few minutes before serving.
Twice-Baked Potatoes are best eaten the day they are made, but leftovers can be draped with a damp paper towel and reheated in the microwave, if desired. I’m sure they can also be reheated in a toaster oven or oven, although I have not tried it myself. Leftovers will keep covered in the refrigerator for up to 3 days.


 I am irrationally irritated by the fact that strawberries are so popular in Valentine’s Day treats. The amount of time I spend stewing over this sort of thing is more than a little ridiculous, but can you blame me? Strawberries aren’t in season right now—most of the punnets in the produce section have the flavor and texture of a styrofoam cup, but they are red and pretty, so there’s no doubt that this February crop will sell like hotcakes* for years to come.
 Personally, I like to bypass the off-season fruit this time of year and reach for freeze-dried strawberries instead. I buy ‘em at Trader Joe’s, whirl them into powder and fold it into all sorts of
 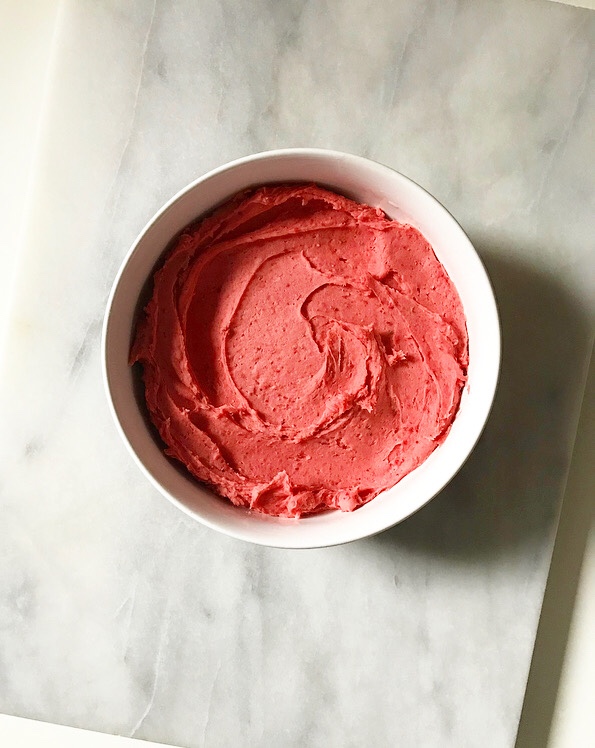 Fluffy buttercream with a fresh strawberry punch? Sign. me. up ❤
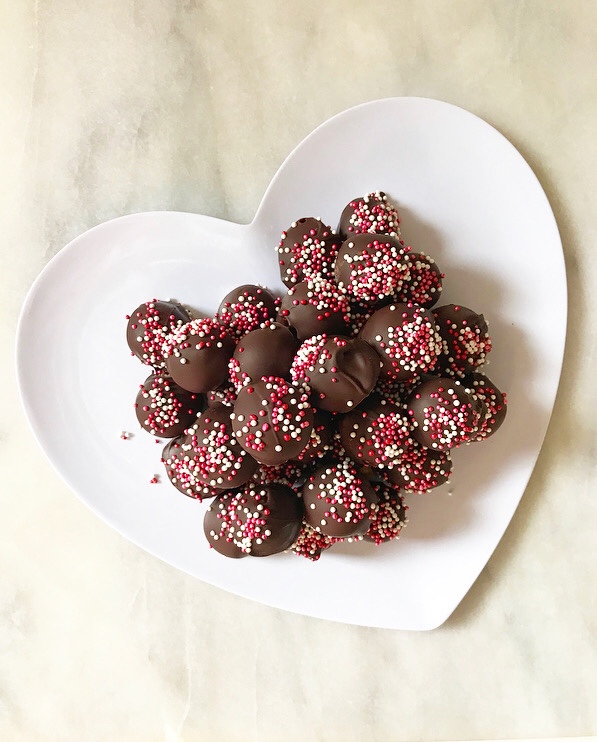
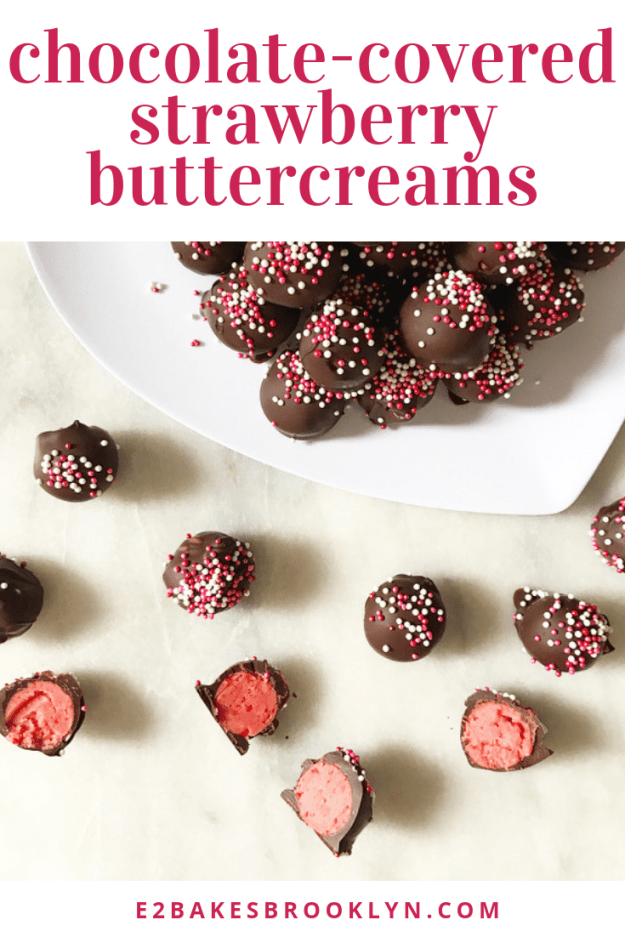
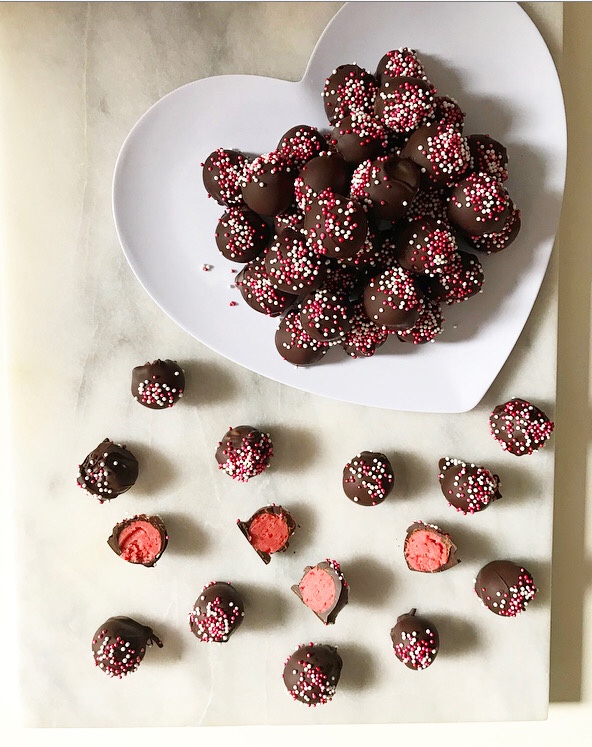 Frosting is, of course, most traditionally used as a flourish on cakes and cookies and bars, but today, I’m putting it in the spotlight with these Chocolate-Covered Strawberry Buttercreams!
 These bite-sized bonbons have sweet, creamy strawberry buttercream centers, a crackly coat of dark chocolate coating, and a smattering of sprinkles—I don’t know about you, but that combination of things is definitely the way to my heart.
 Add to that that these no-bake beauties are are simple to make and keep for days on end (as long as your heavy cream stays good), and you’ve got a Valentine’s Day treat that’ll have people lining up to get your number.
 I mean, they may only want it so that they can get more homemade candy, but is that such a bad thing?

 Remember that
 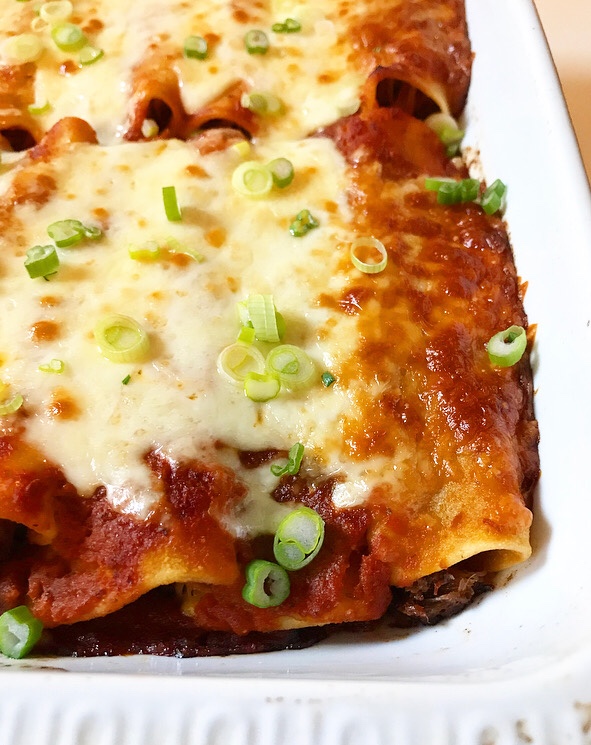 I like to freeze the leftovers by the pound, which works out to about four loosely-packed cups of pulled pork. That way, I can thaw just a little bit at a time. You know, for more sandwiches. Or salads. Or nachos. Or eating directly out of the refrigerator.
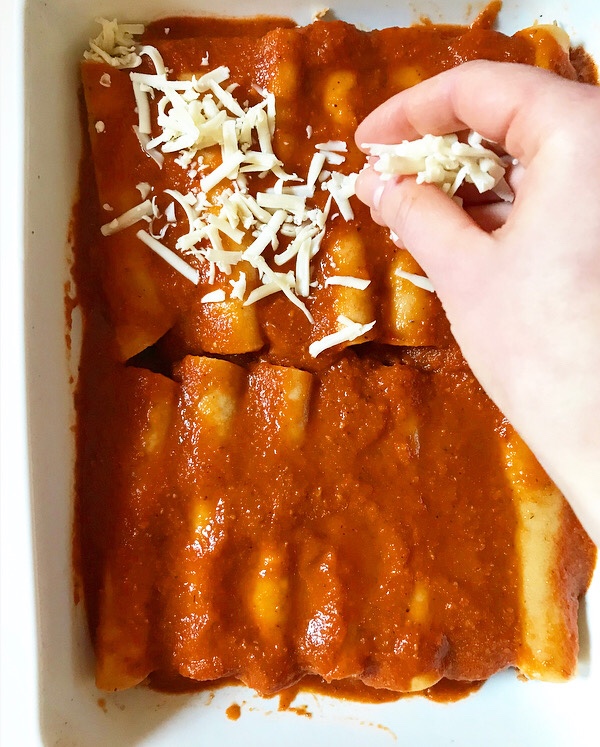
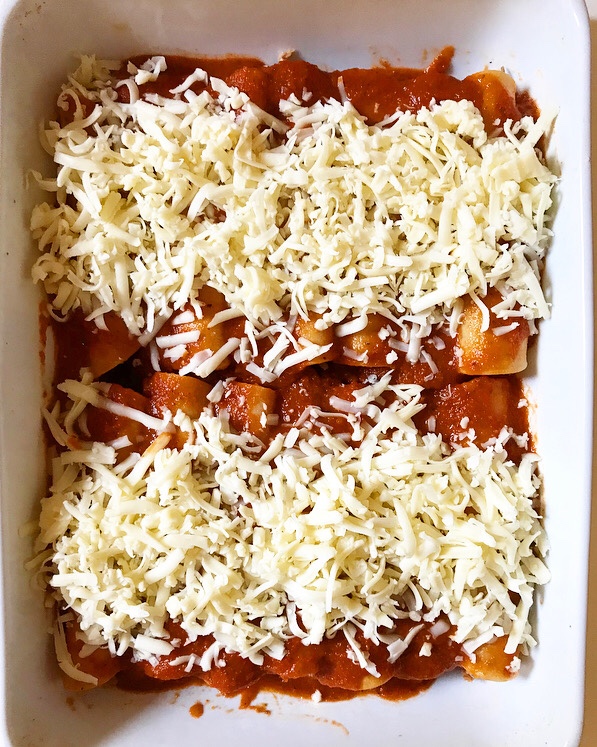
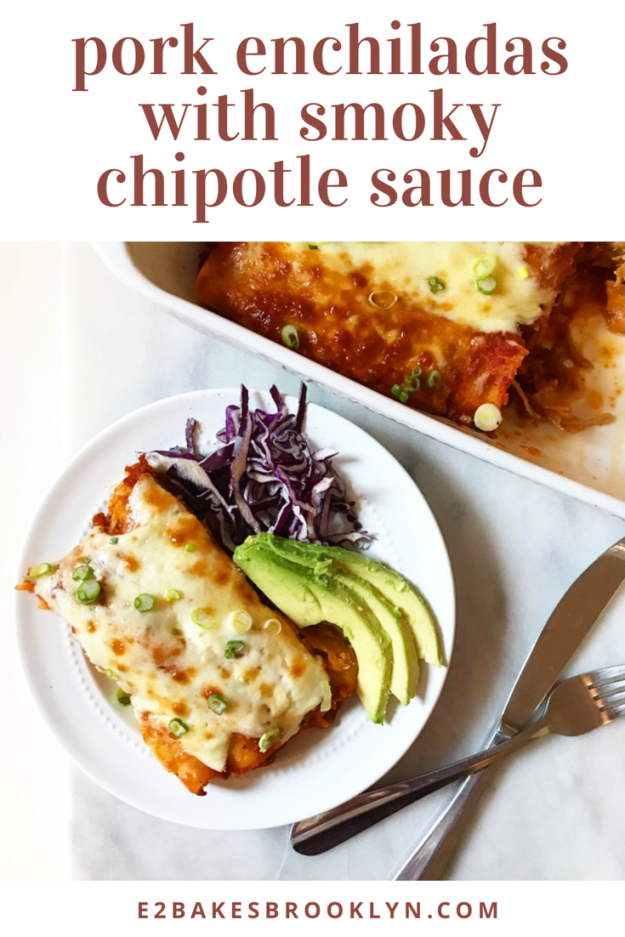
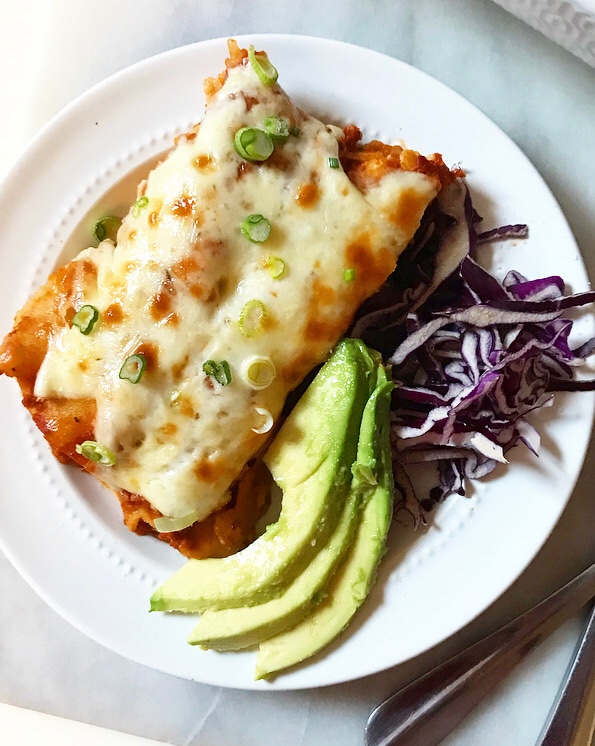 All of those are great options (especially that last one), but these Pork Enchiladas with Smoky Chipotle Sauce are almost certainly my favorite way to repurpose my leftovers! Succulent pulled pork wrapped in tender corn tortillas, covered in a simple homemade sauce, smothered with monterey jack and baked until bubbly? Sign me up!
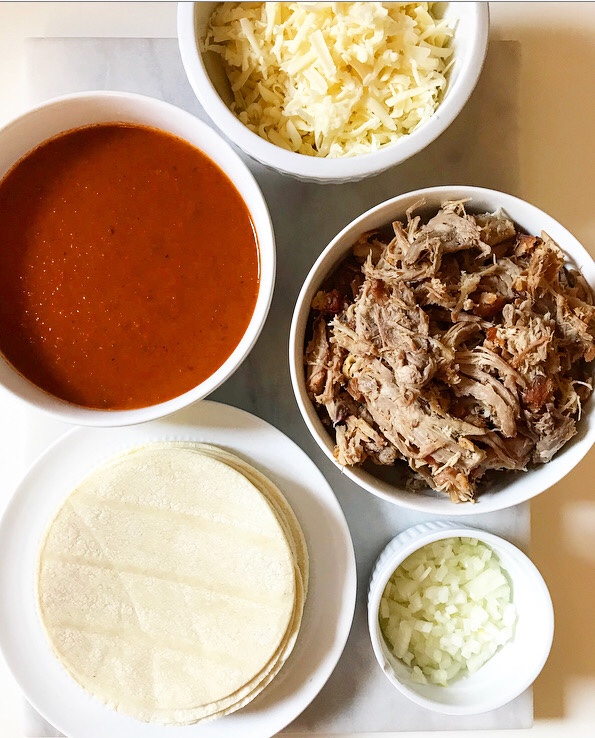
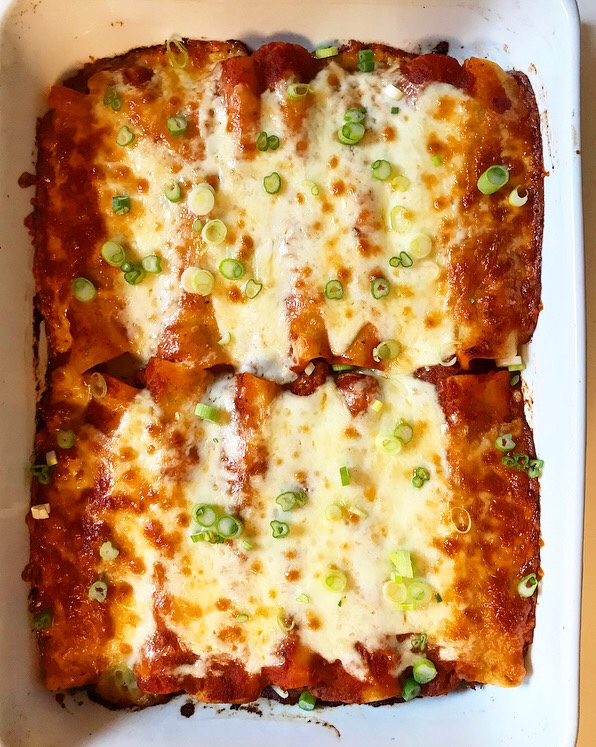 I absolutely love these enchiladas. I made a big batch last weekend, ate them for dinner for four days, and was still sad to see them go! They’re meaty and smoky, cheesy without being greasy or heavy, and since the filling is prepared beforehand, they’re pretty low-maintenance as far as enchiladas go. Did I mention that the sauce can be made ahead, too?
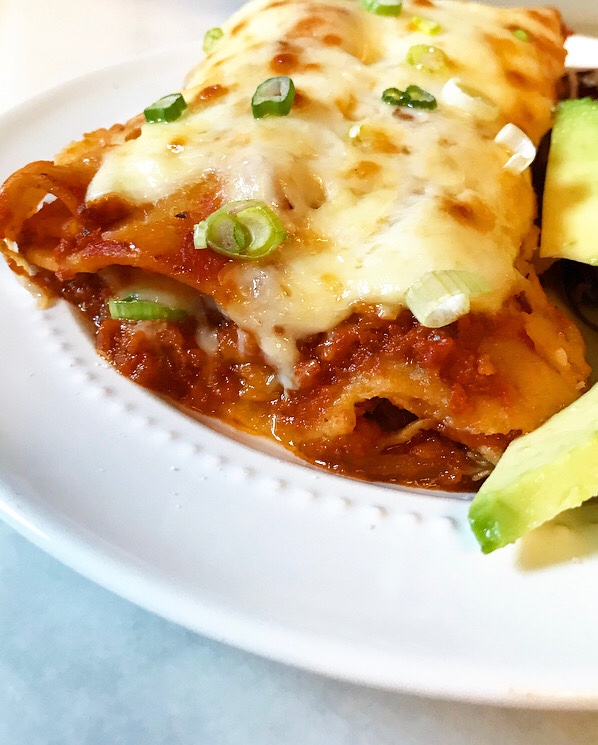 Pork Enchiladas with Smoky Chipotle Sauce would be great with rice and beans, but I like them paired with a big salad and a few slices of avocado. They’re also the sort of dish that works just as well for a weeknight as they do for a dinner party.
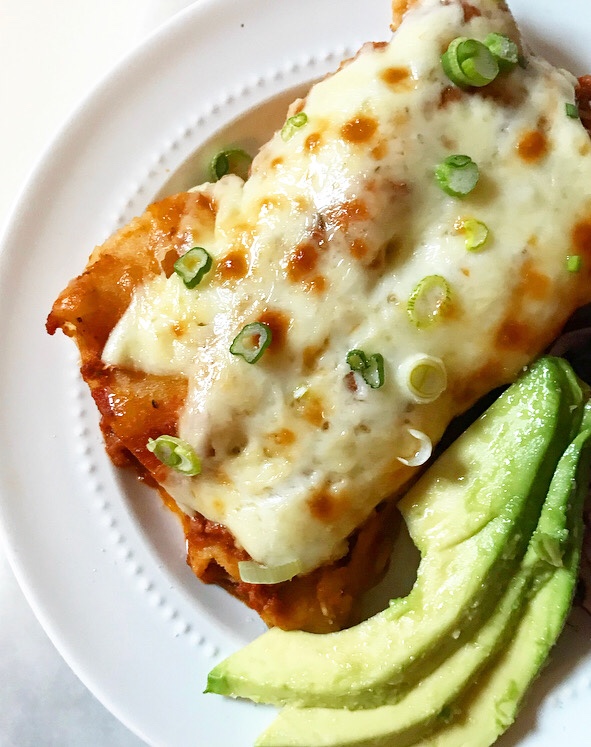 On that note, if you’re making these for a dinner party, I would like to be invited, okay? Okay.
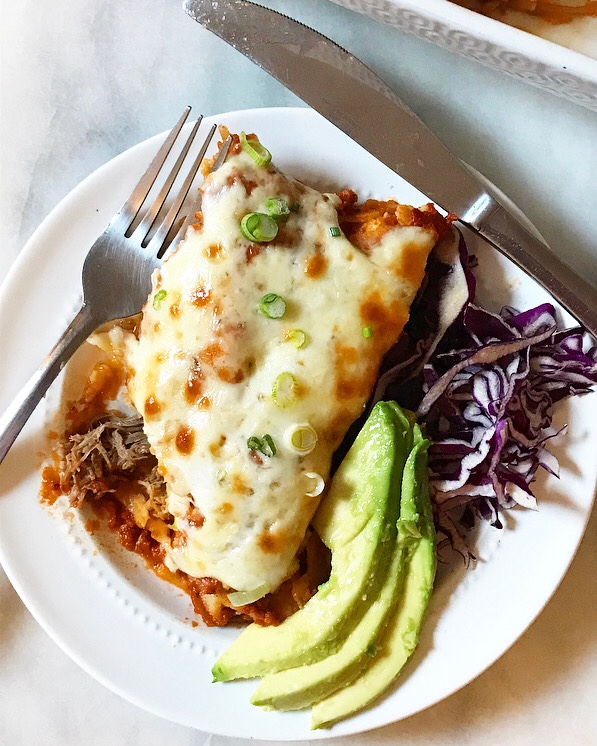

 We may not have done any holiday baking when I was a kid, but we still had plenty of Christmas food traditions. When I was growing up, my mom used to make a breakfast casserole every Christmas morning. While I was (and, honestly, continue to be) wary of any dish with “casserole” in the name, I made an exception for that one. Paired with Mom’s traditional all-citrus fruit salad,* it was impossible for even the pickiest of us to resist. It was so good that we didn’t complain when we were told we had to eat breakfast before opening our gifts. It was magic, I tell you.
 Now, you may have noticed that I am speaking about my mom’s breakfast casserole in the past tense. That’s because she stopped making it about ten years ago, right about the time that my sisters and I started wanting more input in our holiday menu.
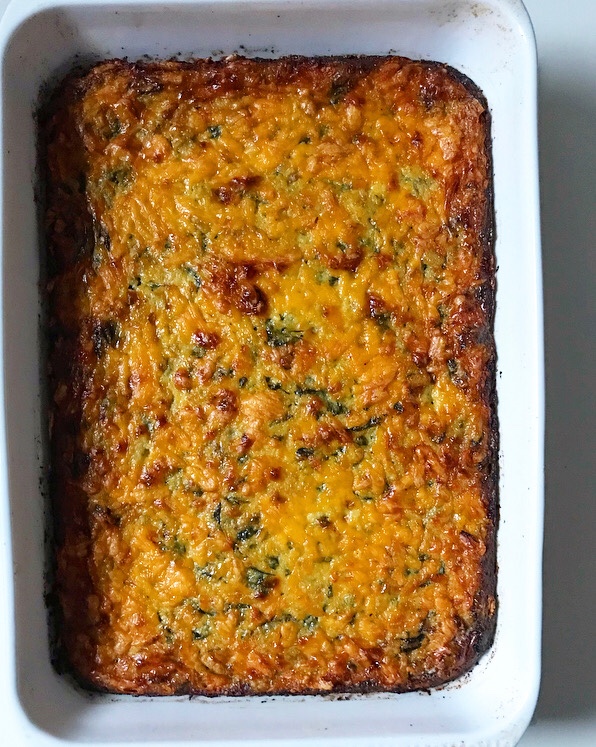
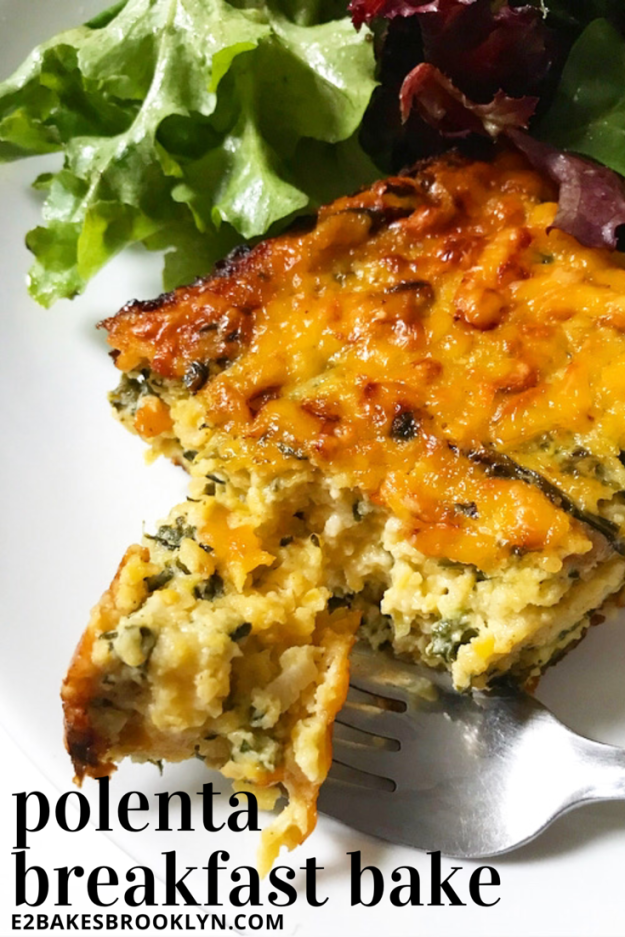
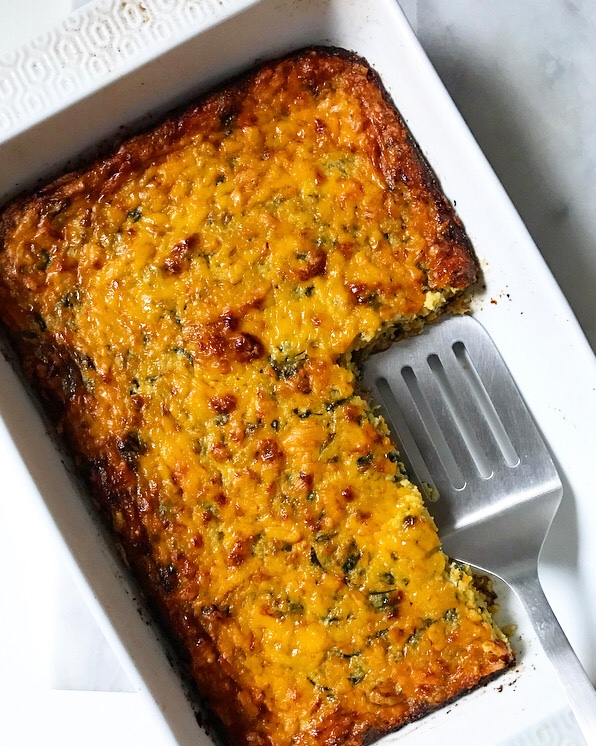 Long story short: today’s Polenta Breakfast Bake is an homage to the Christmas Morning Casserole of my childhood, minus the Bisquick, plus a creamy polenta base and some extra greens. It’s not my mom’s recipe, but it’s damn good.
 Also, it’s naturally gluten-free (thanks, coarse ground cornmeal!). And people think you’re fancy when you say you made polenta anything, so there’s that.
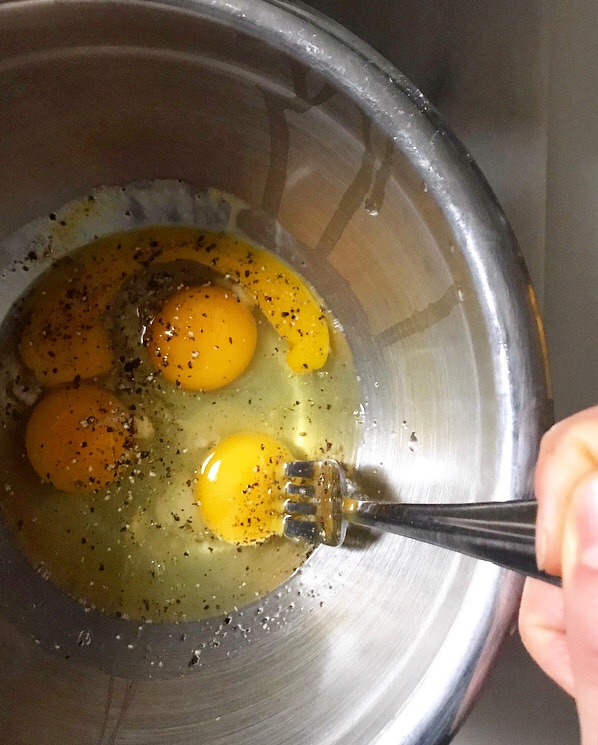
 My favorite thing about this recipe is that, like my mom’s, it doesn’t require any specific timetable. Flexibility is important when it comes to any holiday meal planning, but I am particularly opposed to any recipe that might require me to get up and start puttering around the kitchen when it’s still dark outside. I’ve said it before and I’ll say it again: sleep > baking (and, um, cooking too).
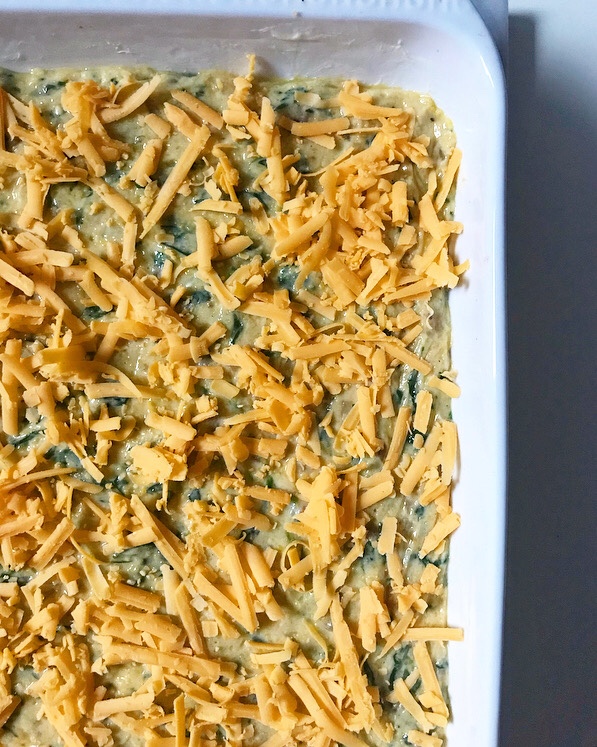
 This Polenta Breakfast Bake can be prepared morning-of, if you are an early bird, but I love that I can assemble it a day or two ahead and then just bake it for 25 minutes before serving. I have a hard time doing anything in the morning without the aid of coffee, but I can absolutely turn on the oven and bake a breakfast casserole for 25 minutes.
 Hot from the oven, this Polenta Breakfast Bake will be a little hard to slice cleanly, so feel free to scoop it instead. I was able to slice the casserole pictured after letting it cool for about half an hour, but I’d be happy to eat this stuff in any shape (or lack thereof). Leftovers keep very well in the refrigerator and will slice & reheat like a freaking dream.
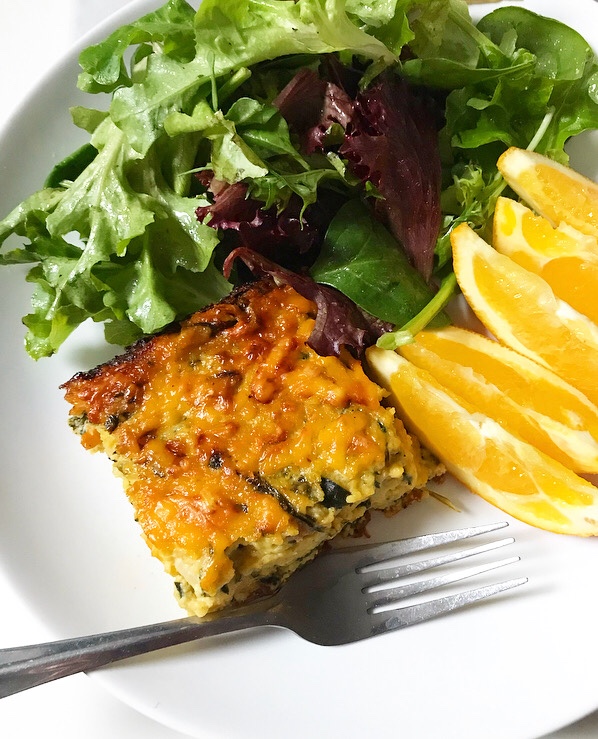 One last thing before I get to the recipe. Like all recipes on this site, I’ve made this Polenta Breakfast Bake to suit my own flavor preferences. I used breakfast sausage and cheddar cheese because those were prominent flavors in my mom’s recipe, but you can swap them for any meat and/or cheese you like in weights equal to those in the recipe. My only word of advice here is that if you choose to use bacon, remove it from the pan while you sauté the onion, garlic, and greens so that it doesn’t burn. Oh, and speaking of greens, feel free to leave ‘em out if you have picky eaters (or if breakfast vegetables just aren’t your thing).


 Let me start by saying that I hope you all had a lovely Halloween, and that I’m so glad it’s over so we can talk about Thanksgiving food.
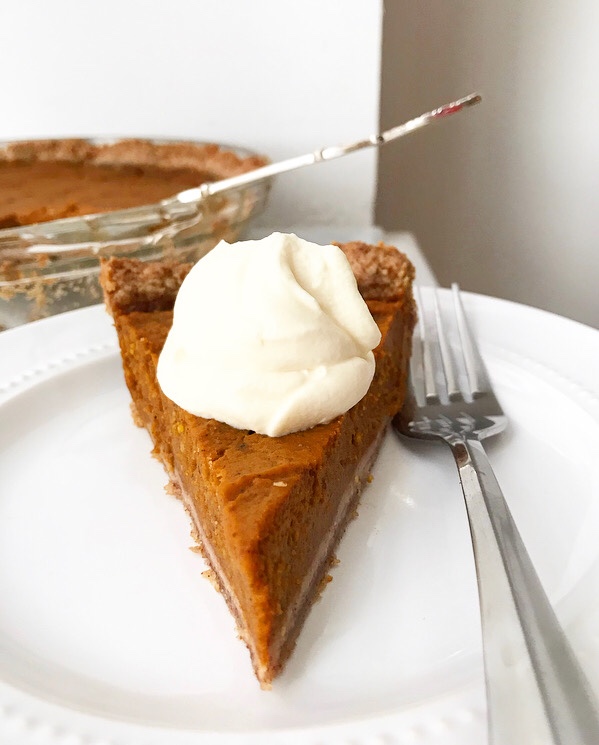 I got a little head start with Wednesday’s
 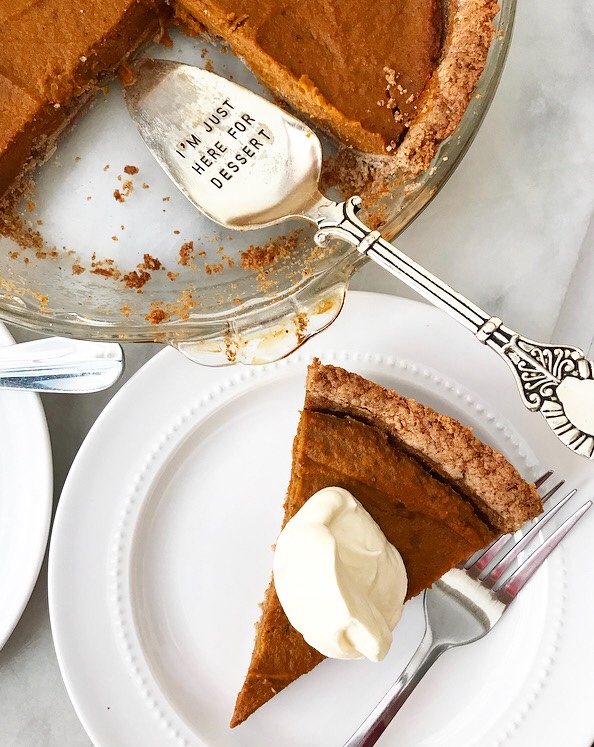 If you haven’t clicked away, never to return…well, good. More pie for us.
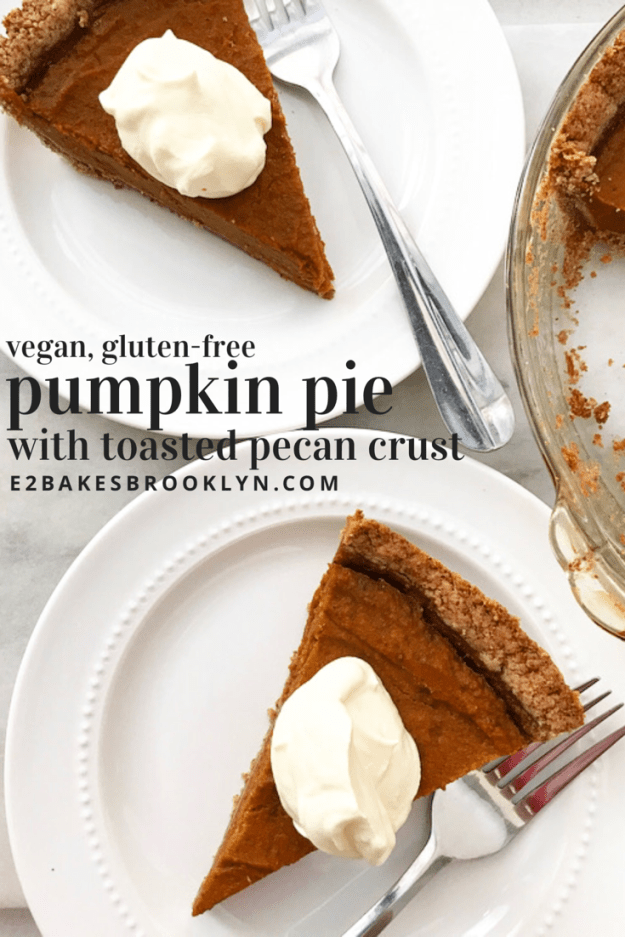
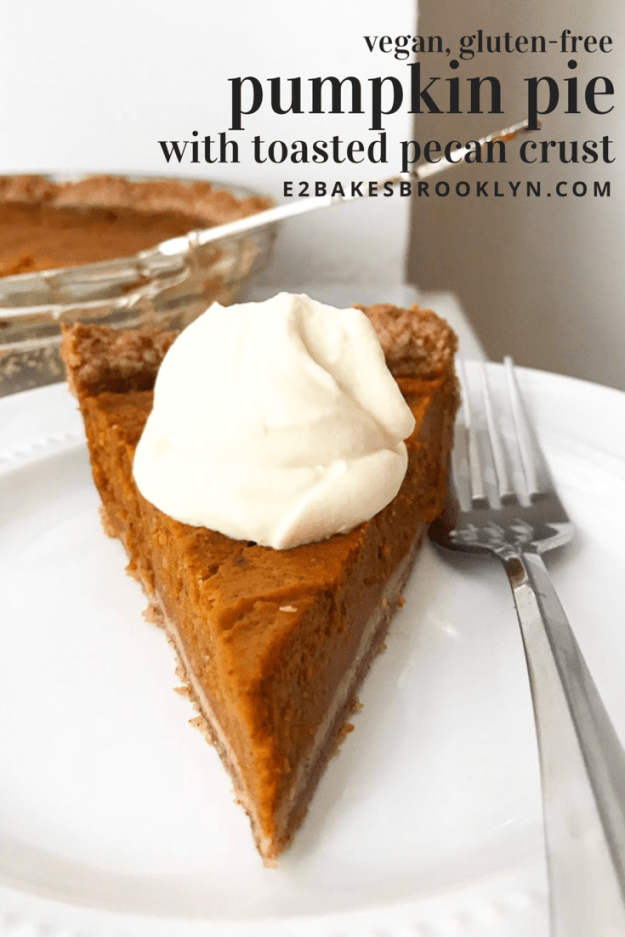
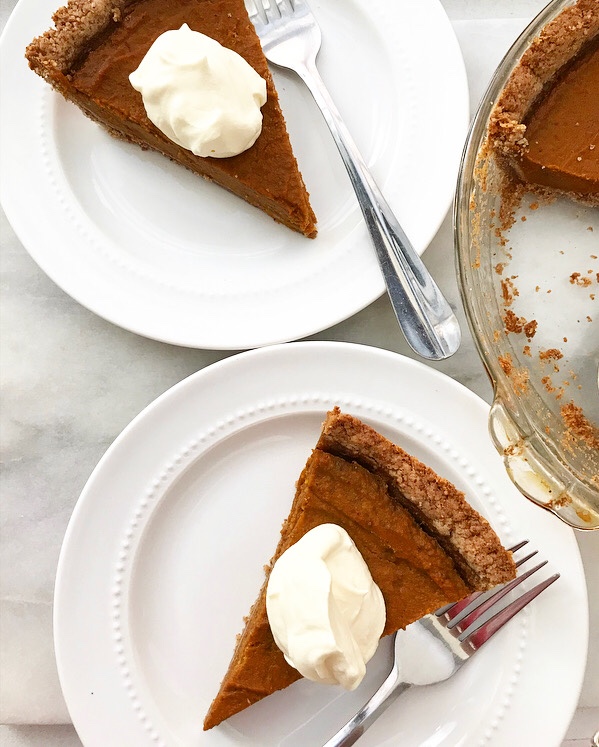
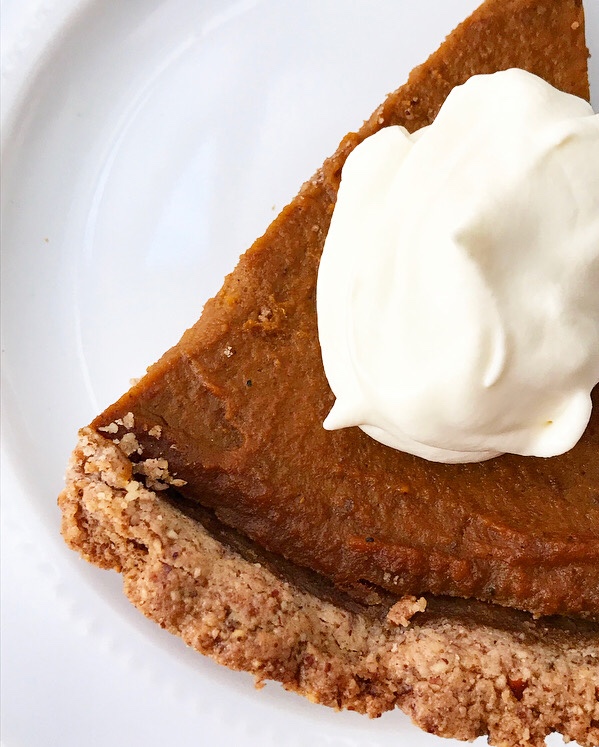 You see, for all the things that this pie is not, it is very much one thing: delicious. Like so good I’m not totally sure why we would eat any other pumpkin pie.
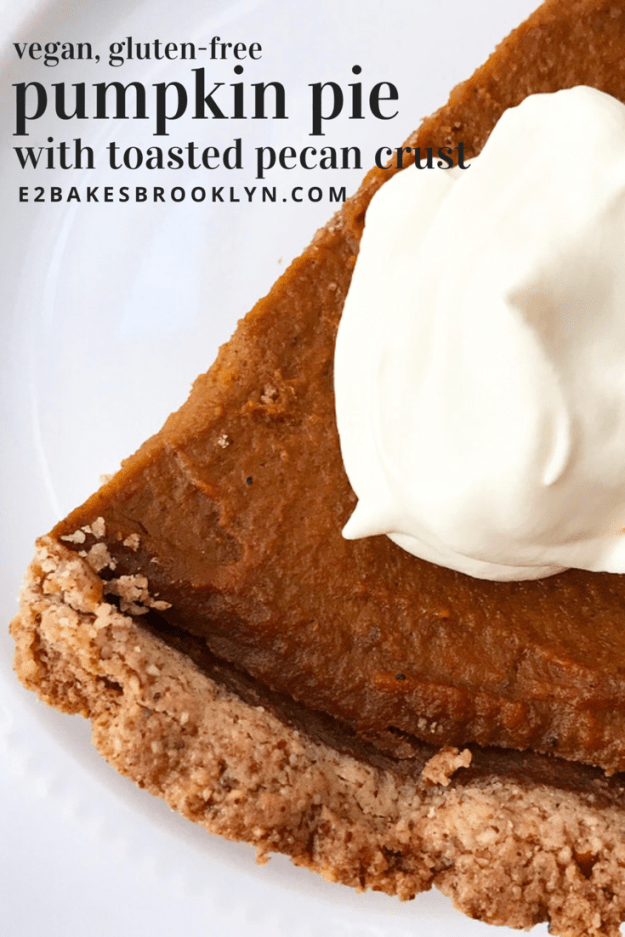
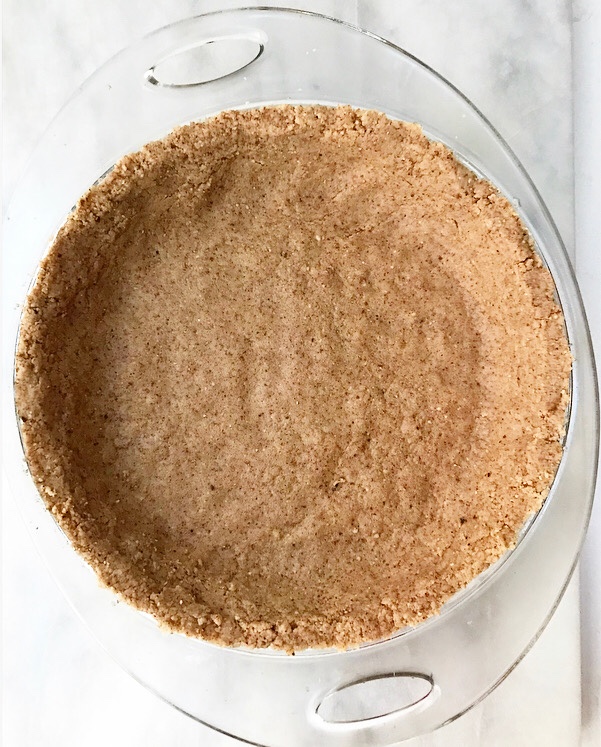
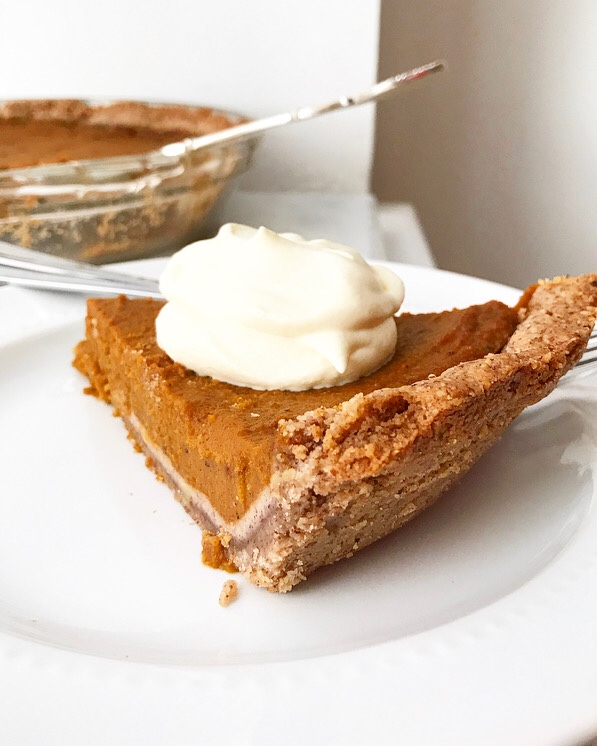 The filling is soft and sweet and perfectly spiced and the crust is mostly made of ground toasted pecans. GROUND TOASTED PECANS. And it’s a press-in crust—no rolling required. Does it get better than that?
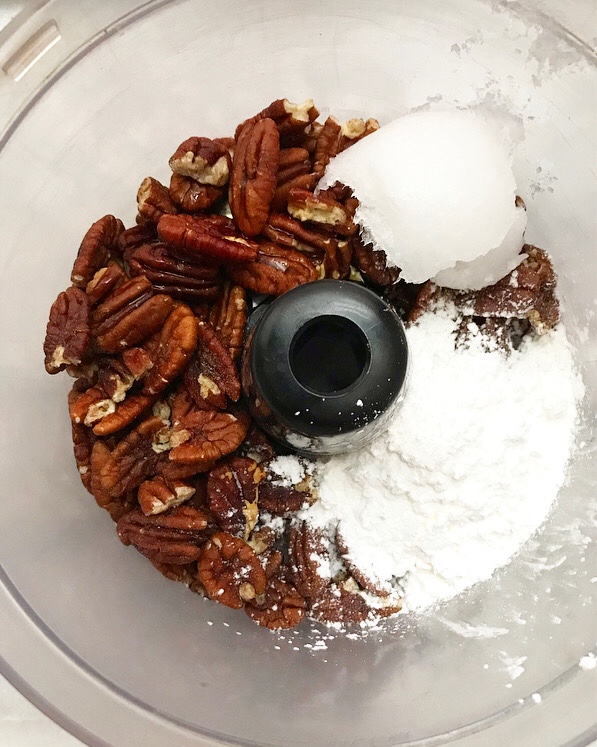
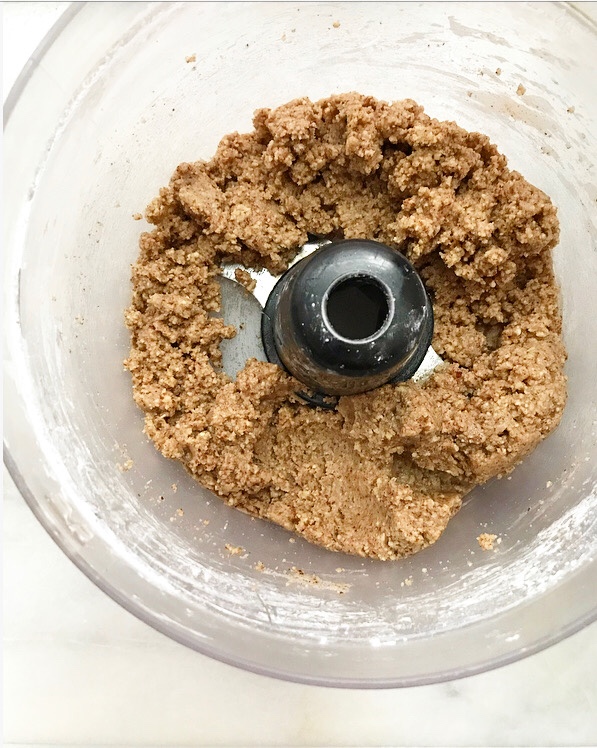
 Both elements come together in the food processor.
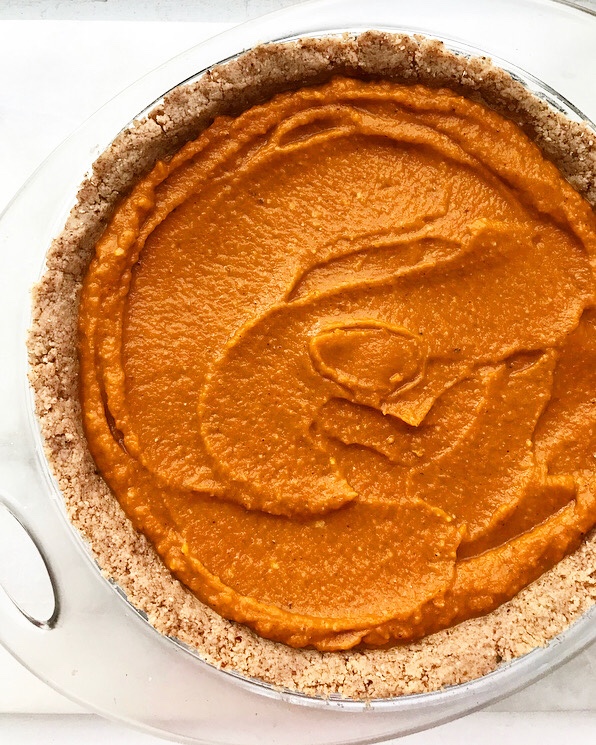 And the whole pie requires exactly nine ingredients.
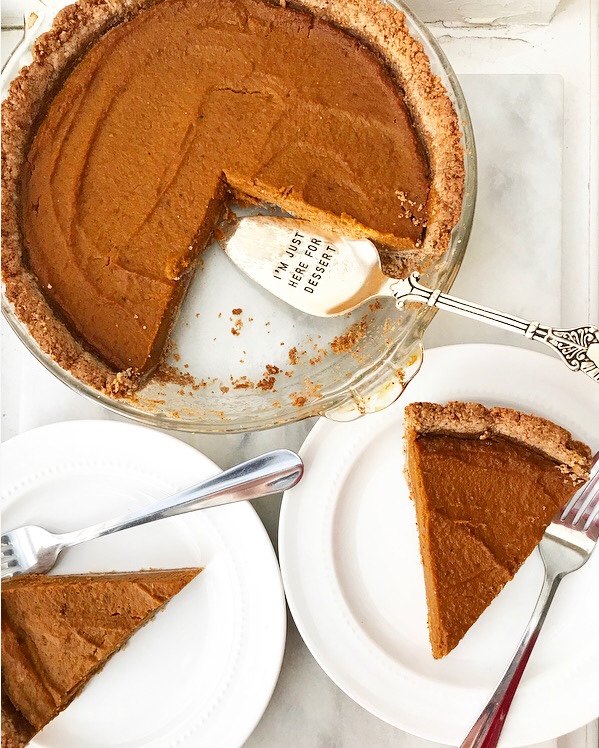 And it’s actually best if it’s made ahead, so you won’t have to give up valuable Thanksgiving Day oven space.
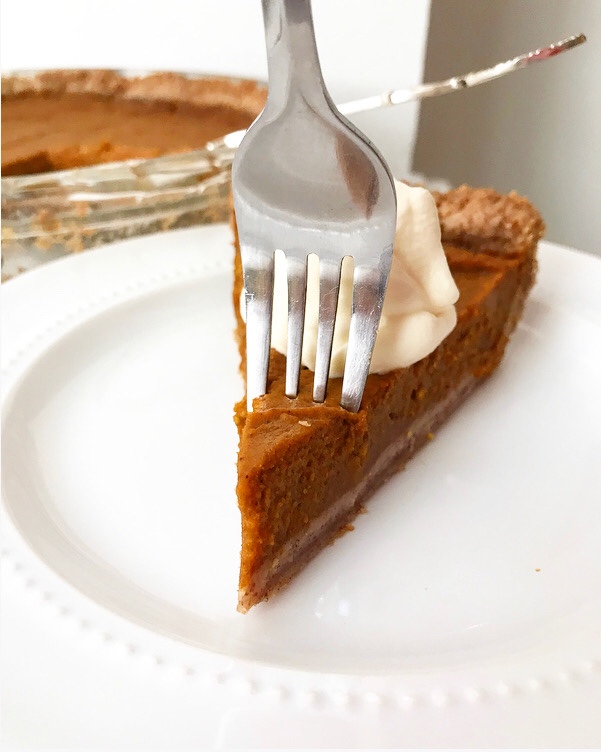 And, again, it’s vegan, gluten-free, and contains just enough sweetener to make it taste like dessert. And make no mistake, it does taste like dessert. I am not the sort of person who is going to get behind a recipe just because it’s “better for you.” Nope. It’s big flavor or go home here at E2 Bakes. If it happens to be somewhat nutritious, that’s just a bonus.
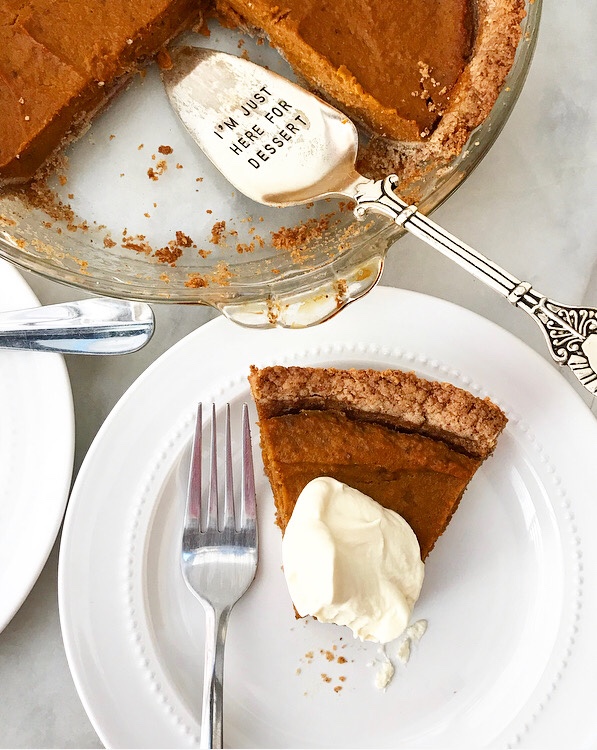 Have a great weekend, y’all ❤