Category Archives: Holiday

Pumpkin Pancakes

Pumpkin Pancakes

Two pumpkin recipes in a row?! ‘Tis the season.

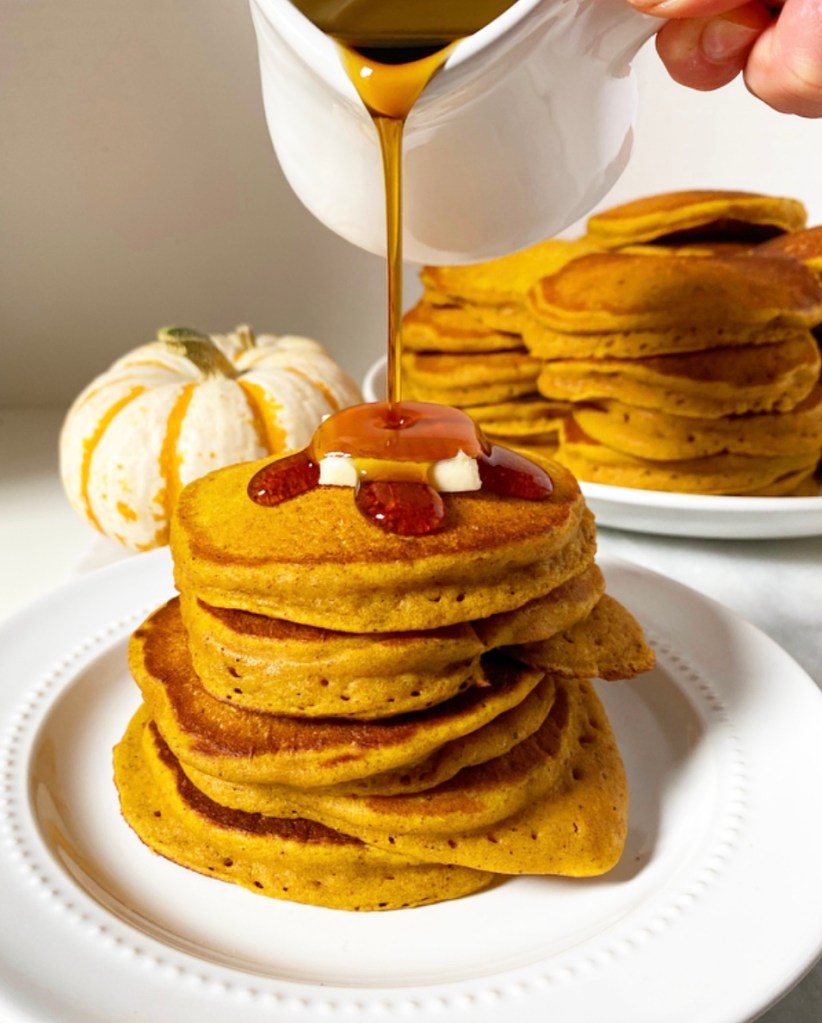
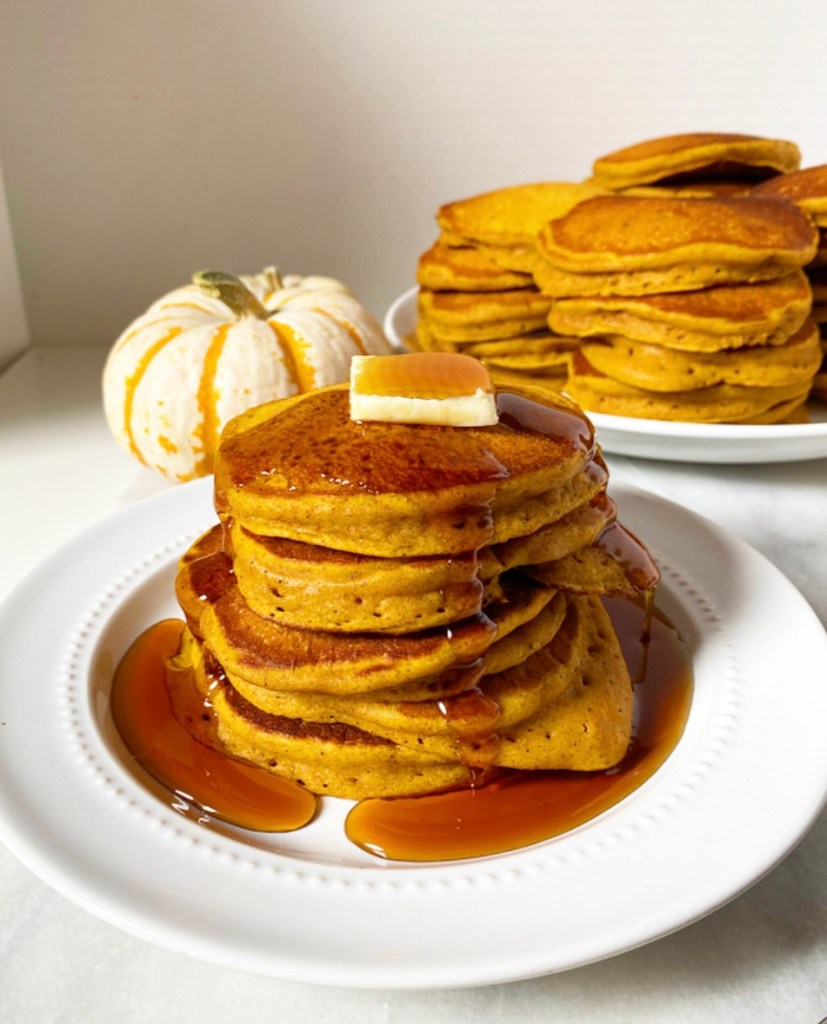
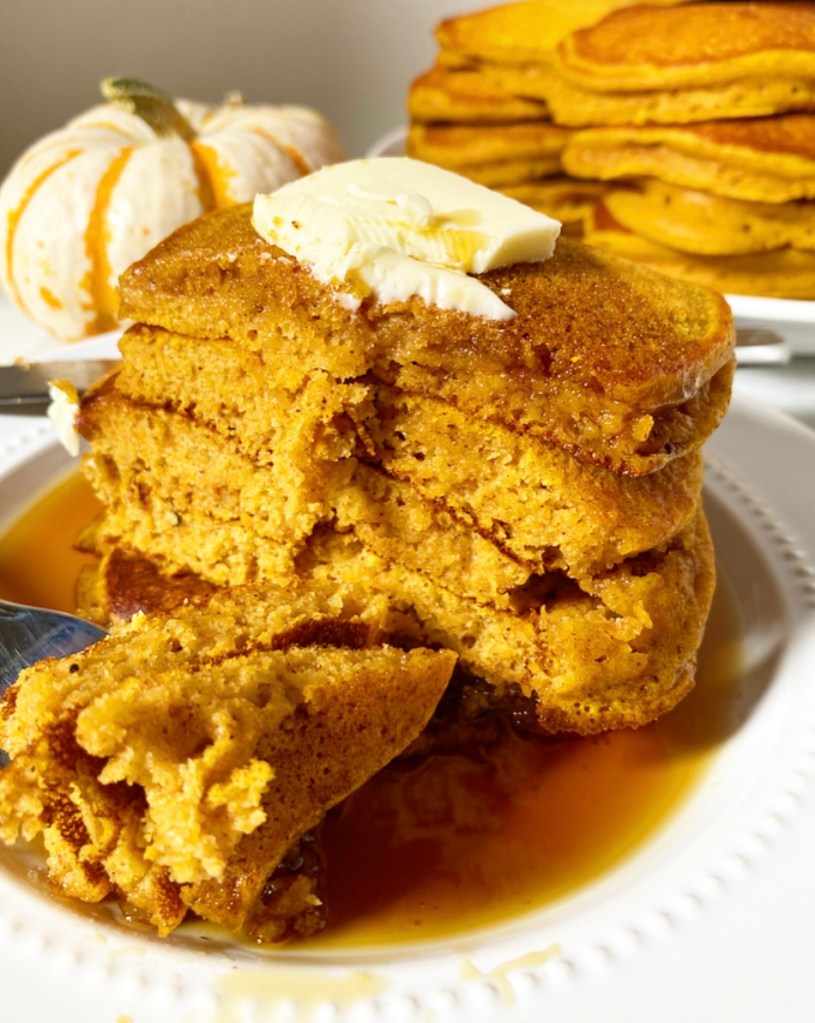
And even if it weren’t, the prospect of these fluffy, golden Pumpkin Pancakes might just get me to crack open a can of the orange stuff any ol’ time. Even in the middle of summer. But seeing as it’s October right now, I suppose I’ll cross that bridge when I get to it.

Pumpkin Pancakes

Right here, right now though, on this autumnal Wednesday? Nobody can argue with me about seasonality. They can call me basic if they want, but if being basic means I get to have a stack of Pumpkin Pancakes for breakfast and then stock my freezer for an inevitable mid-November Pumpkin Pancake “emergency?” Well, call me basic.

Call me whatever you want, in fact. Just don’t forget to call me when you’re making these for breakfast.

Pumpkin Pancakes
makes 18 pancakes

1 1/2 cups all-purpose flour
3 tablespoons light or dark brown sugar, packed
2 teaspoons pumpkin pie spice
2 teaspoons baking powder
1 teaspoon baking soda
3/4 teaspoon Kosher or sea salt
1 cup pure pumpkin purée
1 1/3 cup milk or buttermilk, room temperature
1/4 cup (1/2 stick) unsalted butter, melted
2 large eggs, room temperature
2 teaspoons pure vanilla extract
canola or vegetable oil, for cooking

For serving:
pats of butter
chopped nuts
maple syrup

Preheat oven to 200F. Line a rimmed sheet pan with parchment. Set aside.

In a large mixing bowl, whisk together flour, brown sugar, pumpkin pie spice, baking powder, baking soda and salt.

In a medium mixing bowl or large measuring cup, whisk together pumpkin purée, milk (or buttermilk), melted butter, eggs and vanilla. Add wet ingredients to dry and whisk until no streaks of flour remain—there will still be some lumps. Let batter rest 5-10 minutes.

Heat your pan or griddle over medium heat for a few minutes, until heated through. Brush with oil (or grease lightly), then wipe excess out with a folded paper towel or kitchen towel.

Stir rested batter one or two strokes. Pour 1/4 cup increments of batter on greased pan. Let cook 2-3 minutes, until bubbles are forming and they are turning golden. Flip with a spatula and cook for 2 minutes, or until the bottom is turning golden. Remove to prepared baking sheet and keep warm in the oven until serving.

Continue making pancakes with remaining batter, greasing the pan only as necessary.

Serve immediately with butter, chopped nuts and/or maple syrup, if desired.

Leftover pancakes may be stacked in threes, triple-wrapped in plastic wrap and frozen for a couple of months. Discard plastic and microwave 2.5 to 3 minutes before serving.

Friday Favorites: Apples

Friday Favorites: Apples​

It’s apple season and I am here for it! They were littered everywhere when we were leaving Maine a couple of weeks ago, and it took everything in me not to scoop them up and bring them home to bake! While I wouldn’t trust apples growing in NYC parks (much less on the ground), I definitely trust the ones at the markets! Whether they’re tucked into a pie, folded into a buttery cake batter, or rolled up in yeast dough, baking with apples is one surefire way to get in the seasonal spirit! Here are a few of my favorite apple recipes from the archives.

Friday Favorites: Apples​

Cranberry Apple Pie

This recipe is from the first few weeks of this blog’s existence, but I remade it last year (she needed some Glamourshots), and I’m here to tell you: it’s SO delicious. Sweet and tart and perfectly spiced, this is one to make when cranberries start showing up in a few weeks!

Friday Favorites: Apples​

Apple & Pear Galette

I love pie, but the ease of galettes wins me over every time! Here apples and ripe pears are nestled into a rustic free form pie crust. It’s a perfect autumnal dessert if I’ve ever had one!

Friday Favorites: Apples​

Apple Pie Cinnamon Rolls

Want the flavors of apple pie for breakfast? Make yourself some Apple Pie Cinnamon Rolls! These were my second post ever, and having remade them for a photoshoot recently, I can confirm that they still make all my apple pie breakfast dreams come true.

Friday Favorites: Apples​

Apple Turnovers

I love turnovers! They’re like pop tarts for grown ups. This apple version is made with my go-to rough puff pastry and folded on the bias for the flakiest little triangles of apple goodness you’ve ever had.

Friday Favorites: Apples​

French Apple Cake

This is easily the most popular recipe on this blog, and for good reason. Its pure, buttery cake base and chunks of soft apple have no pie spices to detract from their balance of flavors. I clearly love apple pie things, but this simple favorite is something really special.

What’s your favorite way to bake with apples? Let me know in the comments or on social media!

Cornmeal Summer Shortcakes

Cornmeal Summer Shortcakes

Like so many of my favorite recipes, these Cornmeal Summer Shortcakes came to be on a whim. There were no plans; I was just playing around with cornmeal leftover from making Blueberry Corn Muffins on a Wednesday morning when shortcake inspiration struck.

Cornmeal Summer Shortcakes

I set to work making a batch of my trusty Cornmeal Biscuits, which are somewhere between a buttermilk biscuit and cornbread. They’re tender and a touch crumbly, but still pretty sturdy—perfect for shortcakes. I added a little extra sugar and cut them larger than I normally would for maximum surface area.

Cornmeal Summer Shortcakes

I baked them up and let them cool, spending the lag time digging through my fridge for seasonal fruit. I sliced up a couple of perfect nectarines and tossed in some blueberries, then added a few tablespoons of sugar and let them macerate. I also whipped some cream.

Cornmeal Summer Shortcakes

Then I assembled the whole lot. The cooled biscuits were sliced into two thin disks and piled high with whipped cream and fruit, only to be quickly demolished with forks and fingers.

Cornmeal Summer Shortcakes

Oh my goodness, y’all, these Cornmeal Summer Shortcakes are so good. Sweet, but not too sweet. Fluffy, tender, just corny enough. Creamy, fruit-forward. Full-on late summer vibes. Not bad for Wednesday morning baking improv.

Cornmeal Summer Shortcakes
makes about 10 shortcakes

2-3 ripe nectarines (or peaches or other stone fruit), thinly sliced
1 cup blueberries
5 tablespoons granulated sugar, divided
2 cups heavy cream
2 teaspoons pure vanilla extract
1 batch Cornmeal Biscuits for Shortcakes (recipe below)

In a small-medium mixing bowl, toss together nectarines, berries and 3 tablespoons of sugar. Cover the bowl with plastic wrap and let sit (macerate) at room temperature for up to an hour.

When the biscuits are cool and the fruit is ready, make the whipped cream. In a large mixing bowl, combine heavy cream, vanilla, and 2 tablespoons of sugar. Use an electric mixer on medium-high speed to whip cream until stiff peaks form.

Assemble shortcakes. Use a fork to gently split biscuits in half equatorially (it’s okay if they’re not perfect). Gently move the bottom half of a biscuit to a plate. Top with whipped cream and fruit. Place the top half of the biscuit over the top. Garnish with more whipped cream and berries, if desired. Serve immediately.
Cornmeal Biscuits for Shortcakes
makes about 10 shortcakes

1 1/3 cup all-purpose flour
2/3 cup yellow cornmeal
4 tablespoons granulated sugar
1 tablespoon baking powder
1/2 teaspoon Kosher or sea salt
6 tablespoons unsalted butter, very cold, cut into cubes
2/3 cup buttermilk, very cold

For finishing:
2 tablespoons unsalted butter, melted

Preheat oven to 425F. Line a baking sheet with parchment. Set aside.

In a large mixing bowl, whisk together flour, cornmeal, sugar, baking powder, and salt. Add butter and use a pastry blender (or two forks or very clean fingertips) to break it down until the largest pieces are the size of small peas. Use a silicone spatula or wooden spoon to stir in buttermilk until a dough forms.

Flour a surface and your fingertips. Turn dough onto the surface and pat until it’s 1/2-inch thick. Use a 2 3/4-inch biscuit cutter to cut biscuits. Make sure to cut directly down—do not twist. Place cut biscuits a couple of inches apart on prepared baking sheet. Chill dough/baking sheet if anything becomes too warm/sticky at anytime in this process.

Bake biscuits 12-15 minutes, or until puffy and golden. Remove from oven and brush tops with melted butter.

Let biscuits cool until you can handle them. Cool completely before using for shortcakes.

Cornmeal Biscuits are best the day they are made, but will keep in an airtight container at room temperature for up to 48 hours.
Cornmeal Summer Shortcakes

Bostock {Toasted Brioche with Almonds}

Bostock {Toasted Brioche with Almonds}​

If you’ve ever seen fancy-looking Bostock in a bakery, you may be surprised to learn that it’s a snap to make as far as French pastry goes. The origin of the name is up for debate, but it’s sometimes also referred to as Brioche aux Amandes or “almond brioche.” All that is fine and good—almonds and brioche are enough of a selling point—but I was drawn to Bostock when I learned it’s not actually a pastry on its own, but instead a way to repurpose day-old bread. Yep, it’s the pastry equivalent of French toast! Bostock is nothing more than thick, day-old slices of brioche painted with simple syrup, topped with frangipane and sliced almonds (and sometimes seasonal fruit), and baked until golden.

Bostock {Toasted Brioche with Almonds}​

Permitting you are using store bought brioche, this recipe comes together very quickly. Simple syrup is made from equal volumes of sugar and water, and takes only five minutes to simmer. Frangipane, a sweet almond pastry cream made primarily of almond flour, sugar, butter and an egg, just needs two minutes in the blender. See? Quick and easy! Also, if you are more organized than I am, both elements can be made up to a week ahead—just make sure to let your frangipane come to room temperature before you try to spread it on the delicate brioche.

Assembly is easy as can be. Cut the stale brioche into 8 thick slices, then give each one a heavy brush of simple syrup and a luxurious smear of frangipane. Add some fresh fruit if you like, or don’t; I sliced up a nectarine for half my pastries. Sprinkle on some sliced almonds and bake your Bostock for 25-30 minutes, or until it’s puffed and browned a bit.

Bostock {Toasted Brioche with Almonds}​

One more wonderful thing about Bostock? You don’t have to let it cool completely! Definitely don’t eat it straight out of the oven, but go right ahead and enjoy it warm with a (admittedly heavy) dusting of confectioner’s sugar. It’s crispy and toasty at the edges, and the frangipane squidges against your teeth in the most satisfying way. Bostock is softer at room temperature, but still pretty dang stellar. I haven’t seen many people tell you to eat it cold, but I’ll admit that I like the leftovers straight from the fridge, too.

Bostock {Toasted Brioche with Almonds}​

Like its spiritual cousin French toast, Bostock is a genius way to repurpose leftovers into something much greater than the sum of its parts. While the classic recipe is made with brioche, you could give the Bostock treatment to a number of leftover carbs. Challah, stale croissants, and day-old waffles come to mind. You could also swap out the simple syrup for warmed jam—I’m absolutely going to try matching the flavor with my seasonal fruit topping next time! Saturday morning double cherry Bostock, anyone?!

Bostock {Toasted Brioche with Almonds}​
Bostock {Toasted Brioche with Almonds}
makes 8 servings

Simple Syrup:
1/3 cup granulated sugar
1/3 cup water

Frangipane:
1 cup blanched almond flour or 4 ounces blanched almonds
1 tablespoon all-purpose flour
pinch of Kosher or sea salt
6 tablespoons granulated sugar
6 tablespoons unsalted butter, cold-ish room temperature, cut into cubes
1 large egg
1/2 teaspoon pure almond extract

For Assembly:
8 thick slices brioche, preferably a bit stale (mine were from 1 14oz loaf)
2 medium sliced nectarines or other seasonal fruit (optional)
2-3 tablespoons sliced almonds
2 tablespoons confectioner’s sugar

Arrange a rack in the center of the oven. Preheat the oven to 350F. Line a rimmed sheet pan with parchment paper. Set aside.

Make the simple syrup. Combine water and sugar in a small saucepan. Heat over medium heat, stirring occasionally, until sugar has dissolved. Remove from heat. Set aside.

Make the frangipane. In a food processor (or very good blender), pulse almond flour, all-purpose flour, salt and sugar together. Pulse in butter. Pour in egg and almond extract, and process until frangipane is a homogenous paste.

Place brioche slices in a single layer on the prepared pan. Brush each slice with simple syrup, making sure to use up all the syrup. Spread about 2 heaping tablespoons of frangipane over each slice of brioche, covering the entire top. Press in fruit, if using, then sprinkle on the sliced almonds.

Bake Bostock for 25-30 minutes, until the frangipane as begun to brown in places. Let cool on a rack for at least 15 minutes before dusting with confectioner’s sugar and serving slightly warm or at room temperature.

Bostock is best the day it’s made, but may be wrapped and kept in the refrigerator for a couple of days.
Bostock {Toasted Brioche with Almonds}​

Vegan Chocolate Hazelnut Cheesecake

It is far too hot to bake today, but that’s okay because Vegan Chocolate Hazelnut Cheesecake requires no baking at all.

Vegan Chocolate Hazelnut Cheesecake

We’re talking all the rich, creamy, irresistible texture of a classic cheesecake with none of the dairy and exactly zero reasons to crank your oven. Oh, and more deep dark chocolate-hazelnut flavor than you can shake a stick at. (What does that even mean?)

This take on vegan cheesecake is made with toasted hazelnuts for flavor and raw cashews for creamy texture. They’re soaked together overnight for maximum tenderness, then combined in a blender with coconut cream, coconut oil, maple syrup, vanilla extract, salt, and—oh yeah—half a pound of melted dark chocolate. Put on the lid and then blitz-blitz-blitz until smooth.

This is the part where I get on my soapbox:

Please get yourself a good blender. You deserve a good blender. Good doesn’t necessarily mean expensive—it means a blender that actually blends things until smooth. Whether that’s a fifty year-old Oster (my parents’ amazing blender) or a Vitamix, a solid blender is crucial to vegan cheesecake success, and a million other things. I have a Ninja that I bought for $100 five years ago and it rules. Get a good blender!!!

*steps off soapbox*

Ahem…the batter is then poured over an Oreo crust—yes, Oreos are vegan!—and chilled until firm. Then it’s released from the springform and finished off with some Homemade Chocolate Shell and easy candied hazelnuts before being sliced and served. You can use a plate and fork if you’re fancy (or taking pictures) or just eat ice cold slices with your fingers like a wild animal, as I did.

Vegan Chocolate Hazelnut Cheesecake

I’m pretty sure that’s what hot girl summer is all about.

Vegan Chocolate Hazelnut Cheesecake
Vegan Chocolate Hazelnut Cheesecake 
makes one 9-inch cheesecake

Filling:
1 cup whole raw hazelnuts
1 cup whole raw cashews
1 14-ounce can coconut cream (not cream of coconut)
4 tablespoons maple syrup
1 1/2 teaspoons pure vanilla extract
1/4 teaspoon Kosher or sea salt
6 tablespoons coconut oil (preferably refined), melted and cooled
8 ounces dark chocolate, melted

Crust:
24 Oreos (or other chocolate sandwich cookies)
5 tablespoons coconut oil or melted vegan butter

Candied Hazelnut Garnish:
1/3 cup whole raw hazelnuts
3 teaspoons granulated sugar
Homemade Chocolate Shell

The night before you want to make the cheesecake, toast and peel the hazelnuts. Place hazelnuts in a dry skillet over medium heat. Stir frequently until fragrant, 7-10 minutes. Immediately transfer hazelnuts to a clean, dry hand towel. Fold towel around the hazelnuts and then rub the towel with the palm of your hand. This will allow the hazelnut skins to loosen. This step does not have to be done perfectly.

Place peeled hazelnuts in a 3-4 cup container that has a lid. Add cashews. Cover with water. Refrigerate for 4-12 hours.

Lightly grease a 9-inch springform pan with coconut oil.

Make the crust. Place Oreos in a high-powered blender and blitz until they are crumbs. Add coconut oil or melted vegan butter, and pulse until the mixture can be pinched together. Transfer crust mixture to prepared pan, and press it to the edges to form an even layer. Refrigerate for 15 minutes to set.

Very carefully wipe it out the blender with a paper towel.

Make the filling. Drain soaked hazelnuts and cashews and place them in the blender. Add half of the coconut cream (~2/3 cup), maple syrup, vanilla, and salt. Process until the mixture is smooth. Add remaining coconut cream & coconut oil, followed by melted chocolate. Continue processing until everything is fully combined and smooth.

Pour filling mixture over crust and smooth with an offset spatula. Refrigerate for at least 3 hours (or freeze for 1 hour).

Make the candied hazelnut garnish. Line a plate with parchment and set aside. Place hazelnuts in a dry skillet over medium-low heat. Toast for 2-3 minutes, stirring frequently, until fragrant and shiny. Add sugar by the teaspoon, stirring until it dissolves (it may smoke up a bit). When all sugar has dissolved, remove hazelnuts to prepared plate. Let cool completely. Place on a cutting board and give them a rough chop with a large, sharp chef’s knife.

Run a thin, flexible knife around the edge of the pan. Release the cheesecake from the springform pan, and allow it to sit at room temperature for 10 minutes. Drizzle with chocolate shell, then immediately scatter on the candied hazelnuts. Slice with a large, sharp chef’s knife, wiping the blade clean between cuts. Serve.

Leftovers will keep covered in the refrigerator for a few days. Filling may slump slightly in very hot weather.
Vegan Chocolate Hazelnut Cheesecake