Olive Oil Marinated Broccoli

Updated 05/16/2019: This post was edited to add better photos, to make the make blanching & shocking the broccoli mandatory, and to reduce the olive oil. It’s still my favorite side dish. You should double it.Olive Oil Marinated Broccoli
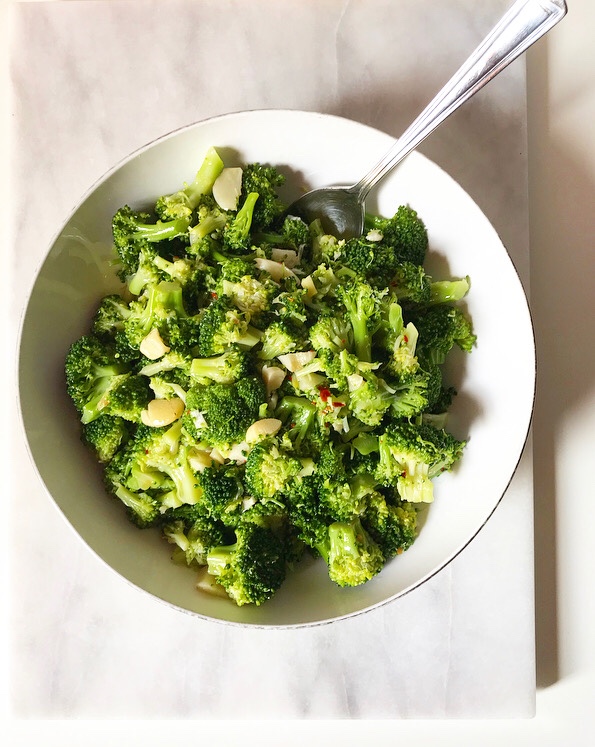
Let’s take a sugar break. It’s been a while since I’ve posted anything on the real food side of things, and I’ve honestly overdone it with all the treats lately. But who can blame me? There were Peanut Butter Cupcakes with Oreo Buttercream to be had! I don’t care to admit how many I ate in three days…

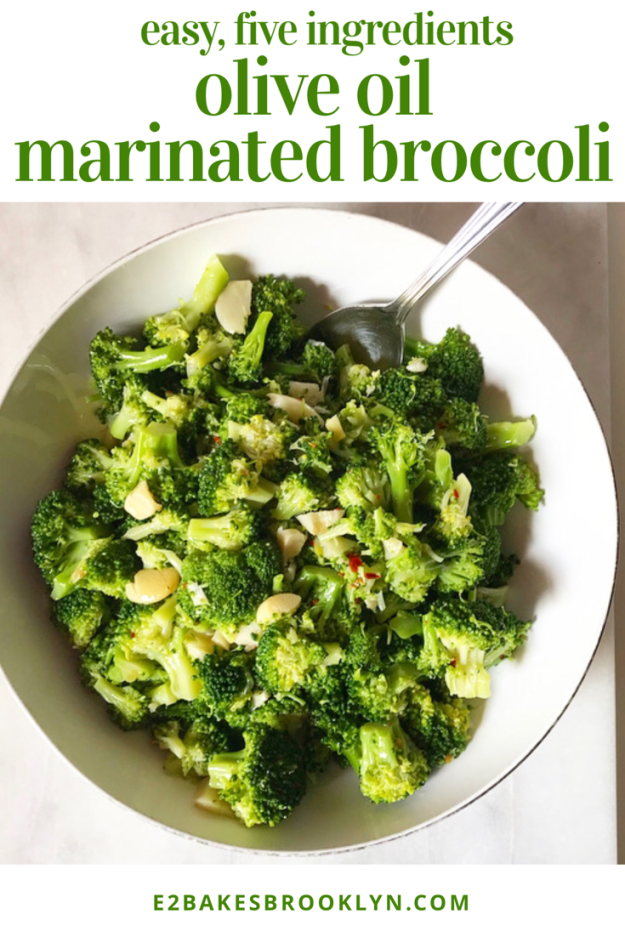
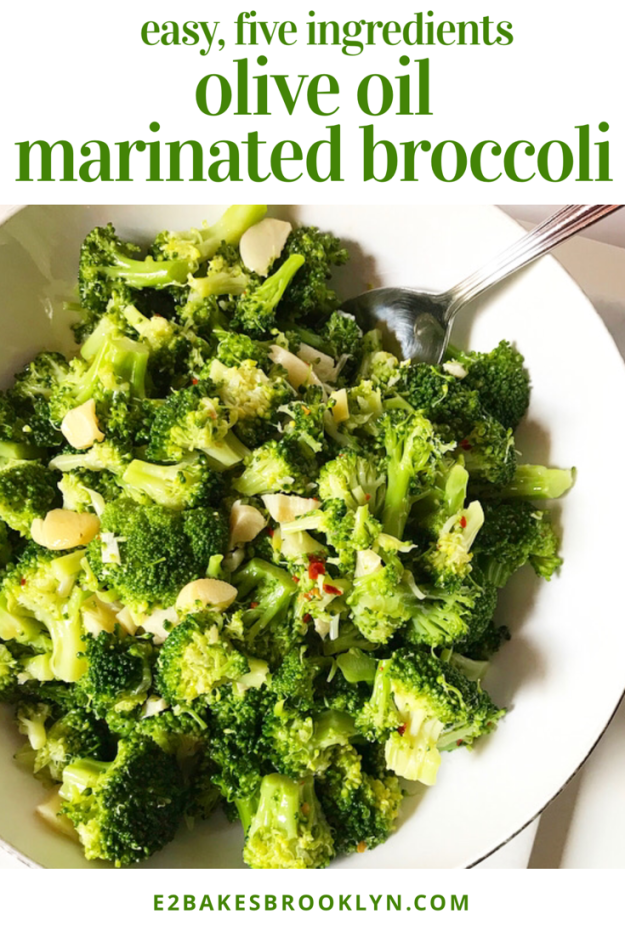
It was seven. I ate seven cupcakes in three days 😁 Olive Oil Marinated Broccoli
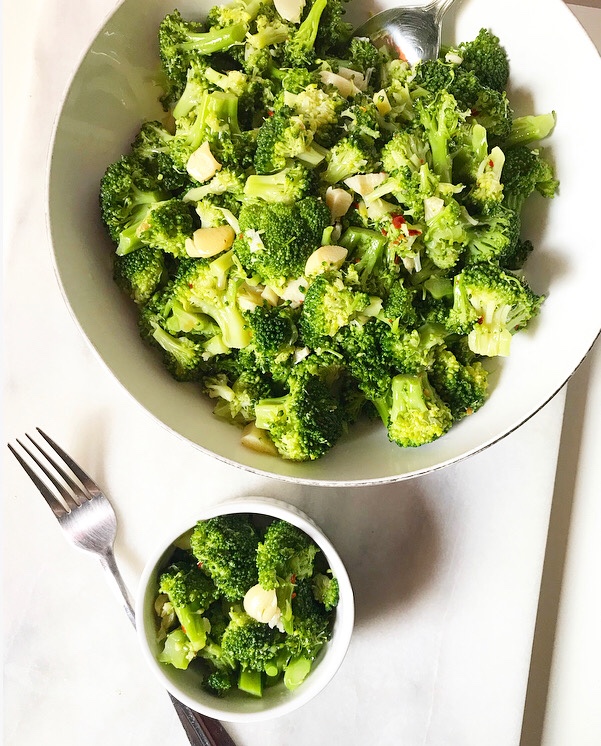
So, let’s eat some broccoli. Really good, crunchy broccoli coated in a salty, spicy, garlicky marinade. 

This recipe is a riff on a side dish that an old boyfriend’s dad used to make all the time. We had dinner with his parents every Sunday, and while everything they served was good (I still dream about the arroz con pollo), the marinated broccoli was always my favorite. And while that boyfriend didn’t last, my obsession with this side dish has continued for years.Olive Oil Marinated BroccoliYes, I get psyched up over vegetables. His dad also made the best peach pie I’ve ever had, but that’s a story for another day. Olive Oil Marinated BroccoliOlive Oil Marinated Broccoli
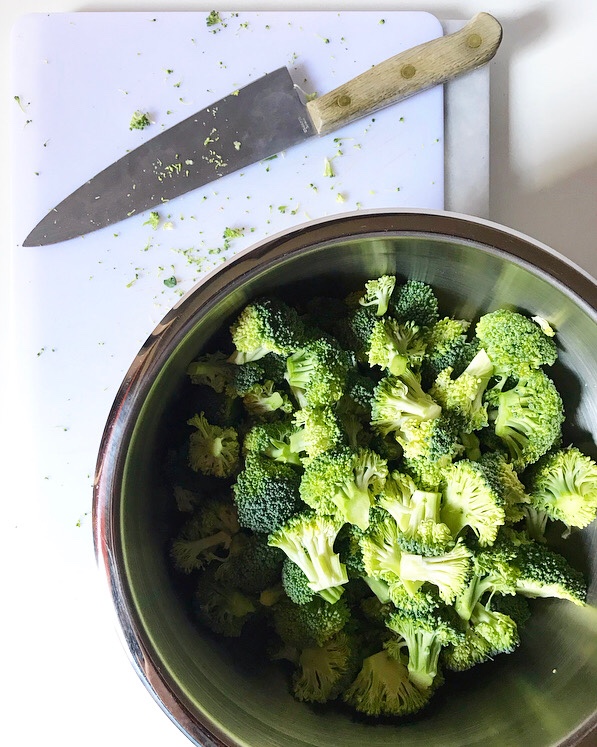
This broccoli is super easy and so good it’s ridiculous. There’s hardly any cooking involved. All you have to do is warm up some olive oil with garlic, salt, and red pepper flakes, and then pour it over a ton of broccoli florets that have barely been cooked.Olive Oil Marinated BroccoliOlive Oil Marinated BroccoliOlive Oil Marinated Broccoli 
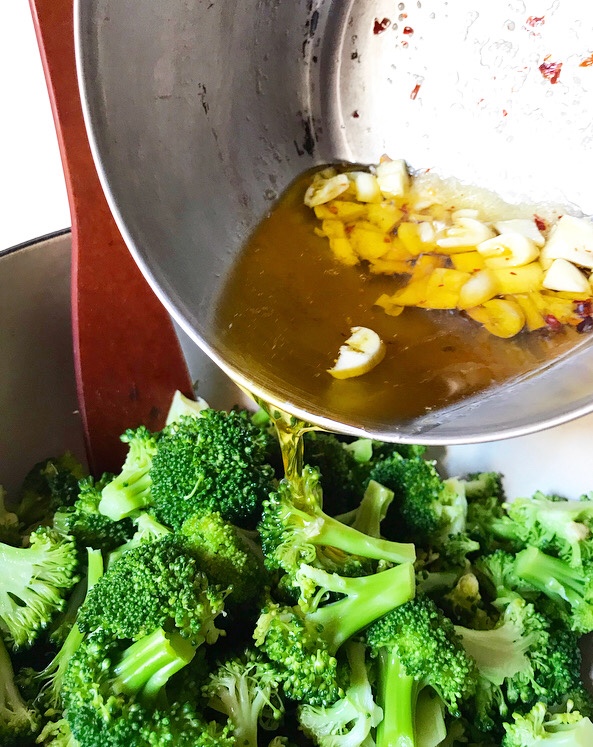
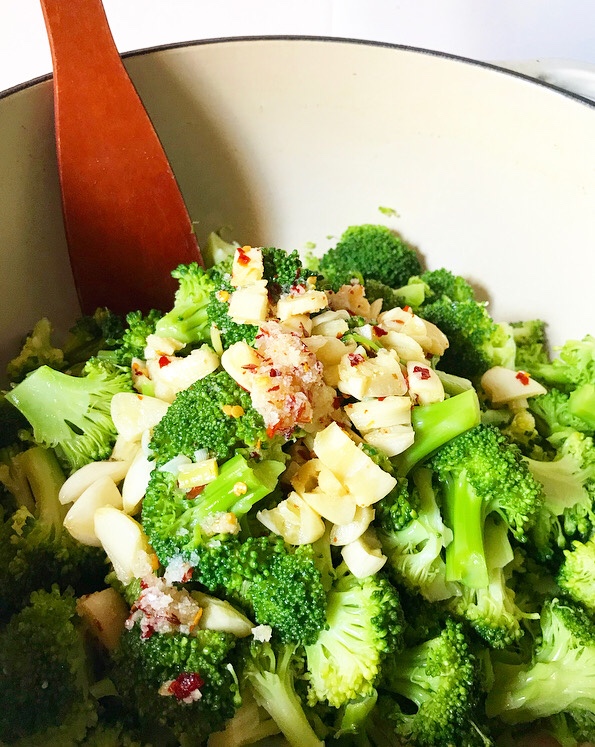
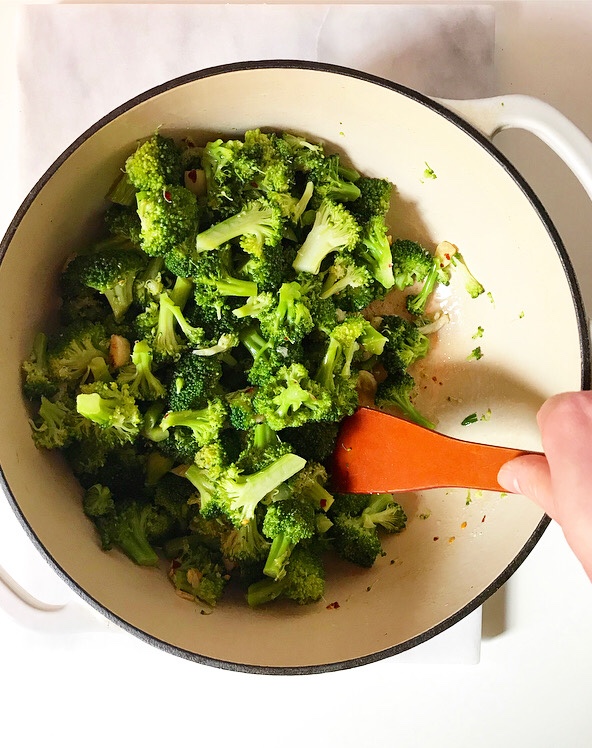
Toss it all together, cover it in plastic wrap, and let it sit for an hour or two at room temperature. That’s it–barely even a recipe. The broccoli softens just slightly and it soaks in all the salty, spicy goodness from the marinade. Olive Oil Marinated Broccoli
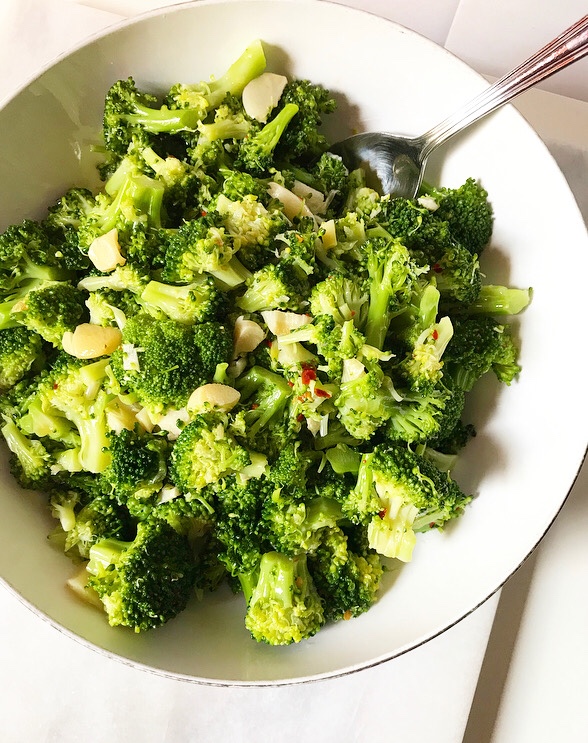
This recipe makes a lot. Like 8-10 servings a lot. But that means your vegetable side is done for at least two days, depending on how many you are feeding. Also, like soup and stew, the longer this sits, the better it will be. It’s great on day one, but the leftovers are *amazing.* The broccoli pictured only sat for two hours, and it was good, but when I went back for more later that night it was truly fantastic. Olive Oil Marinated Broccoli
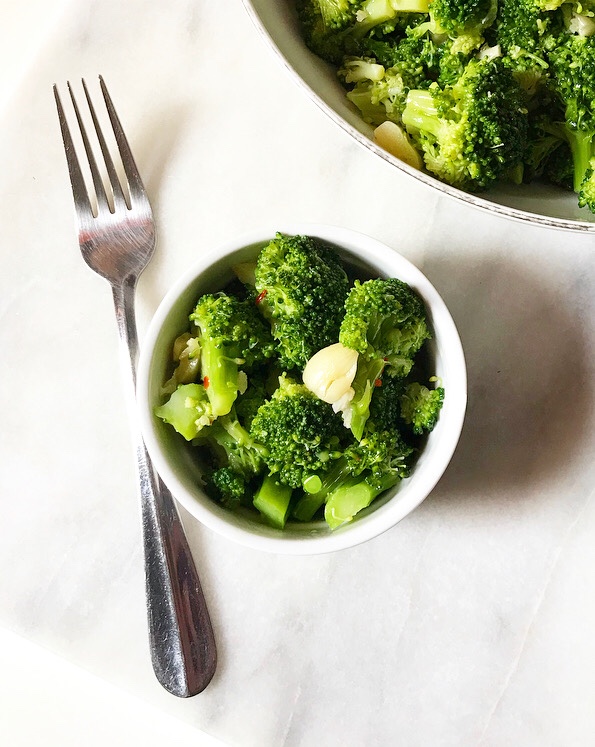
Marinated broccoli is great with chicken, pork, fish, beef, tofu, mac and cheese…it literally goes well with any main you can imagine. I’ve been known to eat a giant pile of it with a hunk of bread and some cheese and call it dinner.

This is the kind of side dish that will make you want to eat your vegetables. I made some for my nine year-old friend last week and she went back for seconds. Of broccoli. Her main dish that night was pizza, so that’s practically a miracle.Olive Oil Marinated Broccoli
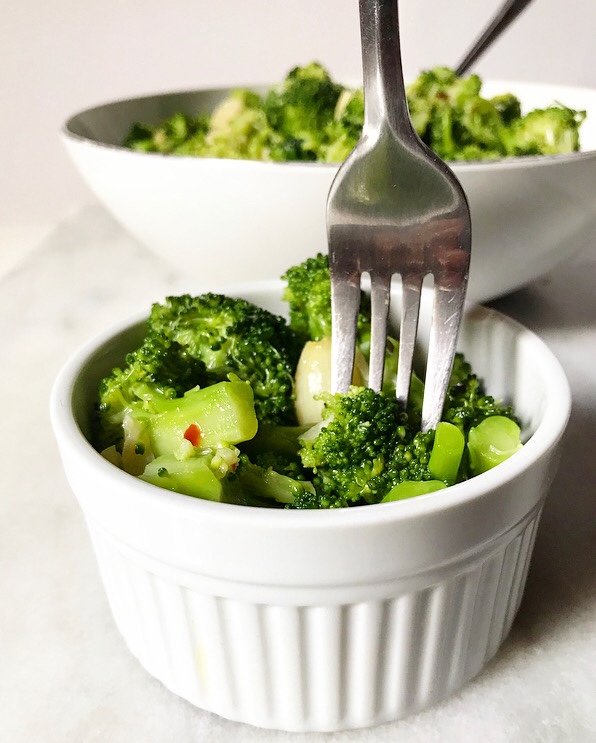
Olive Oil Marinated Broccoli is a great side for weeknight dinners, and is great in packed lunches. I’ve served it at casual dinner parties and am planning to bring it to picnics in Prospect Park all summer long! Add this to your list of easy side dishes–it’ll be a favorite in no time! Olive Oil Marinated Broccoli

Olive Oil Marinated Broccoli
makes 8-10 servings*

8 cups broccoli florets (about 5-6 crowns)
1 cup extra virgin olive oil
10-12 cloves (about 1 head) fresh garlic, peeled and crushed
1-1 1/4 teaspoons Kosher or sea salt, or to taste
1/4-1/2 teaspoon crushed red pepper flakes

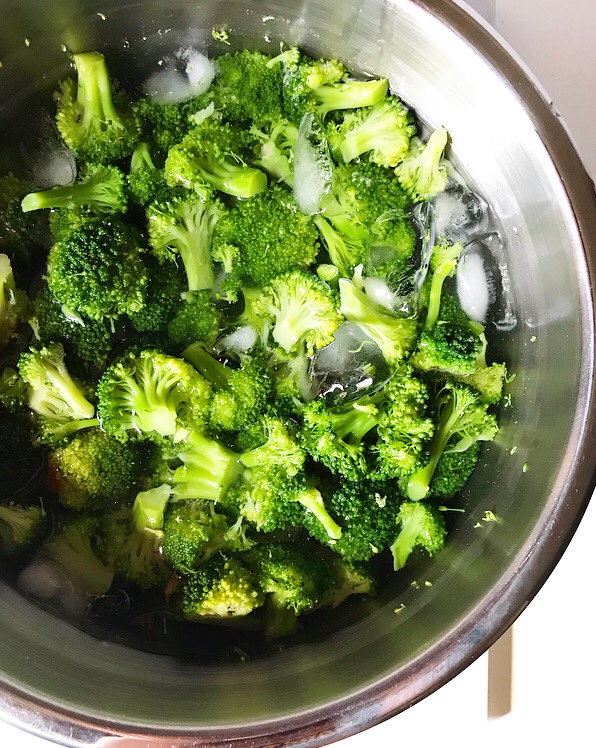
Bring a large pot of water to a boil. Season well with salt. Add broccoli and let come back to a boil for one minute. Strain broccoli and plunge into a large bowl of ice water.

Once cool, strain broccoli well (I like to set it on paper towels) and place in a large mixing bowl. Set aside.

Place olive oil, garlic, salt, and crushed red pepper flakes in a small pot. Heat over medium-low heat just until the oil starts to bubble and the garlic begins to sizzle. Do not let garlic brown. Remove pot from heat. Pour oil mixture over the broccoli, using a silicone spatula or wooden spoon to scrape any remaining spices from the bottom of the pot into the bowl. Use a large spoon to coat the broccoli in the oil mixture. Cover the bowl with plastic wrap and allow to sit 1-2 hours at room temperature, tossing occasionally. It may also be marinated overnight in the refrigerator; let sit at room temperature for for at least 30 minutes before serving.

Use a slotted spoon to serve. Broccoli is best served at room temperature.

Cover and refrigerate leftovers in marinade for up to four days, bringing them back to room temperature before serving.

Notes:

  • This recipe halves and doubles easily, should you like to make a smaller or greater amount.
  • Olive Oil Marinated BroccoliOlive Oil Marinated Broccoli
  • Peanut Butter Cupcakes with Oreo Buttercream

     Peanut butter and Oreos are a match made in heaven. The salty-sweetness of peanut butter combined with dark chocolate wafers and creamy filling is straight-up amazing. Seriously, if you have never tried them together, I demand that you do so ASAP. And while there’s nothing quite like spreading peanut butter onto an Oreo, why not take this magical combination and make it into cupcakes?

    Today, I’m bringing you just that–moist, fluffy cupcakes jam-packed with peanut butter and a buttercream frosting chock full of crushed Oreos. Oh yes, these are goooooooood. Like, I’ve-eaten-three-today-and-am-considering-another good. Almost too good to share. But I will, because having seventeen…make that fourteen…of these in my apartment is clearly a bad idea. 

    These cupcakes are full of peanut butter flavor. There’s 2/3 cup of the good stuff mixed right into the batter. Yes, it takes that much. Peanut butter is one of those ingredients that can easily disappear in baked goods. If you don’t use a lot, you might as well just make vanilla cupcakes because that’s exactly how the final product will taste. I love vanilla cake, but when I want peanut butter, I. want. peanut butter.

    Not only does the peanut butter serve to flavor the cupcakes, it also keeps everything moist along with a little bit of softened butter, a lot of dark brown sugar, and a couple of eggs. Where many peanut butter cupcakes are dry and crumbly, these stay soft and springy. The rest of the ingredients are pretty standard fare: flour, baking powder, baking soda, salt, granulated sugar, vanilla, and buttermilk. There’s also 1/4 cup of cornstarch to lighten the batter and keep the texture nice and soft. 

    These cupcakes bake up to be gorgeous and golden with crackly tops. And oh, they smell ridiculously good. You’ll want to have two straight out of the oven, but you should wait because 1) you will burn your mouth, and 2) there’s Oreo Buttercream to be had! 

    This frosting is pretty much everything I want in life. It’s light, fluffy, super creamy, and packed with crushed Oreos! And it couldn’t be simpler. Beat softened butter and confectioner’s sugar together until light and fluffy. I always add a pinch of salt too, just to keep the frosting from being overly sweet. Next comes some vanilla, followed by nearly a cup of crushed Oreos. There are twelve of the little sandwich cookies in this frosting! YAAAAAS. Add in a few tablespoons of heavy cream, and beat until everything is super fluffy, delicious, and ready for cake. Pipe or spread the frosting onto the cooled cupcakes and garnish with more Oreos. Because Oreos.

    Peanut Butter Cupcakes with Oreo Buttercream are too good, you guys. Too good. The cake itself is moist, springy and packed with peanut butter, while the frosting is fluffy and full of that classic Oreo flavor. They’re perfect for birthdays, cookouts, or any occasion that demands cupcakes. Just make sure that you have people to share with. I’m still eyeing that fourth one. 

     Want more peanut butter and Oreos? Check out my homemade Oreo Peanut Butter!

    Peanut Butter Cupcakes with Oreo Buttercream
    makes about 16-17 cupcakes

    Cupcakes:
    1 1/4 cups all-purpose flour
    1/4 cup cornstarch
    1/2 teaspoon baking powder
    1/4 teaspoon baking soda
    1/2 teaspoon Kosher or sea salt
    4 tablespoons (1/2 stick) unsalted butter, softened to room temperature
    2/3 cup creamy-style peanut butter*
    3/4 cup dark brown sugar, packed
    1/4 cup granulated sugar
    2 large eggs, room temperature
    2 teaspoons pure vanilla extract
    3/4 cup buttermilk*

    Buttercream:
    1 cup (2 sticks) unsalted butter, softened to room temperature
    3 cups confectioner’s sugar
    pinch of Kosher or sea salt
    2 teaspoons pure vanilla extract
    12 Oreo cookies, finely crushed (a scant 1 cup of crumbs)
    4-6 tablespoons heavy cream*

    For Garnish:
    16-17 Oreo cookies

    Preheat oven to 350F. Line a standard muffin pan with cupcake liners. Set aside.

    Make the cupcakes. In a medium mixing bowl, whisk together flour, cornstarch, baking powder, baking soda, and salt. Set aside.

    In a large mixing bowl, use an electric mixer to beat butter and peanut butter until combined and fluffy. Beat in dark brown and granulated sugars, followed by eggs and vanilla. Mix in buttermilk. Add dry ingredients in two installments, mixing until combined.

    Fill prepared muffin cups 2/3 full of the batter. Gently tap pan on the counter five times to release any large air bubbles. Bake cupcakes 21-23 minutes, until a toothpick inserted in a couple of cupcakes comes out clean. Let cupcakes cool in the pan for five minutes before removing to a rack to cool completely. Cool muffin pan completely before filling with any remaining batter.

    Make the buttercream frosting. In a large mixing bowl, use an electric mixer to beat butter until light and fluffy. Beat in confectioner’s sugar in two installments, followed by salt and vanilla. Mix in crushed Oreos until well-dispersed. Beat in cream until your desired consistency has been reached. Spread or pipe onto cooled cupcakes. Garnish with additional Oreos, if desired.

    Cupcakes will keep covered at room temperature for up to three days or in the refrigerator for up to a week.

    Notes:

    1. Do not use natural-style peanut butter.

    2. If you do not have buttermilk, you may make your own. Pour one teaspoon of white or Apple cider vinegar into a liquid measuring cup, and pour in regular milk up to the 3/4 cup mark. Stir and let sit for five minutes before using. I do not recommend skim or fat-free milk.

    3. Half & half or whole milk may be substituted in the frosting, although the final product will not be as rich and creamy as frosting made with heavy cream.

    Oatmeal Chocolate Chip Cream Cheese Cookies

     One of the best things about being a baker is watching people enjoy what you’ve made. When you’ve put a few hours (or more!) into making something delicious, it’s always a treat when your friends really love it. I am really lucky–for the last 18 months, I’ve had the opportunity to make cookies for 30+ of my closest acquaintances every Wednesday night. My cookie commitment is one of the highlights of my week. I love bringing in whatever I’ve been working on lately and seeing how it goes over with the crowd. If all the cookies disappear within the first half hour, I know I’ve got something blog-worthy. These Oatmeal Chocolate Chip Cream Cheese Cookies have done that three times. Three.

    I first made these cookies about a year ago. It was one of those rare days when I was down to a single stick of butter. I sat in front of my refrigerator dreading going to Trader Joe’s at rush hour (read: every single hour they’re open) just for butter. I mean, if I’m going to brave that kind of craziness, I better need at least five different things, and the free sample better be taquitos. I dug around the back of my fridge for something–anything–that might work, and lo and behold, I found a half-brick of cream cheese. I mixed it into some dough, baked some cookies, and headed out the door.

    I set these cookies on a platter next to the coffee pot and waited for the crowds. I wasn’t expecting much, if any, fanfare–they were just oatmeal cookies, after all. But life is funny, and less than thirty minutes later the cookies were gone and my friends were raving about the super chewy texture! 

    Oatmeal Chocolate Chip Cream Cheese Cookies have been one of the few recipes I’ve repeated with that group, and they disappear in a flash every single time. Last night, they were gone in fifteen minutes flat! 

    So, why does cream cheese make these cookies so special? Well, it’s all in the chemistry. In standard oatmeal cookie recipes, eight ounces of butter are softened and beaten into the wet ingredients. The high fat content in the butter allows for the resulting cookies to bake up super tender. There’s plenty of chew from the oats, but the cookie base stays pretty soft.

    If, however, you use four ounces of softened butter and four ounces of softened cream cheese, the resulting cookies will be extra chewy. This is because cream cheese has a butterfat content of 35% and a water content of 55%. Butter, on the other hand, has a butterfat content of 84% and a water content of 15%. The fat (butterfat, in this case) is what keeps our cookies from drying out and becoming rocks. It keeps everything moist after the water evaporates and makes the resulting cookies super soft, chewy and delicious. It also keeps them from spreading very much in the oven.

    Where standard oatmeal cookie dough has 84% butterfat, this oatmeal cream cheese cookie dough has about 60% butterfat. This means that a) the resulting cookies will be slightly chewier than they are soft, and b) they will have fewer calories, so you can eat more with less guilt 😊 
    Whew! That’s a lot of science for a Thursday. Too much.

    The point is this: these Oatmeal Chocolate Chip Cream Cheese Cookies aren’t your average oatmeal cookies. While you may not be able to really taste the cream cheese, you will notice the extra chewiness…and trust me, you’ll love it. 


    Oatmeal Chocolate Chip Cream Cheese Cookies
    makes about 4 dozen cookies

    1 1/2 cups all purpose flour
    1 teaspoon baking soda
    1 teaspoon Kosher or sea salt
    1/2 cup unsalted butter, softened to room temperature
    4oz full fat cream cheese, softened to room temperature
    1 cup light brown sugar, packed
    1/2 cup granulated sugar
    2 large eggs, room temperature
    1 1/2 teaspoons real vanilla extract
    3 cups old fashioned rolled oats
    2 cups semisweet chocolate chips

    Preheat oven to 350F. Line two baking sheets with parchment paper. Set aside.

    In a small mixing bowl, whisk together flour, baking soda, and salt. Set aside.

    In a large mixing bowl, use an electric mixer to beat softened butter and cream cheese until light and fluffy. Beat in dark brown and granulated sugars, followed by eggs and vanilla. Mix in flour mixture in two installments, scraping the bowl as necessary. Beat in oats in two installments, followed by chocolate chips.

    Drop dough onto prepared pans by the tablespoon, keeping them about 2 inches apart (the cookies won’t spread much). Bake 9-11 minutes, until no longer raw-looking. Let cool on the pans for five minutes before transferring to a rack to cool completely. Repeat baking process until all dough has been used.

    Cookies will keep covered at room temperature for up to a week.

    Coconut Oil Biscuits

     I know what you’re thinking. “Coconut oil in biscuits? This girl’s lost her mind!”

    But hear me out. Until last week, I felt the same way. Up to that point, every great biscuit I had ever eaten was made with butter and buttermilk, or occasionally, heavy cream. But while surfing Pinterest one morning, I came across a recipe for Coconut Oil Biscuits. At first, I was horrified. Coconut oil? In biscuits? No way. And they were vegan? I love experimenting with vegan recipes, but biscuits were sacred. 

    I kept scrolling. But the evil geniuses who designed the Pinterest algorithm had other ideas. The recipe kept showing up! I closed the app and went about my day.

    But that Pin kept popping up in my mind. And the more I thought about it, the more I welcomed the idea. Biscuits made with coconut oil and coconut milk? I like coconut. I love biscuits. Was it so wrong to put them together? I gave in and decided to try it myself. I figured that if they were a real disaster, I could toss them and go back to my buttermilk biscuit-only mentality. 

     Very long story short, I shouldn’t have worried. Coconut Oil Biscuits rise high and are super soft and fluffy. And they don’t need any of the chilling, rolling, folding, or thwacking that my buttermilk biscuits require. None of those things are difficult or take much time, but there’s something really awesome about being able to make scratch biscuits in 25 minutes start-to-finish. Yes, if you turn the oven to 425F right now, you are only 25 minutes away from slathering jam onto a warm biscuit! 

     But before you go running to the kitchen, there are a couple of ingredients we need to talk about. First, the coconut oil. In buttermilk biscuits, the butter must be kept cold so that it only melts in the oven–this creates flakiness and layers. If it were at room temperature during the mixing, the resulting biscuits would be dense and dry because the butter “pockets” basically wouldn’t exist. But unlike butter, coconut oil is solid (and kind of hard) at room temperature, so it will cut into the flour easily without becoming gooey. And since the oil doesn’t have butter’s water content, it keeps these biscuits nice and moist. Hello fluffy, flaky magic. 

    The other thing we need to talk about is the milk. In buttermilk biscuits, the liquid is buttermilk (duh). Here, you could use regular dairy buttermilk, but why not add an extra dose of flavor (and keep the biscuits vegan!) by using coconut milk?! I use refrigerated coconut milk because of it’s textural similarity to dairy buttermilk. Doctored up with a teaspoon of vinegar, it creates tenderness just like its dairy counterpart. 

     Coconut Oil Biscuits bake up in just 10-12 minutes. They don’t really turn golden, but they definitely rise high. And they are so tender that you can lift the tops right off–perfect for topping with whatever your biscuit-loving heart desires!

    For those wondering if these are super coconutty or not, well…they definitely have a coconut flavor, but as there isn’t much sugar, they are decidedly on the savory side. I like them with a little jam (raspberry is my favorite!), but I think a sweeter nut butter, like this one, would do well here. I could also imagine them slathered with some salted butter or made into little breakfast sandwiches.

    No matter how you serve them, these Coconut Oil Biscuits are sure to be a new favorite. 

     Coconut Oil Biscuits
    adapted from Gimme Some Oven
    makes about 12 biscuits

    1 teaspoon white or apple cider vinegar
    3/4 cup milk of choice*, plus extra for brushing
    2 cups all-purpose flour
    1 tablespoon granulated sugar
    1 tablespoon baking powder
    1 teaspoon Kosher or sea salt
    1/4 cup coconut oil,* solid

    Preheat oven to 425F. Grease a 9″ pie plate with coconut oil. Set aside.

    Pour vinegar into a liquid measuring cup. Pour in milk until you have 3/4 cup total liquid, and stir to combine. Place measuring cup in the fridge to chill while you prepare the other ingredients.

    In a large bowl, combine flour, sugar, baking powder, and salt. Whisk to combine. Using a pastry blender or two forks, cut coconut oil into the dry ingredients until the largest pieces are the size of small peas. Pour in milk mixture and use a silicone spatula or wooden spoon to fold everything together, scraping the sides and bottom of the bowl as you go.

    Turn dough out onto a floured surface. Use floured fingertips to knead a few times, until everything is fully combined. Pat dough to a 1/2-inch thickness. Use a 2-inch round biscuit cutter or sharp knife to cut biscuits. When cutting, press directly down–do not twist or saw. Pat dough out again as necessary.

    Place biscuits close together in prepared pan. Brush the tops with additional coconut milk. Bake for 10-12 minutes, until biscuits have risen and are no longer doughy. The tops may not turn golden.

    Let cool for a few minutes, and serve warm with your jam of choice.

    Notes:

    1. I use SO Delicious Unsweetened Vanilla Coconut Milk Beverage. Any non-dairy milk will work, as will whole, 1%, and 2% cow’s milk. Do not use skim or fat-free cow’s milk.

    2. I use Trader Joe’s Extra Virgin Coconut Oil.

    Friday Favorites

    Hello!

    How are you? Got any April Fools Day pranks up your sleeves? Any good plans this weekend?

    I’ve got a day of work at my day job and then I’m making cake for 300 because I’m insane. Maybe I’ll get a nap next weekend…but probably not since I’m catering a party.

    So I’m taking a break from the kitchen today, but that doesn’t mean I’m taking a break from the blog! No way. I spend way too many of my waking hours (and sometimes my sleeping hours…) thinking about making cookies and cupcakes and pie. Also, how to obtain Oreos right now without leaving my apartment.

    Anyway, I dug through my archives so you could spend all weekend thinking about frosting, just like me. Thank me later 😜 

    Why not start the weekend off with some Glazed Cream Cheese Cake Doughnuts? They’re super tender and the homemade glaze is the stuff of dreams. Mmhmm. Oh, and they’re shockingly easy, too. The batch makes a little more than 1 1/2 dozen, so they’re an excellent excuse to have friends over for a little Saturday morning doughnut party! 

    But if frying doughnuts first thing on a Saturday morning sounds like a hazard, why not make a Puff Pancake {Dutch Baby}? It’s my go-to “special” breakfast. The way it puffs up in the oven is really amazing, and the recipe is easily adjustable, so you can make anywhere from 1-4 servings. 

    Weekends and homemade cookies just go together. Check out these M&Ms Potato Chip Cookies! I made these for Christmas, but you could use regular M&Ms, or the pastel Easter variety. These sweet and salty little cookies always hit the spot 😊 

    Oh, and the Katharine Hepburn Brownies I made this week. They’re grain- and gluten-free without any unusual ingredients! They’re sure to please all the chewy brownie lovers in your life. 

    It’s supposed to get cold here this weekend, so soup has to be on the menu! This Spicy Southwestern Chicken Soup totally fits the bill. It’s full of southwestern flavors–it even has salsa in the broth! The best parts? It takes an hour start-to-finish and makes enough for a few lunches next week! 

    Are you always rushing on weekday mornings? If you’re anything like me, you never have time to make breakfast. And I am one of those who absolutely *can’t* go without breakfast. My solution? I make a huge batch of granola over the weekend and then eat it with fruit and yogurt all week long. I’m obsessed with this Peanut Butter Granola

    And because I said there would be frosting, here’s my favorite Red Velvet Cake. It’s super simple, ridiculously good, and my light and fluffy cream cheese frosting is just…well, make the cake. You’ll see.

    Let me know if you have made (or are planning to make ) these or any of my other recipes! Leave me a comment below or find me on Instagram @e2bakesbrooklyn! I’ll be back next week with new recipes 😊 Enjoy your weekend!