Cornmeal Summer Shortcakes

Cornmeal Summer Shortcakes

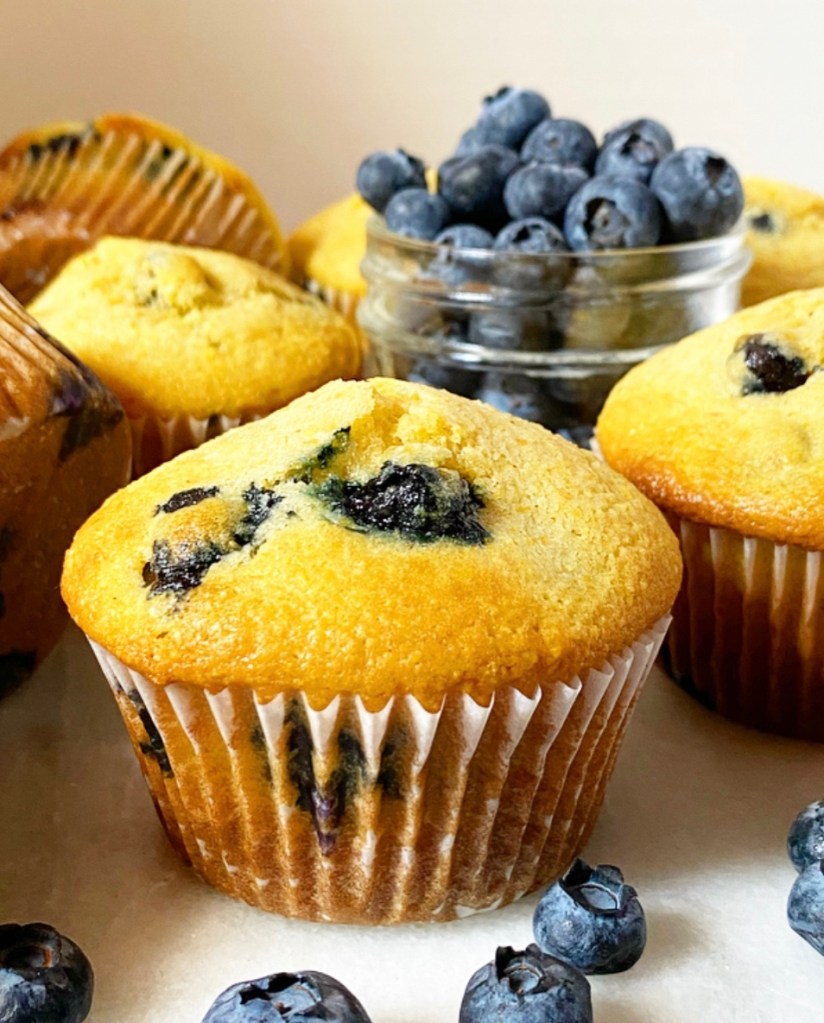
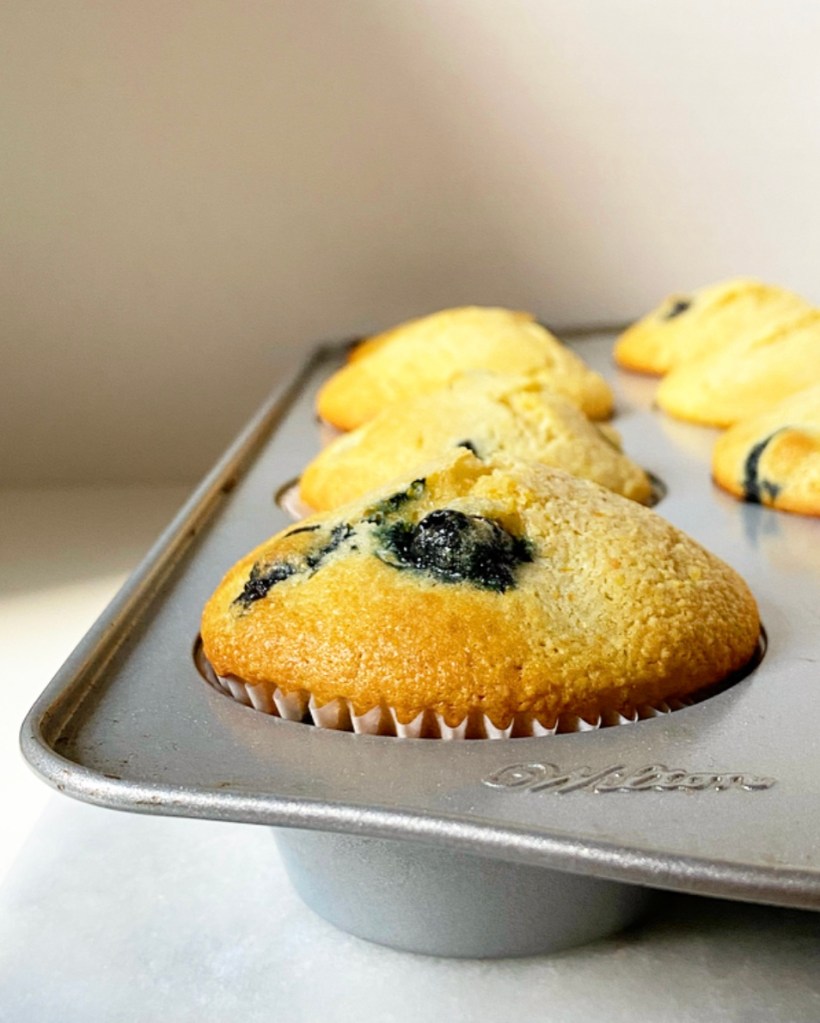
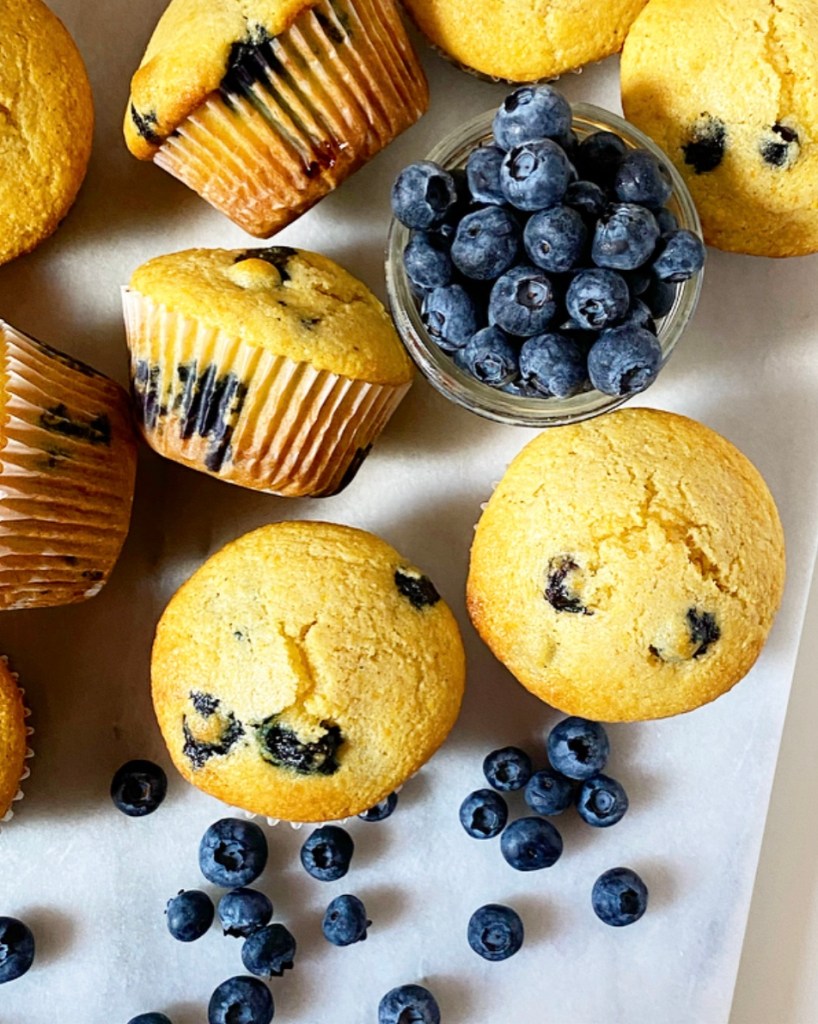
Like so many of my favorite recipes, these Cornmeal Summer Shortcakes came to be on a whim. There were no plans; I was just playing around with cornmeal leftover from making Blueberry Corn Muffins on a Wednesday morning when shortcake inspiration struck.

Cornmeal Summer Shortcakes

I set to work making a batch of my trusty Cornmeal Biscuits, which are somewhere between a buttermilk biscuit and cornbread. They’re tender and a touch crumbly, but still pretty sturdy—perfect for shortcakes. I added a little extra sugar and cut them larger than I normally would for maximum surface area.

Cornmeal Summer Shortcakes

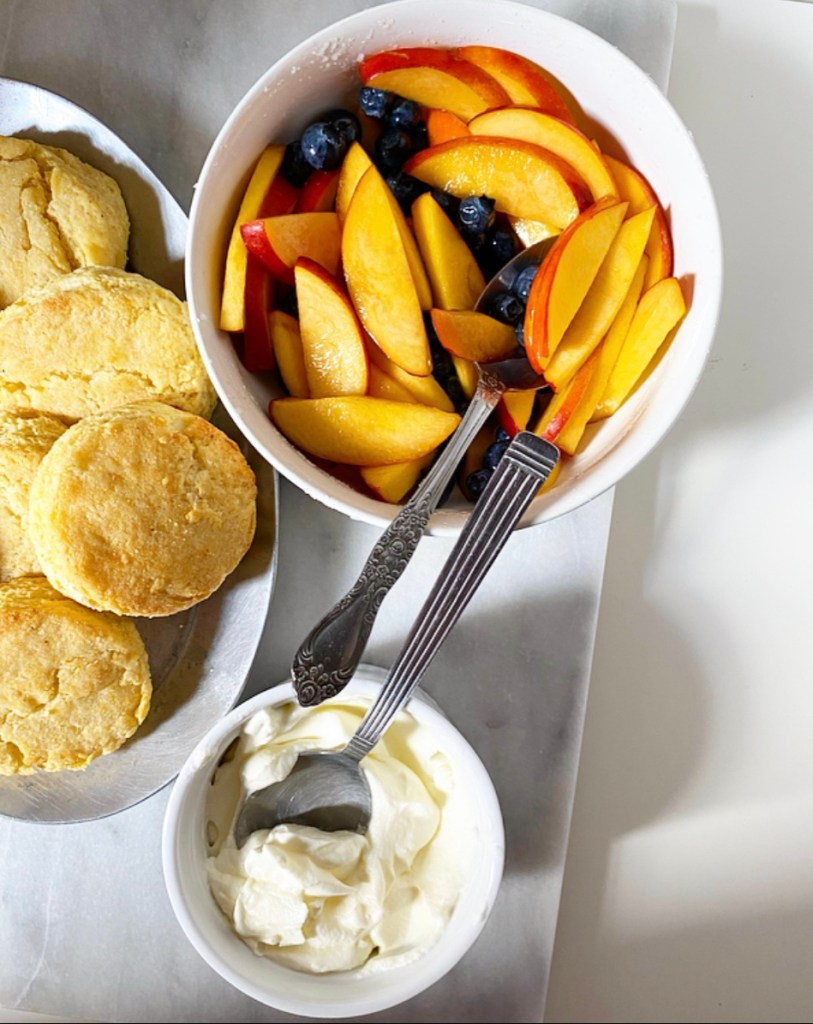
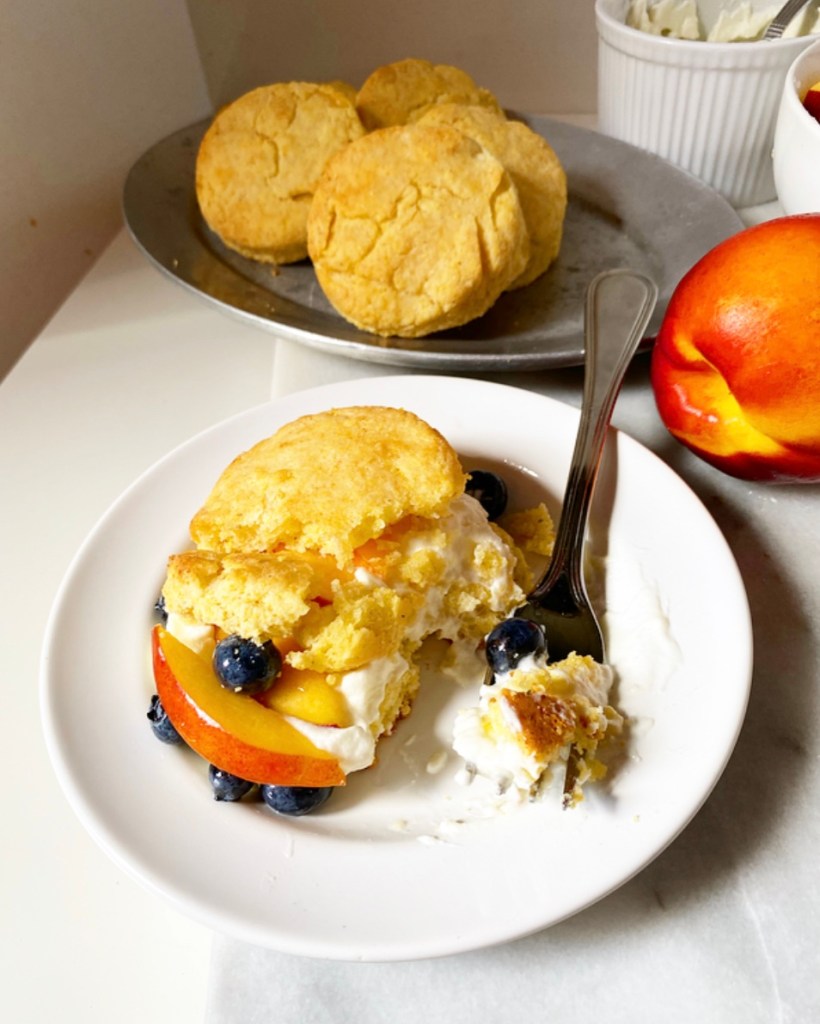
I baked them up and let them cool, spending the lag time digging through my fridge for seasonal fruit. I sliced up a couple of perfect nectarines and tossed in some blueberries, then added a few tablespoons of sugar and let them macerate. I also whipped some cream.

Cornmeal Summer Shortcakes

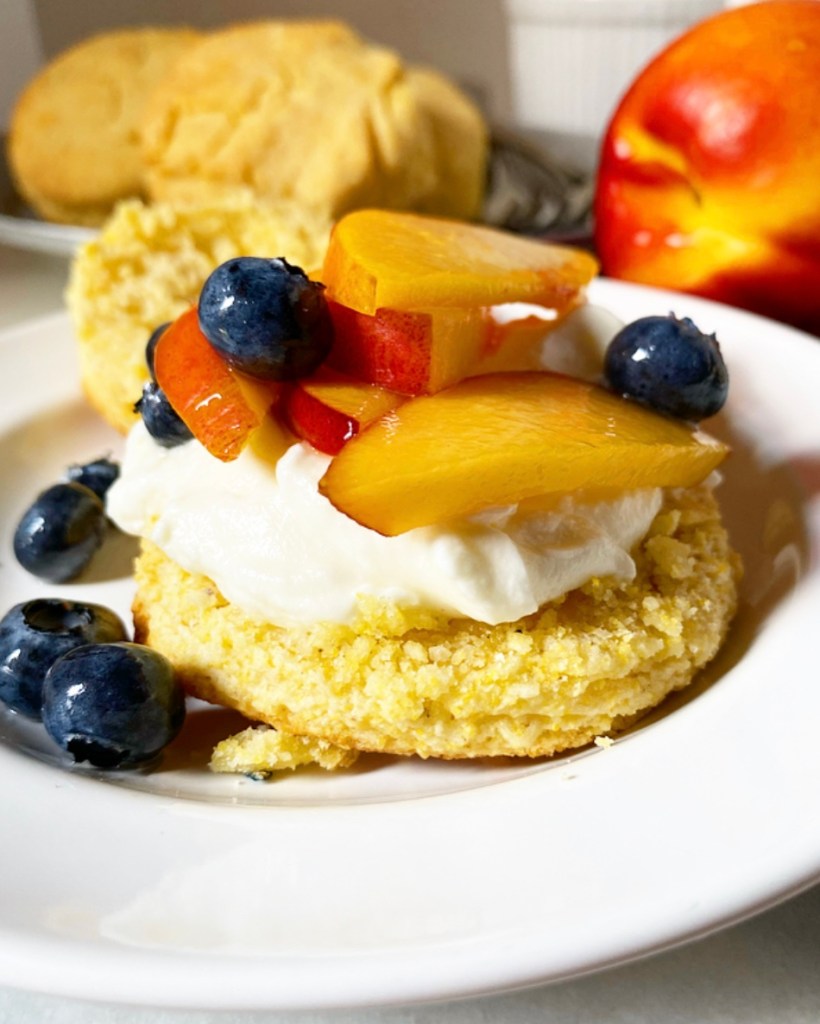
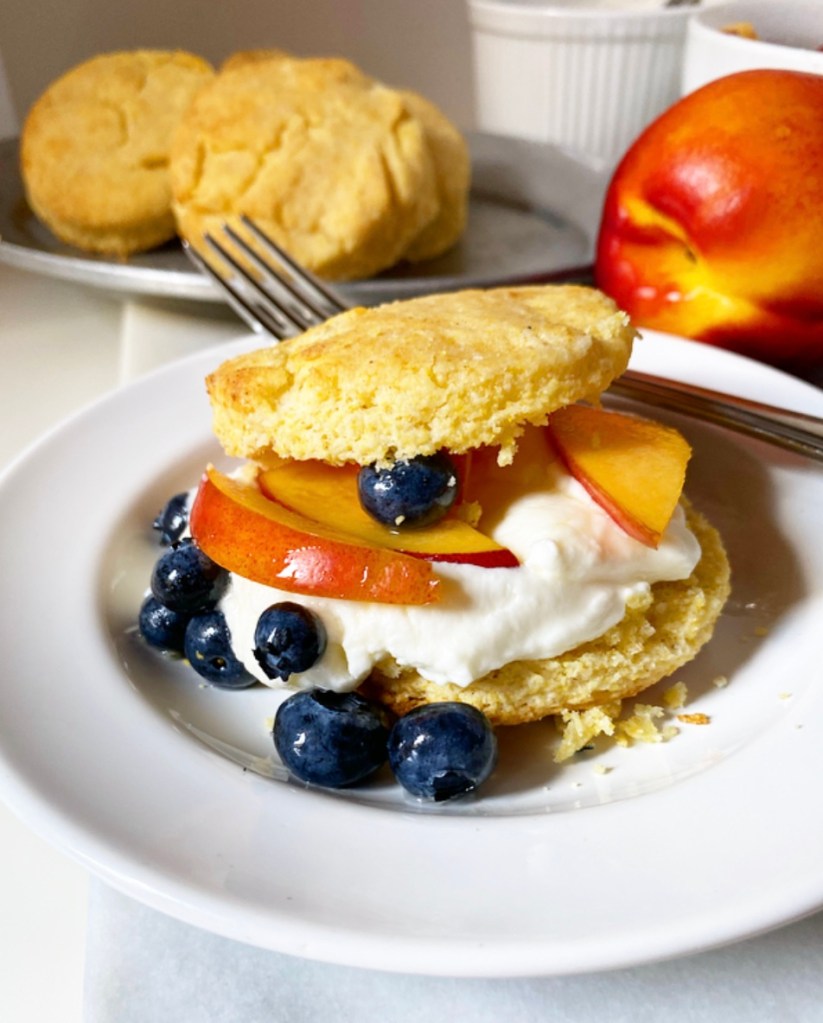
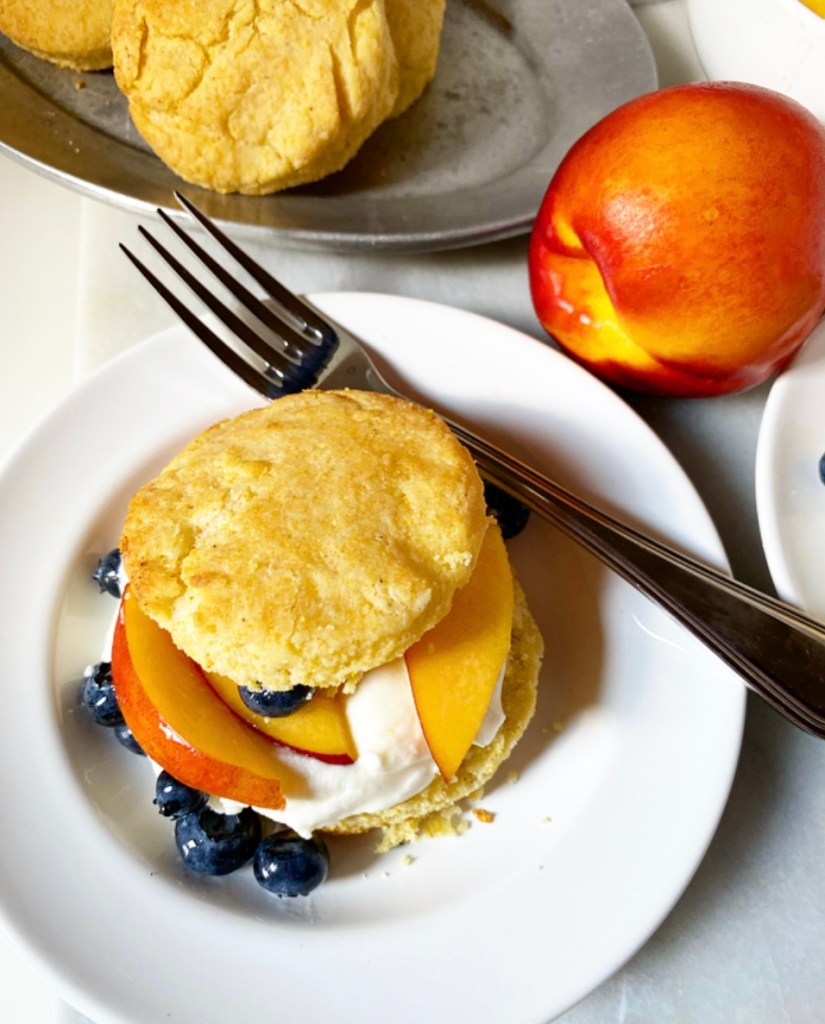
Then I assembled the whole lot. The cooled biscuits were sliced into two thin disks and piled high with whipped cream and fruit, only to be quickly demolished with forks and fingers.

Cornmeal Summer Shortcakes

Oh my goodness, y’all, these Cornmeal Summer Shortcakes are so good. Sweet, but not too sweet. Fluffy, tender, just corny enough. Creamy, fruit-forward. Full-on late summer vibes. Not bad for Wednesday morning baking improv.

Cornmeal Summer Shortcakes
makes about 10 shortcakes

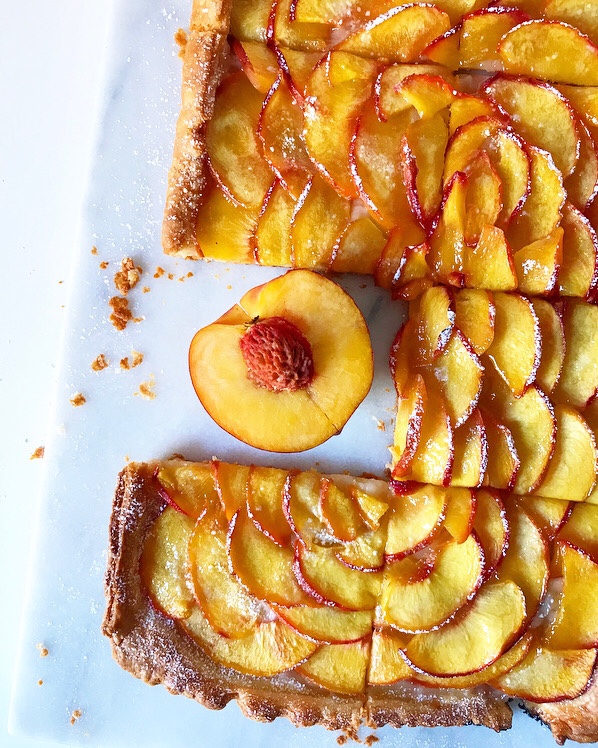
2-3 ripe nectarines (or peaches or other stone fruit), thinly sliced
1 cup blueberries
5 tablespoons granulated sugar, divided
2 cups heavy cream
2 teaspoons pure vanilla extract
1 batch Cornmeal Biscuits for Shortcakes (recipe below)

In a small-medium mixing bowl, toss together nectarines, berries and 3 tablespoons of sugar. Cover the bowl with plastic wrap and let sit (macerate) at room temperature for up to an hour.

When the biscuits are cool and the fruit is ready, make the whipped cream. In a large mixing bowl, combine heavy cream, vanilla, and 2 tablespoons of sugar. Use an electric mixer on medium-high speed to whip cream until stiff peaks form.

Assemble shortcakes. Use a fork to gently split biscuits in half equatorially (it’s okay if they’re not perfect). Gently move the bottom half of a biscuit to a plate. Top with whipped cream and fruit. Place the top half of the biscuit over the top. Garnish with more whipped cream and berries, if desired. Serve immediately.
Cornmeal Biscuits for Shortcakes
makes about 10 shortcakes

1 1/3 cup all-purpose flour
2/3 cup yellow cornmeal
4 tablespoons granulated sugar
1 tablespoon baking powder
1/2 teaspoon Kosher or sea salt
6 tablespoons unsalted butter, very cold, cut into cubes
2/3 cup buttermilk, very cold

For finishing:
2 tablespoons unsalted butter, melted

Preheat oven to 425F. Line a baking sheet with parchment. Set aside.

In a large mixing bowl, whisk together flour, cornmeal, sugar, baking powder, and salt. Add butter and use a pastry blender (or two forks or very clean fingertips) to break it down until the largest pieces are the size of small peas. Use a silicone spatula or wooden spoon to stir in buttermilk until a dough forms.

Flour a surface and your fingertips. Turn dough onto the surface and pat until it’s 1/2-inch thick. Use a 2 3/4-inch biscuit cutter to cut biscuits. Make sure to cut directly down—do not twist. Place cut biscuits a couple of inches apart on prepared baking sheet. Chill dough/baking sheet if anything becomes too warm/sticky at anytime in this process.

Bake biscuits 12-15 minutes, or until puffy and golden. Remove from oven and brush tops with melted butter.

Let biscuits cool until you can handle them. Cool completely before using for shortcakes.

Cornmeal Biscuits are best the day they are made, but will keep in an airtight container at room temperature for up to 48 hours.
Cornmeal Summer Shortcakes

Friday Favorites: Peaches

Friday Favorites: Peaches

Late summer means stone fruits are out in full force, and while I won’t turn my nose up at apricots, plums and nectarines, none is more iconic than peaches! Anywhere I go right now, I seem to run into them. Peach cakes, scones, cobblers, pies—they’re inescapable, even in my own kitchen. Not that I’m complaining. Here are some of my favorite peach desserts from the archives.

Friday Favorites: Peaches

Peach Pie

It doesn’t get much more classic than peach pie! Mine is made with a just the barest hint of spice and wrapped up in a delicious whole wheat crust.

Friday Favorites: Peaches

Peach Tart

What’s easier than pie? This Peach Tart! It’s a sheet of rough puff pastry topped with a fresh peach mosaic and the tiniest amounts of sugar and butter, assembled in no time and baked to golden peachy perfection.

Friday Favorites: Peaches

Peach Crisp

And what’s even easier than a Peach Tart? Peach Crisp! This classic dessert begins with sweetened fresh peaches, gets topped up with an oaty, nutty crumble and is baked until bubbly and begging for vanilla ice cream.

Friday Favorites: Peaches

Peach Upside-Down Cake

Here, a mosaic of ripe sliced peaches are baked underneath a brown sugar batter, then inverted to reveal a sweet, sticky, summery upside-down cake.

Friday Favorites: Peaches

Peachy Paleo Cheesecake

This delicious cheesecake is completely vegan and gluten-free, and sweetened with maple syrup. It’s chilled until firm, then crowned with sliced fresh peaches and another drizzle of maple syrup. It’s non-traditional, but delicious—a no-bake dessert for everyone.

What’s your favorite thing to make with peaches? Let me know in the comments or on social media!

Plum Frangipane Galette

Plum Frangipane Galette

This Plum Frangipane Galette might just be the prettiest thing I’ve ever made.

Do you see that golden crust? Those red and gold plums? The frangipane peeking through? It’s gorgeous.

But looks aren’t everything, so it’s a good thing it’s delicious too. The crust—my favorite all-butter recipe—is flaky as all get-out, and it’s filled to the brim with barely sweetened fresh plums and fragrant frangipane, AKA the almond pastry cream of dreams. It’s so good!

My train of thought is not hard to follow. As this is my third frangipane based dessert in three weeks, you can probably gather that I am on a bit of a frangipane kick right now. But it’s for good reason—frangipane is easy to blitz up in a food processor and works as a perfect foil to any number of summer fruits. I’m already thinking up some ways to incorporate it into my Thanksgiving pies, too!

Plum Frangipane Galette

But I’m getting ahead of myself. Today, it’s all about the plums.

Plum Frangipane Galette
makes 1 galette, about 8 servings

Frangipane:
1 cup almond flour or 4 ounces blanched almonds
1 tablespoon all-purpose flour
pinch of Kosher or sea salt
6 tablespoons granulated sugar
6 tablespoons unsalted butter, cold-ish room temperature, cut into cubes
1 large egg
1/2 teaspoon pure almond extract

For the Galette:
1/2 recipe All-Butter Pie Dough or other good single crust recipe
3 medium plums, thinly sliced
2 tablespoons granulated sugar
2 tablespoons butter, cut into small pieces

For Assembly:
1 large egg
1 teaspoon water
coarse sugar (optional)

For Serving (optional):
confectioner’s sugar
vanilla ice cream
whipped cream

Make the frangipane. In a food processor (or very good blender), pulse almond flour, all-purpose flour, salt and sugar together. Pulse in butter. Pour in egg and almond extract, and process until frangipane is a homogenous paste.

Arrange oven racks in the upper and lower positions. Preheat oven to 375F. Line a rimmed baking sheet with parchment paper. Set aside.

Flour a surface and a rolling pin. Roll pie dough out until it is 1/8-inch thick (about a 12-inch circle). Transfer to prepared pan. Spread frangipane in a circle, leaving a 2-inch border on all sides. Arrange plums in a pattern over the top, making sure to overlap the slices. Fold dough over the sides of the filling to contain it. Dot exposed filling with butter.

In a small bowl, whisk together egg and water. Brush mixture on exposed pie dough. Sprinkle with coarse sugar, if desired.

Bake galette on the upper rack for 25 minutes. Move to the lower rack. Bake for 20-25 more minutes, tenting with foil if anything begins to brown too quickly. Crust will firm up as the galette cools.

Let galette cool completely in the pan on a rack. Remove to a cutting board. Slice and serve as-is, or with sifted confectioner’s sugar, whipped cream or vanilla ice cream, if desired.

Galette will keep covered at room temperature for two days, or in the refrigerator for up to four.

Blueberry Corn Muffins

Blueberry Corn Muffins

I don’t really like to tell people how to live their lives or what they should eat, but I have to make an exception. It’s important, I promise.

Y’all, you need to start putting blueberries in your corn muffins. Yes, the dinner-appropriate muffins I posted in the dead of winter. Those. Put blueberries in them and then eat them for breakfast or lunch, or even dinner, if you can get away with it.

Just do it. You won’t regret it. #peerpressure

Blueberry Corn Muffins

It seems obvious once you’ve thought about it. Corn and blueberries are great together! Corn is sweet and earthy; blueberries are sweet and tart. The two are frequently paired in salads in the summer months, so why not combine them in muffins, you know? This was my exact train of thought when I made these a few days ago, and now I’m just wondering why I didn’t make them sooner.

These Blueberry Corn Muffins are so easy to whisk together, and the payoff is outstanding. The recipe is the tiniest tweak on my original corn muffin recipe; I added a touch more flour and some vanilla for a sweeter profile without upping the sugar. Oh, and plenty of fresh summer blueberries, of course!

Blueberry Corn Muffins

Blueberry Corn Muffins bake up in less than 15 minutes. They’re soft, tender and perfectly domed, with a slight crumbly crunch from the cornmeal and bursting blueberries in every bite! While combining two already great things doesn’t always give great results, I am here to say that the union of corn muffins and blueberries is not to be missed.

I’ll say it again: you need to start putting blueberries in your corn muffins.

Blueberry Corn Muffins
makes 12 standard muffins

3/4 cup yellow cornmeal
1 1/4 cup all-purpose flour
1/2 cup granulated sugar
1 1/2 teaspoons baking powder
1 teaspoon baking soda
1/2 teaspoon Kosher or sea salt
1 cup fresh blueberries
1/2 cup milk (preferably whole), room temperature
1/2 cup full-fat sour cream
1/2 cup (1 stick) unsalted butter, melted
2 large eggs, room temperature
2 teaspoons pure vanilla extract

Preheat oven to 400F.

Line a 12-cup standard muffin pan with cupcake liners, or grease well. Set aside.

In a medium mixing bowl, whisk together cornmeal, flour, sugar, baking powder, baking soda and salt. Set aside.

In a small bowl, toss 1 tablespoon of the dry ingredients with the blueberries. Set aside.

In a small-medium mixing bowl (or large measuring cup), whisk together milk, sour cream, butter, eggs and vanilla. Add wet ingredients to dry and stir with a silicone spatula or wooden spoon just until combined. Gently fold in blueberries.

Divide batter among muffin cups, about 4 tablespoons (1/4 cup) each; they will be pretty full. Carefully tap the pan on the counter five times to release any large air bubbles. Bake for 13-14 minutes, until domed and a bit golden.

Remove muffins from the oven and let cool in the pan for ten minutes before removing to a rack to cool. Serve slightly warm or at room temperature.

Leftovers will keep well tightly-covered at room temperature for up to two days or in the refrigerator for up to five. Muffins may be double-wrapped in plastic and frozen for up to 3 months.

Triple Raspberry Icebox Cake

Triple Raspberry Icebox Cake

I happily bake year-round, but I’ll be the first to tell you that my favorite kind of summer baking is no-baking. Like leaving the oven off. Like letting the fridge do all the work. Like not heating up my remarkably well-insulated New York City apartment on an already steamy day, and still having incredible dessert.

Today’s recipe is a variation on the queen of no-bake desserts: icebox cake! At its simplest, it’s just layering whipped cream and thin cookies (usually chocolate wafers or graham crackers) together and then letting the assemblage chill out in the fridge for a few hours. The cookies soften against the whipped cream and become cakelike—it’s very good.

Icebox cakes have been around for a good long time now, since the advent of the home refrigerator. In all those years—and in all the recipes I’ve tried—I’ve yet to find one that isn’t outstanding. Icebox cakes can be as easy or complicated as you want them to be. Low brow, high brow, whatever. The two ingredient classics are just as delicious as more intricate variations. I guess what I’m saying is that you should absolutely get on the icebox cake train if you haven’t already, and then, once you are a believer, twist up the original recipe and make it Triple Raspberry.

Triple Raspberry Icebox Cake

Oh yes, this cool & creamy pink icebox cake is loaded with raspberry flavor. From whole fresh raspberries to spoonfuls of raspberry jam to airy raspberry whipped cream, this cake is about as raspberry as it is possible to be!

All the ingredients are stacked in a loaf pan with plain honey graham crackers to divide the layers. After a long chill, the crackers are tender as can be, making for clean slices.

Triple Raspberry Icebox Cake

Can we discuss the cross-sections of fresh raspberries and ruby red streaks of jam? Because those…well, they’re my jam. I mean that in every sense of the word.

Triple Raspberry Icebox Cake

Like its predecessors, this cake is so much more than the sum of its parts. It’s about as easy as from-scratch summer desserts come, and about as raspberry-forward as it can be! It’s berry good, if I do say so myself.

Triple Raspberry Icebox Cake
makes one 9x5-inch cake, about 8-10 servings

Raspberry Whipped Cream:
6 tablespoons pulverized freeze dried raspberries
1/2 cup confectioner’s sugar
3 cups heavy cream, very cold

For Assembly:
10-12 whole graham crackers (4 sections per cracker), divided
1 6-ounce package fresh raspberries, divided
1/2 cup raspberry jam, divided

Decoration & Garnish:
1/2 cup raspberry jam, strained
2-3 teaspoons pulverized freeze dried raspberries
fresh raspberries

Lightly grease a 9x5-inch loaf pan. Line with parchment paper, leaving a little overhang on the long sides. Set aside.

Make the raspberry whipped cream. Place freeze dried berries in a food processor and process until they are powder, about 45-60 seconds. Alternatively, place the berries in a sealed zip-top bag and crush well with a rolling pin or other heavy object.

Measure out 2 tablespoons of pulverized berry powder, and reserve any remaining powder for another use.

In a medium-large mixing bowl, combine heavy cream, vanilla, confectioner’s sugar, and pulverized berries. Use an electric mixer to whip cream until stiff peaks form. Do not over whip (but if you do, just add a little more cream).

Gently spread 1/3 of the whipped cream in an even layer in the bottom of the prepared pan. Scatter 1/3 of the raspberries over the top and spoon 1/3 of the raspberry jam over, so that there are little globs everywhere. Tile a single layer of graham crackers over the top, breaking the crackers to fit, as needed. Press the graham crackers down *lightly* with your palm to adhere. Repeat layering step 2 more times.

Gentry cover the loaf pan in plastic wrap and refrigerate for at least 6 hours or overnight.

When you’re ready to serve, remove the pan from the refrigerator and discard the plastic wrap. Place a serving plate upside-down over the pan. Holding tightly to both the pan and the plate, flip them over so that the pan is now sitting upside-down on top of the plate. Gently lift the pan up to remove it. Gently peel off the parchment.

Decorate. Place jam in a small microwave-safe bowl and microwave for 15 seconds so it’s a bit loose. Push through a fine mesh strainer (set over a bowl) to remove seeds. Transfer warmed, seedless raspberry jam to a piping bag and snip the tiniest corner. Drizzle the cake with the jam as desired.

Dust cake with pulverized raspberry powder. Garnish with whole fresh raspberries. If not serving immediately, refrigerate.

Serve cake cold. Slice with a serrated knife, wiping it clean between cuts.