Crispy, Crunchy Double Chocolate Cookies

Crispy, Crunchy Double Chocolate Cookies​

I’ve been a chewy cookie devotee for pretty much my whole life, but I might be coming around to the other side. I mean, I’m not going to swear off soft cookies forever or anything, but let’s just say I get where the crunchy cookie people are coming from.

Crispy, Crunchy Double Chocolate Cookies​

Think about it. We don’t eschew crunchy vanilla wafers or snappy shortbread. Lord knows we love Oreos. But for some reason we all rush to vilify pretty much any other cookie with that texture. And why? What’s so wrong with a light, crispy cookie with a good crunch all the way through?

Nothing. That’s what. Especially when they’re double chocolate and can be yours in less than an hour’s time.

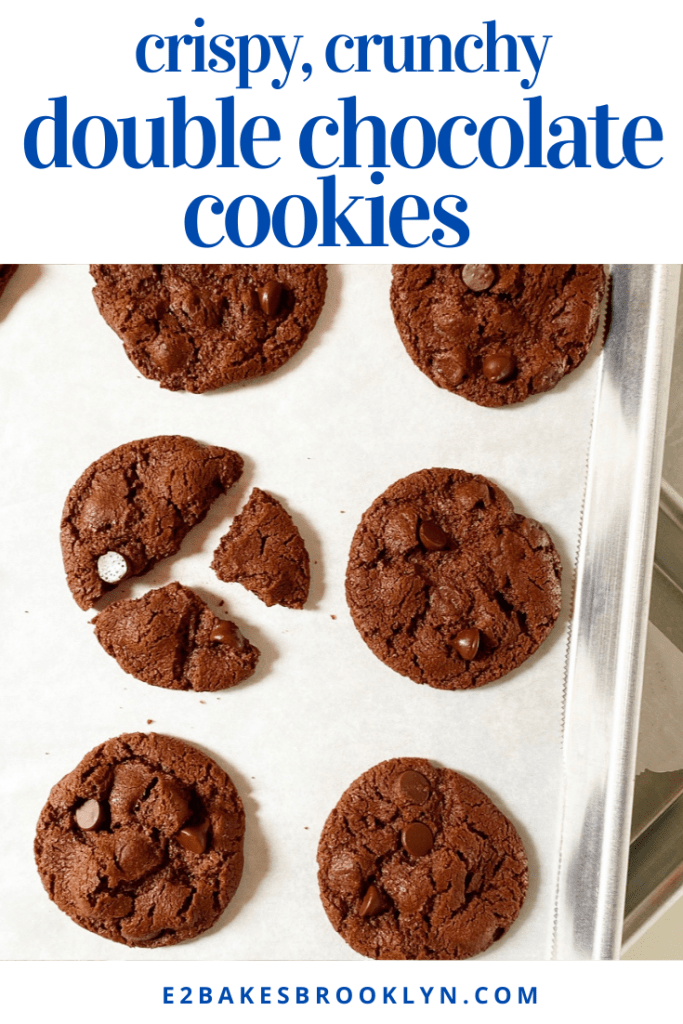
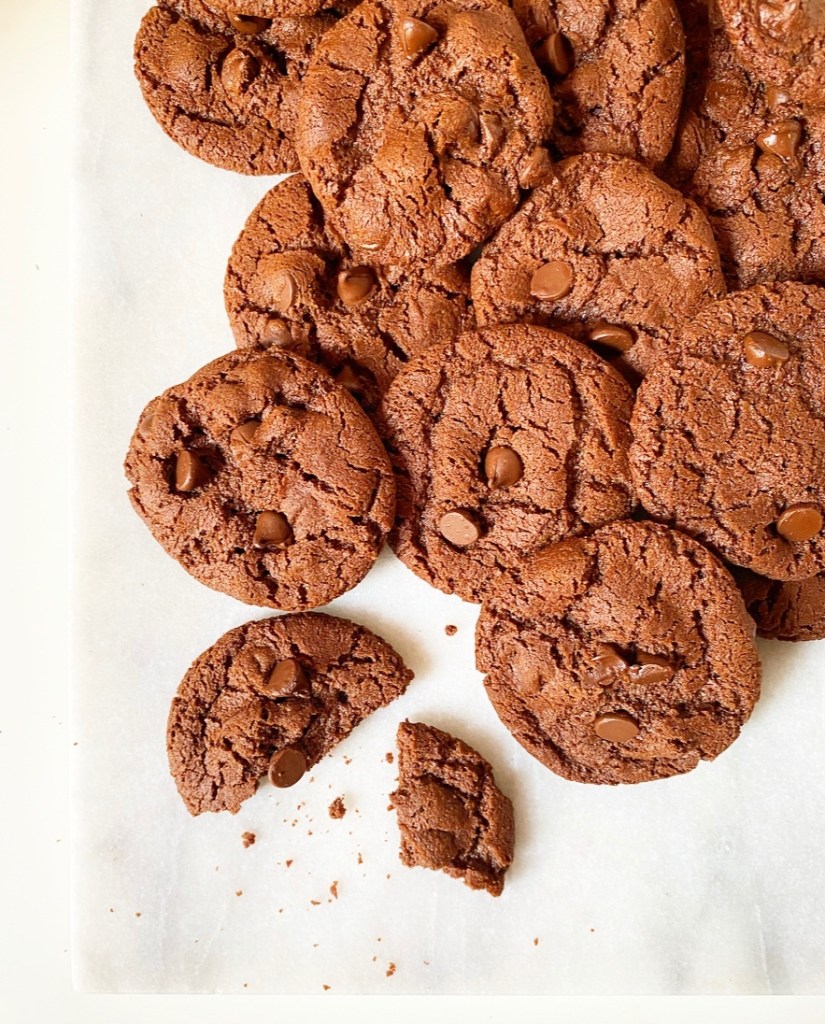
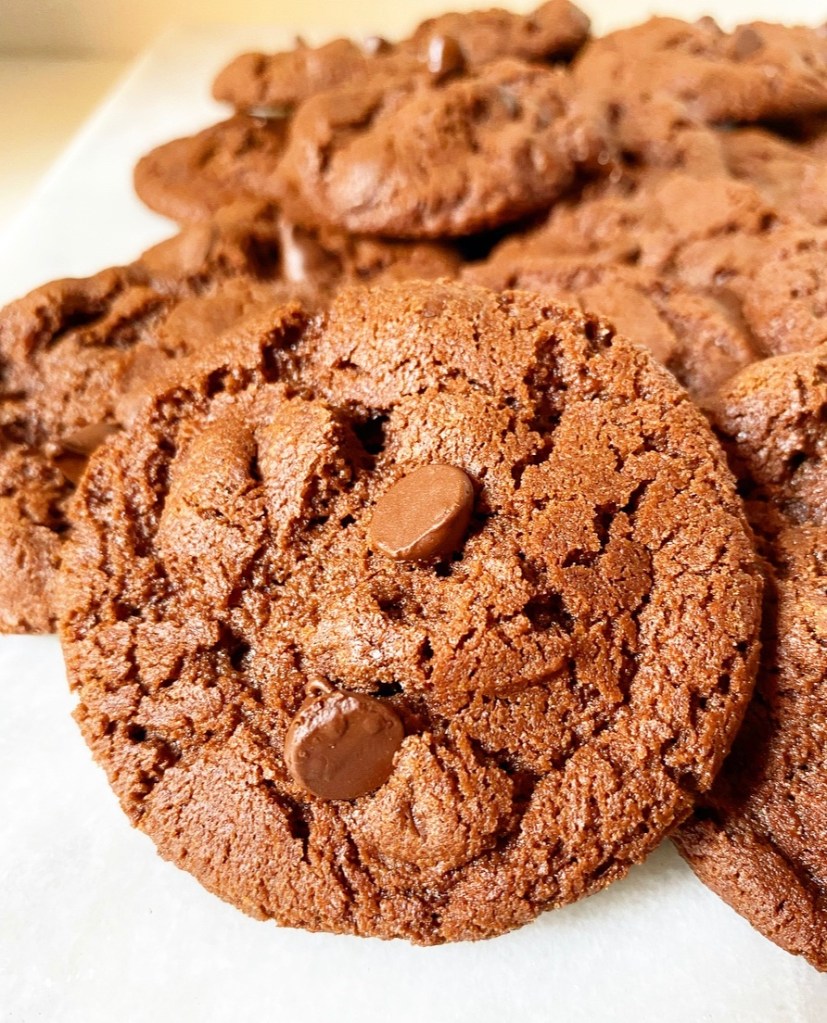
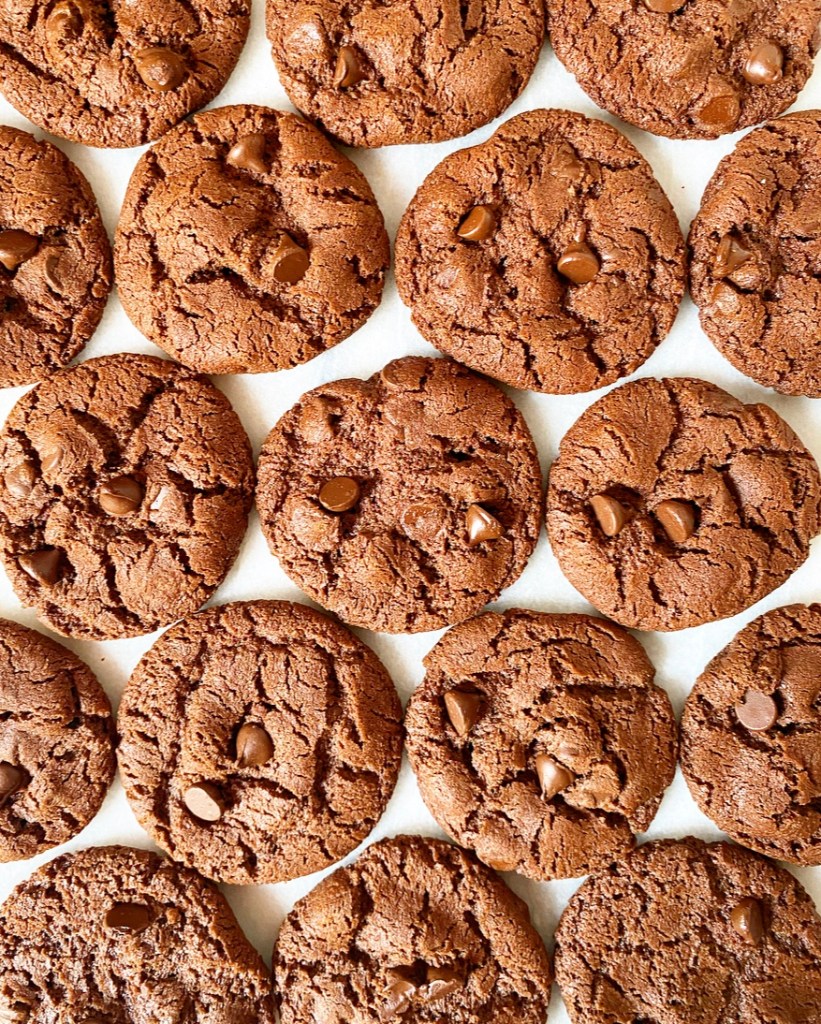
As with other crispy, crunchy cookies I’ve made, these Double Chocolate Cookies are top notch. They’re not a second best, or an “if you don’t have eggs and brown sugar” cookie. They’re their own thing—a double chocolate cookie for the crunchy cookie people. They’re light, crackly-topped, and chocolaty as all get out. If that isn’t enough, you likely have all the ingredients in your kitchen right now.

Crispy, Crunchy Double Chocolate Cookies​

Who knows, with a little elbow grease and working oven, you could become a crunchy cookie person any day now. Welcome to the club.

Crispy, Crunchy Double Chocolate Cookies​
Crispy, Crunchy Double Chocolate Cookies
makes about 2 dozen cookies

1 cup all-purpose flour
1/2 cup natural unsweetened cocoa powder
2/3 cup granulated sugar
1/2 teaspoon baking powder
1/2 teaspoon baking soda
1/2 teaspoon Kosher or sea salt
1/2 cup (1 stick) unsalted butter, softened to room temperature
2 tablespoons light corn syrup (or golden syrup or mild honey)
1 teaspoon pure vanilla extract
2/3 cup semisweet chocolate chips + more for topping

Arrange oven racks in central positions. Preheat the oven to 350F. Line two rimmed baking sheets with parchment paper. Set aside.

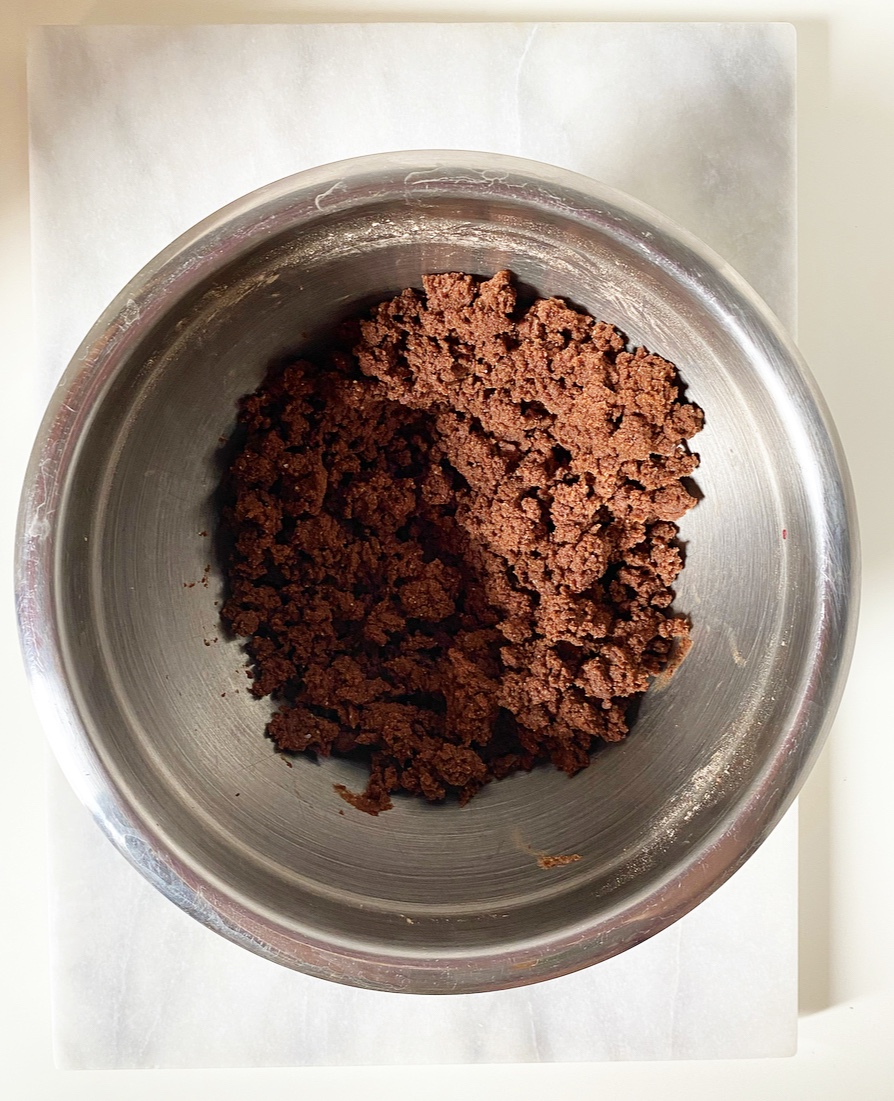
In a medium mixing bowl, whisk together flour, cocoa powder, granulated sugar, baking powder, baking soda and salt.

Cut softened butter into 8 pieces and add them to the mixing bowl. Starting at low speed and increasing as ingredients become incorporated, use an electric mixer to mix the butter into the flour/sugar mixture until powdery and wet-sandy. You may need to stop a time or two to break up larger pieces of butter.

Add corn syrup and vanilla and mix to combine. Dough will look crumbly, but should hold together well when pinched.

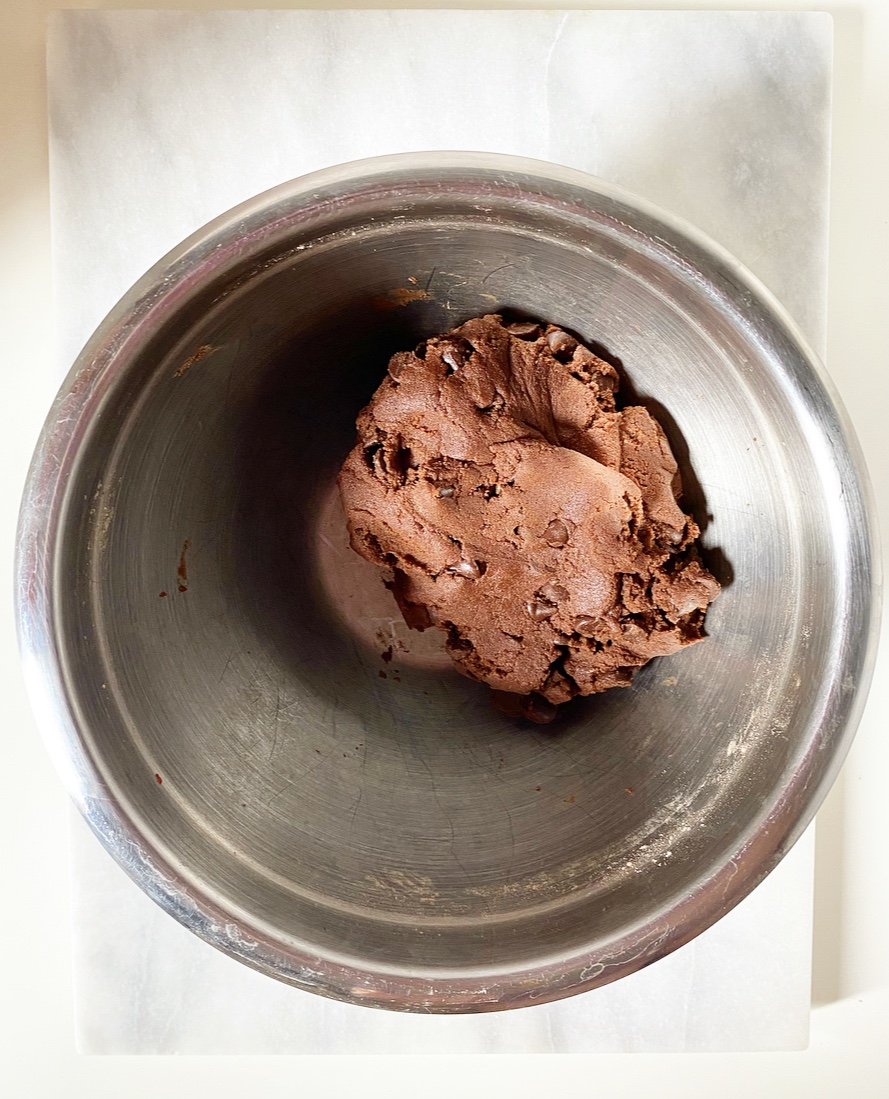
Add the chocolate chips to the dough and mix/knead them in with a clean hand (or a silicone spatula or wooden spoon) until evenly distributed and the dough is a cohesive unit.

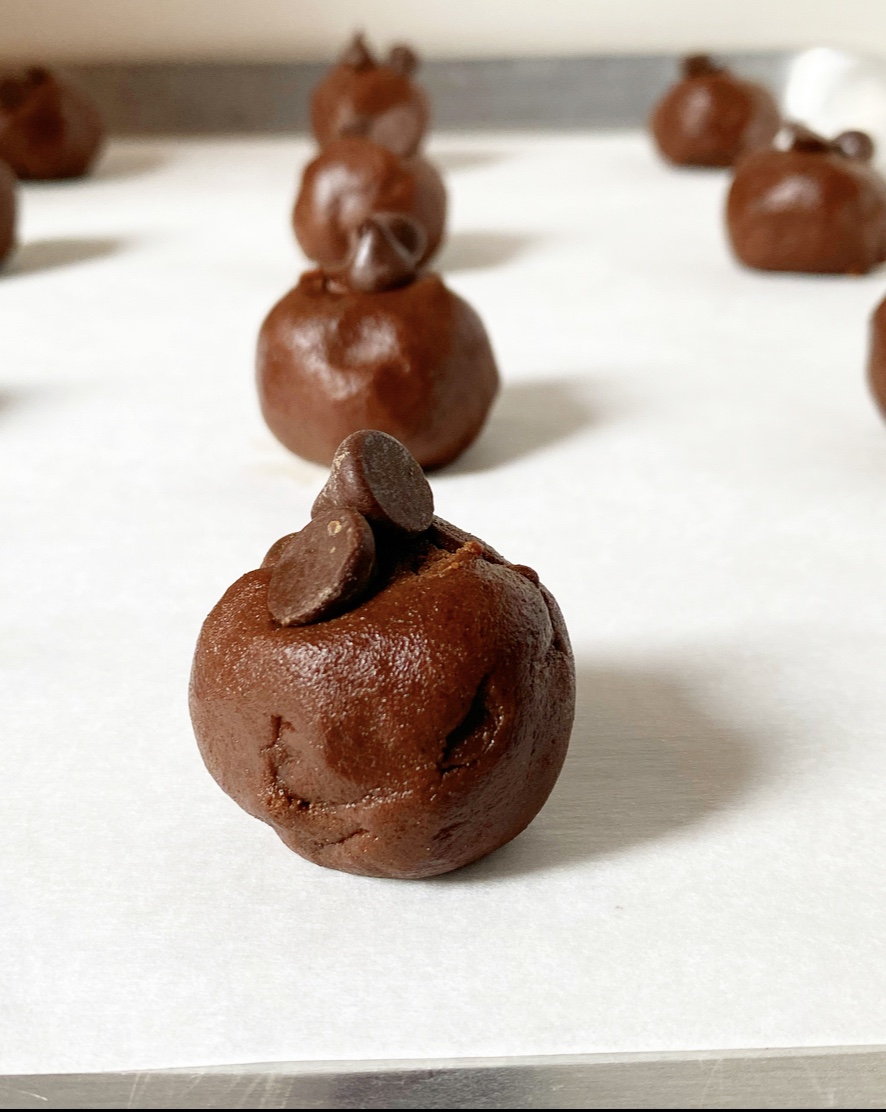
Scoop the dough by the tablespoon, roll into balls and place them 2-3 inches apart on prepared pans (I fit 12 on each half-sheet pan). Bake for 9 minutes, then rotate the pans top-to-bottom and front-to-back. Bake another 8-9 minutes, until a bit puffy and cracked on top.

Let cookies cool for 7 minutes on the pans. Remove to a rack to cool completely. Serve.

Leftover cookies will keep in an airtight container at room temperature for up to a week.
Crispy, Crunchy Double Chocolate Cookies​

No-Bake Strawberry Cream Pie

No-Bake Strawberry Cream Pie​

If you can’t tell, I am all about baking with berries right now. Or no-baking with them, in this case.

That’s right! This lush pink strawberry pie is a completely oven-free operation. It’s cold and creamy with huge strawberry flavor, and just enough chocolate to please anyone who says they don’t like fruit desserts. This is a recipe you’ll be delighted to have in the warmer months. Anything to keep the oven off, right?

No-Bake Strawberry Cream Pie​

No-Bake Strawberry Cream Pie starts with an Oreo crumb crust filled with dark chocolate ganache AKA a “black bottom.” Fresh strawberries are pressed into the chocolate for flavor an texture, though you can skip this particular adornment if you need to make the pie more than a day in advance.

Next up is the titular strawberry cream. I’m sure there are plenty of ways to do this by reducing fresh strawberries, but I took the easy way out and opted for freeze-dried. They’re my go-to for strawberry-flavored desserts; they’re always excellent quality, and I love that they can be crushed and added to anything for a hefty hit of fresh berry flavor. Here, they’re pulverized and mixed with cream cheese, confectioner’s sugar and vanilla before being lightened with fresh whipped cream. In addition to providing the flavor in the filling, the freeze-dried berries also give our pie the most vibrant pink color! I just love it.

No-Bake Strawberry Cream Pie​

As with many no-bake pies, this one needs a chill to set up properly. I prefer to plan ahead and chill overnight, but you can get away with three hours if you’re in a bind. Once the chill time is up, spoon or pipe whipped cream over the top and finish with fresh strawberries. ‘Tis the season after all.

No-Bake Strawberry Cream Pie​
No-Bake Strawberry Cream Pie
makes one 9-inch pie

Oreo Crust:
24 Oreos
5 tablespoons unsalted butter

Ganache Layer:
4 ounces dark chocolate, chopped
1/4 cup heavy cream
~8 ounces (1/2 box) fresh strawberries, trimmed & quartered

Filling:
2 1.2 ounce packages freeze dried strawberries
1 1/3 cup heavy cream, very cold
8 ounces (1 brick) full-fat brick-style cream cheese, room temperature
1 1/2 cups confectioner’s sugar
pinch of Kosher or sea salt
2 teaspoons pure vanilla extract

Topping:
3/4 cup heavy cream, very cold
2-3 tablespoons confectioner’s sugar
1 teaspoon pure vanilla extract
5-6 fresh strawberries, thinly sliced

Place Oreos in the bowl of a food processor and blitz until they are crumbs. Add melted butter and pulse until the mixture can be pinched together. Press it into the bottom and up the sides of the pie plate. Refrigerate for 15 minutes to set.

Make the ganache. Combine chopped chocolate and heavy cream in a small microwave-safe bowl. Heat in 15 second increments, stirring in between, until a smooth even ganache forms (about 45 seconds total). Pour it into the crust and use the back of a spoon to carefully spread it into an even layer on the bottom. Top with quartered fresh strawberries. Refrigerate crust and ganache while you prepare the filling. If making the pie more than a day in advance, skip adding the fresh strawberries. They may lose their freshness over a long period.

Place freeze dried strawberries in a food processor and process until they are powder, about 30 seconds. Set aside.

In a large mixing bowl, use an electric mixer to whip heavy cream until stiff peaks form. Do not overwhip. Set aside.

In a separate large mixing bowl, use an electric mixer to beat strawberry powder, cream cheese, and confectioner’s sugar until combined and fluffy. Use a silicone spatula or wooden spoon to stir in 1/3 of the whipped cream. Working in 2 installments, carefully fold in remaining whipped cream until combined. Transfer to chilled pie crust and use a silicone spatula to spread to the edges. Press plastic wrap to the top. Chill for 3 hours or overnight.

Make whipped cream topping. In a medium-large mixing bowl, combine heavy cream, sugar, and vanilla. Use an electric mixer to whip cream until stiff peaks form. If you want to pipe, load it into a piping bag fitted with a star tip. Remove pie from the refrigerator and discard plastic wrap. Spoon or pie whipped cream over the top. Finish with sliced fresh strawberries.

Slice and serve. Leftover pie will keep covered in the refrigerator for a couple of days.
No-Bake Strawberry Cream Pie​

Friday Favorites: Chocolate Chips

Friday Favorites: Chocolate Chips

Of all the bits and bobs you can mix into baked goods, none can compete with semisweet chocolate chips. They’re small, eye-catching and good in everything. Even if you’re not much of a baker, you probably have a bag somewhere in your pantry right now.

Tomorrow, May 15th, is National Chocolate Chip Day (not to be confused with National Chocolate Chip Cookie Day, August 4th). Celebrate by making one of these chocolate chip-centric treats, or just eating the morsels by the handful!

Friday Favorites: Chocolate Chips

“I Got Yolks” Chocolate Chip Cookies

You can’t celebrate chocolate chip day without cookies! These are made with all egg yolks so they’re super soft and rich.

Friday Favorites: Chocolate Chips

Crispy, Crunchy Chocolate Chip Cookies

These crunchy cookies are incredibly easy and so good, they’ve been known to convert avowed chewy cookie people.

Friday Favorites: Chocolate Chips

Whole Wheat Chocolate Chip Cookies

A recent update of an ooooold blog recipe, the flavor of these Whole Wheat Chocolate Chip Cookies is amped up with—you guessed it!—100% whole wheat flour.

Friday Favorites: Chocolate Chips

100% Whole Wheat Chocolate Chip Muffins

Whole wheat flour also does wonders for these chocolate chip muffins!

Friday Favorites: Chocolate Chips

Brown Butter Chocolate Chip Scones

Oh yes, I did. These tender scones are made with chilled brown butter and packed to the gills with chocolate chips. Needless to say, they’re so good, it’s stupid.

Friday Favorites: Chocolate Chips

Salted Caramel Chocolate Chip Bars

These ooey-gooey chocolate chip squares are filled with soft salted caramel! They’re super easy to make and always a hit, as all salted caramel chocolate chip things are.

Friday Favorites: Chocolate Chips

Chocolate Chip Cookie Crumb Cake

This is coffee cake for chocolate chip cookie people! No cinnamon—just chocolate chip sour cream cake and crunchy cookie crumbs.

Friday Favorites: Chocolate Chips

Basic Blondies

When I don’t have it in me to make cookies, I make blondies! These six ingredient bars are great on their own, but chocolate chips make them sing.

Friday Favorites: Chocolate Chips

One Big Chocolate Chip Cookie

If you love chocolate chip cookies and hate sharing, this is a great recipe to have in your back pocket.

Friday Favorites: Chocolate Chips

Brown Butter Chocolate Chip Cookie Cake

And if you love sharing, this cake can’t be beat.

Have you made these or any of my other chocolate chip treats? Let me know in the comments or on social media!

Friday Favorites: Chocolate Chips

Double Chocolate Berry Shortcakes

Double Chocolate Berry Shortcakes​

I’m generally not a fruit and chocolate gal, but I’ll make an exception for these Double Chocolate Berry Shortcakes. Made with dark chocolate biscuits, chocolate whipped cream and fresh berries, this spin on the classic dessert has “delicious” written all over it!

Getting deep chocolate flavor into these biscuits was more challenging than just adding some cocoa powder. My starting point was my five ingredient cream biscuit base, but you’ll see that I deviated pretty significantly. I added cocoa, of course, but also chopped dark chocolate, granulated espresso and brown sugar for a good bittersweet flavor. Butter and heavy cream provide just enough moisture to bind the dough. Baking powder and baking soda leaven everything and produce good crackly tops, which are made all the better with crunchy coarse sugar.

I would normally encourage you to bake your biscuits close together so that they rise up instead of out, but I prefer to bake them separately here. Because cocoa powder doesn’t play by the rules of gluten, these will expand pretty dramatically. The results have distinct, crisp exteriors and tender interiors, perfect for splitting and layering with berries and cream. I tested this recipe seventeen times, and while these are not the tallest chocolate biscuits I made, they are by far the most delicious. I don’t know about your kitchen, but in mine, delicious beats aesthetic perfection every time. Craggy tops and soft centers for the win!

Double Chocolate Berry Shortcakes​

As far as assembly goes, this is a pretty run-of-the-mill shortcake operation. I like to use a fork to gently split the cooled biscuits into two thin layers, then sandwich them with chocolate whipped cream, berries and chopped dark chocolate. I add an extra flourish on top because I think it’s pretty, but feel free to leave your shortcakes unadorned if that’s more your style.

Double Chocolate Berry Shortcakes​

You’ll notice that I didn’t specify any particular berry for these shortcakes. Why limit yourself, you know? I used a mix of strawberries and raspberries because that’s what sounded good at the time. Feel free to use any berry (or other fruit) you like. We’re already twisting a classic—might as well do away with all the rules.

Double Chocolate Berry Shortcakes​
Double Chocolate Berry Shortcakes
makes about 12 shortcakes

1 3/4 cup + 2 tablespoons all-purpose flour
6 tablespoons natural unsweetened cocoa powder
1 1/2 teaspoons granulated espresso (optional)
6 tablespoons light or dark brown sugar, packed
2 1/4 teaspoon baking powder
3/4 teaspoon baking soda
3/4 teaspoon Kosher or sea salt
6 tablespoons unsalted butter, very cold
2.5 ounces dark chocolate, finely chopped
1 cup + 2 tablespoons heavy cream + more for brushing, very cold
1 tablespoon coarse sugar

Berries:
20-24 ounces fresh berries (about 4-5 cups)
1/4 cup granulated sugar

For assembly:
Chocolate Whipped Cream (recipe below)
2 ounces dark chocolate, finely chopped

Preheat oven to 425F. Line a rimmed baking sheet with parchment.

In a medium mixing bowl, stir together flour, cocoa powder, espresso granules, brown sugar, baking powder, baking soda and salt. Using your fingertips (not your palms!) or a pastry blender, cut cold butter into flour mixture until it is roughly the size of peas. Stir in chopped dark chocolate.

Pour in heavy cream. Stir with a rubber spatula or wooden spoon until a shaggy dough forms. You may need to knead it in the bowl a couple of times. If it seems too dry (“dusty”), add more cream by the tablespoon.

Turn dough out onto a floured (or cocoa powdered) surface. Give it 1-2 kneads before patting into a 1-inch thick rectangle. Flour a large, sharp chef’s knife before slicing the rectangle into 12 biscuits. Be sure to slice directly down—do not saw.

Evenly space biscuits on prepared pan, leaving 2.5 inches between each. Brush the tops with more heavy cream and sprinkle each with coarse sugar. Bake for 14-15 minutes, or tops are craggy and they have spread somewhat dramatically. Let biscuits cool completely the pan.

While the biscuits are cooling, fold berries and sugar together in a medium mixing bowl. Cover the bowl with plastic wrap and let sit (macerate) at room temperature for up to an hour.

When the biscuits are cool and the berries are ready, make the chocolate whipped cream (recipe below).

Assemble shortcakes. Use a fork to gently split biscuits in half equatorial (it’s okay if they’re not perfect). Gently move the bottom half of a biscuit to a plate. Top with chocolate whipped cream and berries. Place the top half of the biscuit over the top. Garnish with more chocolate whipped cream and berries, if desired. Serve immediately.

Leftovers are best eaten within a day or so.

Chocolate Whipped Cream
makes ~1 1/2 cups (enough for 6-8 desserts)

2 cups heavy cream, very cold
4 tablespoons natural unsweetened cocoa powder
4 tablespoons confectioner’s sugar, depending on preference

In a medium-large mixing bowl, combine heavy cream, cocoa powder and confectioner’s sugar. Use an electric mixer to whip cream until stiff peaks form. Do not over whip (but if you do, just add a little more cream).

Load whipped cream into a piping bag fitted with a tip or scoop with a spoon and use as desired.
Double Chocolate Berry Shortcakes​

Baking Shoes: A Love Story with Arch Support

I can’t pinpoint the moment when my chocolate brown Birkenstock Boston clogs became my dedicated baking shoes, but sometime between their arrival at my apartment in 2016 and the time they conformed to my deeply messed up feet, they became my constant companion in the kitchen. When I slide them on in the morning, a little signal goes from my toes to my brain that says “it’s time to bake.” I affectionately refer to them as my “Indoor Birks” because I can count on one hand the number of times they’ve experienced sunlight since they’ve been in my possession. They aren’t my first Birkenstocks and they certainly won’t be my last (I have three other pairs), but they are definitely the hardest-working and my favorites.

Baking Shoes: A Love Story with Arch Support​
After five years of wear. April 2021.

I am not exaggerating when I say that these clogs are the most important piece of baking equipment I own. Over the last eight years, I have amassed all the baking paraphernalia a modern American home baker could possibly need (tart pan and ice cream machine excepted). I have three mixers (two stand, one hand, all Kitchen Aid). I have four sets of measuring cups and so, so, so many measuring spoons. I have a whisk, two blenders, a food processor, a waffle iron, a scale, and silicone spatulas in every color, shape and size. I have two favorite brands of pans. I have a drawer for sprinkles, a cabinet for cookie mix-ins, and a mini-fridge that is only for butter! But I’m here to tell you that these shoes are the real MVPs.

This blog doesn’t happen if I’m not wearing my Indoor Birks. They are the thing that delineates my working from home from my just being at home. They have no known magical or mind controlling powers, but they do seem to get a Pavlovian response from my ADHD brain. I put them on the moment I roll out of bed most days, and from that point, I am baking or blogging or both. I don’t bother to get dressed or even put on a bra for these activities, but the Birks are non-negotiable. Though they have seemingly never been captured on camera (probably because of the aforementioned pajamas and bralessness), they have become my official-unofficial work uniform.

Baking Shoes: A Love Story with Arch Support​
I lied. Here’s the last time my Indoor Birks went outside. Who let me dress myself? January 2017.

My Indoor Birks have been to Texas, Maine, Massachusetts, San Francisco and Washington DC. I’ve worn them to make countless birthday cakes, a wedding cake, dinner for hundreds, and many meals for my nearest and dearest. They’ve seen me develop more than 500 recipes. At various times, their leather tops and cork soles have been covered in flour, dairy products, hot oil, boiling water, molten sugar, beaten egg, dishwater and god knows what else. They’ve protected my toes from broken glass and more than one falling knife. They’ve never failed me.

Baking Shoes: A Love Story with Arch Support​
“Indoor Crocs.” They work in a pinch.

About six months ago, I started to really see the wear and tear on my beloved clogs. They continued to be comfortable and provide support to my (seriously screwed up) feet, no matter what I threw, splashed or dropped their way, but there was no denying they were dirty and busted. Their sheen had long since disappeared. Their tread had smoothed to a probably-dangerous point. They squeaked so loudly that for months they announced my presence to my roommate’s dog long before I arrived in his sight line. I went on the Birkenstock website in search of a new pair, but my fellow Birk enthusiasts had cleaned out the stock, so I waited. Even when the supply was replenished, I waited. After five years, and having given in and bought a pair of interim floral “Indoor Crocs,” I just wasn’t ready to let go.

Refurbished. Monday, May 3, 2021.

Luckily, I didn’t have to, because if there’s a niche job to be done, New York City has people that will do it. Enter the magicians at Vince’s Village Cobbler, who not only asked about the history of my shoes upon arrival (and really seemed to care), but also did a full refurbish. In the span of a week, they cleaned them, returned the leather to close to its original quality (but kept the character), and replaced the soles and tread, all for much less than a new pair would have cost. I can’t begin to say how delighted I am with the makeover my Indoor Birks received, not least because it means I might get another half-decade of baking out of the deal.

This not an ad for Birkenstock and I understand that not everyone needs or can afford dedicated baking shoes (though you really should cover up your toes in the kitchen). I just wanted to acknowledge the silent (occasionally squeaky) partners in E2 Bakes, that support my arches and keep me standing even when I have to test something 27 times and probably should lie down. My relationship with these shoes has been longer than that of any of my ex-boyfriends. They’ve sustained more trauma than I anticipated, but they’re still there by my bedside whenever my baking inspiration (or my iPhone alarm clock) strikes.

If you’ve ever had a fresh pair of Birkenstocks, you know they take time to conform to your feet, but once they do, they’re yours and yours alone. Nobody can comfortably borrow them for any length of time because they’ve molded to the contours of your feet. I haven’t quite reached that point with these fresh soles—they’ve only been home four days—but I know someday soon I’ll forget all about having them refurbished and they’ll just be my Indoor Birks again, covered in something but carrying on nonetheless, one recipe at a time.