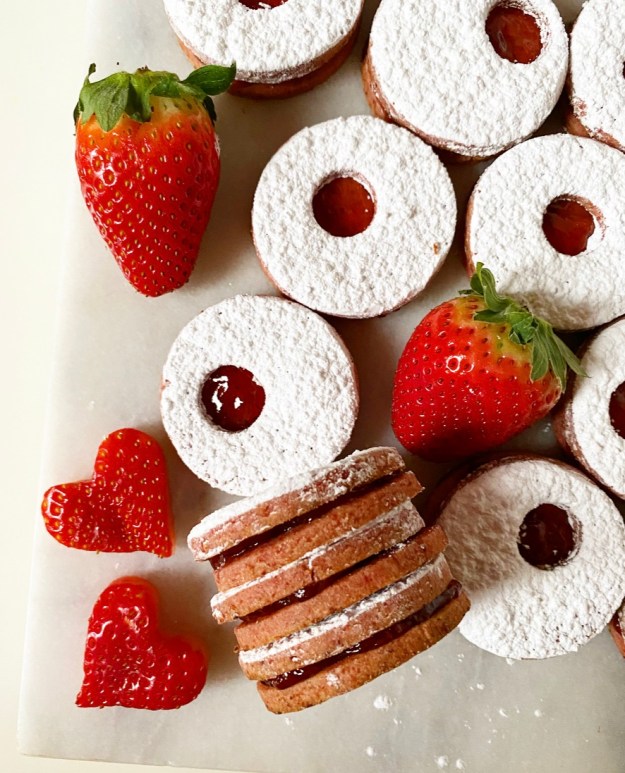
 Two cookie recipes in a week? Sure, why not. With Valentine’s Day coming up, these Double Strawberry Linzer Cookies just couldn’t wait.
 They’re filled to the brim strawberry flavor, and even I—an avowed midwinter strawberry hater—can’t resist them. Oh yes, I’m that person. Every year I get on my soapbox about strawberries not being in season in the dead of winter, and yet every year I make a strawberry baked good in the middle of February. I’m full of contradictions.
Thing is, I don’t do my midwinter baking with fresh strawberries, instead relying on flavorful and consistent freeze dried strawberries. I buy them in 1.2-ounce bags, grind them up and throw them in cakes, cookies, bars, buttercream candies, and anything else I can imagine. Here I swapped freeze dried strawberry powder for the ground nuts usually found in linzer cookie dough, yielding a batch of gorgeous pink strawberry roll-out cookies.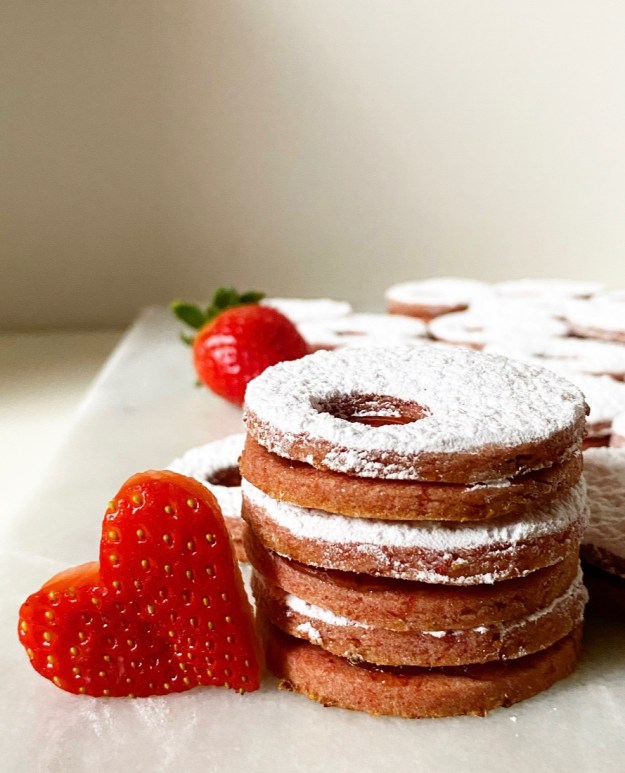 The cookie dough is rolled very thin, cut in two-inch circles (some with little windows), and baked for just six minutes. The results are firm, but on the soft side, something that makes these linzers irresistible when doused with confectioner’s sugar and sandwiched with strawberry jam. Yum.
 While these little treats are unapologetically strawberry, they can be made with any freeze dried berries and jam you like! I’ve even been toying with the idea of using freeze dried mango in this dough (maybe with this filling?) for a little tropical flair. The possibilities are endless.
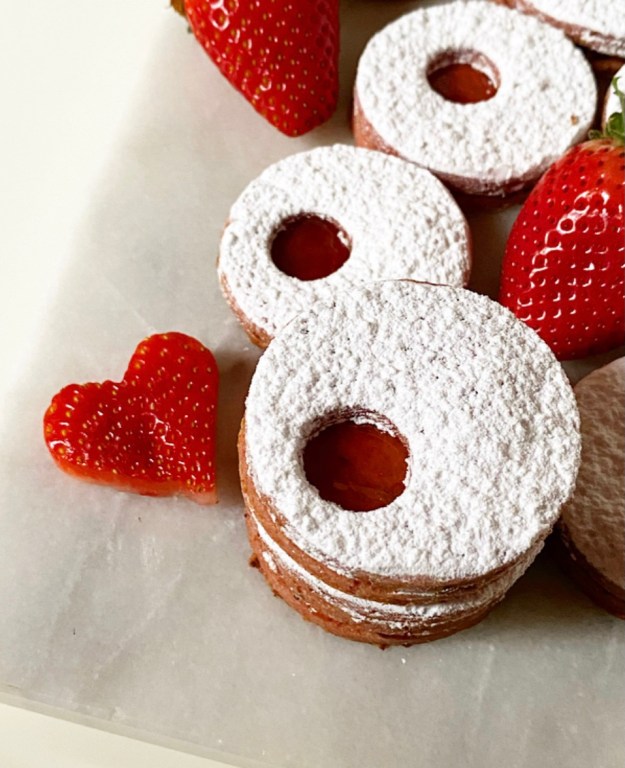
Double Strawberry Linzer Cookies
makes about 4 dozen sandwich cookies
Cookie Dough:
1 1.2-ounce package freeze dried strawberries
2 3/4 cups all-purpose flour
1 teaspoon baking powder
1/2 teaspoon Kosher or sea salt
1 cup (2 sticks) unsalted butter, softened to room temperature
1 cup granulated sugar
1 large egg, room temperature
1 teaspoon pure vanilla extract
For Assembly:
3 tablespoons confectioner’s sugar
~6 ounces strawberry jam
Special Equipment:
rolling pin
2-inch round cookie cutter
smaller round cookie cutter (I used the wide end of a piping tip)
sifter or wire mesh strainer
Make the cookie dough. Place freeze dried strawberries in a food processor and process until they are powder, about 30 seconds. Add flour, baking powder and salt, and pulse to combine. Set aside.
In a large mixing bowl, use an electric mixer to beat butter until light and fluffy, about 2 minutes. Cream in granulated sugar, followed by the egg and vanilla. Add dry ingredients in 3 installments, combining completely after each. Divide dough into quarters.
Working with one quarter at a time, sandwich dough between two pieces of parchment paper and roll until 1/8-inch thick. Transfer to the freezer (on a baking sheet) for 15 minutes. Repeat with remaining dough. It is okay to stack the sheets of dough in the freezer.
While the dough is freezing, place racks in the center positions. Preheat the oven to 350F. Line two baking sheets with parchment.
Remove one sheet of dough from the freezer. Peel on of the pieces of parchment off. Use a lightly floured 2-inch round cookie cutter to cut cookies. Use a smaller cookie cutter to punch the centers out of half the cookies. Place them 2 inches apart on prepared pans. Repeat with remaining dough. Scraps can be re-rolled, frozen, and cut.
Bake cookies 6-7 minutes, until tops are no longer raw-looking. Let cookies cool on the pans for five minutes before removing to a rack to cool completely. Repeat rolling, cutting, and baking with any remaining dough.
Set a cooling rack over a piece of parchment. Once all cookies are baked and cooled, set the cookies with the centers cut out on a prepared rack. Sift confectioners sugar over the tops.
Spread each whole cookie with 1/2-1 teaspoon of jam (amount is based on your preference). Carefully sandwich cookies together. Serve.
Strawberry Linzer Cookies will keep in an airtight container in the refrigerator for several days. Place wax paper between layers for best storage. Cookies will keep in an airtight container at room temperature for up to a week.


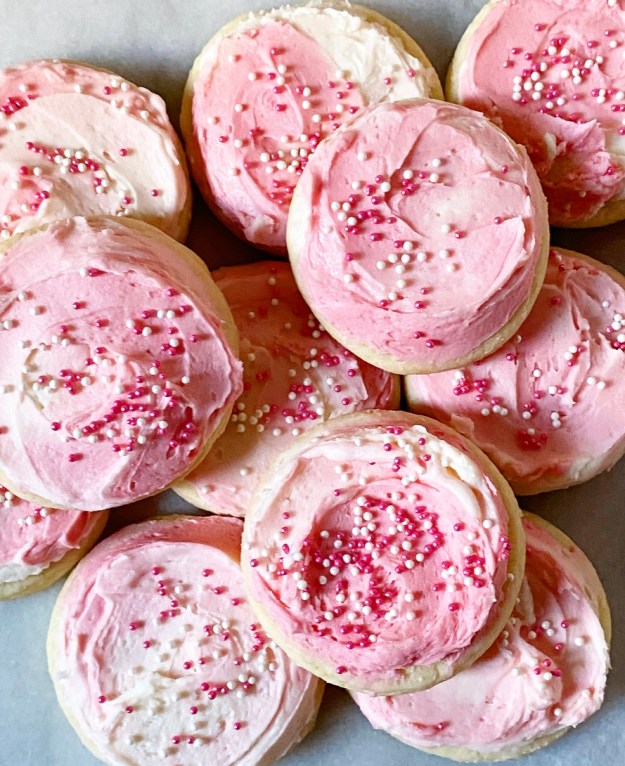
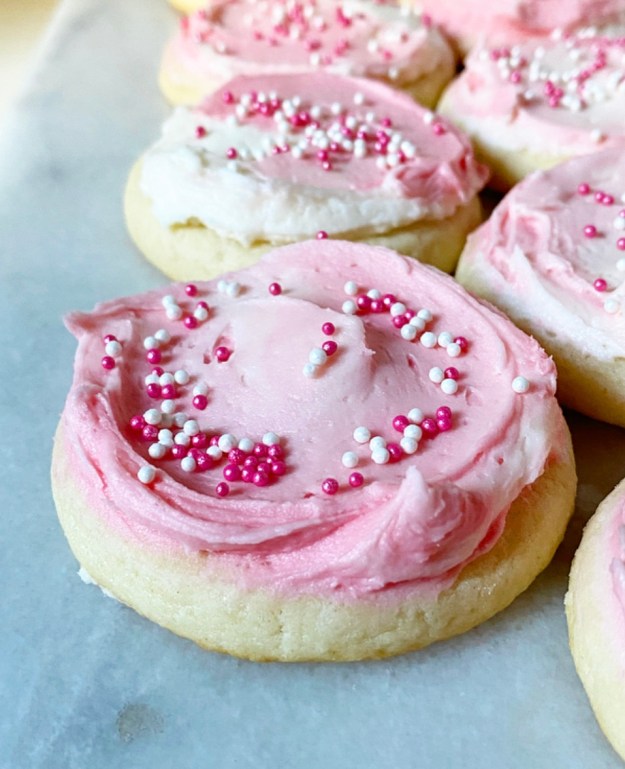
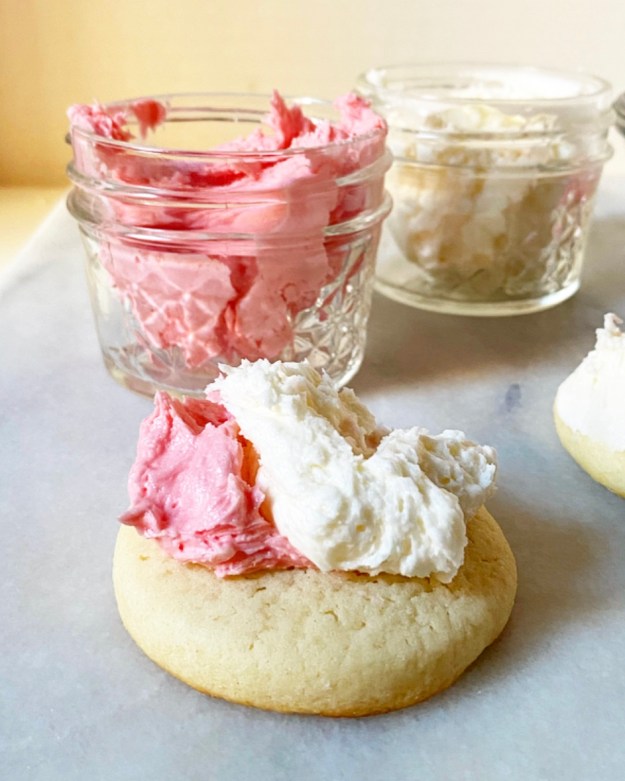
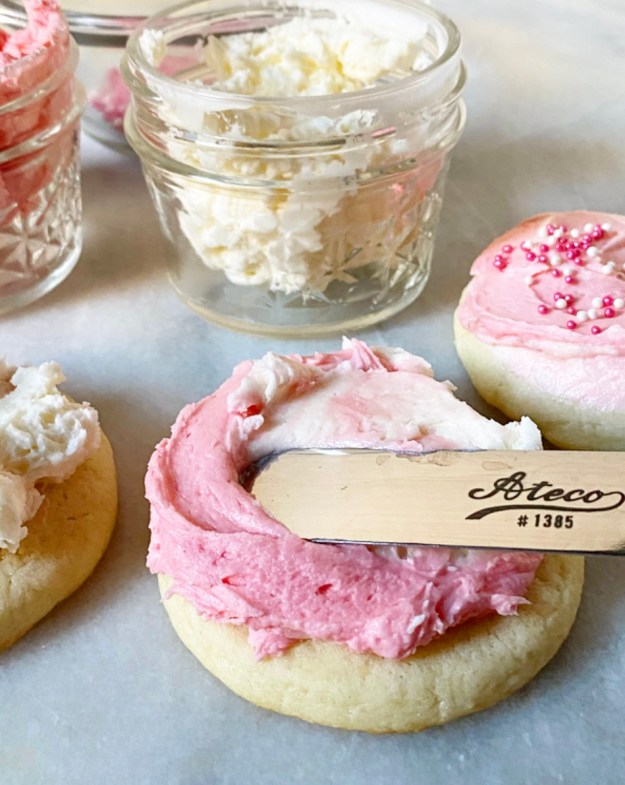
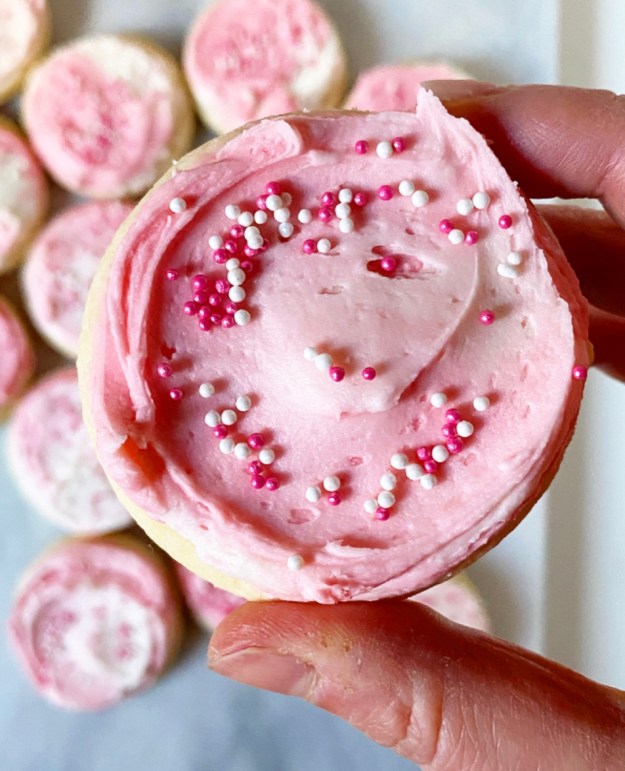
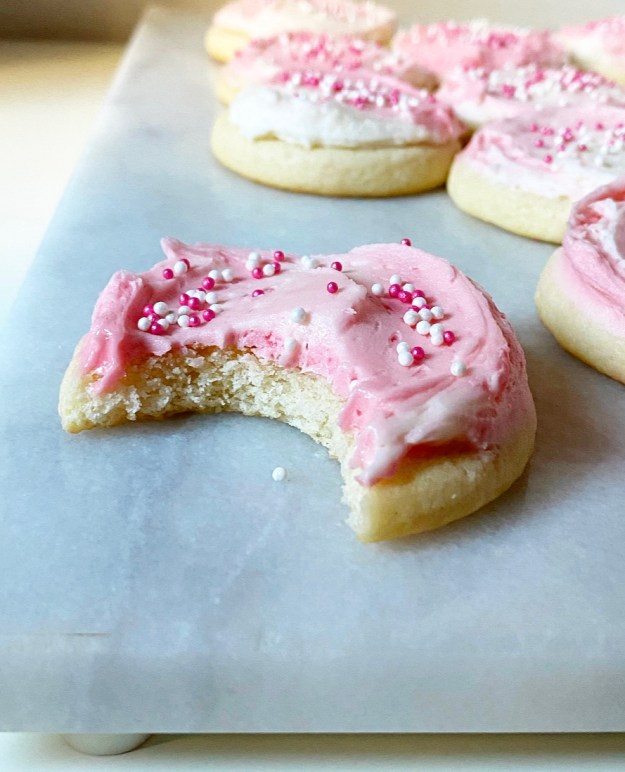
 Soft Sour Cream Sugar Cookies. Try saying that five times fast. Or, you know, skip the silliness and just make ‘em.


 I have made it clear over the years that I am a

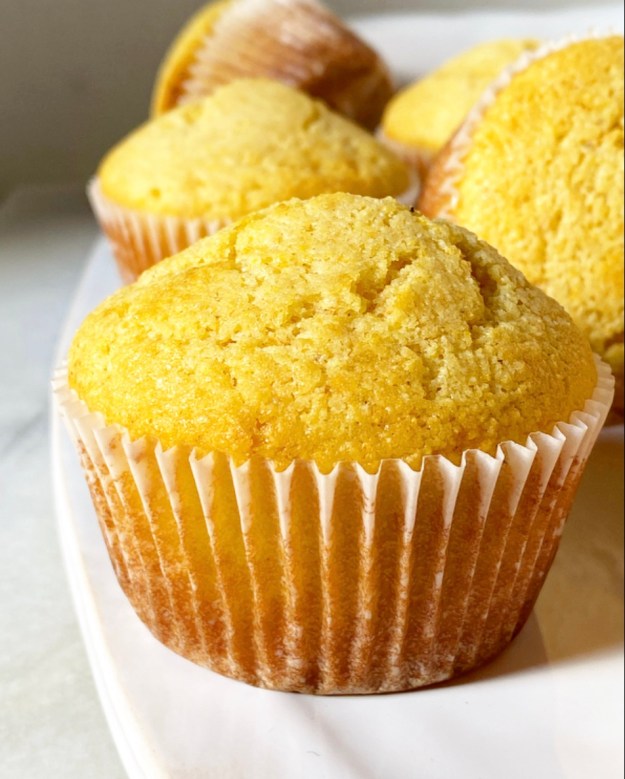
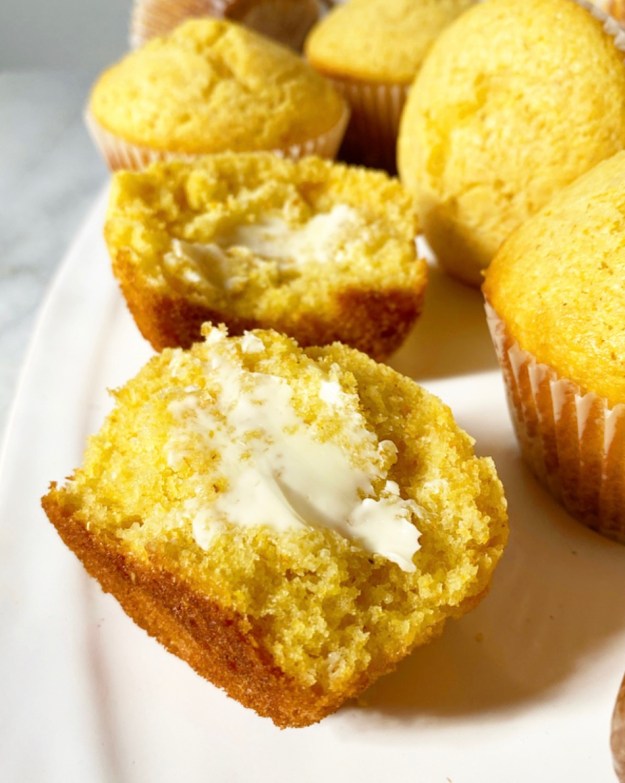
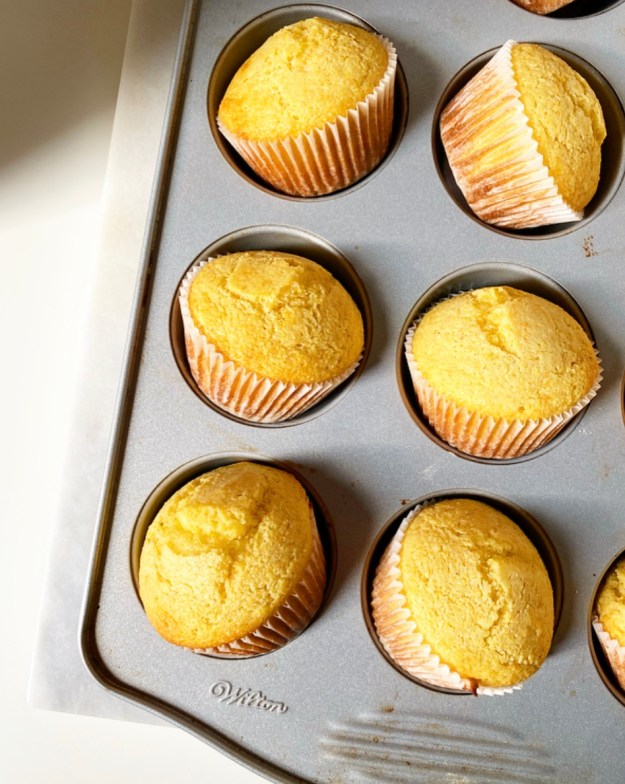
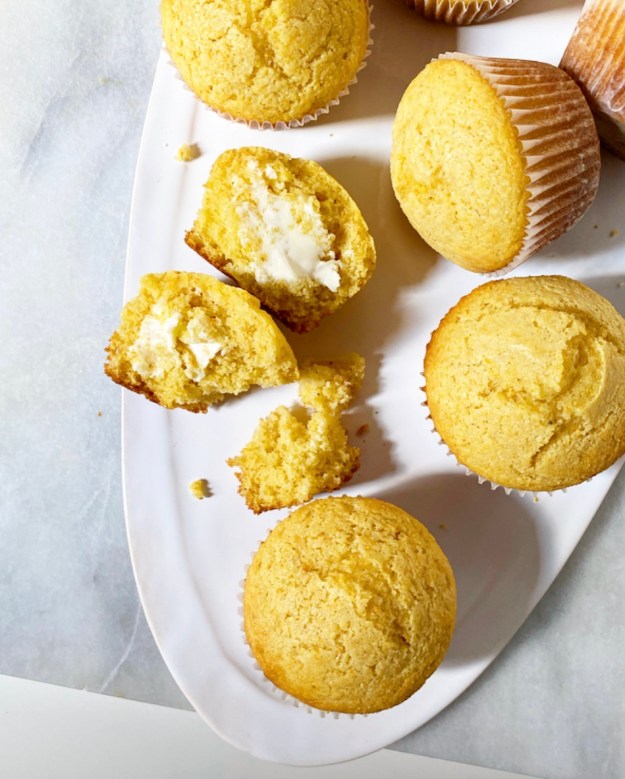
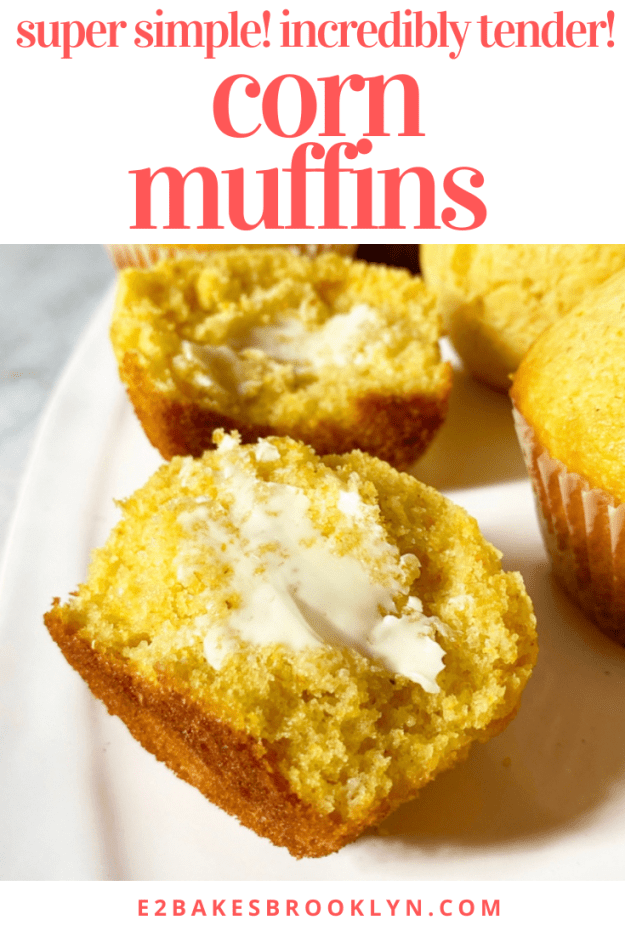
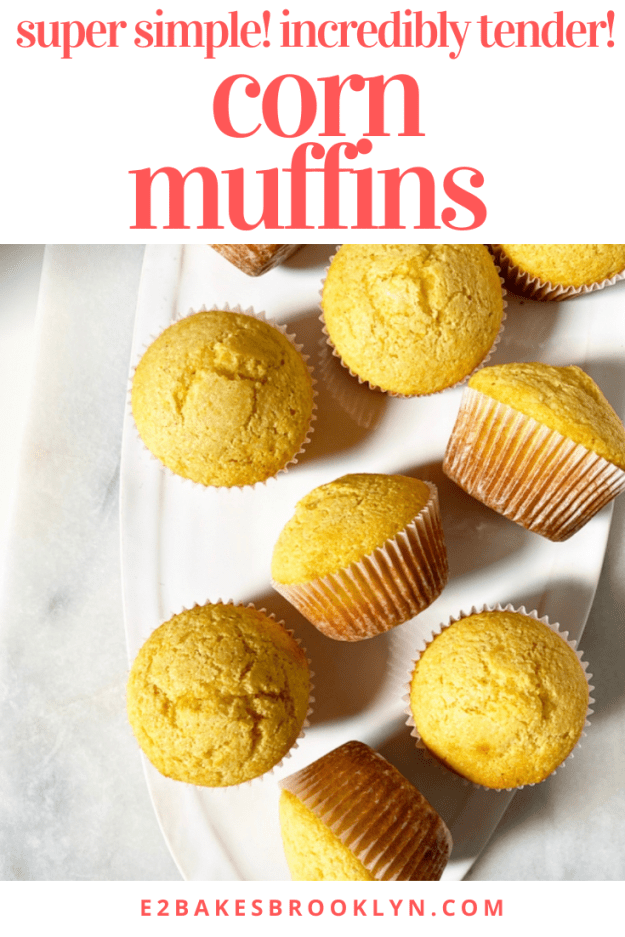
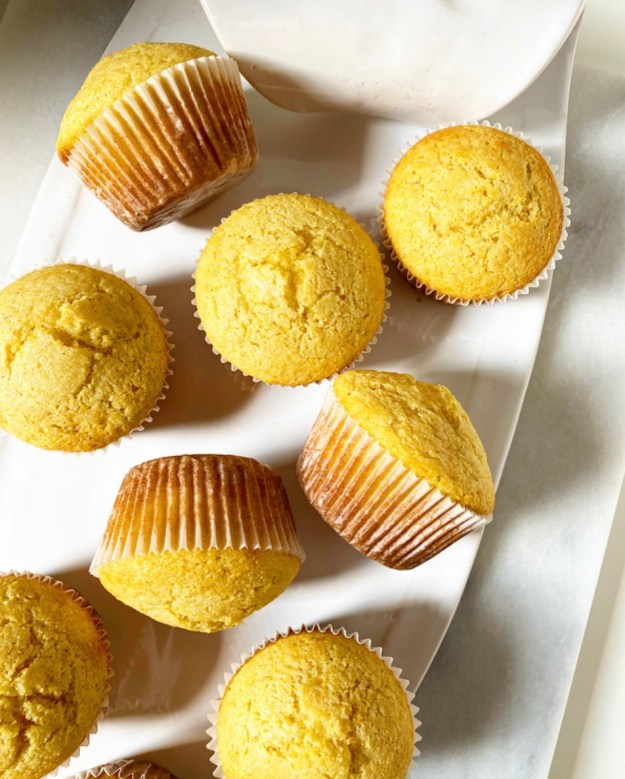 If you’re thinking “Doesn’t she already have a cornbread recipe on here?” the answer is
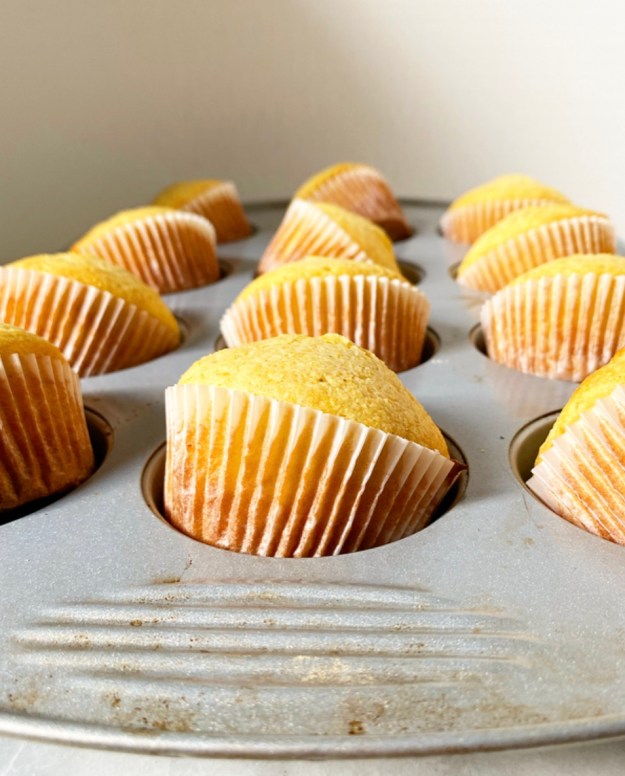

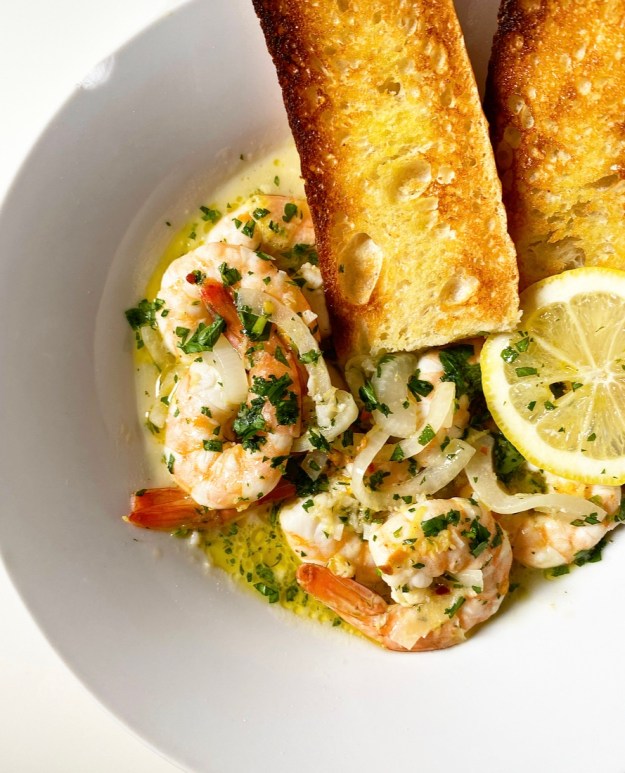
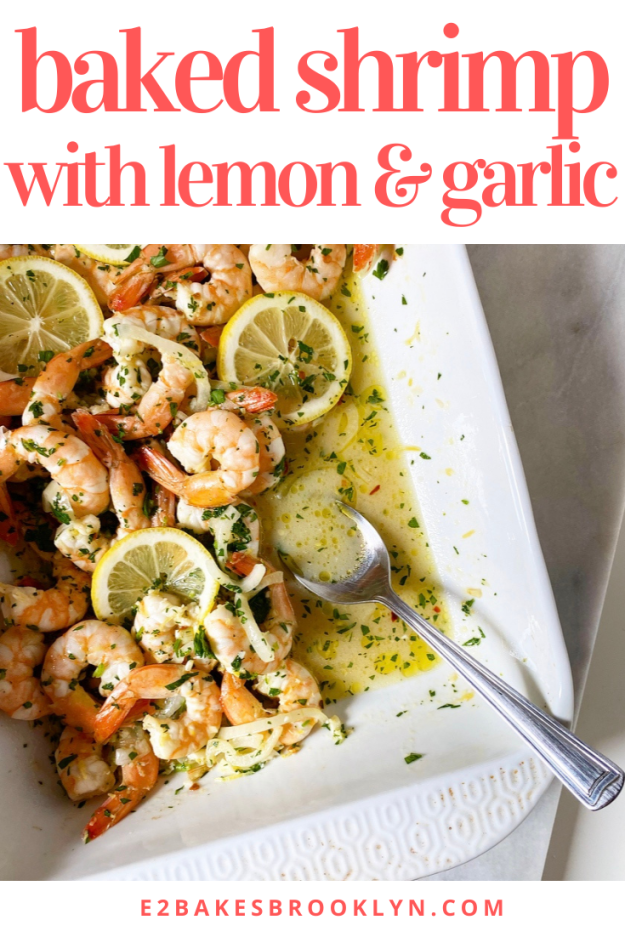
 There is a time for involved, long-cooking, multi-dish recipes, and then there’s the time for a 30 minute main that can be made in two steps and served with any carby thing that makes you happy.
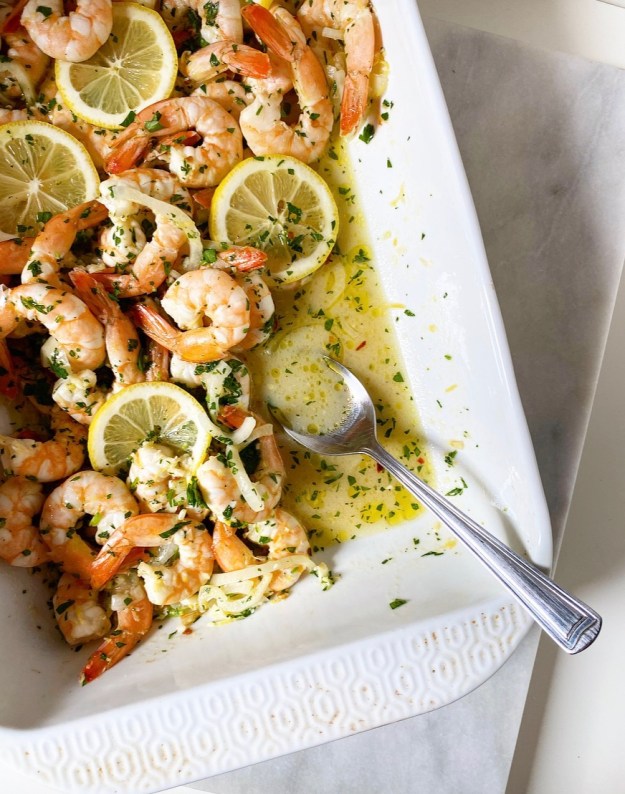
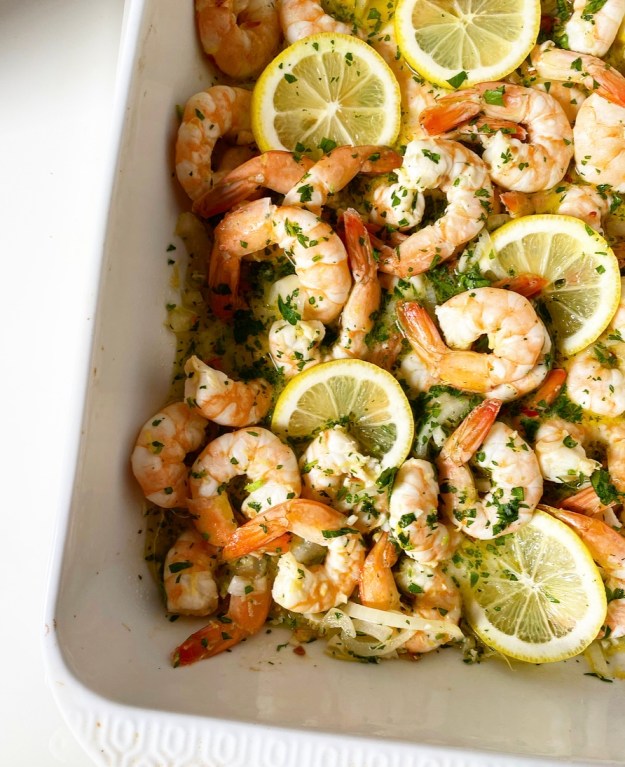 Whether you’re looking for something you can throw together on a weeknight or an easy special occasion meal for when dinner parties are a thing again, Baked Shrimp with Lemon & Garlic fits the bill. It’s light and refreshing, a snap to make and can be on your table in half an hour! Yesssss.
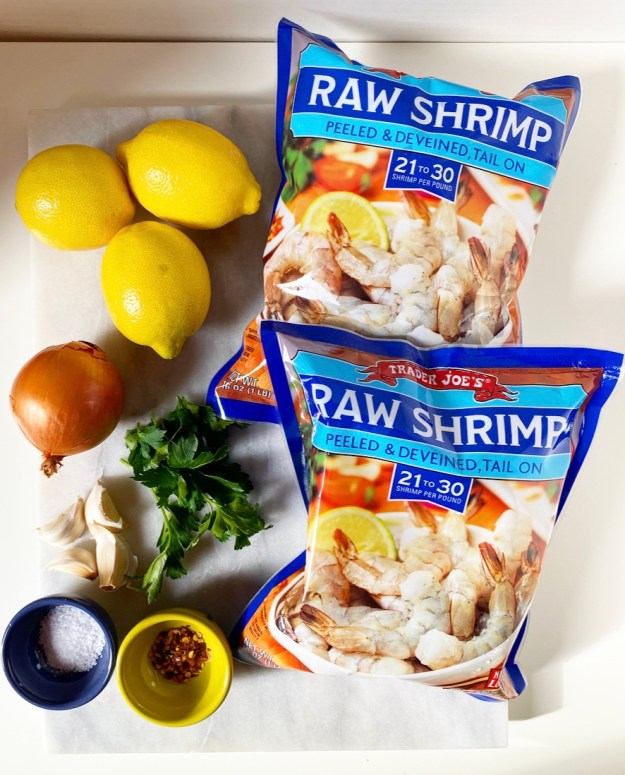
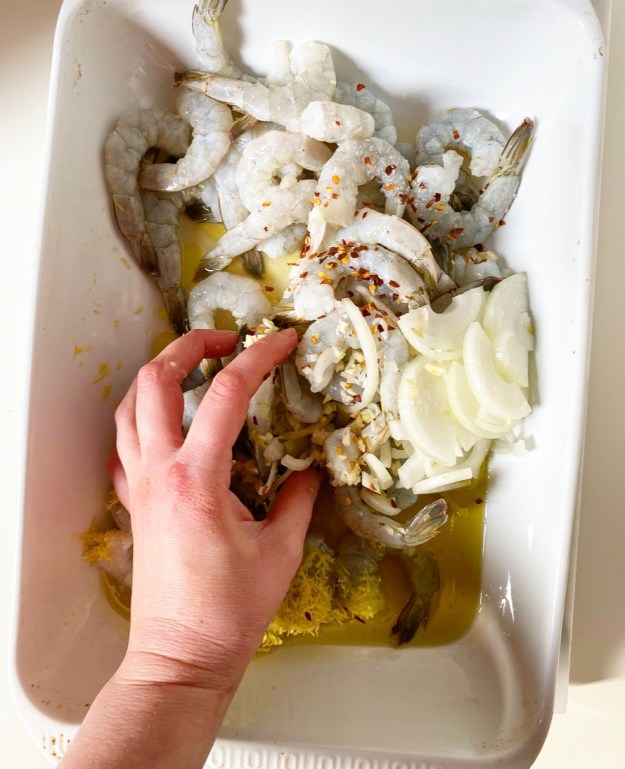
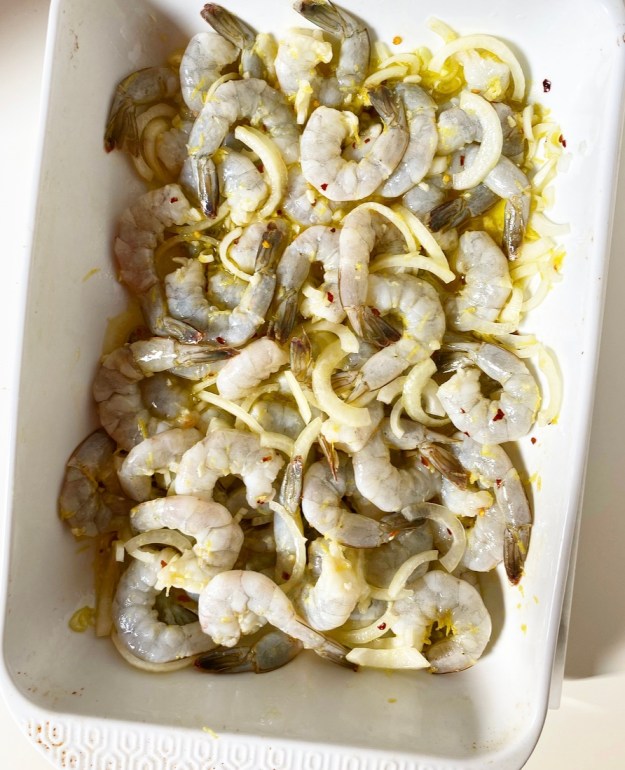 This is one of those dishes for which I almost always have the ingredients. My kitchen is always stocked with lemons, fresh garlic, onions, red pepper flakes, salt and olive oil, and I usually have parsley, too. Just add a couple of pounds of raw shrimp (I used frozen/thawed) and we’re ready to roll!
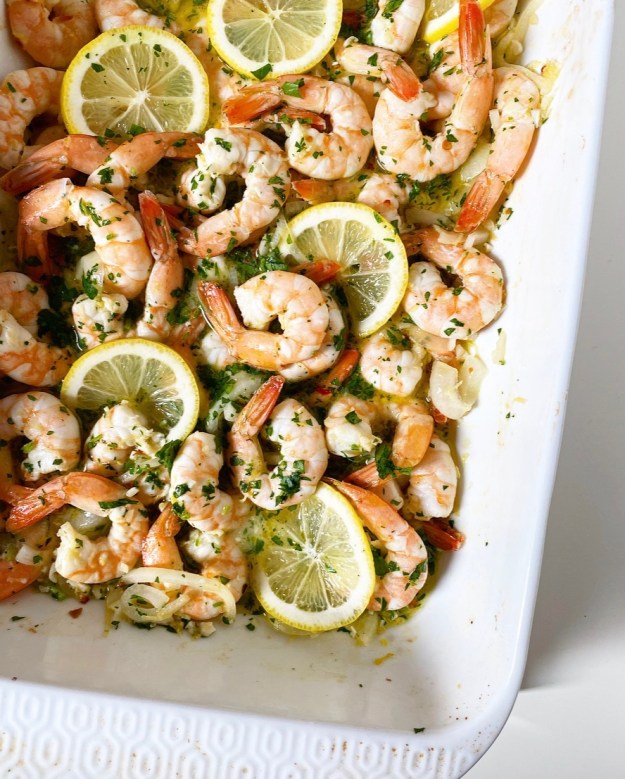 Serve Baked Shrimp with Lemon & Garlic over rice, orzo (or other pasta) or with crusty bread—anything to take advantage of all that lemony, garlicky oil! Oh, and a glass of something