For Let’s Make a Wedding Cake, Vol. 1, click here. For Vol. 2, click here.
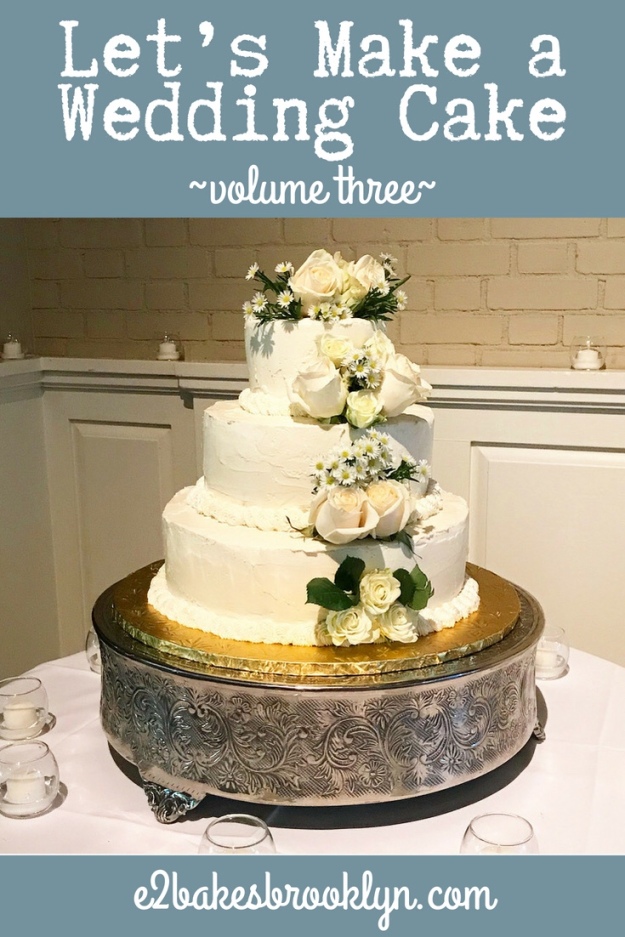
I made a wedding cake, you guys!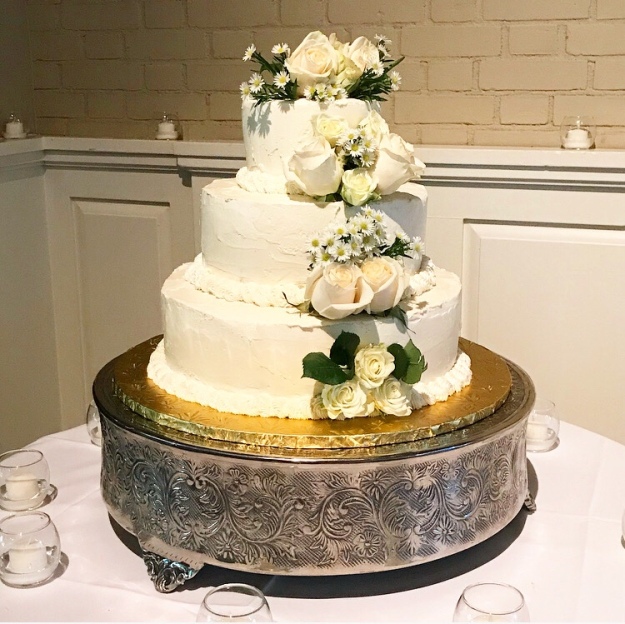 I sort of expected to have a little cake assembly drama to tell you about, but the truth is that it basically went off without a hitch.
 When last we spoke, I painstakingly laid out my wedding weekend plan…and then I promptly changed it. After making the fillings on Friday morning, I started fearing that if I filled the cakes that night, the mocha and caramel puddings would soak into the layers too much by Sunday, leaving everything sort of…mushy. Gross.
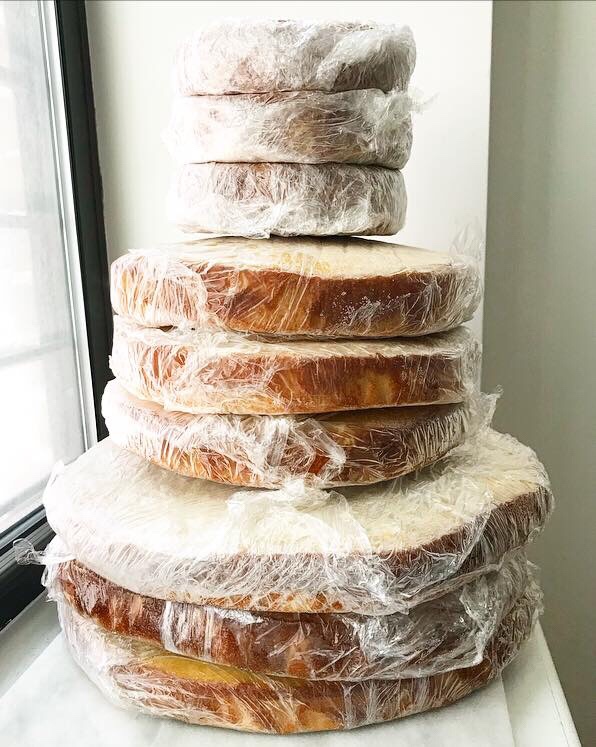
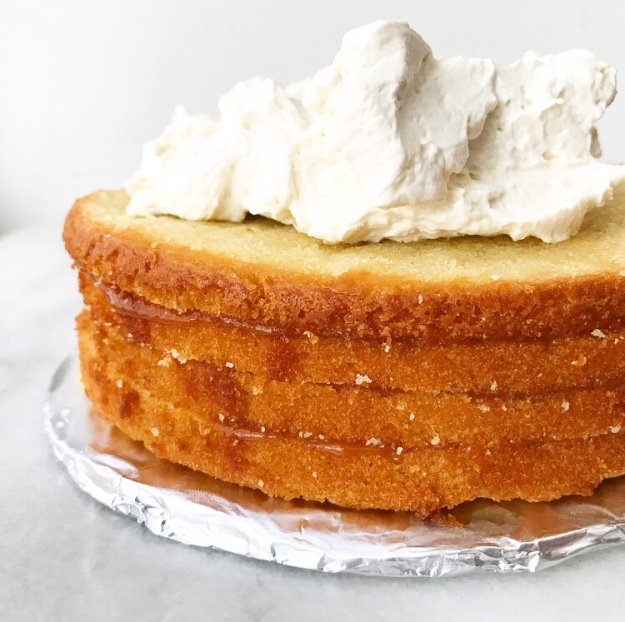
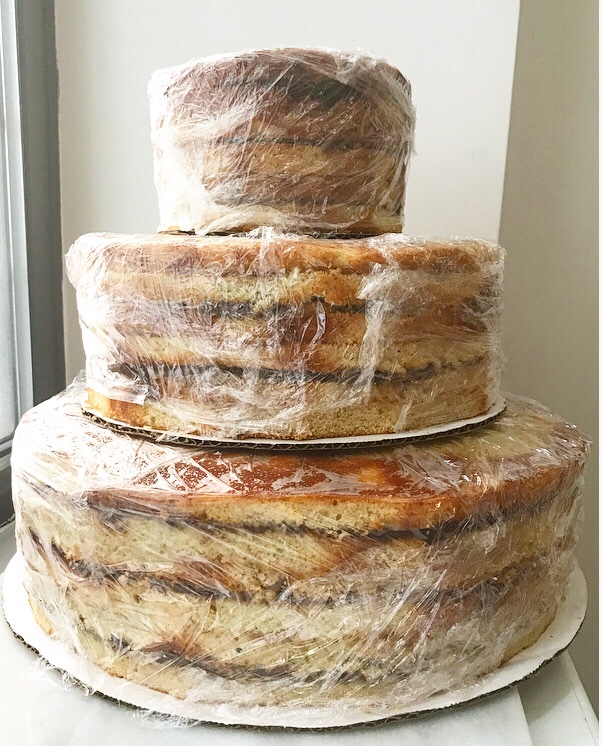 Instead, I chose to get up early on Saturday morning to torte, fill, and level the tiers. As you might have expected, the 14-inch base took the longest, clocking in at 1:40. The 10-inch center and 6-inch topper took 90 minutes combined. Each tier ended up being 3 1/2-inches tall.
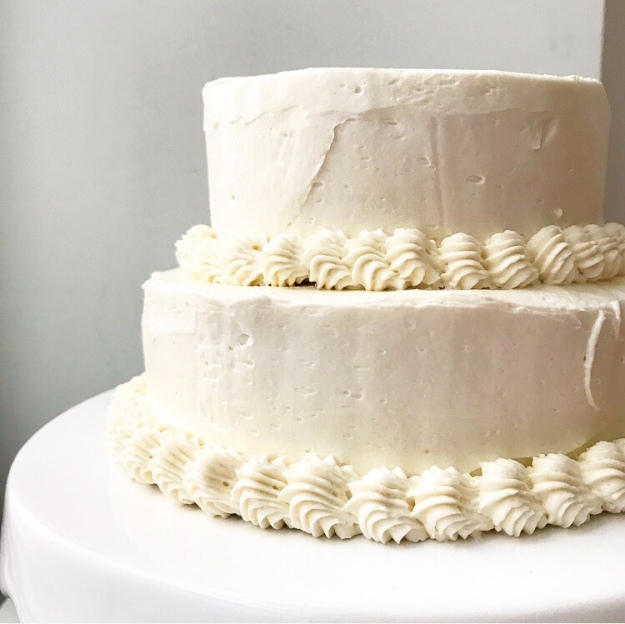
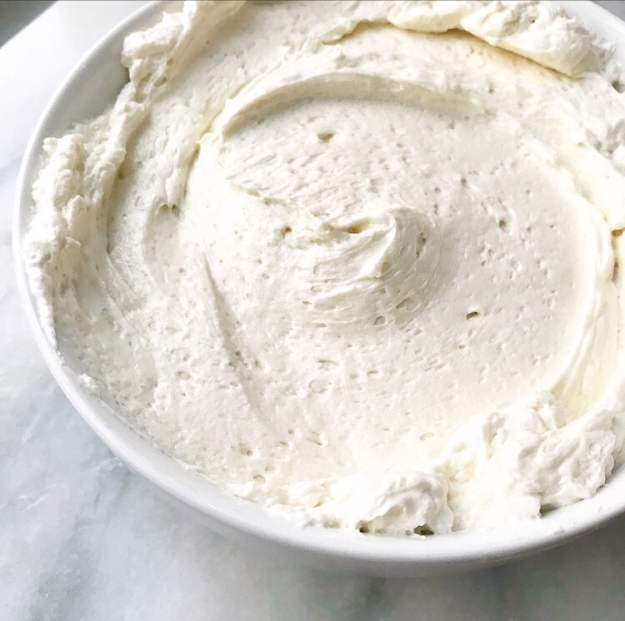
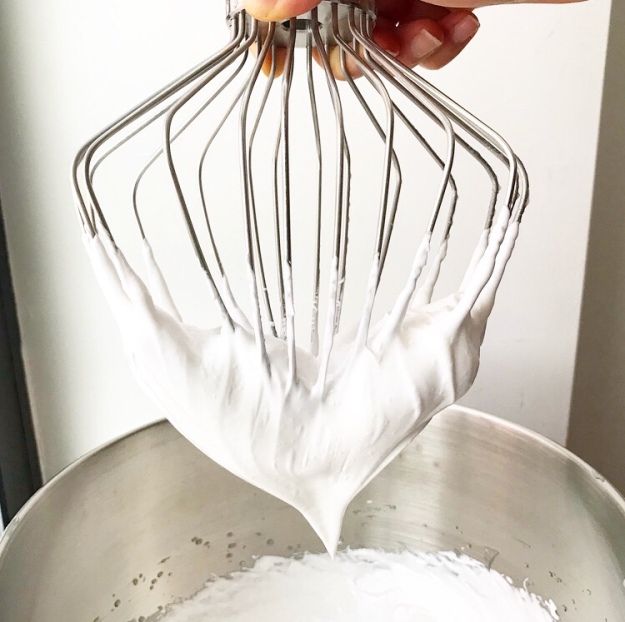
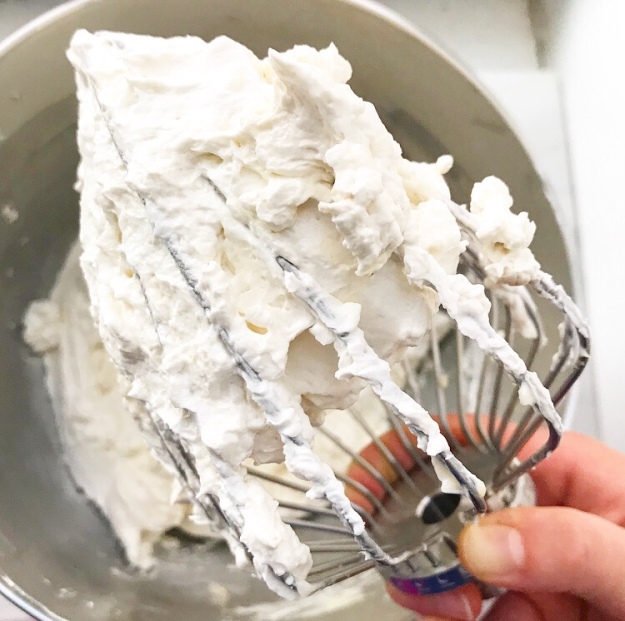
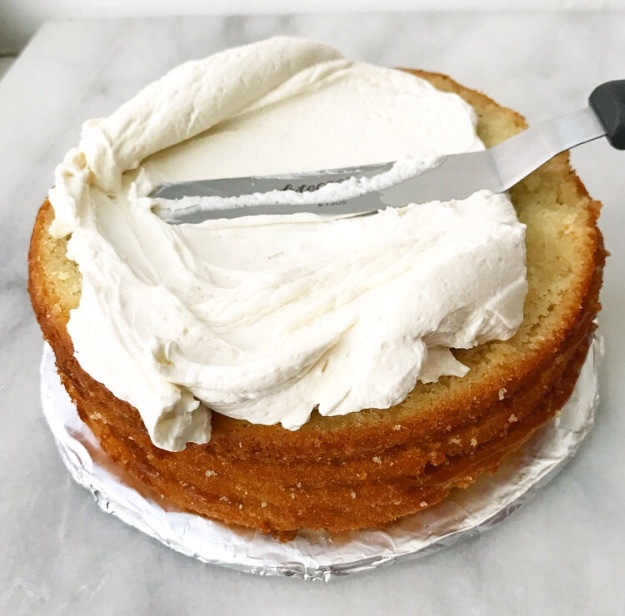
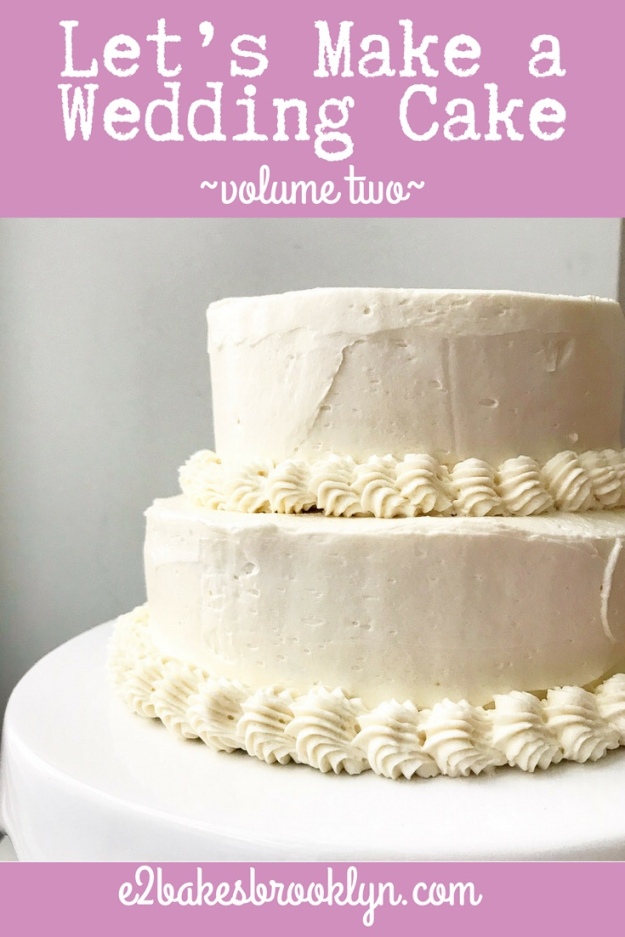
Large pieces of thin cake are difficult to stack perfectly so, in addition to torteing the layers and leveling for height, I trimmed the sides a bit all the way around. I wrapped the tiers in plastic and put them in the refrigerator for about three hours while I popped over to the rehearsal luncheon in TriBeCa.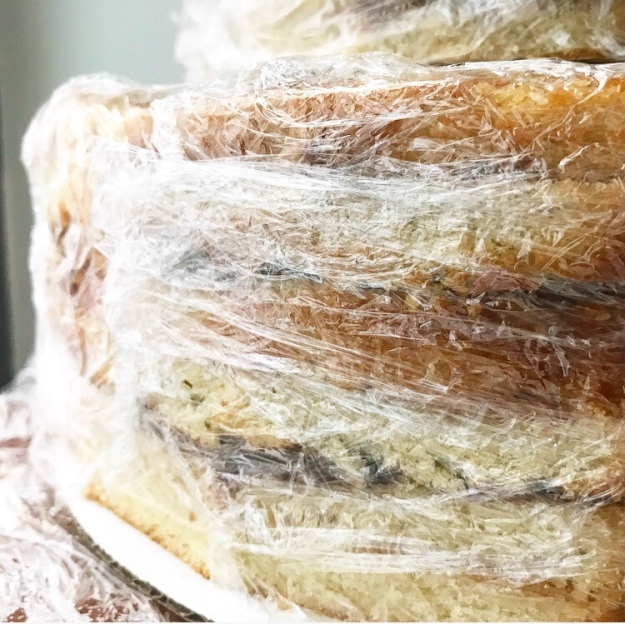 When I returned home, I made a triple batch of Swiss Meringue Buttercream. I used a dozen egg whites (leftover from the fillings), which I had stored overnight in a very clean, dry mason jar. It was crazy humid here on Saturday so I had to give the frosting a few 15 minute chills to keep it workable. Crumb-coating, frosting, and doweling took about two hours, although I probably could have done it faster if I hadn’t been so tired from getting up so early. I refrigerated all the tiers uncovered overnight.
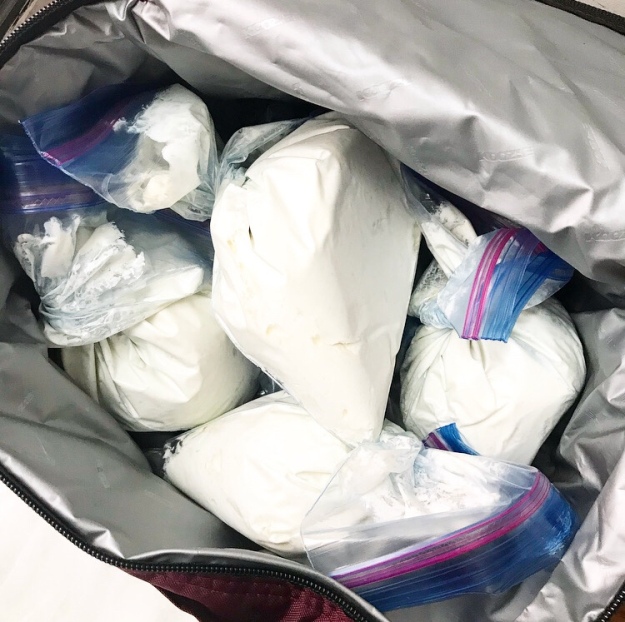 On Sunday morning, I made a double batch (8 egg whites) of Swiss Meringue Buttercream. I divided it among four piping bags and refrigerated them while I went to have my hair done. #bridesmaidlife
 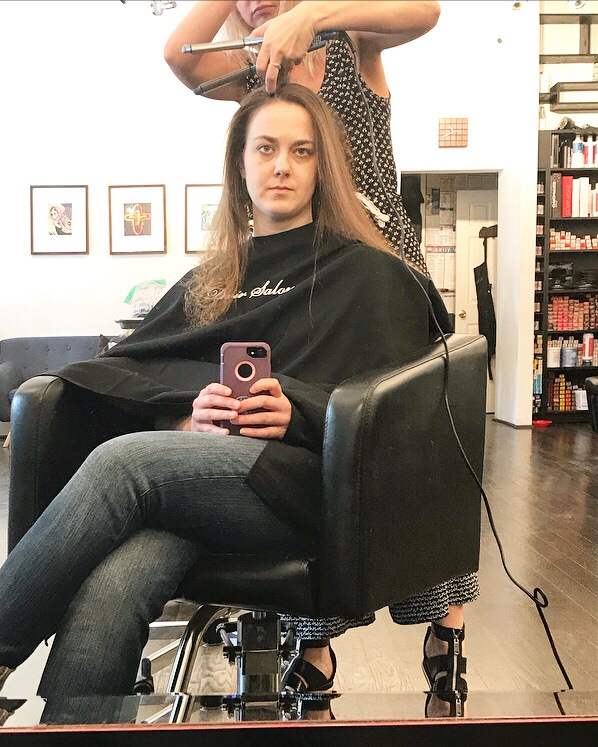 I got home about an hour before the cake and I were scheduled to be picked up and taken to the venue. I scurried around my apartment, grabbing anything that seemed like it might be important. Think icing spatulas of every conceivable variety, loads of ziplock bags, scissors, tape, three piping bags fitted with couplers and star tips, extra cake dowels, a weight-bearing central dowel, a permanent marker for marking those extra dowels, a box of food safety gloves, and a dozen damp paper towels. And insulated cooler bags. And wax paper. And aprons.
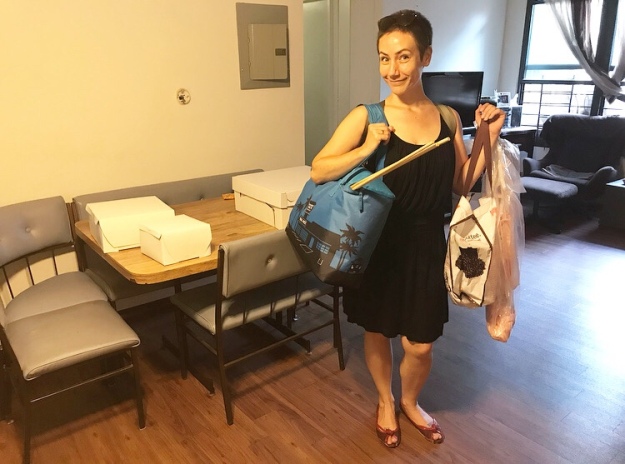 Also, a bridesmaid’s dress, four-inch heels (because I was too busy worrying about cake to get my dress tailored), makeup, deodorant, jewelry, and my trusty friend, VJ.
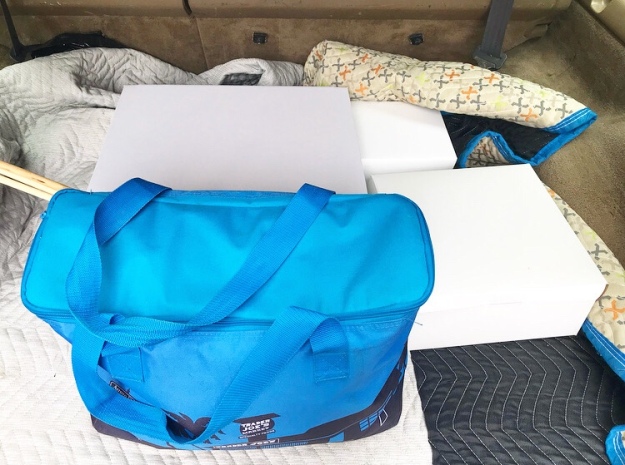
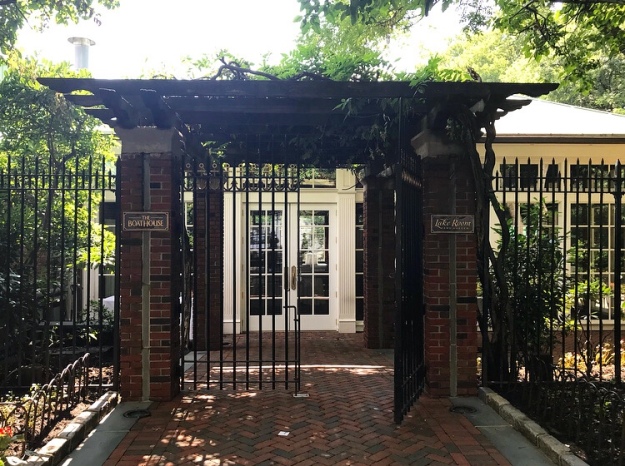 We loaded all the tiers into the back of my friend, David’s Volvo station wagon and set off for the Central Park Boathouse.
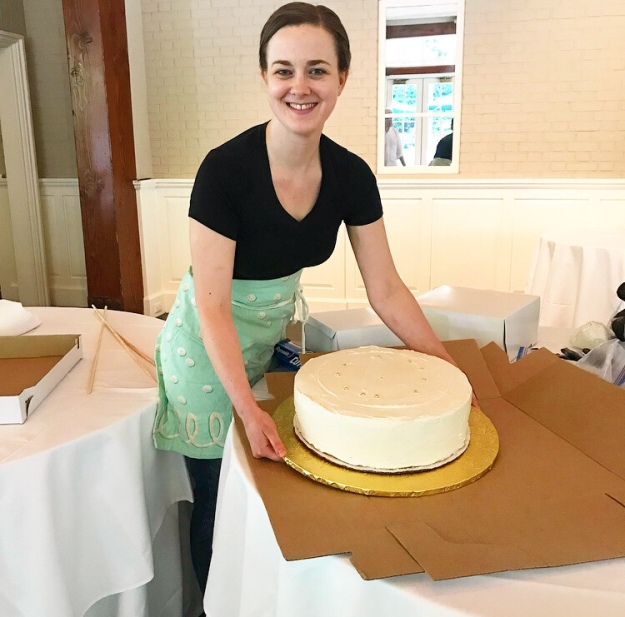

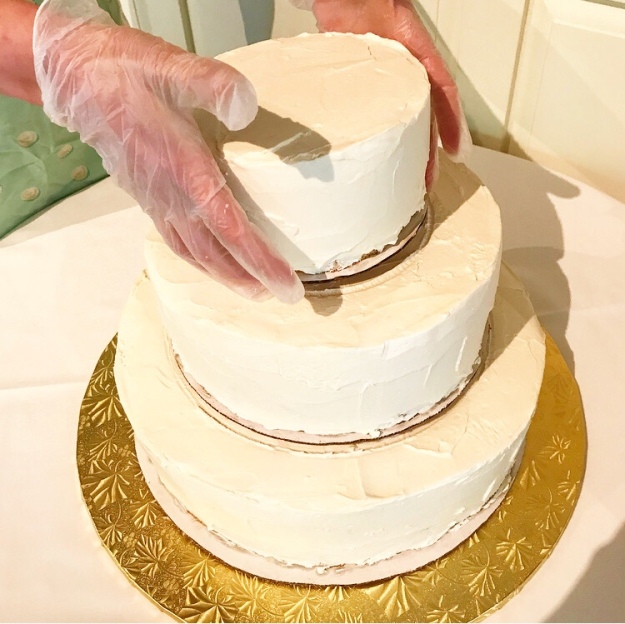
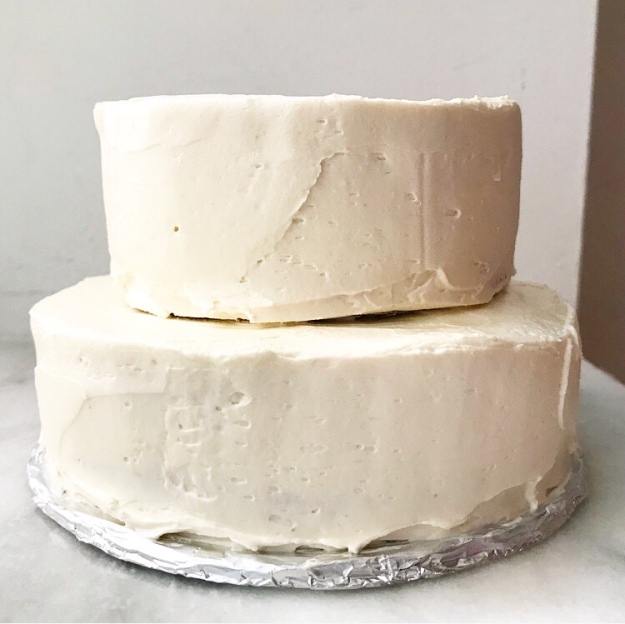
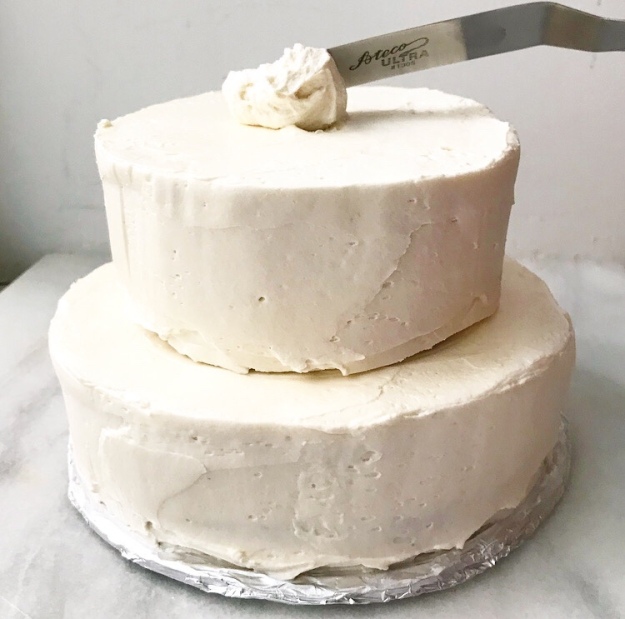
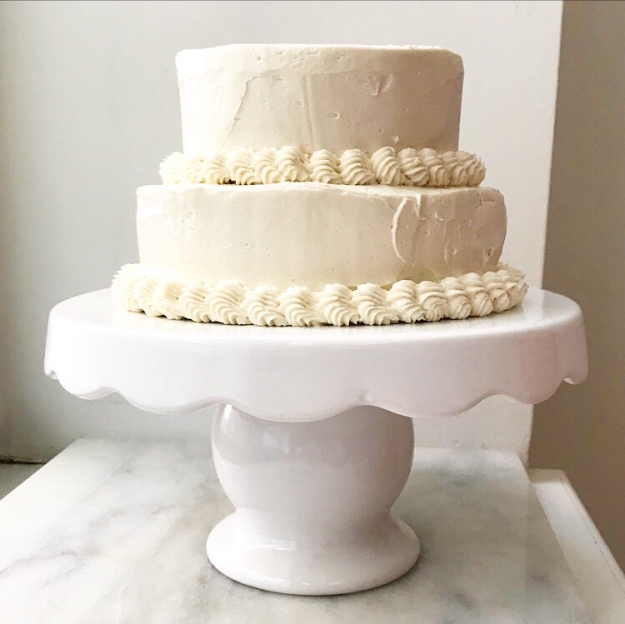
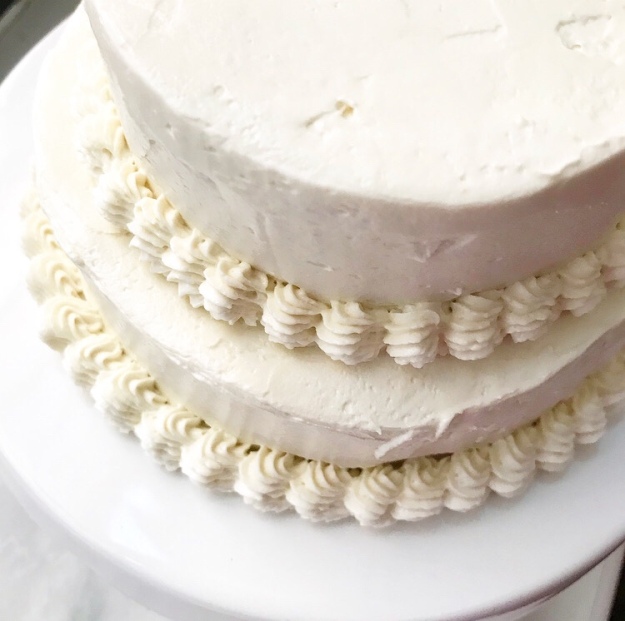
Assembling the cake took about an hour. I mostly did it by myself, although VJ did help center the tiers. 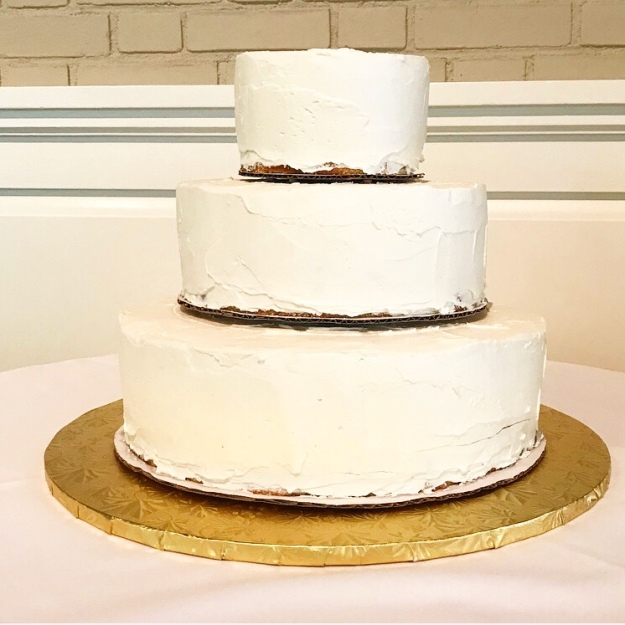
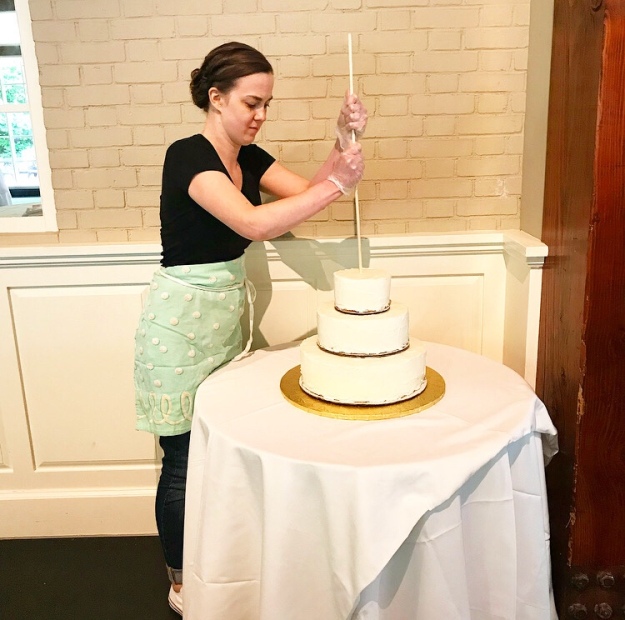
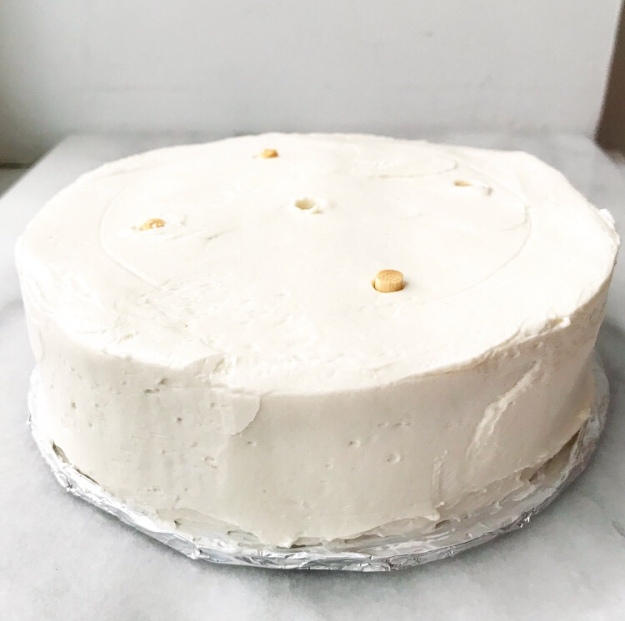
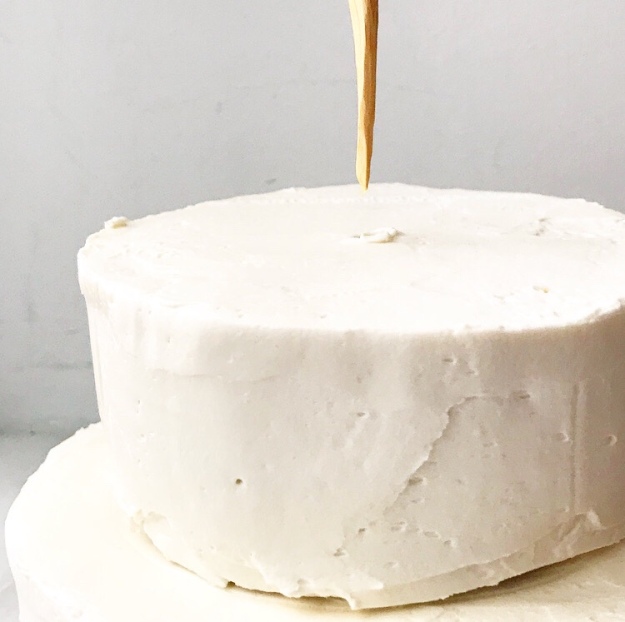
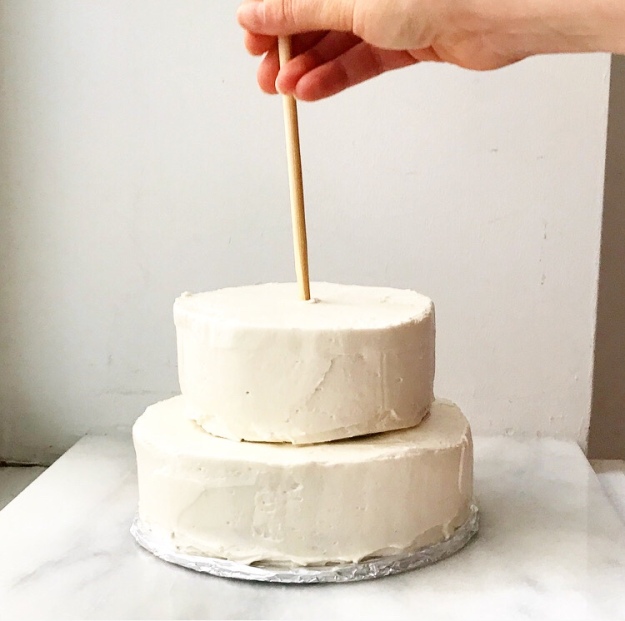
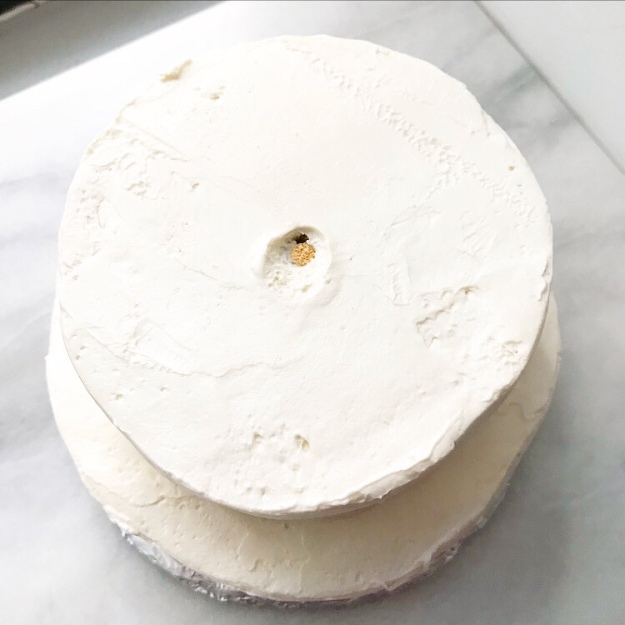
 My favorite part of assembling tiered cakes remains inserting the central dowel. I used a 3/8-inch dowel that I sharpened with a vegetable peeler, and it popped through the cake boards just fine. I couldn’t find much information on how thick the central dowel should be, so this diameter (1.5x the tier dowels) was a guess. I saw the cake lifted and moved three times without incident, so I suppose it was a good guess.

I was very happy to have my friends around for moral support, especially when the frosting started to separate while I was piping. Instead of panicking, we opened a second bag and used a new piping tip. It turned out that I had just overloaded the first bag—an easy fix. When I felt like crying, they made me laugh instead.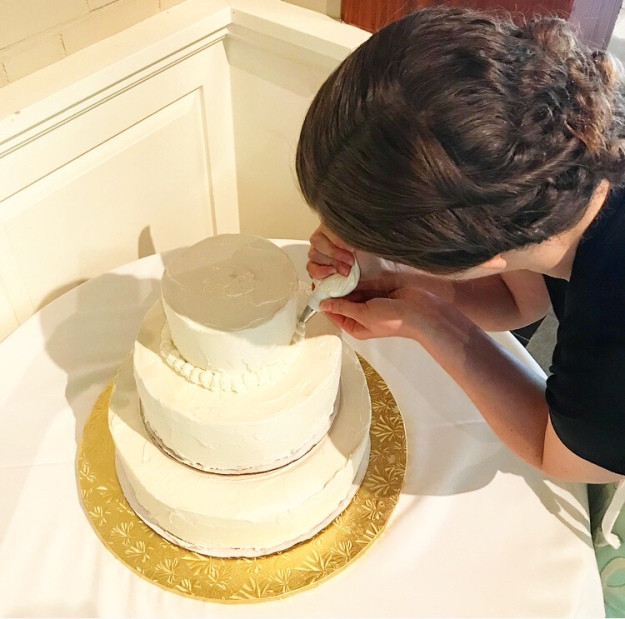
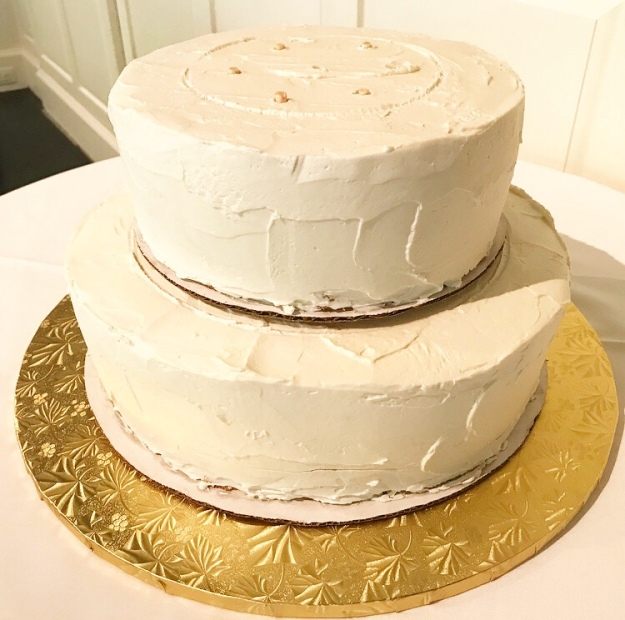
If I could go back and fix one aesthetic thing on this cake, it would be the piping. It was just a little uneven, mostly because I was nervous, but once the flower cascade was placed, nobody noticed. Expectations are the enemy of joy…or something. Once the cake was assembled, I got myself glammed up to be a bridesmaid. The ceremony and reception were beautiful.
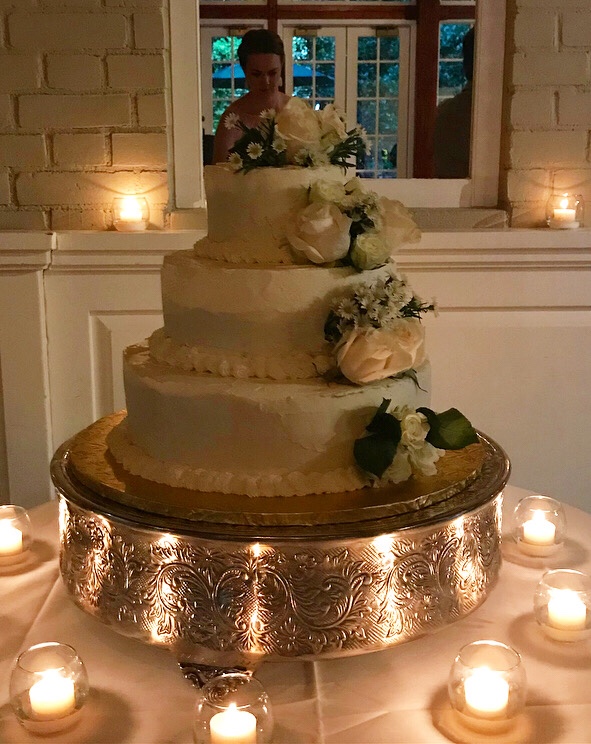
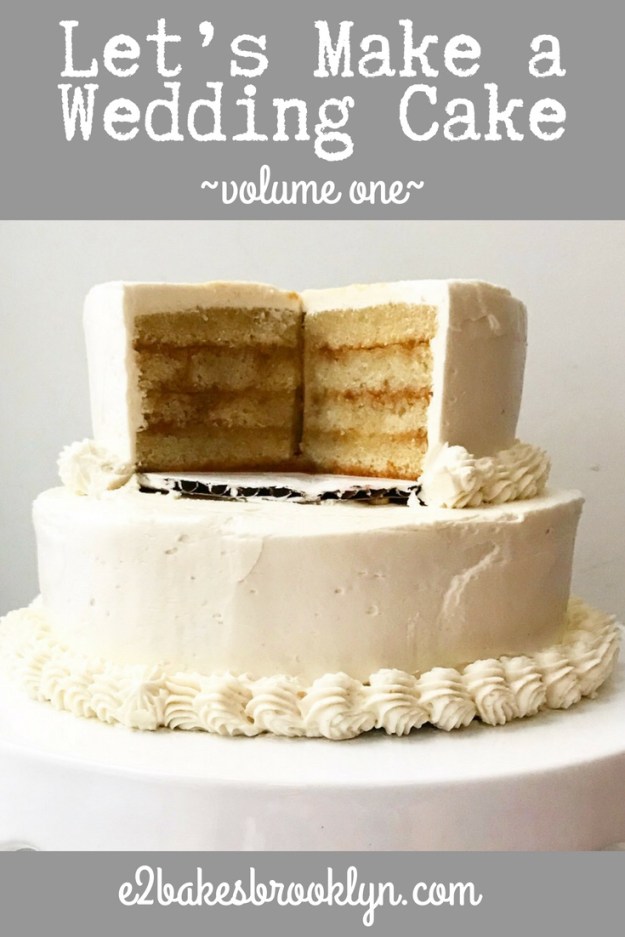
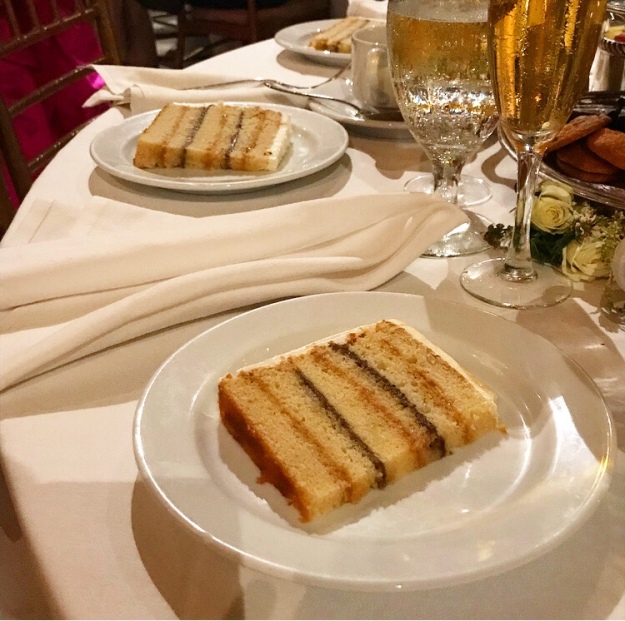 The cake was sliced at the end of the night and it looked just how I had hoped it would. I love those alternating stripes of filling!
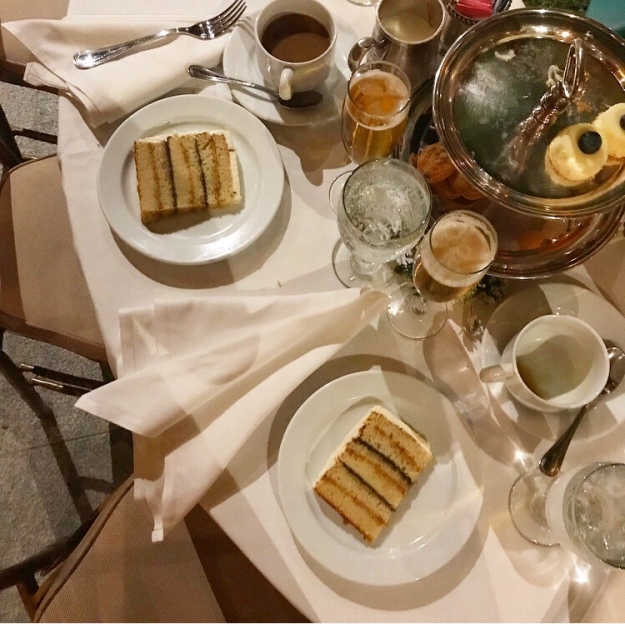 I got loads of compliments on this cake. The guests loved the mix of flavors and that this wedding cake was lighter than most—a benefit of using puddings and Swiss Meringue Buttercream instead of all-butter American buttercream.
 There was also one peanut-allergic teenager who was so happy this cake was peanut-free that he gave me a bear hug and ate two slices! Who knew so many people have peanut butter wedding cakes?!
 The bride and groom were happy with it too, and that is the most important part. I’ve known Ariella and Bob for several years now and love them both. Ariella, in particular, was a huge support when I began to take baking seriously, so I was really touched that she wanted an E2 cake for her big day. It was such an honor to be asked to participate in their wedding day as both a baker and a bridesmaid.
And now, the question that I’ve been asked multiple times since Sunday: will I ever consider making a wedding cake again?
Absolutely. I don’t think I’ll be putting Sylvia Weinstock out of business anytime soon, but I learned a ton during this process and had a great time baking and assembling my first tiered cake. I am going to need a bit of a breather though—it’s been an intense few weeks and I am exhausted in more ways than one! I’m taking this Friday off so I can enjoy some family time in Austin, but I’ll be back next week with some great new recipes.
Thank you all for your support, encouragement, and excitement for this project! It wouldn’t have been nearly as much fun without you ❤
 Wedding Day is two days away and things are getting *real* around here. I have not lost my mind yet, but that’s a very big “yet.”


 If you’ve been on my
  One of my nearest and dearest friends is getting married on Sunday, and asked yours truly to make a big, beautiful cake for her and her dream man. I said yes—it was a proposal this baker couldn’t refuse. Of course, July 15, 2018, seemed very far away when I agreed to this last summer. In fact, it didn’t start feeling imminent until May, when she and future hubs planned a trip home to NYC to make some final arrangements, including a cake tasting.
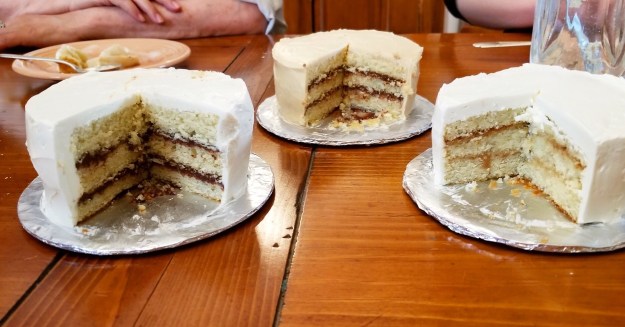 Cut to June 4th when I showed up to the bride’s mother’s apartment with three little layer cakes: all
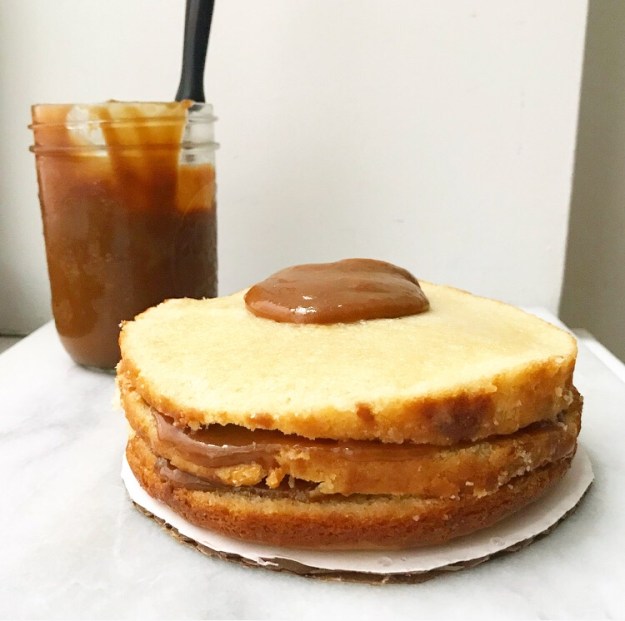
 The original plan was that they would choose one filling and one frosting and that would be that. About five minutes into the tasting we were all in agreement—vanilla, mocha, and bright-white Swiss Meringue Buttercream. But that was before the mother of the bride randomly stacked a bite of the caramel-filled cake on top of a bite of the mocha-filled cake and then insisted the rest of us do the same. Just like my friend and her betrothed, each filling was fine on its own, but they were better together—the combination of chocolate, espresso, and dark caramel is divine. And so, it stands that this cake will be vanilla layers with Swiss Meringue Buttercream and alternating mocha and caramel fillings.
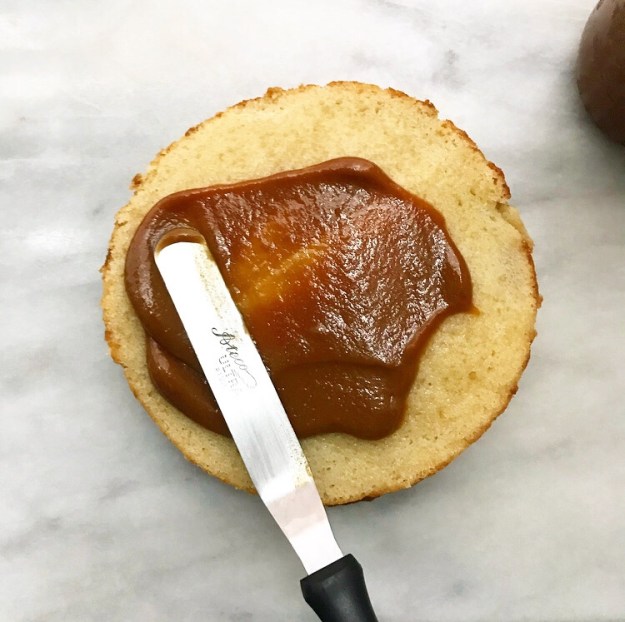 Since this cake has to be made, transported, and assembled in the middle of a hot, humid NYC July, I had to take melting into consideration when developing the recipe(s). Traditional American Buttercream (butter + confectioners sugar + vanilla + heavy cream, AKA most of the
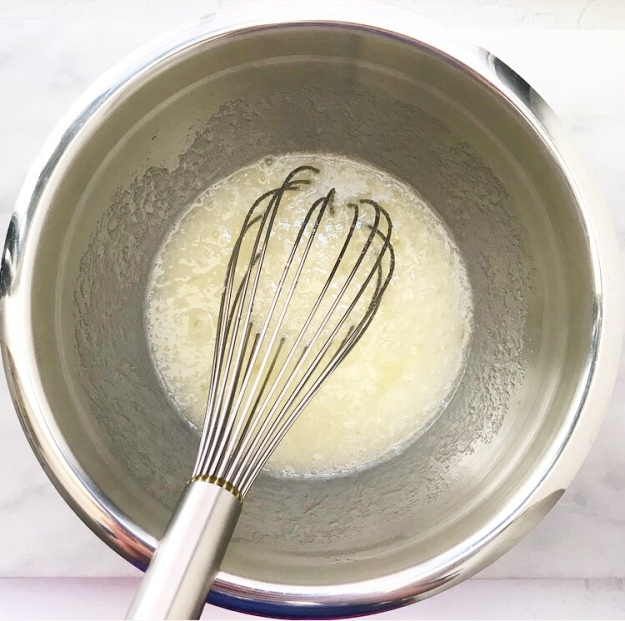
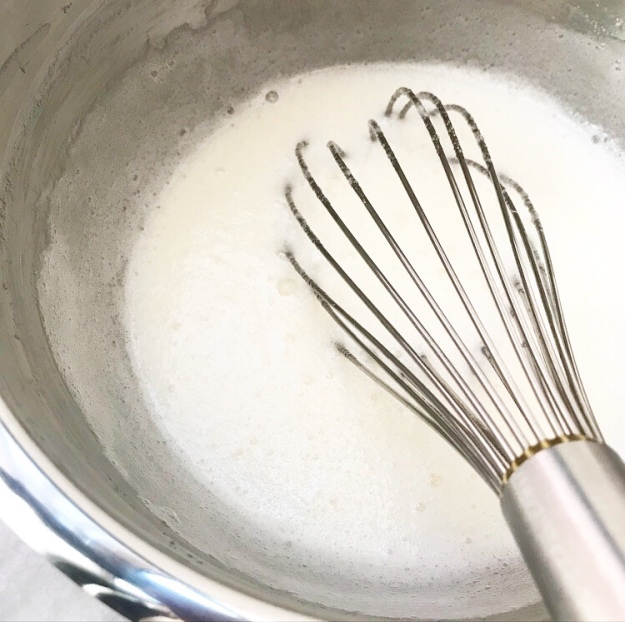
  The frosting, which I’ll write more about on Friday, is made from egg whites, while the fillings are made with the yolks. The mocha filling is simply my
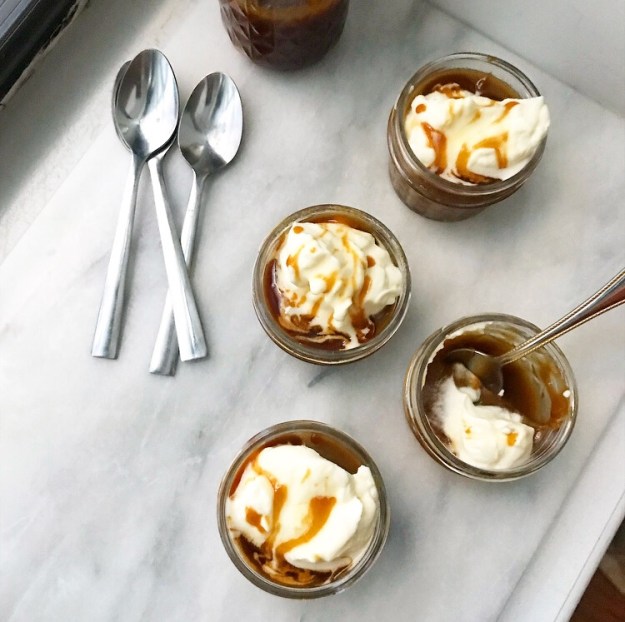
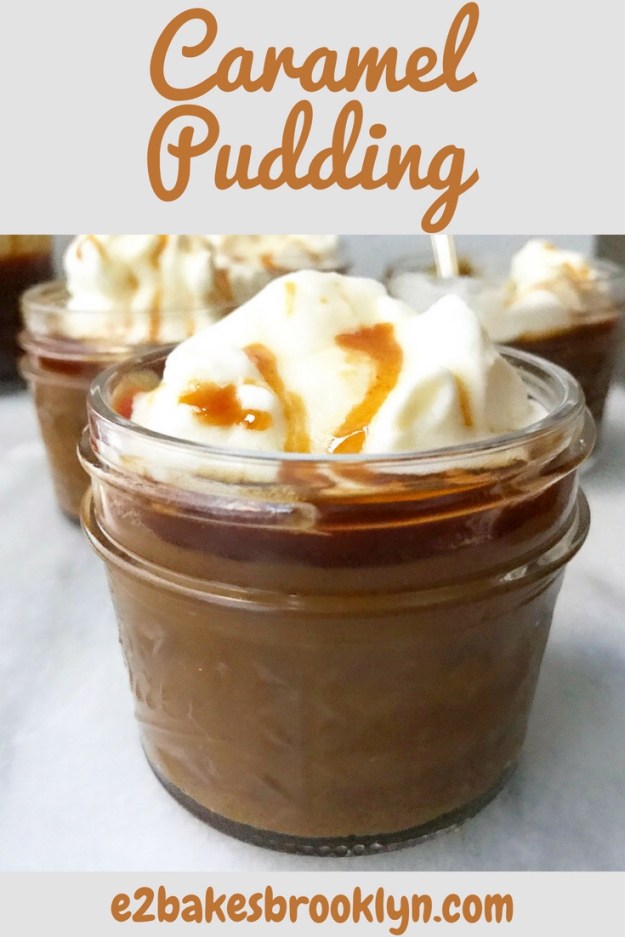
 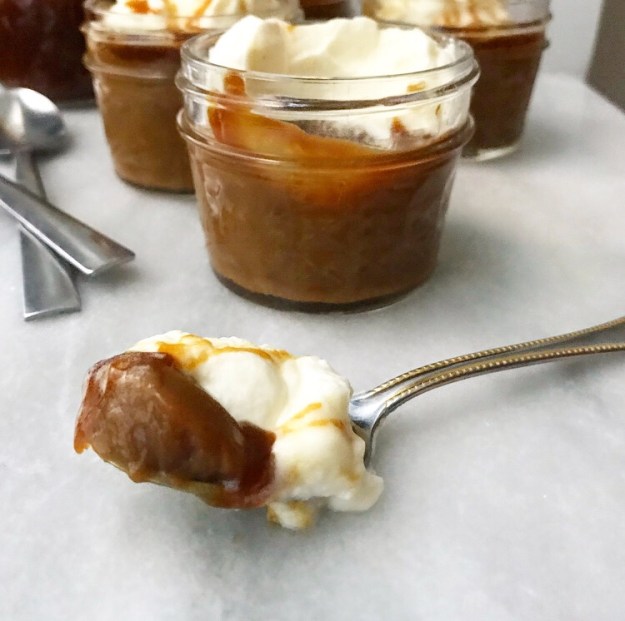 Today is all about the caramel filling—this rich, silky, insanely delicious pudding that is practically like eating a little bowl of pure caramel! So freaking good.
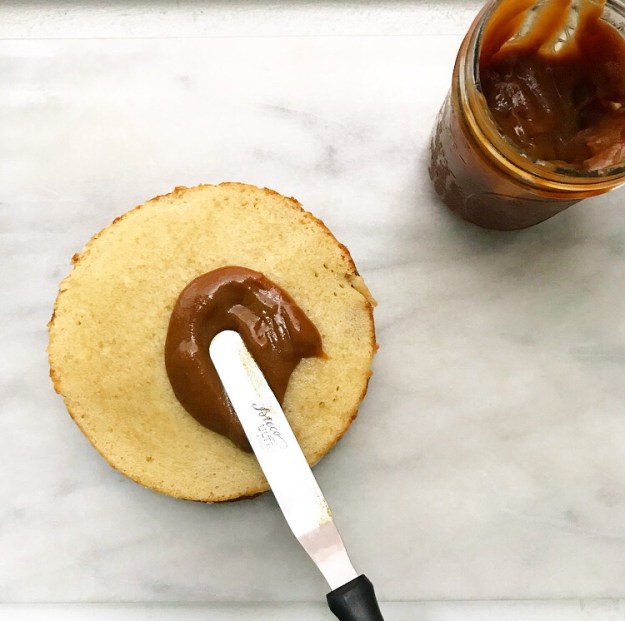
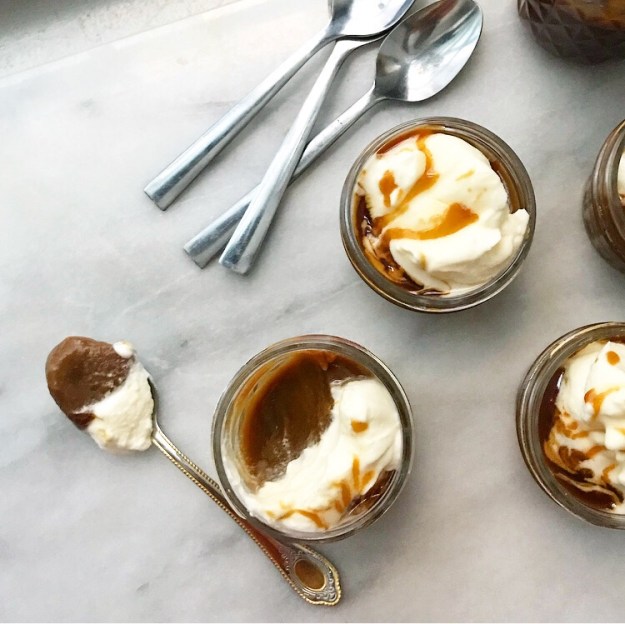 Caramel Pudding is a streamlined spin on the Butterscotch Cream Pie filling I made last fall. It’s super quick and easy to make, coming together in just 15 minutes on the stovetop. You may absolutely enjoy it without any accoutrements, but I especially love it with
 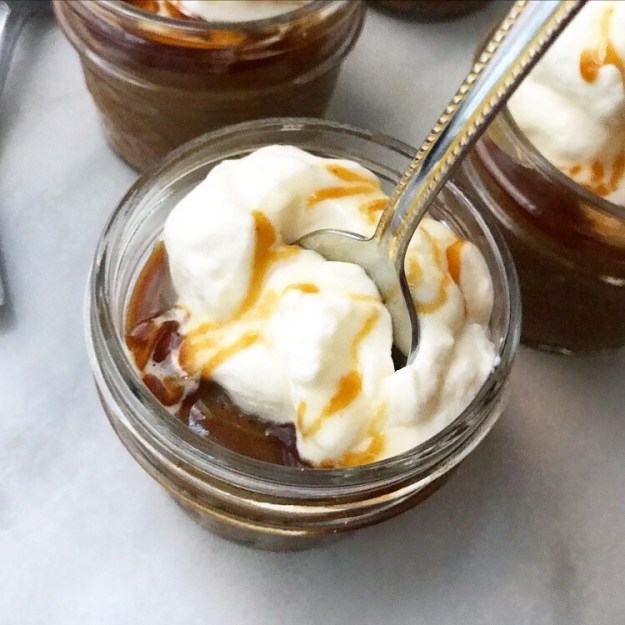 And, of course, it also works well as a cake filling, if whispers of dark caramel between layers of buttery vanilla cake are a thing you’re into.
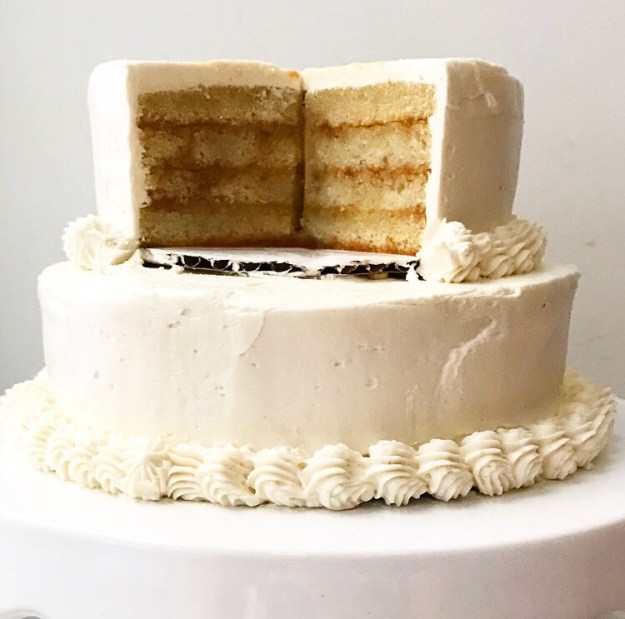 They are definitely a thing I’m into.
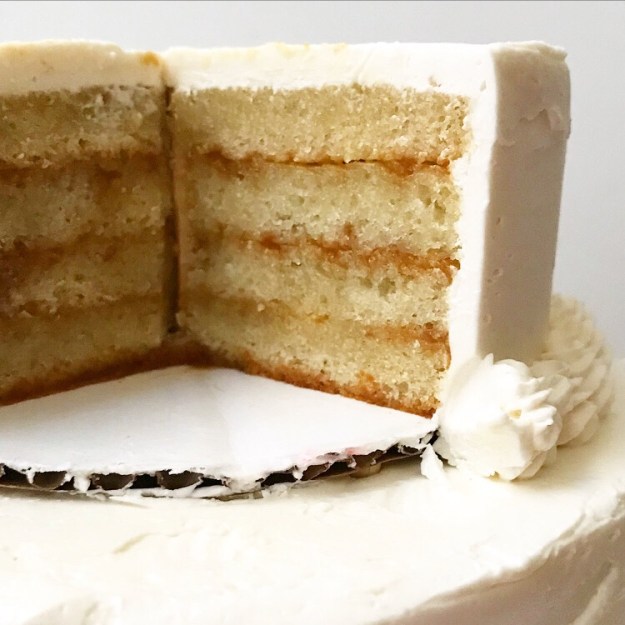
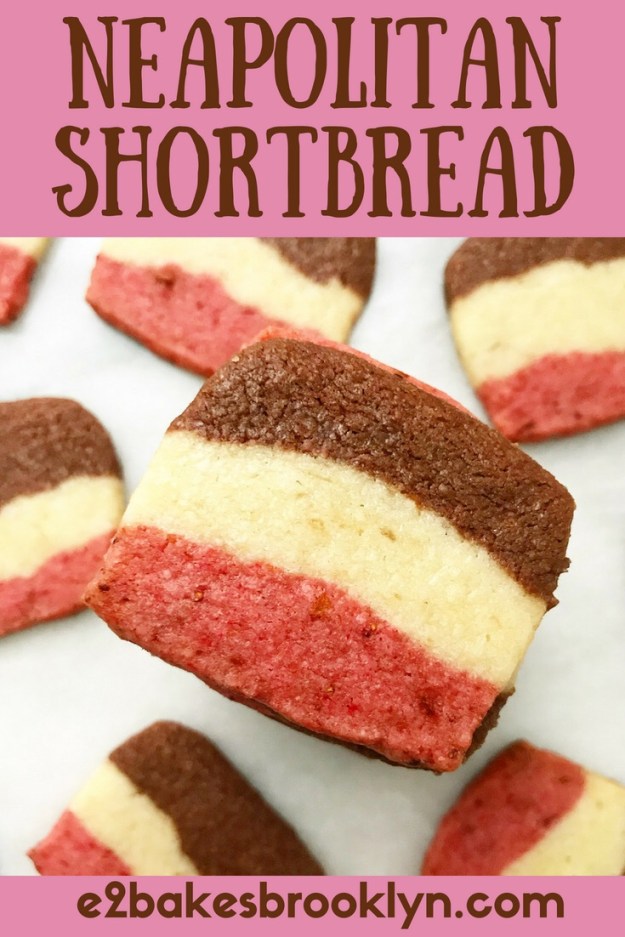
 I have never had many feelings about Neapolitan ice cream—that classic all-in-one combination of chocolate, vanilla, and strawberry—except that I’d probably prefer a scoop of vanilla with sprinkles instead.
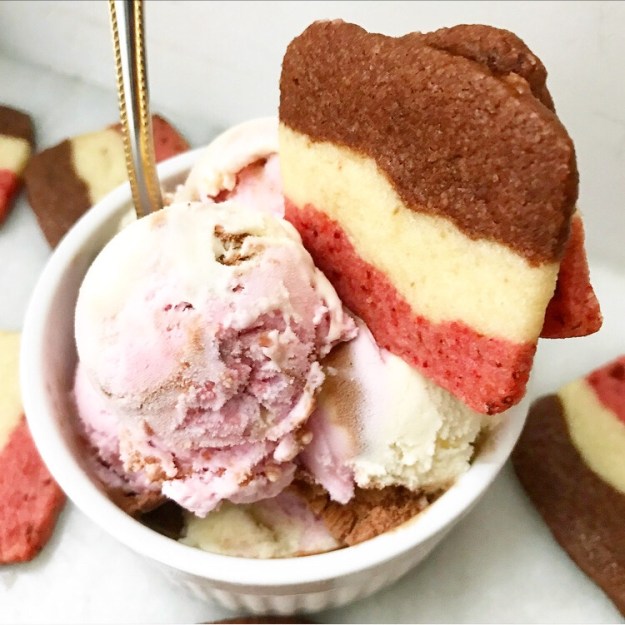 Neapolitan Shortbread, though, are a different story. I saw a few recipes for them while scrolling through
 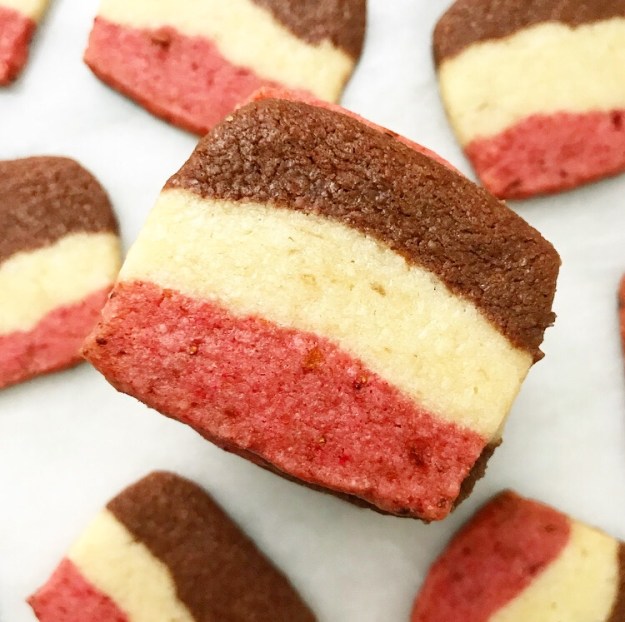 I clicked on a link and saw, to my utter (and definitely over-the-top) horror, that the layers were all made with one dough, the chocolate portion being mixed with melted chocolate and the pink part being just vanilla with food coloring! I clicked through more links and found a lot more of the same. Some had mixed their pink portion with strawberry jam, but that was even more problematic—it meant that all three portions would have different textures and bake differently.
 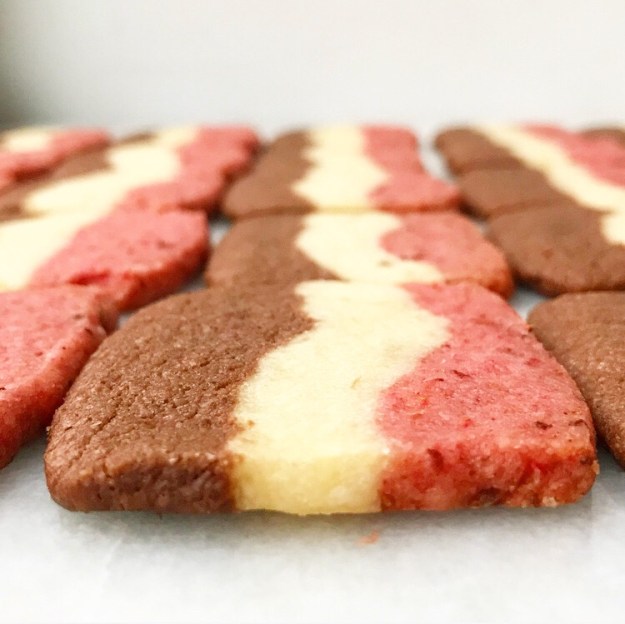 And so, I set out to fix this problem. Yes, I know that this “problem” is one I created with my own pickiness, but I don’t care because I believe in cookies that bake evenly and deliver flavors as advertised, damn it! I will not apologize for being a cookie snob. #justiceforstrawberry
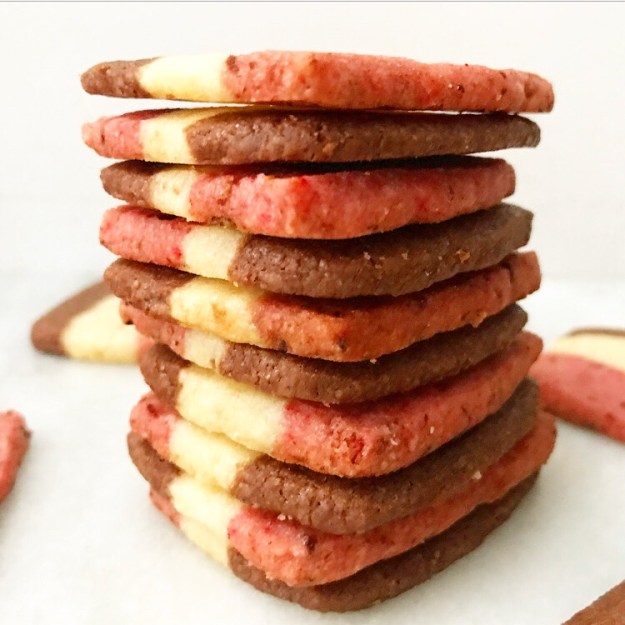 I set to work, and it took me five test-batches, but y’all, these Neapolitan Shortbread are fantastic. They’ve got bold colors and big flavors and they bake evenly and they are shockingly easy to make.
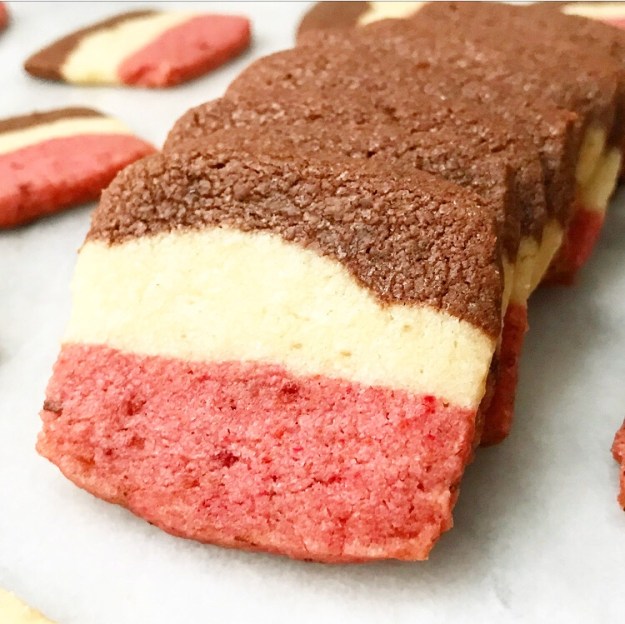
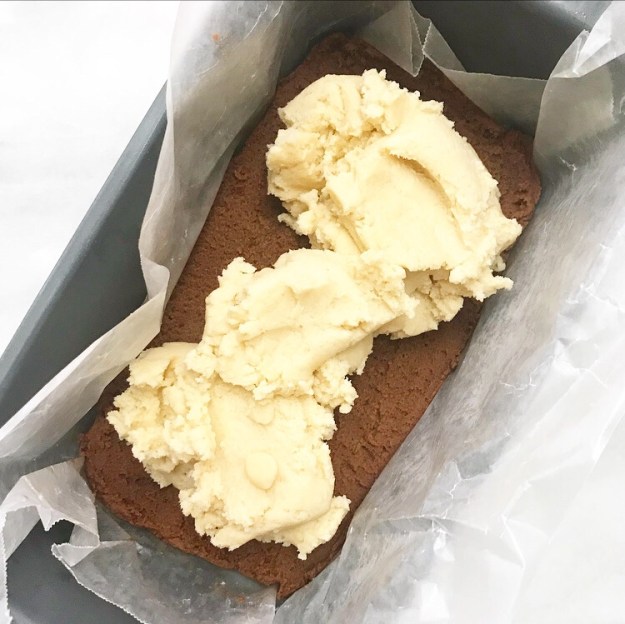
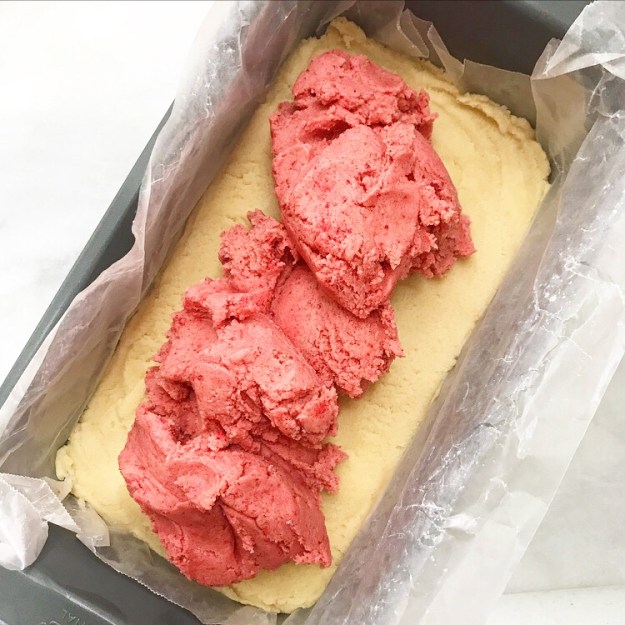 Each layer is made from its own quick, simple dough, all three of which can be made in the same bowl in under twenty minutes. Here’s the rundown:
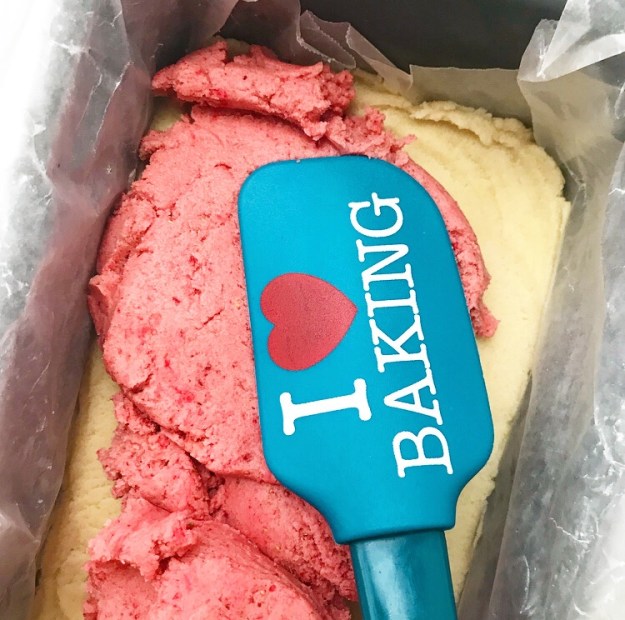

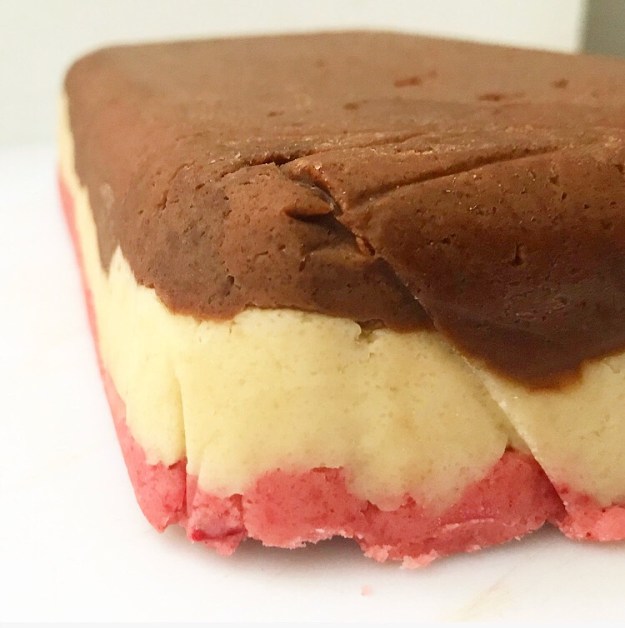
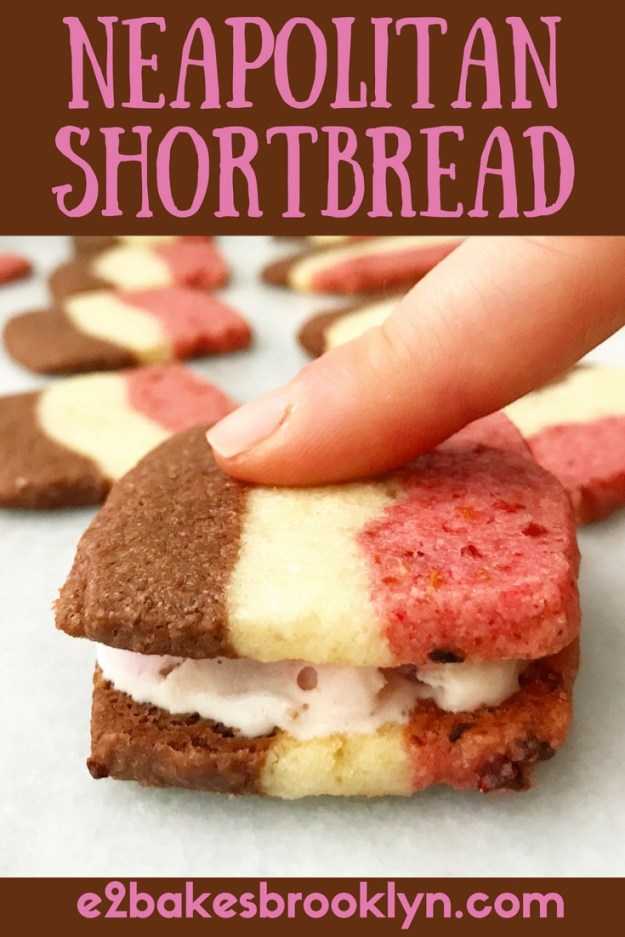
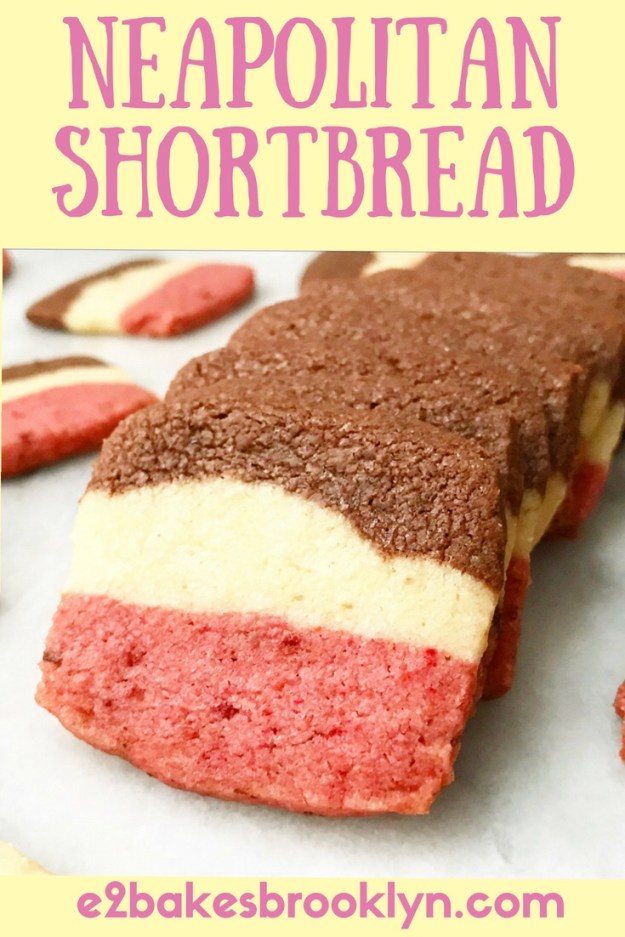
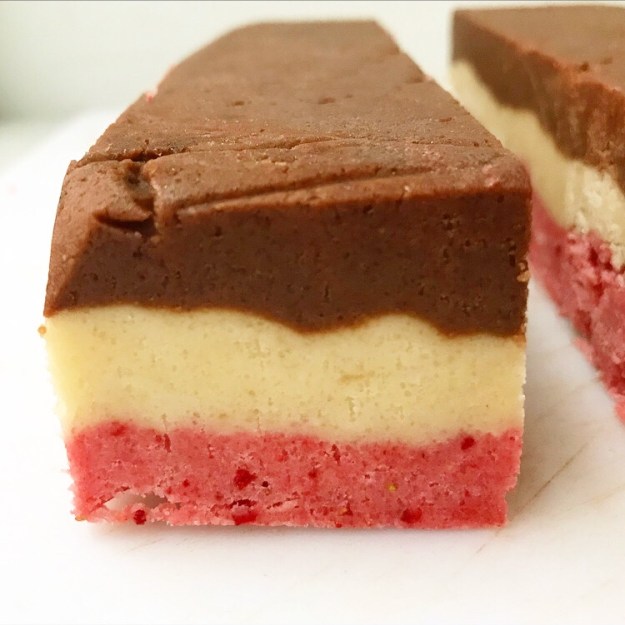 All the doughs are all pressed together in a wax paper-lined loaf pan and chilled until hard. Then the edges are trimmed off, the dough is cut into two long pieces, and each one is sliced into cookies. I ❤ ❤ ❤ a slice & bake recipe!
 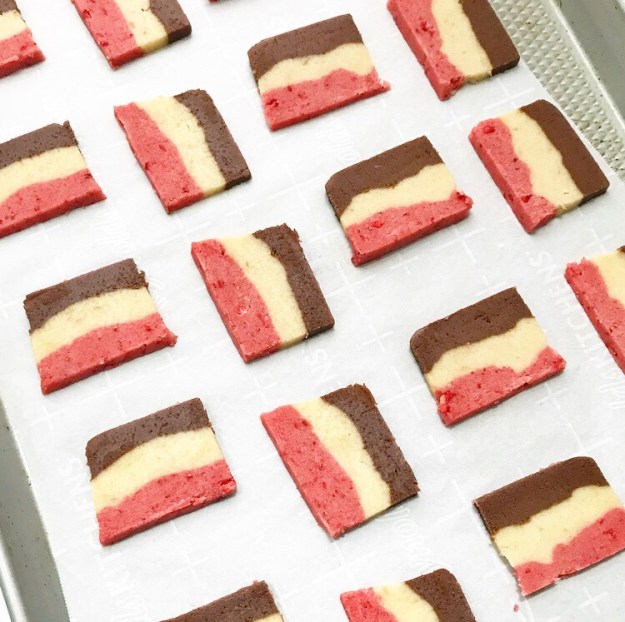 Neapolitan Shortbread bake at a low temperature for 17-18 minutes. The cookies will be a little soft coming out of the oven, but should set up quickly. They’ll be crisp at the edges, slightly chewy in the centers, and oh, so buttery.
 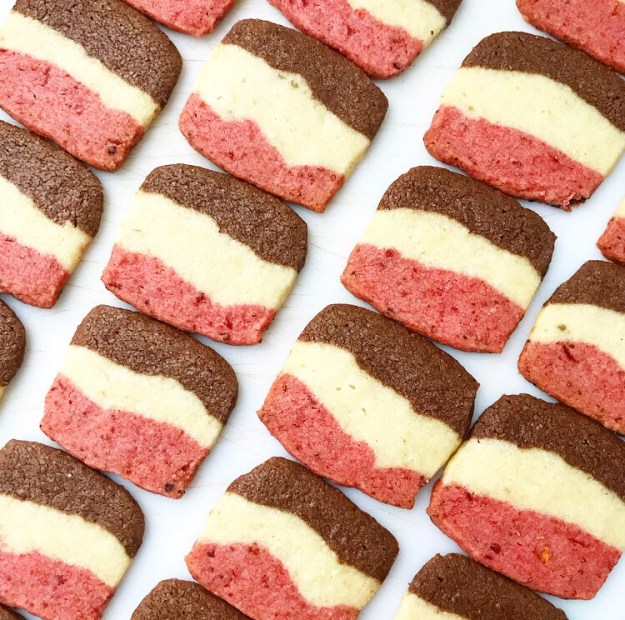 These cookies are as delicious as they are beautiful, with plenty of chocolate, vanilla, and strawberry flavors in every bite! And that’s to say nothing of the bright, bold colors—I just love that berry pink!
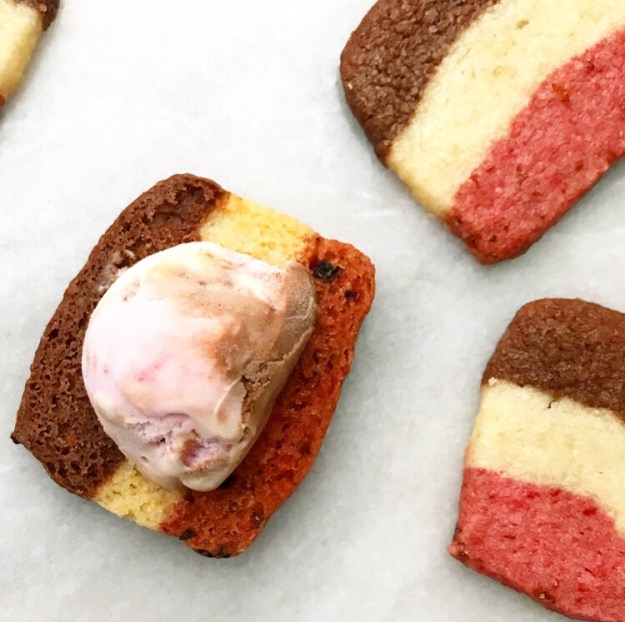
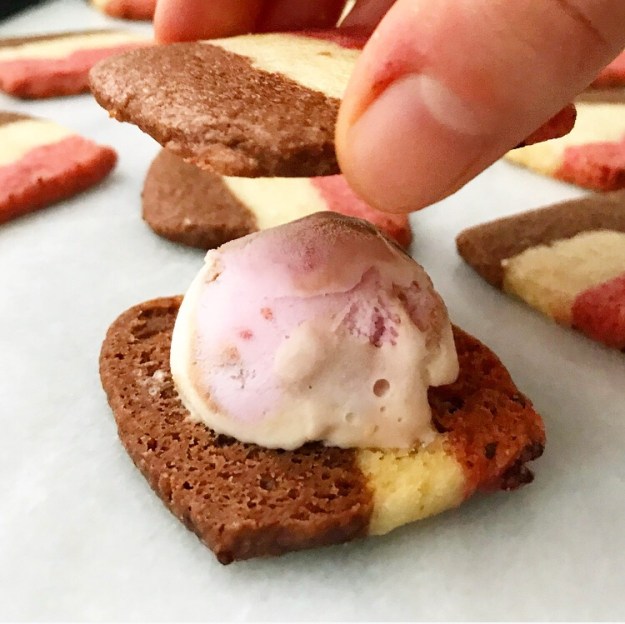
 Oh, and I was right. They do make adorable ice cream sandwiches 🙂
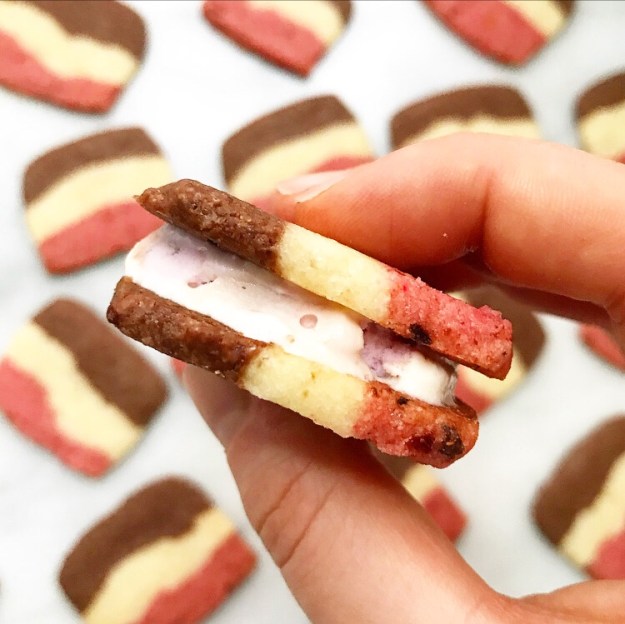
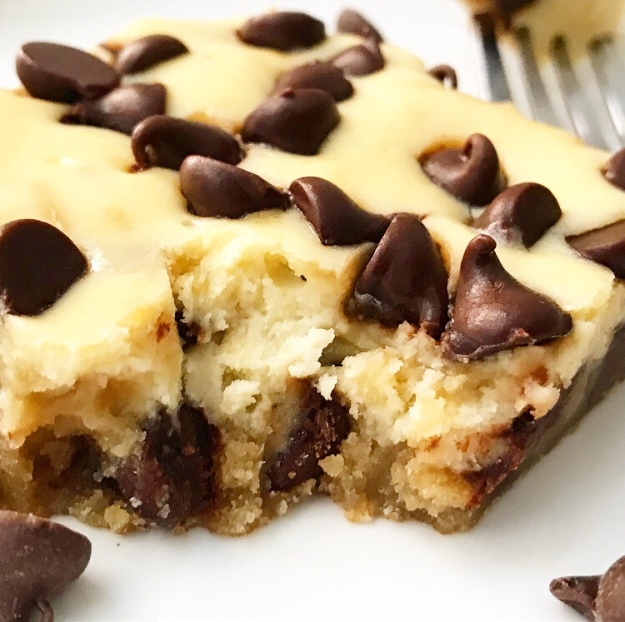
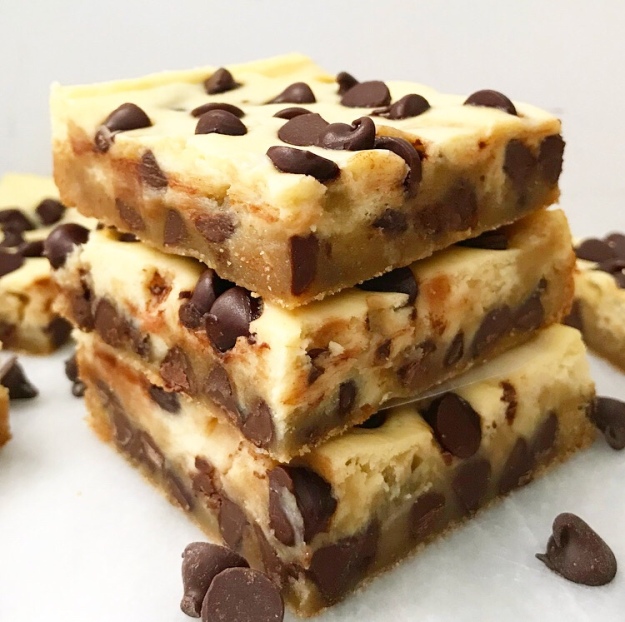 I have been debating for three days whether or not I should post these Cheesecake Blondies or use Independence Day as a “free pass” to take a rare blog day off.
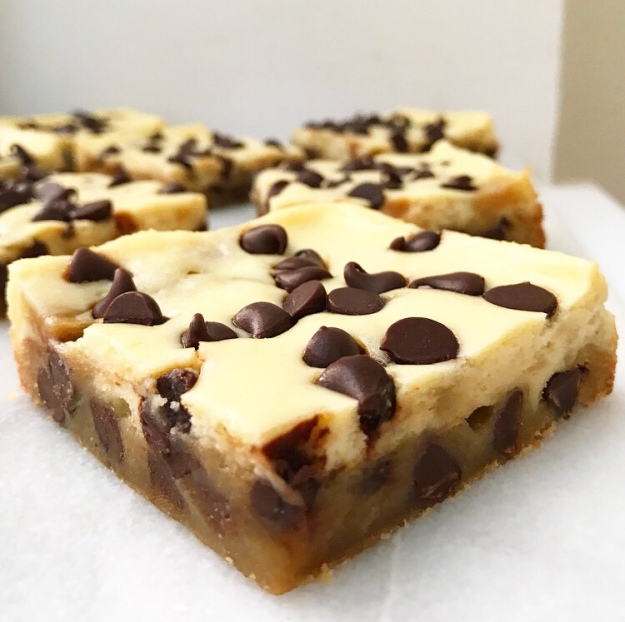 Cheesecake Blondies won out though, because they are the perfect treat to sink your teeth into while you watch the fireworks. Creamy cheesecake and chewy
 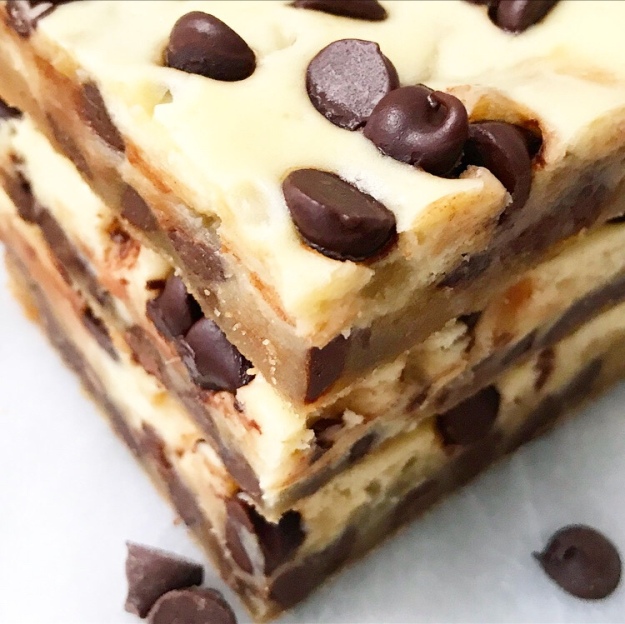 Another great thing about these blondies? They are super easy to make and bake up in just 25 minutes!
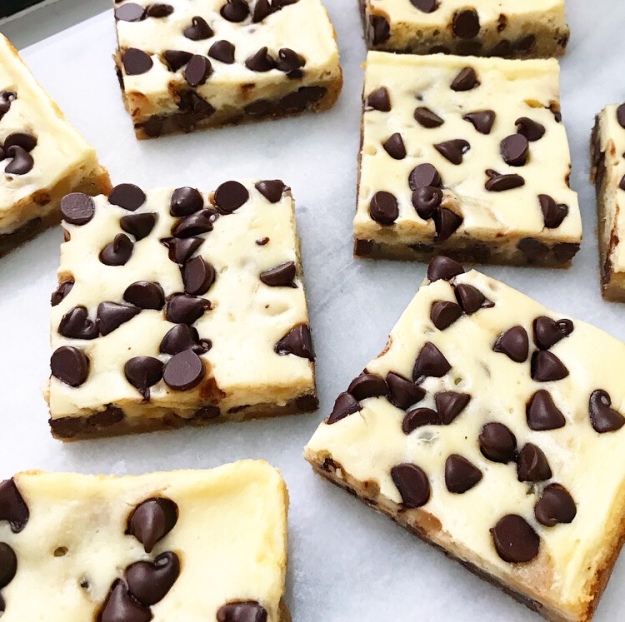 The most difficult part of making Cheesecake Blondies is waiting for them to chill. Those three hours can seem eternal, but they are completely necessary—nobody likes warm cheesecake.
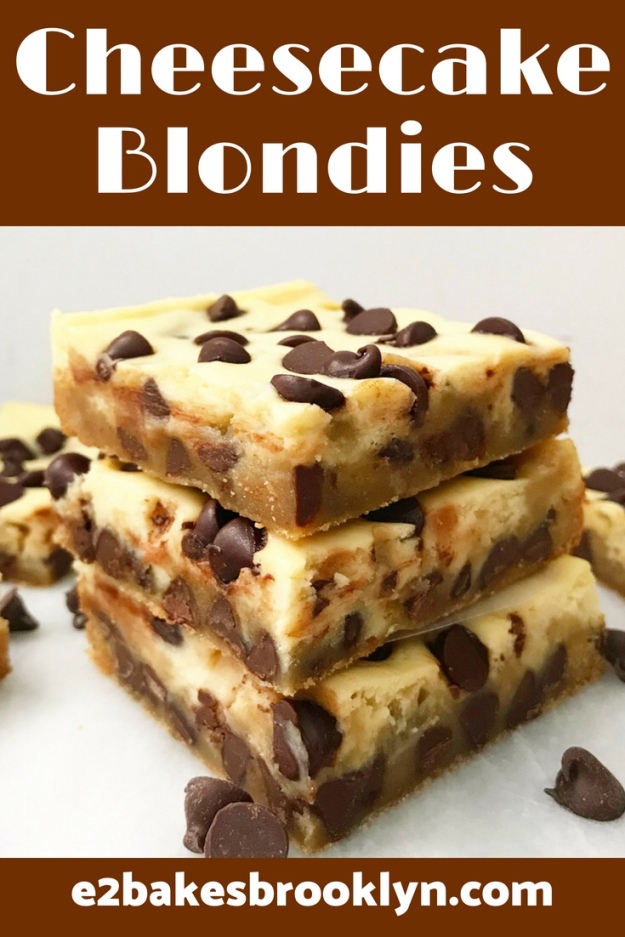
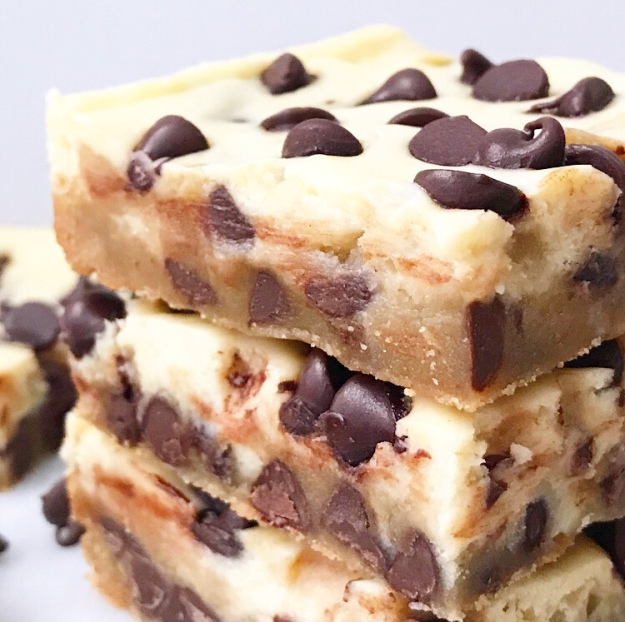 Once the chill time is up, slice up the blondies and revel in their cuteness. Chocolate chips have a way of making things more adorable, don’t they?
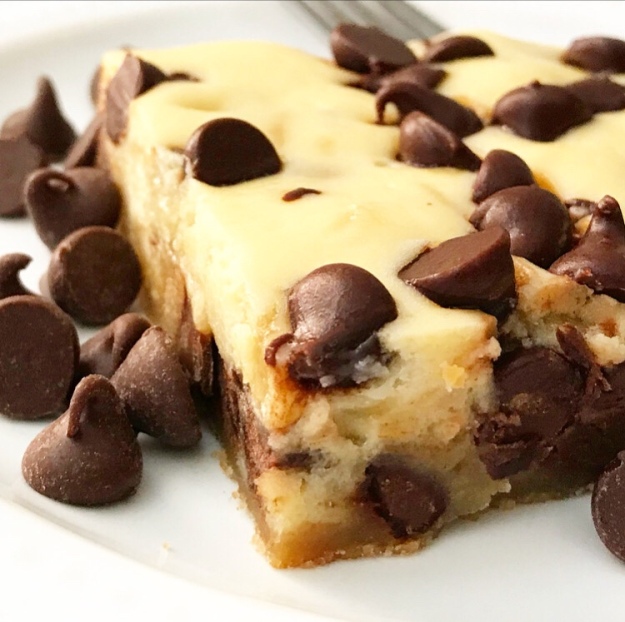 Make a batch of Cheesecake Blondies for your holiday cookout or pack a box into a cooler and take them on the go! You and your friends and family will love the combination of tangy cheesecake and sweet, brown buttery blondie ❤
 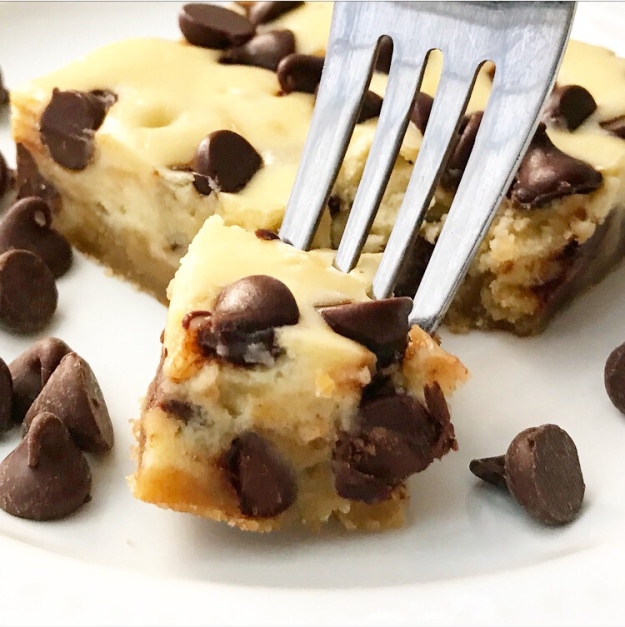 Happy Fourth of July!