Cinnamon Swirl Zucchini Bread

 Cinnamon Swirl Zucchini BreadIsn’t it funny how our tastes evolve as we age? Things that we were horrified by years ago become our favorites out of the blue, leaving us with no idea of when or why our opinions changed. Sometimes we don’t even notice that we’ve changed at all.

For instance, my mother ordered a slice of zucchini bread once on a family vacation eighteen years ago. We were in who-knows-where Pennsylvania at the crack of dawn, eating breakfast at a picnic table outside a white clapboard coffee shop. I have no memory of what I ordered, but I remember being taken aback when my mom sat down with that bread. 

Cinnamon Swirl Zucchini BreadIt was like I didn’t even know her anymore. Who was this woman, and why was she trying to ruin breakfast with vegetables? She offered me a bite and I recoiled in horror (internally, at least). Don’t get me wrong, I liked vegetables, but in my thirteen year-old mind, there was something utterly wrong about eating bread loaded with squash. 

Cinnamon Swirl Zucchini Bread
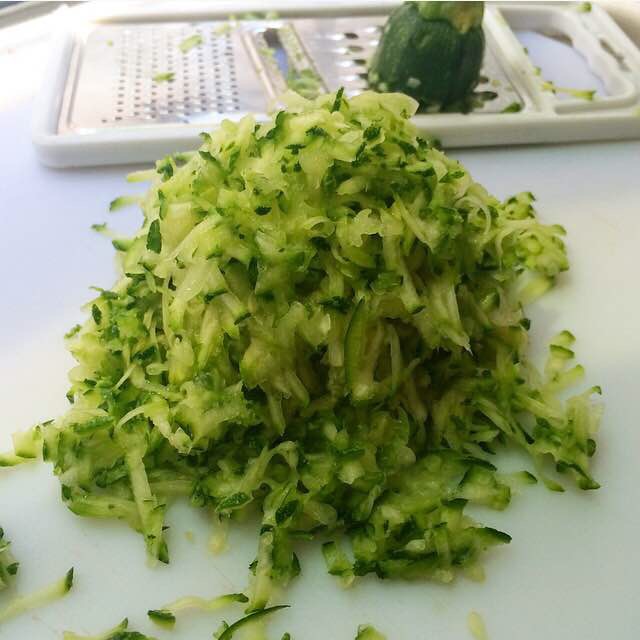
But times have changed. Here I am eighteen years later, writing a blog post about zucchini bread. I don’t know when I moved over to the dark green side, but I’m now a card-carrying member. I mean, what’s not to love about soft, sweet, cinnamon-scented quick bread? It’s perfect for breakfast or a snack or dessert. Sure, there’s zucchini in there, but aside from a few green flecks, it’s not even noticeable. It’s only there for moisture. And you could use buttermilk or sour cream or yogurt for that anytime of year, but when the produce aisles are exploding with ripe, reasonably-priced zucchini, why not take full advantage?!

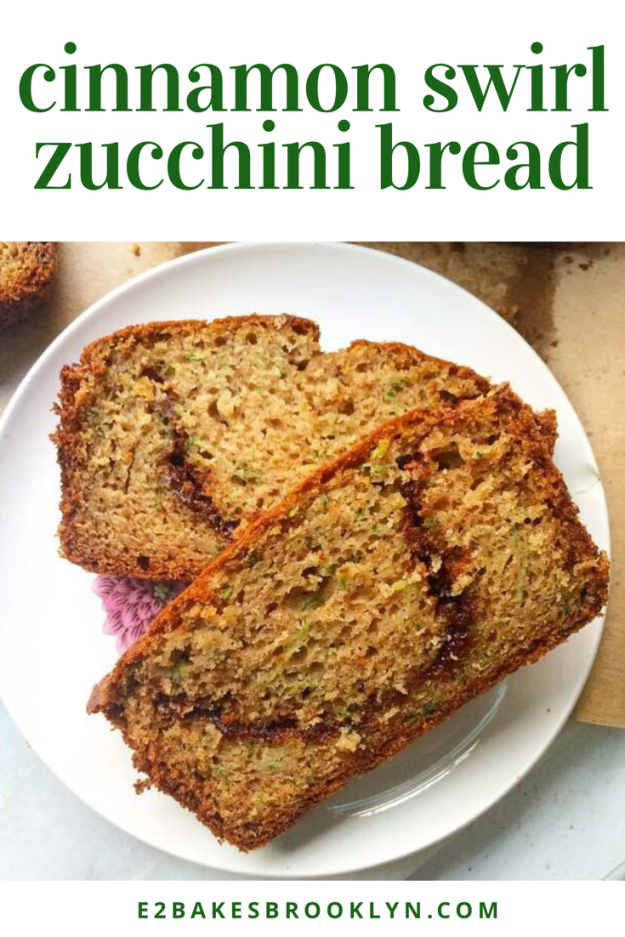
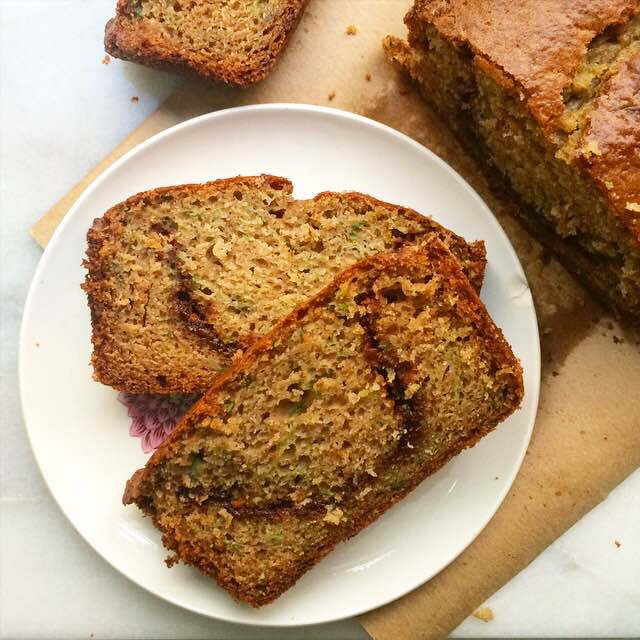
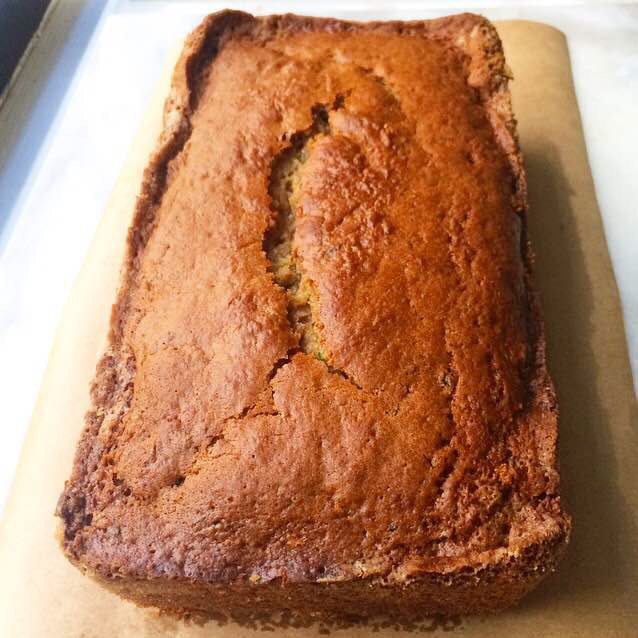
This zucchini bread recipe is a total classic and would be great with a cup of chopped nuts stirred into the batter, but today, let’s get a little crazy and fill our quick bread with a tunnel of melted cinnamon-sugar. Yes, you read that correctly. This isn’t any old zucchini bread–this is Cinnamon Swirl Zucchini Bread! 

Cinnamon Swirl Zucchini Bread
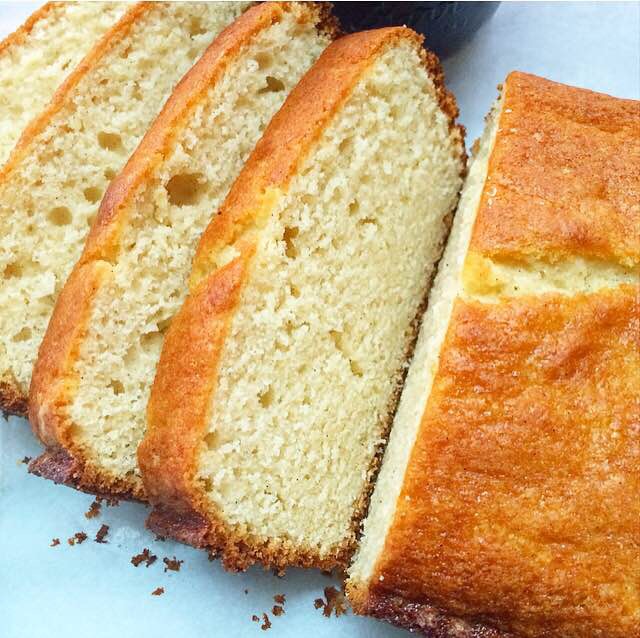
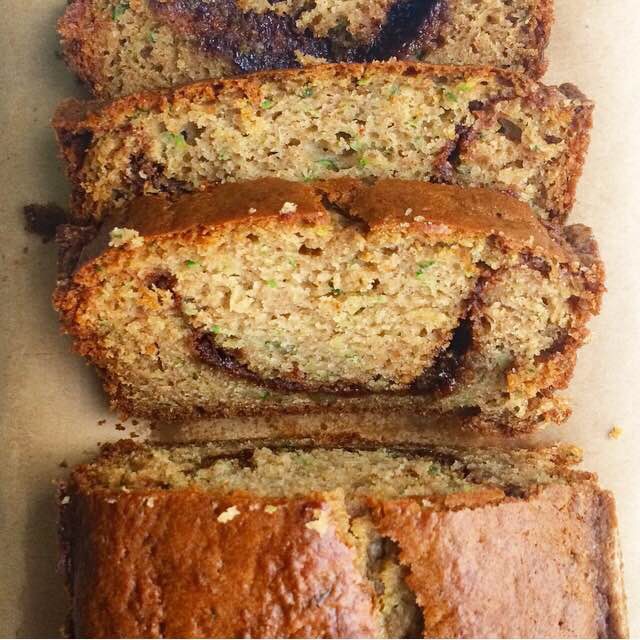
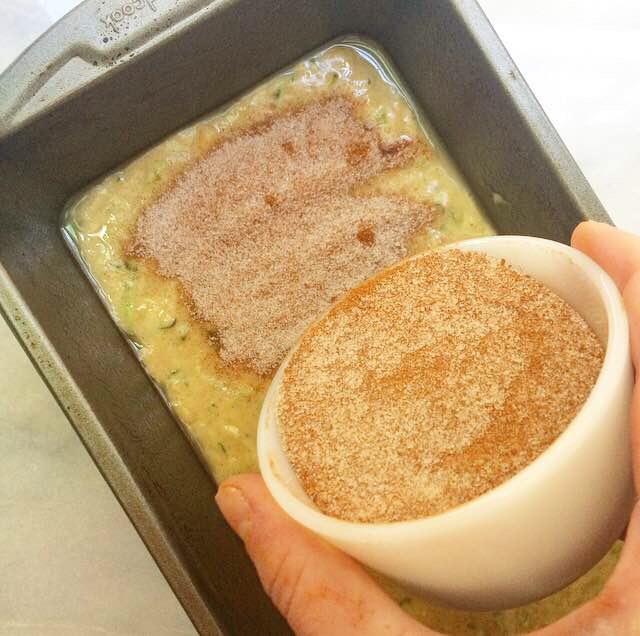
So how do you get all that cinnamon-sugar goodness inside your quickbread? Well, it’s surprisingly easy. Once the simple no-mixer-required batter is stirred together, half of it is poured into the bottom of a loaf pan, then blanketed in cinnamon-sugar before the rest of the batter is layered on top. As the zucchini bread bakes, the cinnamon-sugar layer melts and moves as the bread rises. Once the loaf is completely cool, you can slice it up and see a little swirl of sweet cinnamon goodness throughout 😍 

Cinnamon Swirl Zucchini BreadOh yes, this Cinnamon Swirl Zucchini Bread is something that even little thirteen year-old me could get excited about. And who wouldn’t? It’s moist, sweet, lightly spiced quick bread swirled with melted cinnamon-sugar, and it comes with a small serving of vegetables that you can’t even taste. It’s the dream. 

Cinnamon Swirl Zucchini Bread Cinnamon Swirl Zucchini Bread
makes one 9×5″ loaf

For the pan:
1 tablespoon all-purpose flour
1 tablespoon neutral-flavored oil

Cinnamon Swirl:*
1/4 cup granulated sugar
1 tablespoon ground cinnamon

Zucchini Bread:
2 cups all-purpose flour
1 teaspoon ground cinnamon
1 1/2 teaspoons baking powder
1 teaspoon baking soda
1 teaspoon Kosher or sea salt
1/2 cup neutral-flavored oil (I use canola)
1/2 cup light brown sugar, packed
1/4 cup granulated sugar
2 large eggs, room temperature
2 teaspoons pure vanilla extract
2 cups shredded zucchini, not packed (about 1 1/2 large zucchini)

Preheat oven to 350F.

Grease the pan. In a small bowl, use a fork to whisk together flour and oil. Use a pastry brush to paint the entire inside of a 9×5″ loaf pan. Pour out any excess. Set aside.

Prepare the cinnamon swirl. In a separate small bowl, use a fork to whisk together granulated sugar and cinnamon. Set aside.

Make the zucchini bread. In a medium-large mixing bowl, whisk together flour, cinnamon, baking powder, baking soda, and salt. Set aside.

In a large mixing bowl, whisk together oil, light brown sugar, and granulated sugar. The mixture will be clumpy, like wet sand. Add eggs one-by-one, whisking to combine after each addition. Stir in vanilla, followed by shredded zucchini. Add dry ingredients, and stir just until combined (no more than 20-25 strokes).

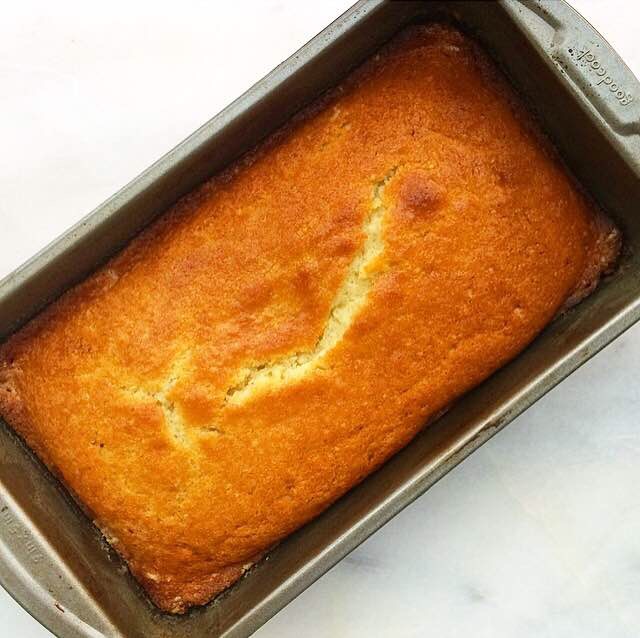
Transfer half the batter into prepared pan. Sprinkle with all of the cinnamon swirl mixture. Top with the remaining batter, spreading to cover the cinnamon-sugar layer. Lightly tap the pan on the counter to release any large air bubbles. Bake 40-50 minutes, tenting with foil at the 20 minute mark. Bread is done when a toothpick inserted in the center comes out clean or with only a few moist crumbs.

Let zucchini bread cool completely in the pan on a wire rack. Once the bread is cool, run a small thin knife around the edges of the pan before inverting to release. Slice and serve.

Store bread in an airtight container at room temperature for up to five days.

Note:

If you don’t wish to use the cinnamon swirl, add an extra teaspoon of cinnamon to the zucchini bread batter.

Cinnamon Swirl Zucchini Bread

Granola Cookies

 By now, you all know how much I love granola. After a lifetime of insisting I hated it, I tried the homemade variety, and the rest is history. There is always a giant jar of the stuff on my counter, full of crispy, glossy oats and whatever odds and ends I can find in my cookie mix-in cabinet.

Yes, I have an entire cabinet dedicated to cookie mix-ins. Doesn’t everybody?! 😜 

My current batch is a play on my Maple Pecan Granola, made with pecans and almonds, large flaked coconut, chia seeds, and brown rice syrup to encourage a little clustering. I usually eat it with yogurt and fruit, but last week, I got a little crazy and bypassed the breakfast option in favor of cookies.

I took my favorite chewy oatmeal cookie base, swapped in granola for 2/3 of the quantity of oats, and threw in some chocolate chips. Within an hour (because this dough doesn’t require a chill!), I was biting into warm, chewy, chocolaty, nutty Granola Cookies. 

I love this recipe as-is, but I’ve already been dreaming up other flavors. How about peanut butter? Swap in 3/4 cup creamy peanut butter for one stick of the softened butter, and use my Peanut Butter Granola! Yum! If you like dried fruit in your granola, you could swap out some or all of the chocolate chips for raisins, dried cranberries, or anything else that strikes your fancy.

You guys, these Granola Cookies are so good that I’ve made three batches in five days. I’m out of granola mid-week and I’m not even miffed about it. Nope–changing my routine in the name of dessert has been totally worth it. And even if it weren’t, I could console myself with a cookie or two. 

 Granola Cookies
makes about 5 dozen cookies

1 1/2 cups all purpose flour
1/2 teaspoon ground cinnamon
1 teaspoon baking soda
1 teaspoon Kosher or sea salt
1 cup (2 sticks) unsalted butter, softened to room temperature
1 cup dark brown sugar, packed
1/2 cup granulated sugar
2 large eggs, room temperature
2 teaspoons pure vanilla extract
1 1/4 cup old-fashioned oats
2 1/2 cups granola (homemade or purchased)
1 1/2 cups semisweet chocolate chips

Preheat oven to 350F. Line two baking sheets with parchment paper. Set aside.

In a small-medium mixing bowl, whisk together flour, cinnamon, baking soda, and salt. Set aside.

In a large mixing bowl, use an electric mixer to beat butter until light and fluffy. Beat in dark brown and granulated sugars, followed by eggs and vanilla. Add flour mixture in two installments, mixing to combine. Beat in oats and granola, followed by chocolate chips. Drop dough by the tablespoon onto prepared baking sheets, making sure the mounds of dough are at least 2 inches apart.

Bake 4 minutes. Rotate the sheet pans top to bottom in the oven before baking for an additional 4-5 minutes. Cookies are done when the tops are no longer doughy-looking. Let cool on the pans for five minutes before removing to a rack to cool completely. Repeat baking process with any remaining dough.

Cookies will keep in an airtight container at room temperature for up to a week.

Chocolate Cake with Malted Chocolate Buttercream

 My birthday is this weekend! I’m going to be 31 😁 I feel a little old, but I’m also really enjoying this phase of my life. 

In my 31st year, I have:

  • seen my family on six separate occasions (together and individually), including my 30th birthday trip to Santa Fe, a super-secret surprise trip to Austin for E3’s birthday, and visits to NYC from my mom, both sisters, and sister-in-law. That’s the most time I’ve spent with them since I moved to NYC in 2007. The older I get, the more I appreciate the amazing people who made me who I am.
  • spent some time off the grid in Maine, and enjoyed it way more than I ever expected. I can’t wait to do it again in a few weeks.
  • catered a dinner party for 300 people. I had three amazing helpers, and it went off without a hitch despite the six weeks of panic that preceded it. I hope to do it again this year…because I am insane.
  • moved. And moving in New York is horrible. Heck, moving anywhere is horrible. But I love my new apartment. Shoutout to my mom for coming to help me on the coldest weekend ever.
  • navigated my way through some major life changes and lessons with some modicum of grace and dignity.
  • opened my own Netflix account. #adulting
  • realized that I am still figuring out who I am. I hope this never ends.
  • made a lot of cookies. And eaten a lot of cookies.
  • really fallen in love with my friendships. My friends really stepped up and took care of me this year when I didn’t feel like I could do it myself. There’s nothing like laughing ’til you cry when you feel like your life is a mess. Thanks, guys.
  • started a baking blog. I dreamt of having this blog for six years before hitting “publish.” Thank you for reading, liking, sharing, and making the recipes. Thank you for making this little corner of the Internet what it is: a place filled with sugar and ridiculousness. Without you, I’m just talking to myself. 

…that got a lot mushier than I intended. 

This weekend, I’ll be celebrating at a cookout with those I hold nearest and dearest. My friends are making dinner, and I can’t wait! They offered to make dessert too, but being me, I just couldn’t leave well enough alone. I’ll be there with pie 😊

Of course, I thought about cake, but with the heat we’ve been having, I am afraid the frosting would melt. But I just can’t let my birthday go by without cake, so I’ve been celebrating a little early with this Chocolate Cake with Malted Chocolate Buttercream. The cake is moist, fluffy, and so, so easy. The best part? No mixer required! I’ve been making this cake for two years, and I can safely say that it’s the best chocolate cake I’ve ever had. And that’s coming from a self-proclaimed vanilla person. 

The frosting is a tribute to one of my very favorite things: chocolate malts. Oh yes, I love a chocolate malt. I just *have* to have one at least twice a month. It only seems appropriate that I’d use it as inspiration for my birthday cake frosting. This is a super easy chocolate buttercream with a hefty dose of malted milk powder. It’s creamy, dreamy, chocolaty, malty magic. If malt isn’t your thing, I recommend replacing the cup of malted milk powder in the recipe with an additional cup of confectioner’s sugar. It’ll still be delicious 😊 

As for decorating, I went for a sort of naked cake approach here, using the bulk of the frosting to frost the top and fill the layers. This recipe makes enough frosting to fully frost and fill a two layer 9″ round cake, if you’d like to cover the whole thing. If you want to pipe, you’ll need to make 1.5 times the recipe. No matter which route you choose to go, your cake will be fantastic.

If you don’t have a reason to make cake this weekend, I give you full permission to use my birthday as an excuse. We’re Internet friends after all. And friends who eat Malted Chocolate Buttercream together stay together, right?!

Have a great weekend! 

 Chocolate Cake with Malted Chocolate Buttercream
cake recipe adapted from Sally’s Baking Addiction
makes one two layer 9″ round cake

For the pan:
2 tablespoons neutral-flavored oil (I use canola)
2 tablespoons natural unsweetened cocoa powder

Cake:
1 3/4 cups all purpose flour
3/4 cup natural unsweetened cocoa powder (not Dutch Process)
1 cup granulated sugar
3/4 cup light or dark brown sugar
1 teaspoon baking powder
2 teaspoons baking soda
1 teaspoon Kosher or sea salt
1/2 cup neutral-flavored oil (I use canola)
2 large eggs, room temperature
2 teaspoons pure vanilla extract
1 cup buttermilk (low fat is fine)*
1 cup strong, hot coffee (decaf is fine)

Frosting:
1 cup (2 sticks) unsalted butter, softened to room temperature
2 cups confectioner’s sugar
3/4 cup natural unsweetened cocoa powder
1 cup malted milk powder (I use Carnation)
pinch of Kosher or sea salt
1 teaspoon pure vanilla extract
3-4 tablespoons heavy cream

chocolate chips, for decorating (optional)

Preheat the oven to 350F. Grease the pans. In a small bowl, use a fork to whisk together oil and cocoa powder. Use a pastry brush to paint the entire insides of the pans with the mixture. Set aside.

Make the cake batter. In a large mixing bowl to sift together flour, cocoa powder, granulated sugar, brown sugar, baking powder, baking soda, and salt. Set aside.

In a separate large mixing bowl, whisk together oil and eggs, followed by vanilla, buttermilk, and coffee. Whisk in dry ingredients in three installments, just until combined. Divide batter evenly among the pans. Tap full pans on the counter five times to release any air bubbles. Bake 23-27 minutes, until a toothpick inserted in the middle comes out clean.

Let cakes cool in pans for ten minutes before running a small, thin knife around the edges. Invert cakes onto cooling racks and allow to cool to room temperature.

Make the frosting. In a large mixing bowl, use an electric mixer to beat butter until light and fluffy (about two minutes). Beat in confectioner’s sugar, followed by cocoa powder. Mix in malted milk powder and salt, scraping down the bowl as necessary. Add in vanilla and 3 tablespoons of heavy cream, and beat on high for two minutes. Add more cream by the tablespoon until desired consistency is reached. Fill the layers and frost as desired. Decorate with chocolate chips, if desired.

Frosted cake will keep covered at room temperature for up to two days, and in the refrigerator for up to a week.

Note:

If you don’t have buttermilk, put one tablespoon of white vinegar in the bottom of a liquid measuring cup, then pour milk up to the 2 cup mark. Stir and let sit for five minutes, until curdled. Use as instructed in the recipe. Do not use skim or fat free milk.

Triple Berry Breakfast Crumble

 As far as I’m concerned, there’s nothing better than an early morning summer walk in New York. I rarely work before 3pm, so it becomes a daily ritual this time of year. Everybody else in Brooklyn Heights is sweating in their business clothes on their way to catch the subway, but I’m in yoga pants and Birkenstocks with an iced coffee in-hand, on my way to the green market for fresh berries. 

That’s my speed on weekday mornings: a quick stroll of the neighborhood, a little shopping, and then home to make breakfast with whatever looks best at the market. It’s a luxurious way to start the day–a fact of which I am far too aware–and I have no intention of wasting a minute of it. One of these days, I’ll likely have a job that requires me to get out of the house bright and early, but until then, I’m going to enjoy my walk, drink too much coffee, and come home to make Triple Berry Breakfast Crumble. 

This crumble is perfect for summer–fresh strawberries, blueberries, and raspberries are coated in a sweet orange mixture and topped with an oat and almond crumble, then baked until bubbly. The berries burst as they bake and create a beautiful red, orange-scented sauce. The topping gets brown and crunchy. Spooned into a bowl with your favorite yogurt (I’m partial to Siggi’s), this crumble is a perfectly delicious way to start the day.

I know what you’re thinking. Aren’t crumbles traditionally served for dessert? Well, yes. And this one would be great with a scoop of ice cream. But why wait all day when you can enjoy it first thing?! This recipe serves six and has less than 1/2 cup sugar. And if that’s not enough to sway you, the crumble is 100% whole grain. It’s made primarily of oats and white whole wheat flour, with five tablespoons of butter to hold it all together. Oh, and there are almonds for a little extra protein. I’m no nutritionist, but that all sounds pretty healthy to me.

Triple Berry Breakfast Crumble can be made start-to-finish in 45 minutes, which means that it’s perfect for a casual summer brunch, but can also be made on a Sunday night and reheated all week long. It’s excellent cold too, so you can pack your portion to-go without wondering if there’s a microwave at your destination. Make this crumble this summer–it’s a little taste of luxury any day of the week. 

  Triple Berry Breakfast Crumble
adapted from Breakfast Apricot Crisp by Deb Perelman
makes one 9-inch pie plate, about six servings

Filling:

16 ounces fresh strawberries, hulled and quartered
1 pint fresh blueberries
6 ounces fresh raspberries
2 tablespoons granulated sugar
1 tablespoon cornstarch
1/4 teaspoon ground cinnamon
1/4 teaspoon ground nutmeg
pinch of Kosher or sea salt
1 tablespoon fresh orange zest
1 tablespoon fresh orange juice

Crumble:
1/2 cup old fashioned oats
1/2 cup white whole wheat flour*
1/3 cup granulated sugar
1/2 teaspoon Kosher or sea salt
2 tablespoons sliced almonds, optional
5 tablespoons unsalted butter, very cold, cubed

yogurt, for serving

Preheat oven to 400F. Grease a 9-inch pie plate. Set aside.

Combine strawberries, blueberries, and raspberries in a large mixing bowl. Add sugar, cornstarch, cinnamon, nutmeg, salt, orange zest and juice, and use a silicone spatula or wooden spoon to gently stir it all together. Transfer berry mixture to prepared pie plate. Set aside.

Make the crumble. In a small mixing bowl, stir together oats, flour, sugar, salt, and almonds. Use a pastry blender or two forks to cut butter into mixture until the largest chunks are the size of small peas. Distribute crumble evenly over the top of the filling.

Place a rimmed baking sheet on the bottom rack of the oven to collect any overflow. Place assembled crumble on the top rack. Bake 30 minutes, tenting with foil if the crumble starts to brown too quickly. Let cool 10 minutes before serving with yogurt.

Triple Berry Breakfast Crumble will keep covered in the refrigerator for up to five days.

Vanilla Bean Ricotta Cake

 Everyone has their go-to dessert–that thing they make when a friend has a baby or they’re asked to bring dessert for a dinner party. For my mom, it’s angel food cake with fresh blueberries and whipped cream. For my grandmother, Mame, it was a cherry-pineapple dump cake, which she called “Simply Delicious,” because who wants to eat something called dump cake?! 

My go-to? This Vanilla Bean Ricotta Cake. Now, the words “vanilla bean” and “ricotta” make it sound fancy, but it’s not–it’s basically pound cake. There’s no frosting or layering because this cake simply doesn’t need that kind of adornment. It’s easy to put together and bakes up super dense and moist, with tons of vanilla bean flavor.

For those of you who aren’t much for ricotta in other applications, you should know that I’m not either. Ricotta cheese doesn’t belong in my lasagna, on my toast, or anywhere else…except this cake. The milky flavor and grainy texture that turn me off in savory foods are what make this cake so insanely moist and delicious. The cheese melds so well into the simple batter, it’ll turn even the staunchest of ricotta-haters. If you really don’t want to use the stuff, you may substitute an equal volume of full-fat sour cream.
 This recipe makes a small loaf cake. It will not rise above the top of the pan. But what it lacks in size, it makes up for in versatility. Vanilla Bean Ricotta Cake is buttery and moist with a distinct vanilla flavor. It’s the kind of cake that’s fantastic by itself with a cup of coffee or tea, but it is a wonderful base for pretty much any toppings you can think of! Mix up a quick vanilla glaze (like the one used here) and drizzle it over the top of the cooled cake before slicing. Top slices with fresh strawberries and whipped cream for a sort of makeshift strawberry shortcake. Use it in trifles or ice cream cakes. Seriously, this cake is good with just about anything. 

This weekend, I’m going to serve Vanilla Bean Ricotta Cake with Blueberry Compote. I just love the look of the berries on the sliced cake, and the blueberry-lemon flavor goes so well with the vanilla bean! Make it this Memorial Day Weekend and enjoy it with your family and friends. Maybe it’ll become your go-to dessert, too 😊 

 Vanilla Bean Ricotta Cake
makes one 9×5″ loaf, about 8-12 servings

For the pan:
1 tablespoon all-purpose flour
1 tablespoon neutral-flavored oil (I like canola)

Cake:
1 1/3 cups all purpose flour
2 tablespoons cornstarch
1 teaspoon baking powder
1/4 teaspoon baking soda
1/2 teaspoon Kosher or sea salt
1/2 cup (1 stick) unsalted butter, softened to room temperature
3/4 cup granulated sugar
2 large eggs, room temperature
2 teaspoons vanilla bean paste**
4 ounces (1/2 cup) full-fat ricotta cheese, room temperature

Preheat oven to 350F. Grease the pan. Mix together flour and neutral-flavored oil. Use a pastry brush to paint mixture over the entire inside of the pan. Pour out any excess. Set aside.

Make the batter. In a small-medium mixing bowl, whisk together flour, cornstarch, baking powder, baking soda, and salt. Set aside.

In a large mixing bowl, use an electric mixer to beat butter until light and fluffy. Beat in sugar. Add eggs one at a time, mixing after each addition. Beat in vanilla bean paste, followed by ricotta. Add dry ingredients in two installments, combining completely after each addition.

Spread batter evenly into prepared pan. Tap full pan on the counter five times to release any air bubbles. Bake 35-40 minutes, tenting with foil if it starts to brown too quickly. Cake is done when it’s golden brown and a toothpick inserted in the center comes out clean, or with only a few moist crumbs.

Let cake cool in the pan for ten minutes. Run a small, thin knife around the edge of the pan to release the cake. Invert it onto a cooling rack, and then revert. Let cool completely.

Cake will keep at room temperature for up to three days, and in the refrigerator for up to five.

Notes:


1. I use Nielsen-Massey Vanilla Bean Paste.
2. If you don’t have or don’t want to use vanilla bean paste, you may use an equal volume of pure vanilla extract, or the scraped seeds of one vanilla bean + 1 teaspoon of pure vanilla extract.