 My dad is the kind of person who just *needs* something sweet at the end of each day, probably because he was raised by someone who always had a chocolate cake on her kitchen counter. Aside from brownies though, he’s not much of a baker and neither is my mother, so homemade desserts weren’t a huge part of my family life growing up. Still, we were a small-dessert-every-night sort of family. We always had something sweet in our weekly grocery haul–Oreos, pecan sandies, popsicles–but I think, if asked, we’d all agree that the best dessert was always vanilla ice cream and chocolate syrup.
 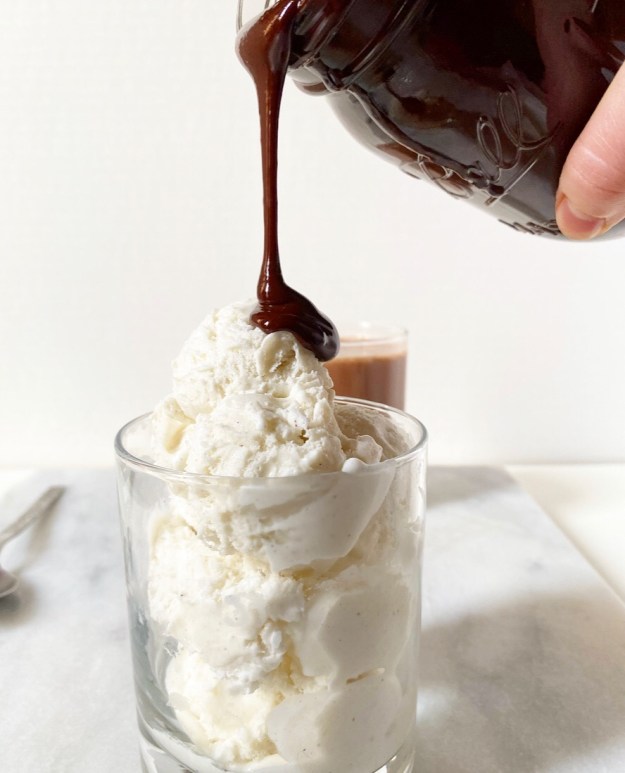 Fast forward fifteen-ish years to me living the professional home baker life in New York in the middle of a pandemic. I can pretty much make whatever dessert I want, and maybe it’s because the weather is warming up or I’m feeling nostalgic or a little homesick, but all I really want right now is vanilla ice cream and chocolate syrup.
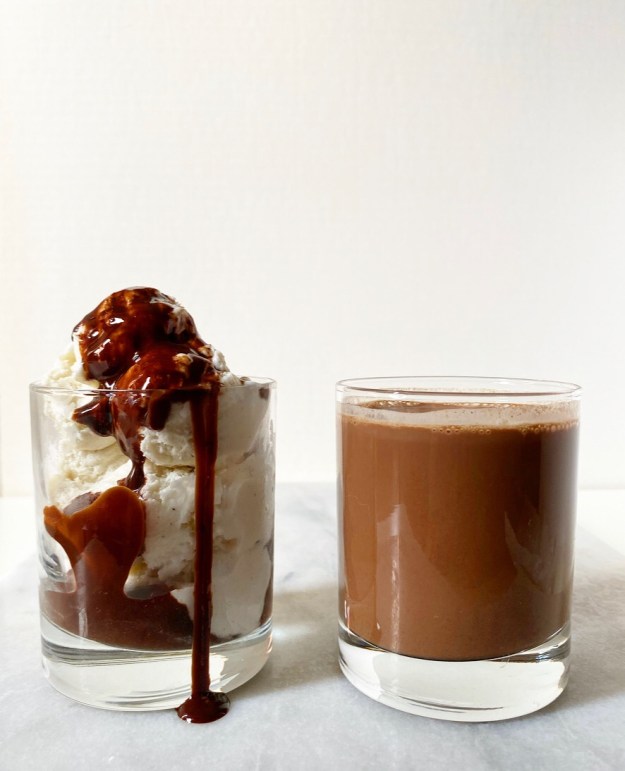
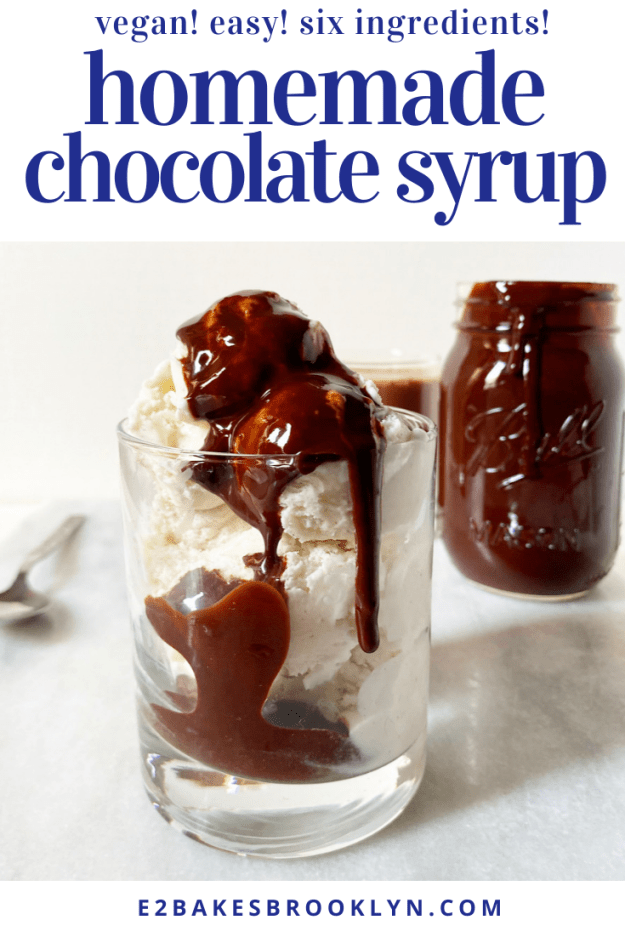
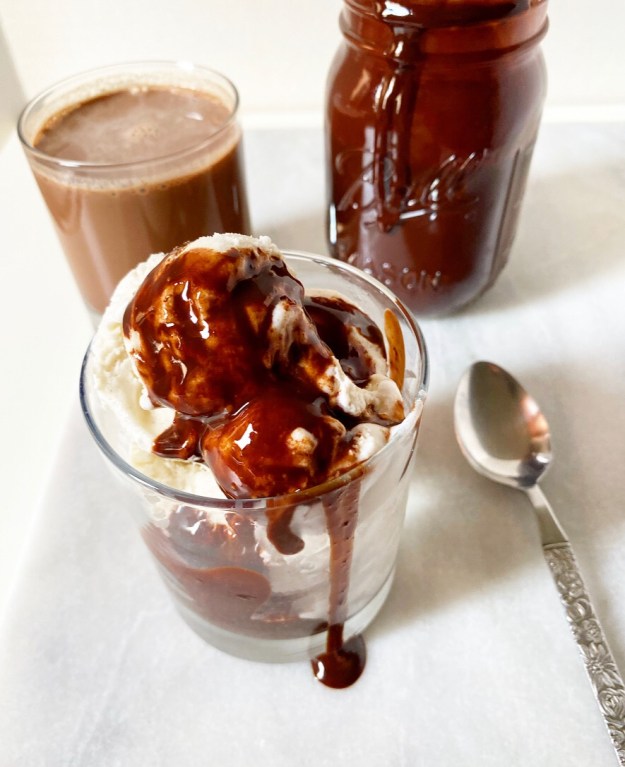 Now, I do not have much desire to begin making my own vanilla ice cream, but Homemade Chocolate Syrup? That, I need. Like many of us, I grew up with Hershey’s Syrup in the fridge, but now that I’ve started making my own chocolate syrup, I’m ruined for storebought forever. Deeply chocolaty, a little tangy, just thick enough, pourable even when it’s fridge-cold—this is the stuff my ice cream dreams are made of.
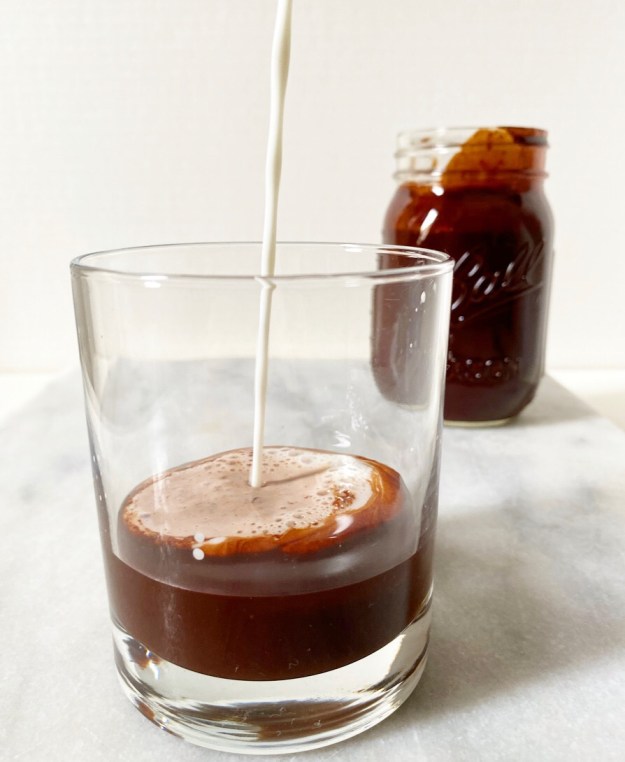
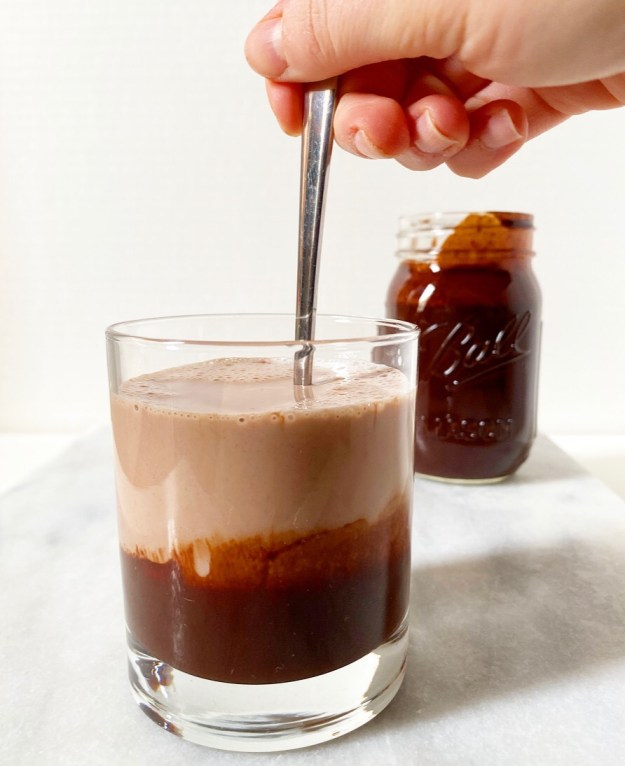
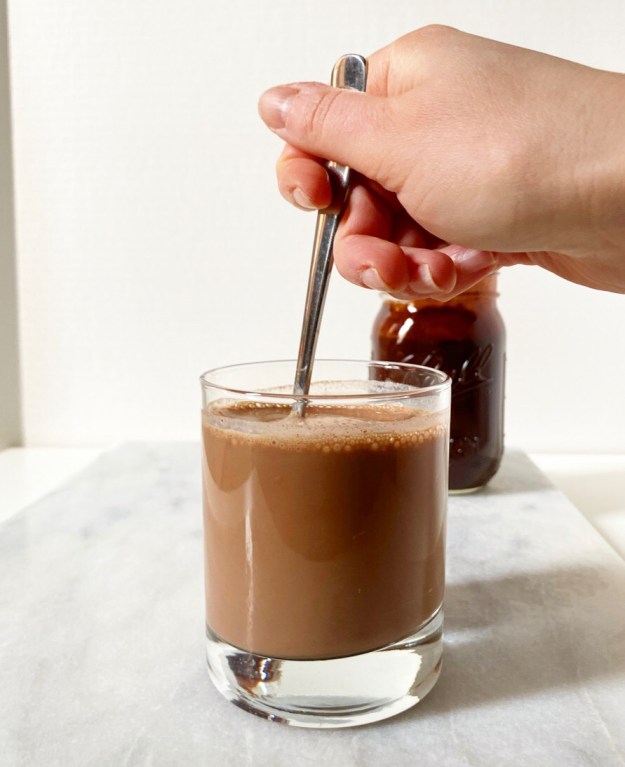
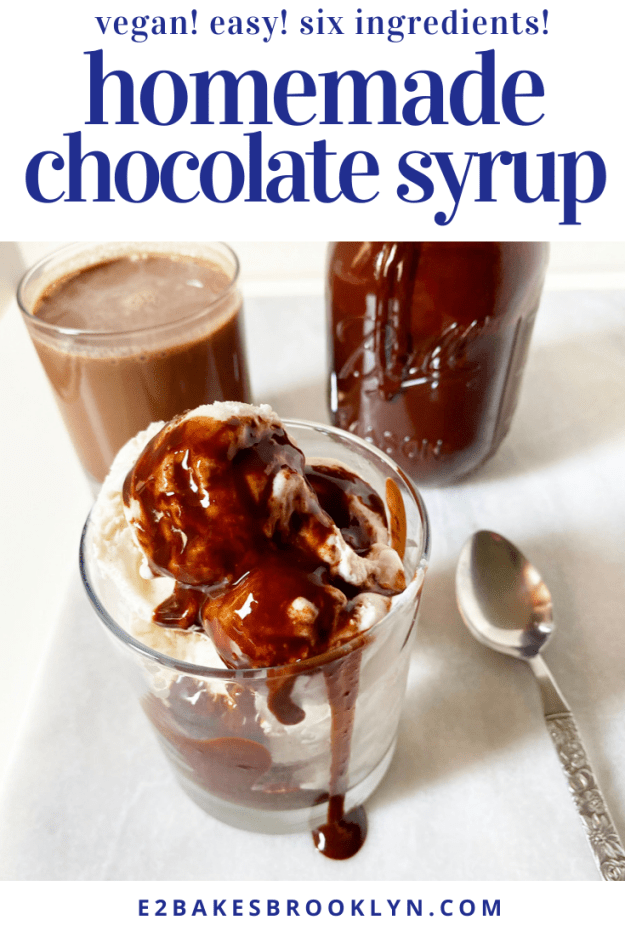
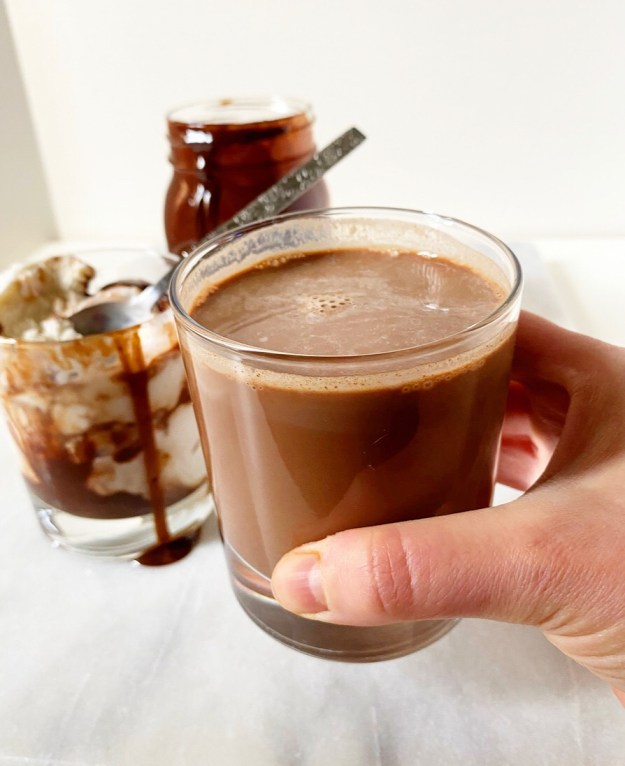 Also, my chocolate milk dreams. I generally cannot abide liquid dairy, but put some chocolate syrup in a glass of whole milk and I. am. interested.
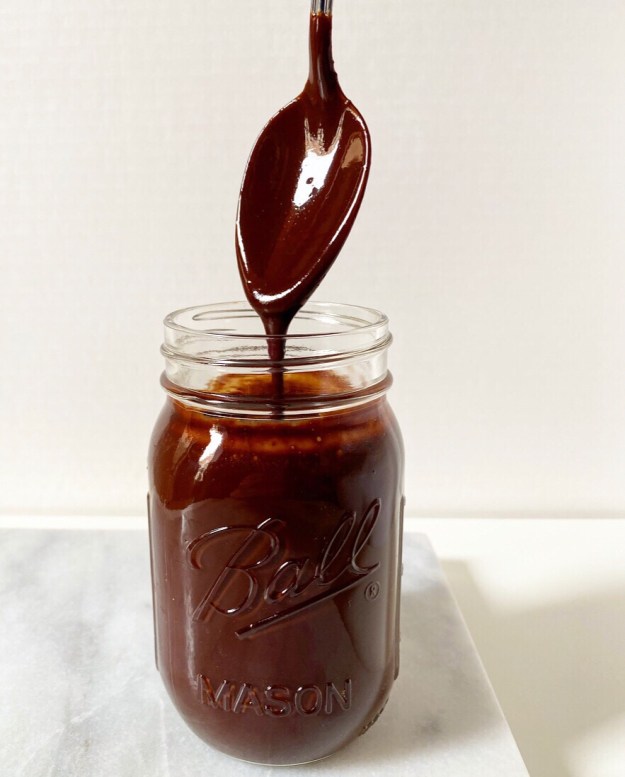 Homemade Chocolate Syrup beats the pants off of every storebought version I’ve ever had. Don’t get me wrong, I wouldn’t turn up my nose if someone offered me a scoop of ice cream with a drizzle of Hershey’s Syrup on top—I’m not a monster!—but it simply can’t compete with this stuff. Where the syrups you’ll find on shelves are cloyingly sweet, lacking in chocolate flavor and full of ingredients none of us can pronounce, this one is super chocolaty from cocoa powder and bittersweet chocolate, has a little depth from brown sugar, and requires six ingredients that you very well may have in your pantry right now. Oh, and it’s vegan.
If you’re wondering if it’s worth the effort to make Homemade Chocolate Syrup, the answer is a resounding “yes.” This is essentially a souped-up simple syrup with a little chopped chocolate and vanilla extract stirred in at the end. We’re talking twelve minutes start-to-finish for a pint (that’s two cups!) of chocolate syrup. I haven’t done the math, but I’m fairly certain this is less expensive than storebought, too.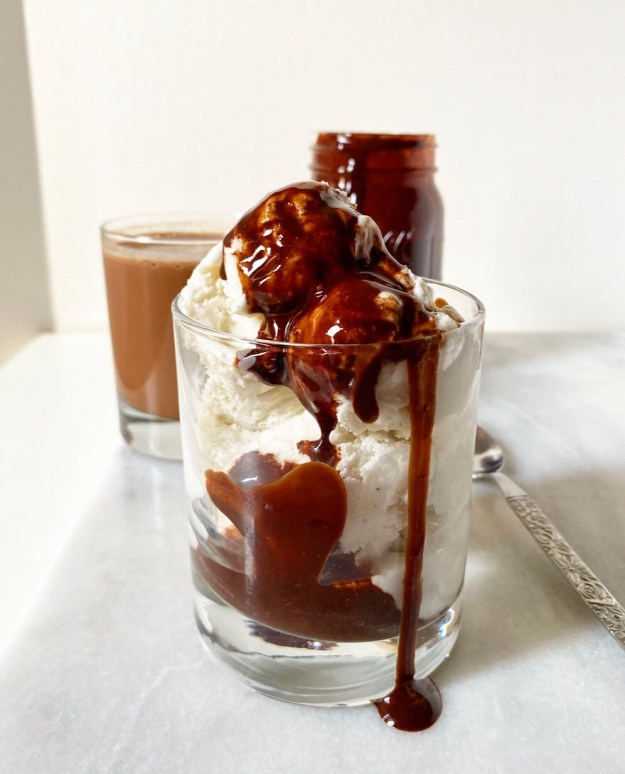 With that, I rest my case…and also tiptoe into my kitchen at 2am for some ice cream and Homemade Chocolate Syrup.
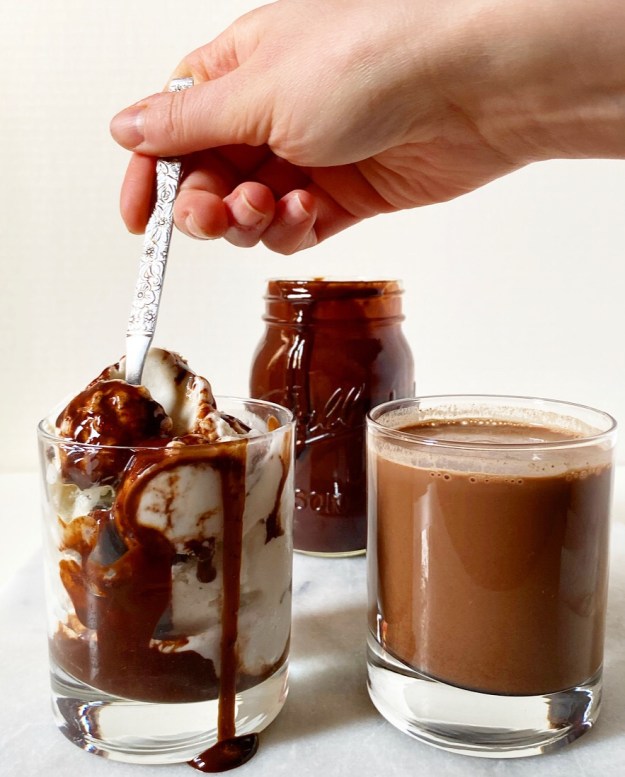
Homemade Chocolate Syrup
makes about 2 cups
1 cup light brown sugar, packed
2/3 cup natural unsweetened cocoa powder
pinch of salt
1 1/4 cups water
1 ounce bittersweet chocolate, chopped
1 teaspoon pure vanilla extract
In a small pot or saucepan, whisk together brown sugar, cocoa and salt to remove any large lumps. Add water and whisk to combine.
Place over medium heat. Stir occasionally until it comes to a simmer, then constantly for 5 minutes while it simmers. Mixture will expand dramatically. Remove from heat.
Whisk in chopped chocolate, followed by vanilla. Let cool a bit in the pot before transferring to a jar (or other container) for storage.
Chocolate syrup will keep covered in the refrigerator. Stir before using.
 This summer is going to be a little different, but one thing remains the same: its unofficial kick-off, Memorial Day, is coming up next week. While it’s highly unlikely that I’ll find myself around a campfire or even on a rooftop anytime soon, I will not let this year go by without a s’mores-centric treat.
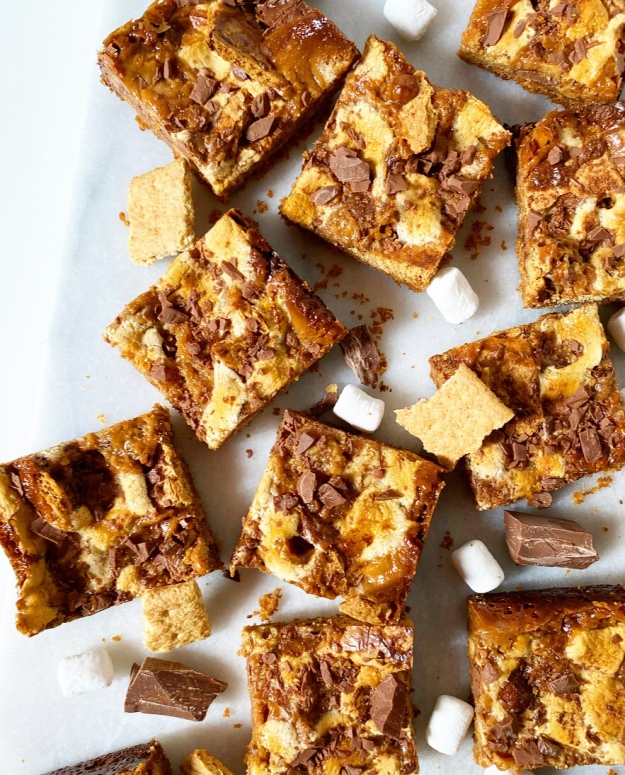
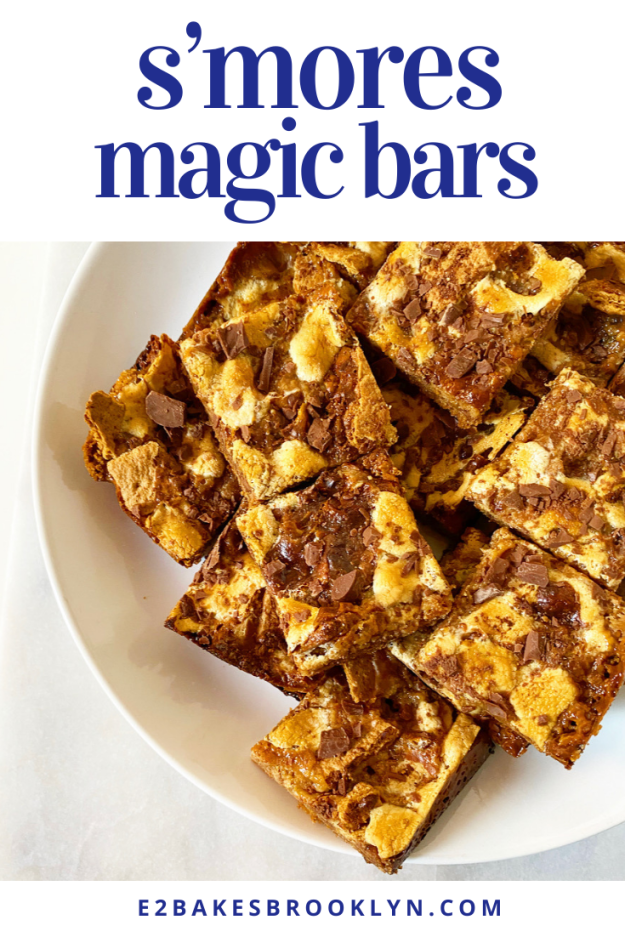
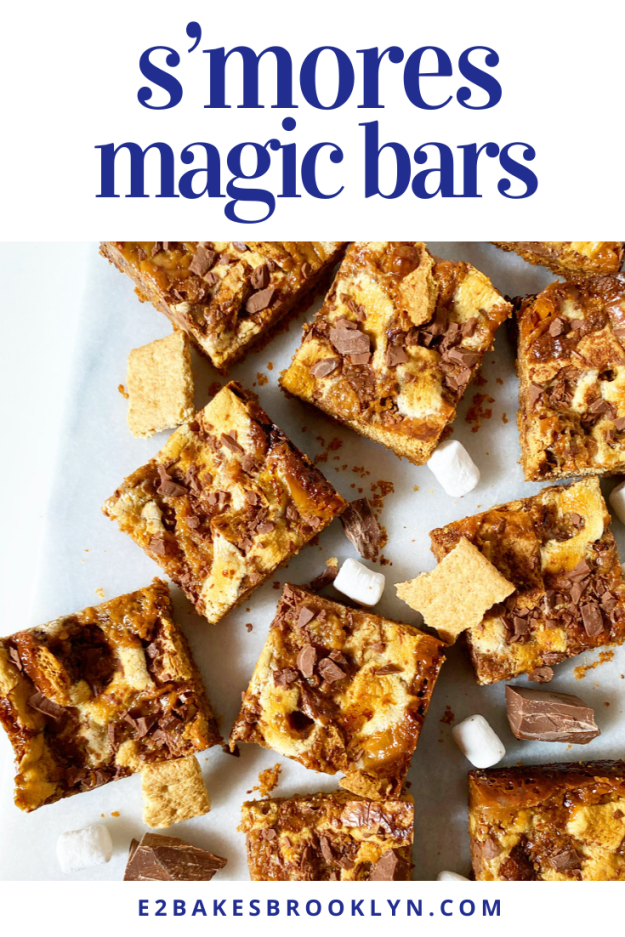
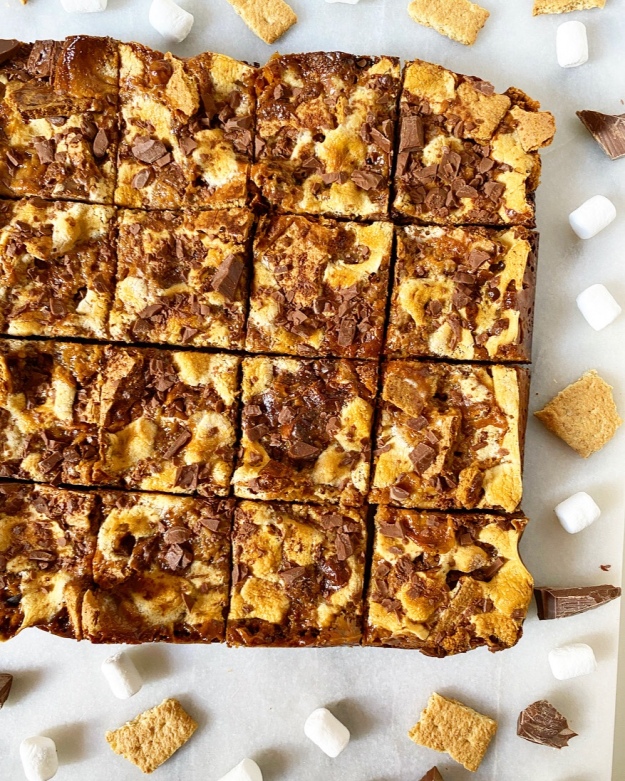 Is there anything that says “summer” quite like a s’more? I mean, what’s not to love about crisp graham cracker, milk chocolate (or
 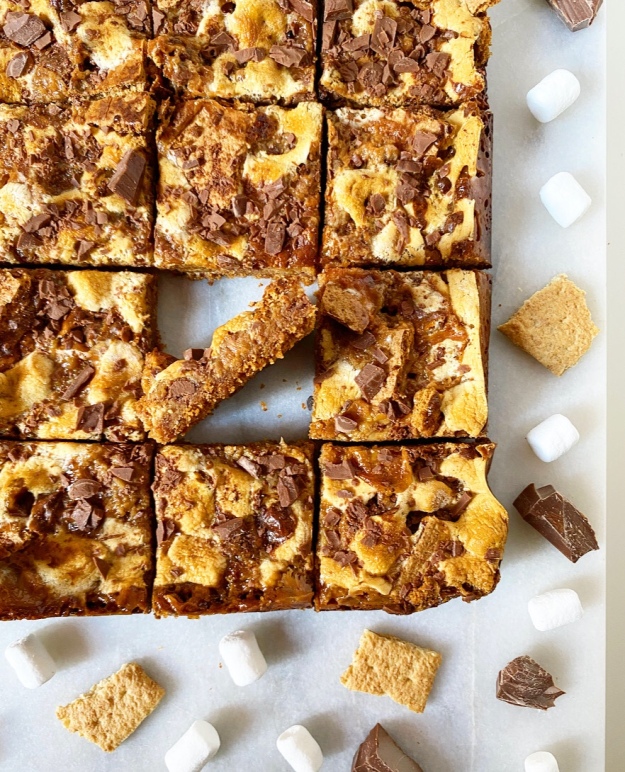 These S’mores Magic Bars aren’t your traditional summertime fare, but they have plenty of graham crackers (in the form of crust and crispy shards), chopped milk chocolate and toasted marshmallows. It straight-up doesn’t count as a s’mores dessert if the marshmallows aren’t toasted, am I right?!
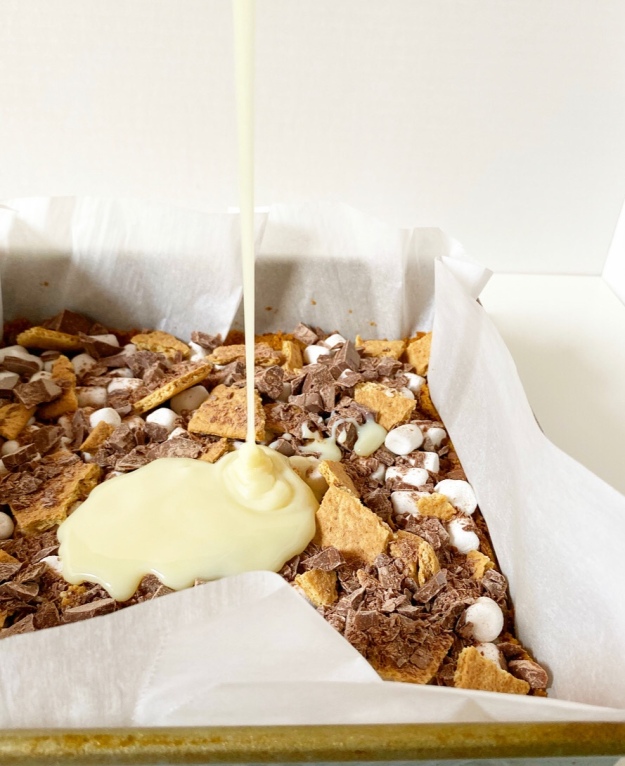
 As with
 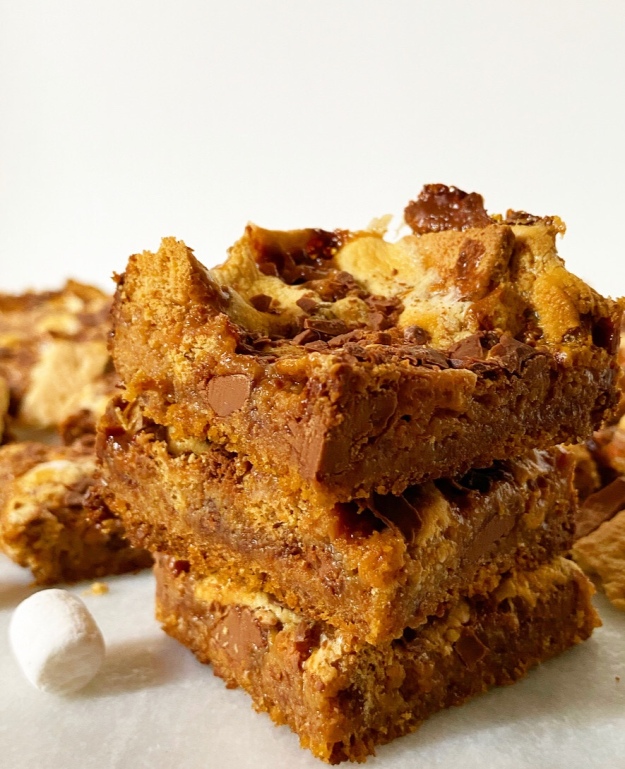 The sweetened condensed milk also gives these bars a slightly gooey finish, which is a good thing because while the marshmallows do get nice and golden brown, they also have to cool completely before you slice the bars. Like I said, we’re not going for tradition, we’re going for the most efficient way to get toasted marshmallow, graham cracker and milk chocolate into our faces in a less than ideal summer situation!
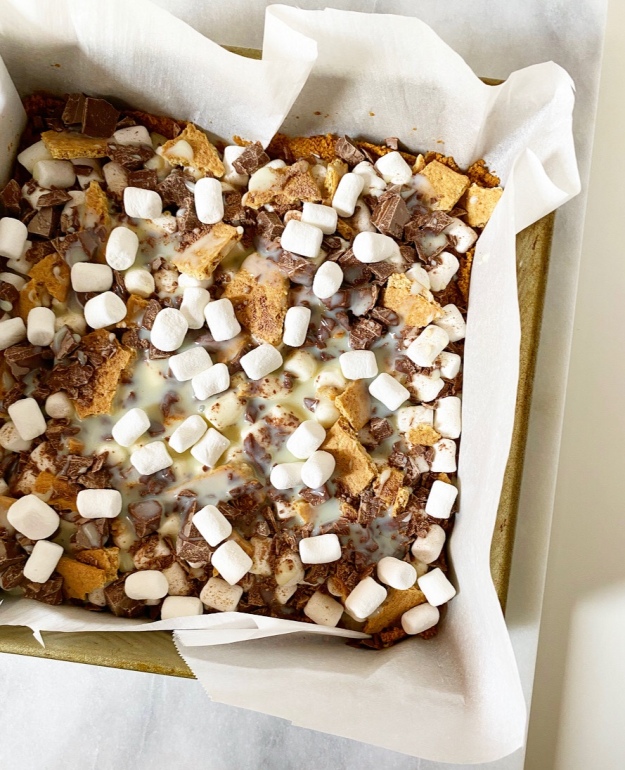
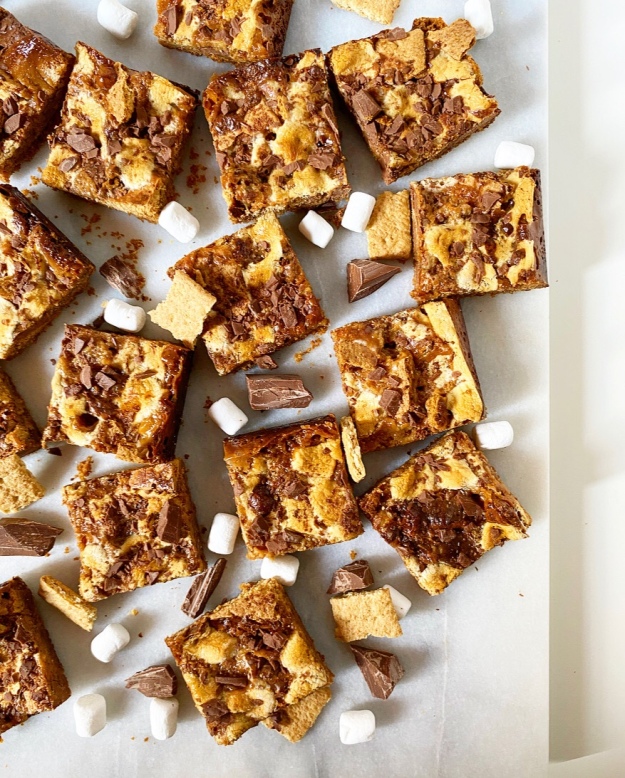 Also, unlike traditional s’mores, these sweet squares will stay good for days after baking. Days! That’s a very good thing, because I have a feeling I’m going to need a few batches between now and Labor Day.
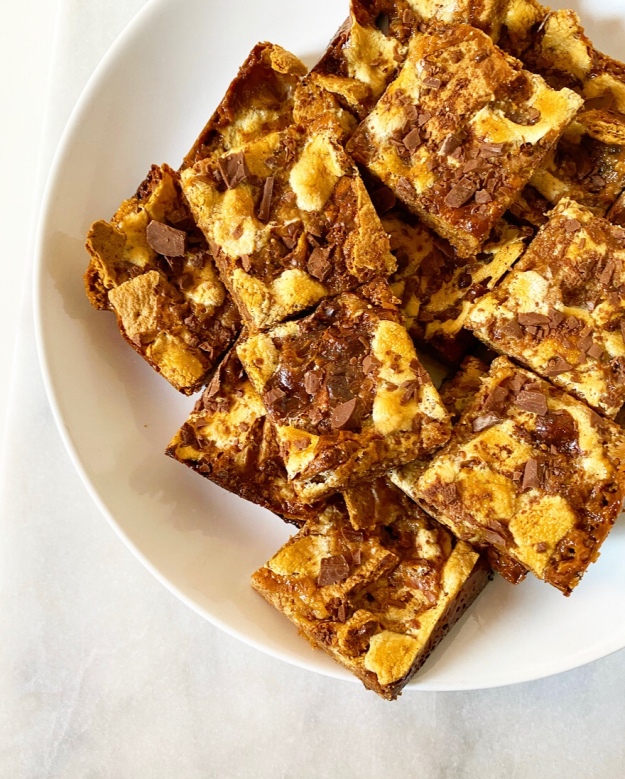
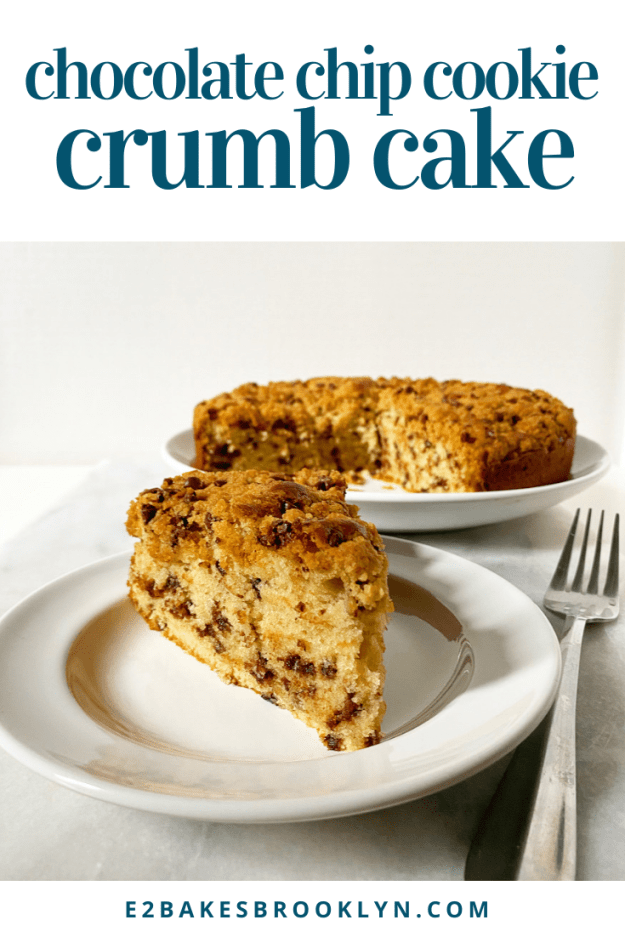
 I had the idea for this Chocolate Chip Cookie Crumb Cake after making
 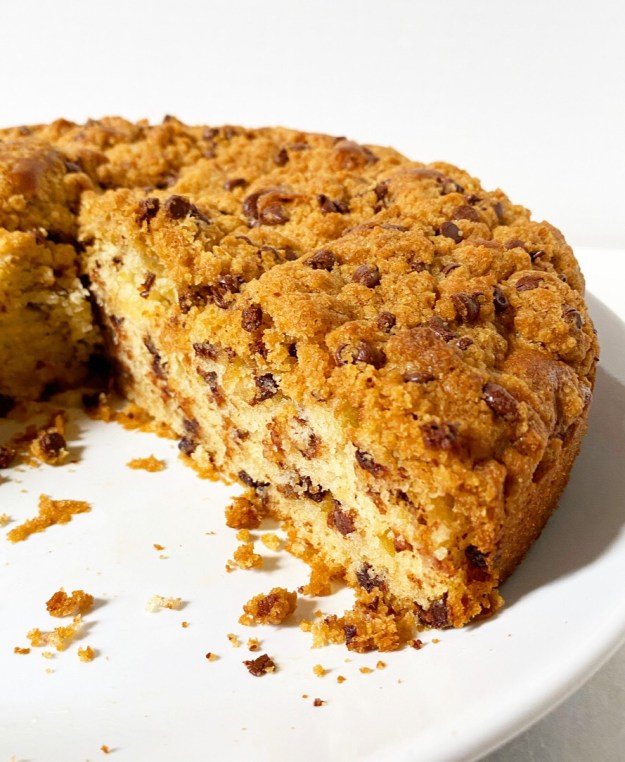 Generally speaking, I’m not a big celebrator of food holidays, but I seem to always remember
  I mean, look at that pillowy soft chocolate chip cake! It’s buttery, tight-crumbed, and super moist thanks to half a cup of sour cream. It’s almost enough to restore my hope for the future.
 Oh, and speaking of restoring hope in things, let’s discuss the crispy chocolate chip cookie crumb topping! It’s the real star of this show. Think streusel, but instead of cinnamon there’s a bunch of brown sugar and chocolate chips in the mix—it’s actual perfection.
 If you want perfectly clean slices and have slightly more patience than I do, you can wait til the cake has cooled completely before divvying it up. I ceased having extra patience 42 days ago, so the pictured slice is a little scraggly…but as a perk, the chocolate chips are still soft. I will choose melty chocolate over aesthetics any day, anytime. But, like, especially today and right now. The future can wait while I finish my slice of cake.
 Happy Chocolate Chip Day, dear readers.


 I want you to know that these took me a while—like 24 test batches, and also years of making subpar pancakes and wondering if there was something wrong with me or if I should give in to a lifetime of Bisquick.
 These Buttermilk Pancakes are on the thick and fluffy side of things—perfect for piling high with butter and maple syrup. They are so soft and tender that I can’t get enough, which is a very good thing considering that I have 24 batches-worth triple-wrapped in plastic and stacked into columns in my freezer. I’d invite you all over for pancakes and
  Anyway…I didn’t reinvent the wheel here. Flour, sugar, baking powder & soda, salt, buttermilk, melted butter, eggs, and vanilla—those are the ingredients you’ll find in most buttermilk pancakes, including mine. You’ll notice that the volume of wet ingredients far surpasses the dry, so these are fluffy but not heavy or rubbery.
 I don’t have any magical tips for you except to rest the batter for a few minutes (it will change dramatically as the gluten develops), make sure your surface isn’t too hot, and don’t cook your batter in too much fat. That last bit of advice seems to be the secret to evenly-browned pancakes, at least when it comes to this recipe. I brush the pan with oil and then wipe out any excess with a paper towel before pouring batter.
 These are buttermilk pancakes, so I tested them primarily with full- and low-fat buttermilk. If you don’t have buttermilk on hand, you can use a
  You may think this batter is particularly thick, or at least I do (maybe from my lifetime of Bisquick?), but it’s still pourable. I find that rotating my wrist/the measuring cup 90 degrees while pouring batter onto the pan helps to develop a good round shape…not that I’ve ever discriminated against a pancake based on its shape. Pancake positivity all the way.
 As for when to make and eat Buttermilk Pancakes, I know the weekend is traditional, but days are just days now, and there’s never really a bad time for pancakes, now is there? Maybe, just this once, be like me–Stop nitpicking and get out of your own damn way. Very good, very easy pancakes happen when you stop nitpicking and get out of your own damn way.