 Although I have never publicized it this way, I have privately referred to this time of my blogging year as “Savory January” for some time now. You see, every January since starting this site, I (mostly) switch focus from sweets to weeknight meals, sides and other savory pursuits. It’s not for weight loss, “cleansing” or any reason beyond keeping things interesting—I cook as much as I bake, and those recipes deserve their moment in the blogging sun, too. Is switching up my blog POV for one month a year weird? Sure. But I like variety, and also this is my website and I can do what I want.
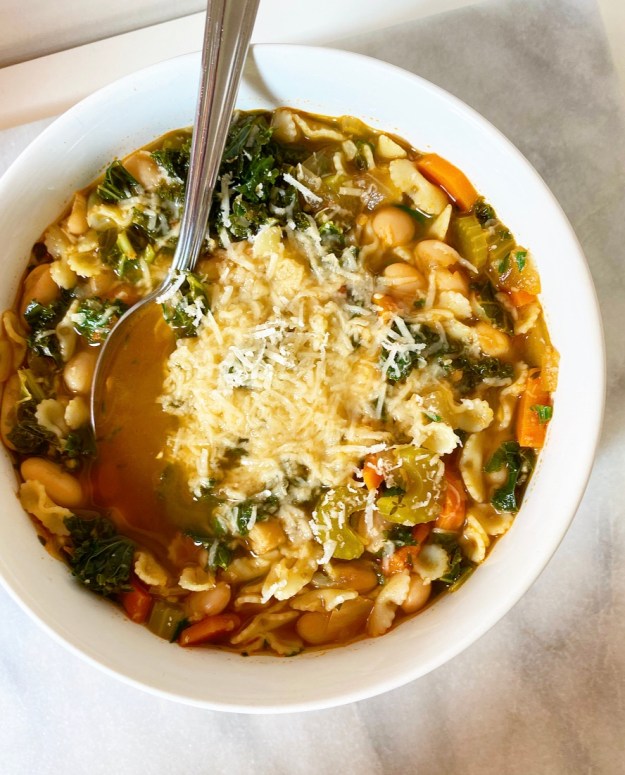
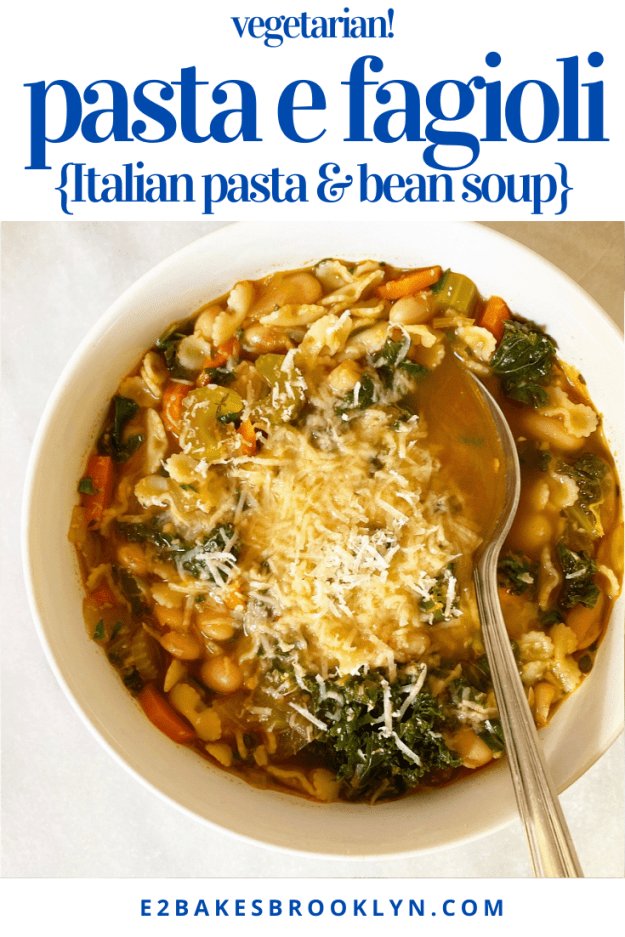
 Pasta e Fagioli has been one of my favorite recipes for years and years. At its most basic, it’s a vegetable soup with pasta and beans, but it’s so much more! It’s easy, it’s cheap, it’s hearty, and it’s dang delicious. Oh, and it’s vegetarian—vegan without the cheese, gluten-free depending what kind of pasta you use. Yesssss.
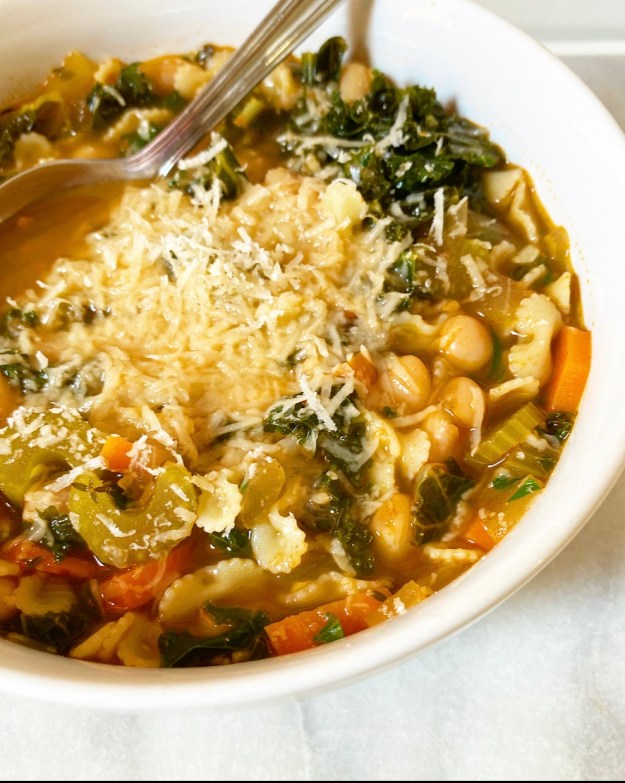 I made this Italian staple all the time when I first moved to NYC, but moved on to other things because that’s just how cooking goes for me. I make something regularly for a few weeks/months/years and then I completely forget about it for a few more weeks/months/years. In this case, I remembered Pasta e Fagioli on the last night of our Maine trip this past October. We had some produce to use up, and we had some tomato paste, beans (aka fagioli), pasta and cheese ends lingering…and well, when life gives you lemons, you know.
Long story short, I used up ingredients, was able to feed my people in under an hour start-to-finish and also became obsessed with Pasta e Fagioli again. We’ve been back in Brooklyn for three months and I’m still over here making this every couple of weeks. The heart wants what it wants.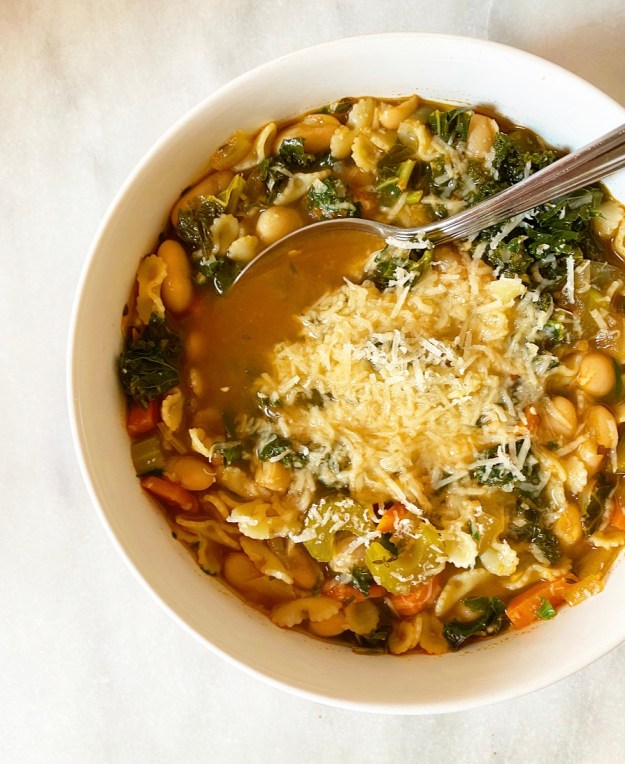 Making Pasta e Fagioli is super simple and you probably have most of the ingredients already. The method is nearly identical fo the way I make Sausage, White Bean & Kale Soup because why fix what isn’t broken?
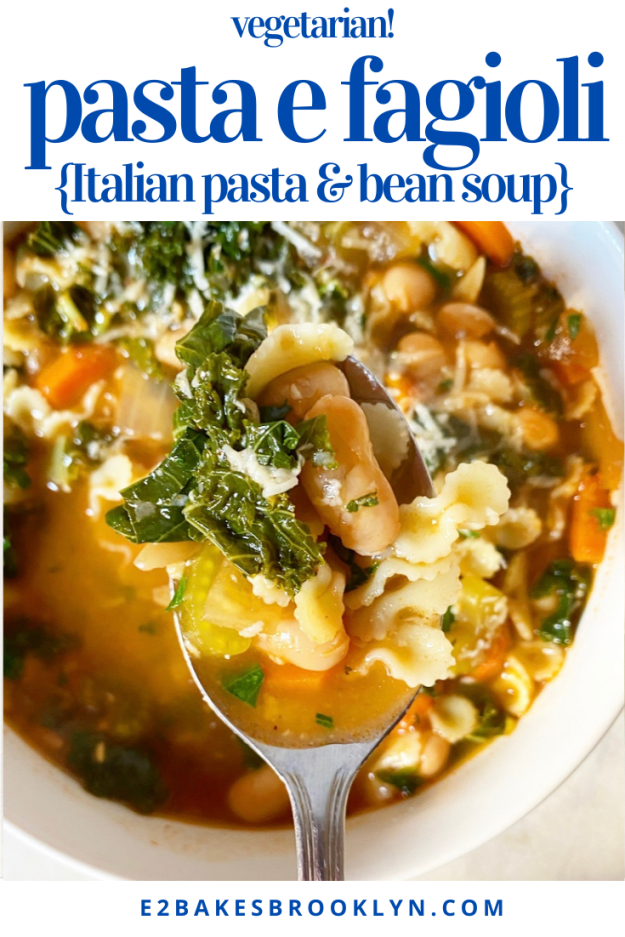
Start by cooking the mirepoix (French term for carrot, celery & onion) for about ten minutes. You’re not going to get any color on it, but this is where the flavor building begins. Add some garlic, and then coat it all in tomato paste and let it caramelize for a few minutes. Add some herbs (fresh or dried), vegetable stock and water, and let that all simmer for 20 minutes or so, until the vegetables are soft. Finish it all off with a couple of cans of white beans and a bunch of kale (or any hearty green) and let them warm through, then combine the soup with cooked pasta in individual soup bowls. All that’s left to do is grate some parm over the top and call it dinner.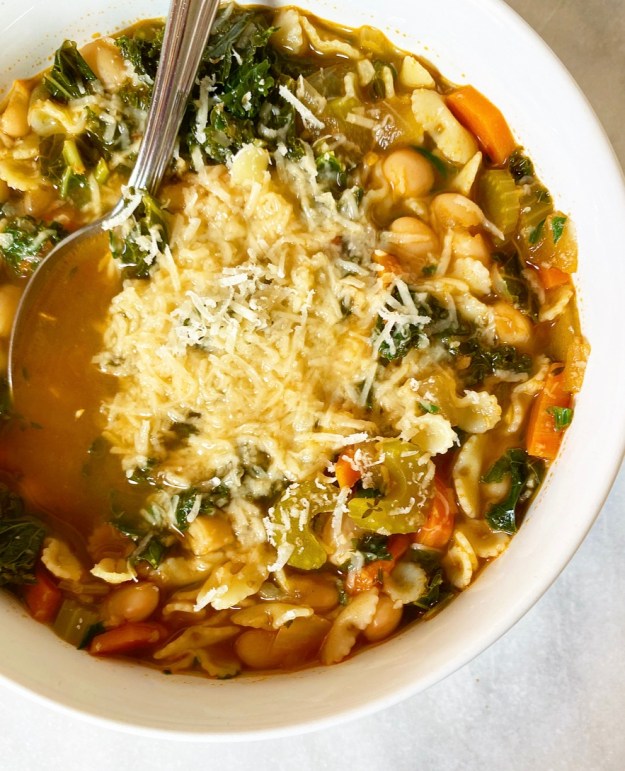 If you’re wondering why I cook the pasta separately from the rest of the soup, it’s because I’m a single lady who eats a lot of leftovers and hates mushy pasta. I do this with chicken noodle soup as well—by keeping the two components separate, the pasta doesn’t overcook or get waterlogged and sad. If you have a group to feed or will otherwise not have leftovers (or maybe like your pasta really soft?), feel free to toss it in the pot with the beans and kale.
Pasta e Fagioli takes less than an hour start-to-finish and keeps like a dream. I made a big pot on Sunday night and have been reheating it for quick dinners when I get home from work. Let me tell you, it’s taking the edge off the post-holiday blues.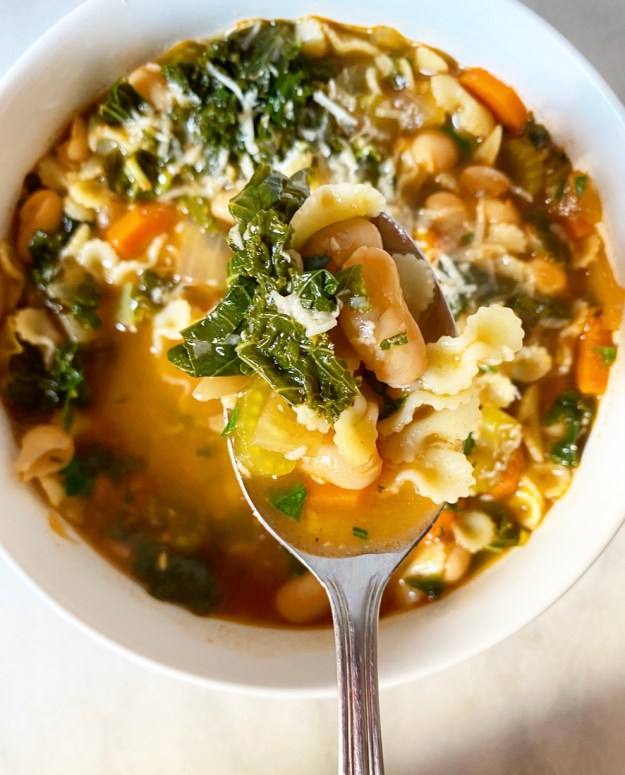
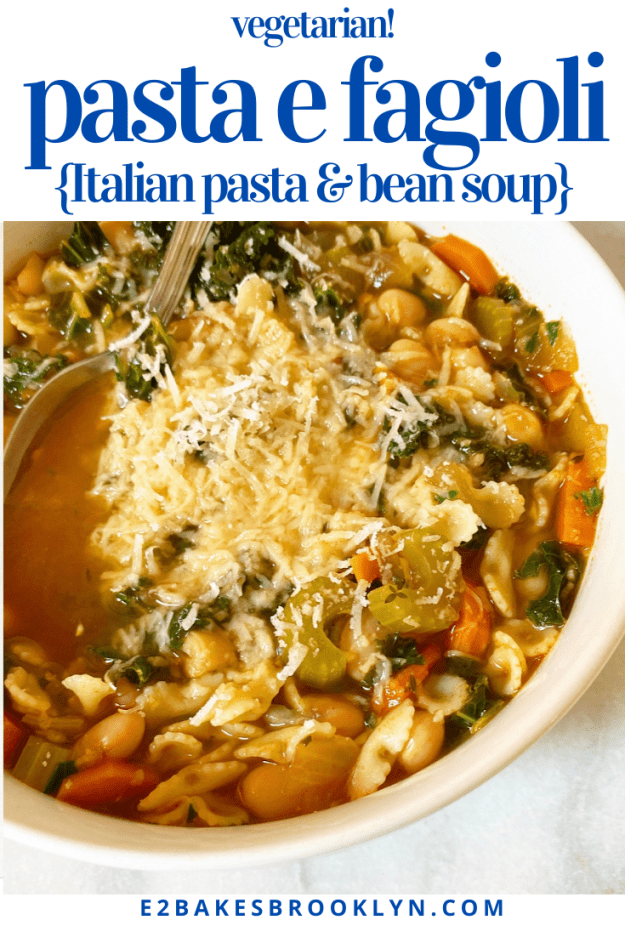
Pasta e Fagioli {Italian Pasta & Bean Soup}
makes 4-6 servings
For pasta:
water
Kosher or sea salt
splash of olive oil
1 1/2 cups small pasta (farfalline, ditalini, elbows)
Soup:
2 tablespoons olive oil
3 medium carrots, peeled, sliced into thin half-moons
3 ribs celery, trimmed, thinly sliced
1 medium-large yellow onion, diced small
1/2-1 teaspoon Kosher or sea salt, divided
6-8 cloves garlic, minced
1/4 cup tomato paste
1 tablespoon fresh thyme leaves (or 1/2 teaspoon dried)
1/4 teaspoon red pepper flakes (optional)
4 cups vegetable stock
4 cups water
2 bay leaves
1 bunch kale or chard, stemmed and chopped into bite-sized pieces
2 15-ounce cans cannelini or other white beans
1/4 cup chopped fresh parsley, plus more for topping
grated parmesan cheese, for topping (optional)
Fill a medium-sized heavy-bottomed pot 2/3 full with water. Bring to a boil. Salt well and add pasta, cooking according to the package directions. Drain pasta and return to the pot. Drizzle lightly with olive oil to keep it from sticking together whil you prepare the soup.
Heat olive oil in a stockpot over medium heat. Add carrots, celery, onion and a pinch of salt to the pot. Cook, stirring frequently, until starting to soften (about 10 minutes). Stir in garlic and cook until fragrant, about 1 minute. Add tomato paste and stir to coat. Let cook for 2-3 minutes, until tomato paste begins to darken. Add bay leaves, thyme, optional red pepper flakes, vegetable stock and water. Bring to a boil, reduce to a simmer, and let cook 20-25 minutes, or until vegetables are soft (but not mush).
Remove bay leaves. Add beans and kale and let cook 5-7 more minutes, until greens have wilted a bit. Stir in parsley. Taste for salt and adjust as needed.
For serving, place about 1/2 cup of cooked pasta in each bowl. Top with soup and stir together. Garnish with Parmesan, if desired.
Soup will keep in an airtight container in the refrigerator for several days.
 Christmas in a pandemic is so strange. I mean, I’ve spent Christmas away from my immediate family before, but it’s always been with (ex-)boyfriends or friends. But this year, traveling and gathering don’t seem like great plans and I am deeply single, so Christmas alone it is.
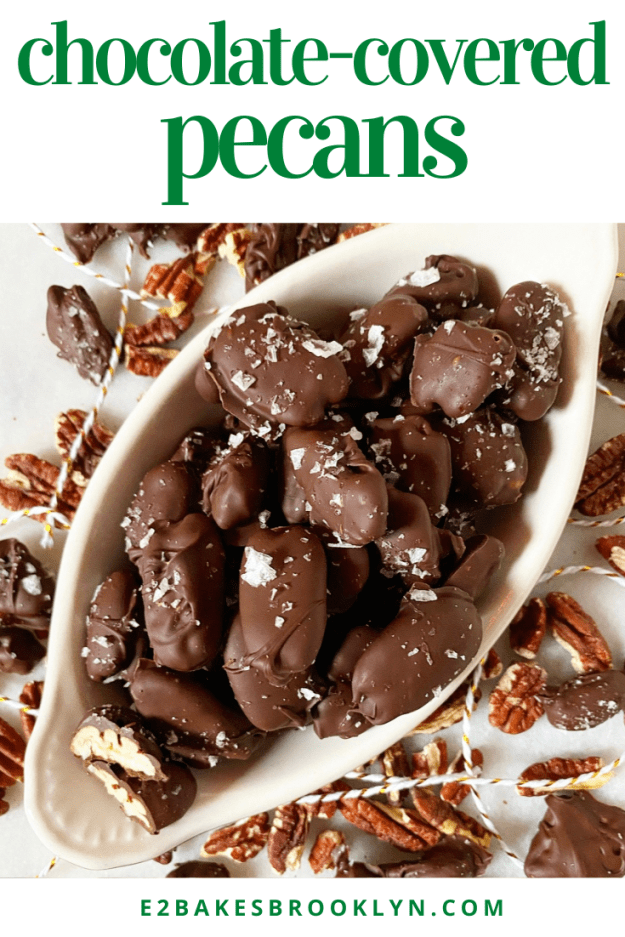
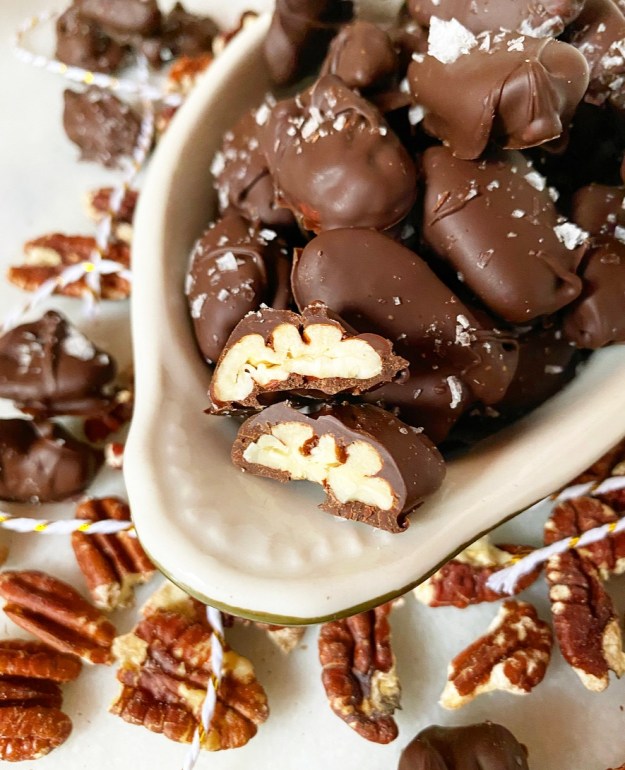 I’ve already had my pre-Christmas anticipatory-loneliness gloom and doom, and have now moved on to determining what will make this Christmas feel like…Christmas. Like, when I FaceTime my family, I’m going to wear my Christmas pajamas that match my sisters. And I’m going to take a walk. Maybe watch Love Actually for the 374th time. Perhaps make a pot roast. And I’m going to eat chocolate-covered pecans by the handful. It’s the Davenport way.
 Chocolate-Covered Pecans have a
  Since my sisters and I all moved away, we’ve each been added to my dad’s chocolate-covered pecan Christmas list. It’s something I look forward to every year—my tin showing up a week or two before I fly home for the holiday break. Except, of course, that I’m not flying home this year. And for a brief moment, thanks to the notorious difficulties with shipping right now, I thought that my dad might have decided not to send chocolate-covered pecans in 2020.
 Thankfully that is not the case and my tin arrived on December 16th, but in that moment where I thought this tradition might be another casualty of 2020, I took the time to create my own recipe for Chocolate-Covered Pecans. I certainly wasn’t going to go without them. No way.
 My Chocolate-Covered Pecans are the tiniest spin on my
 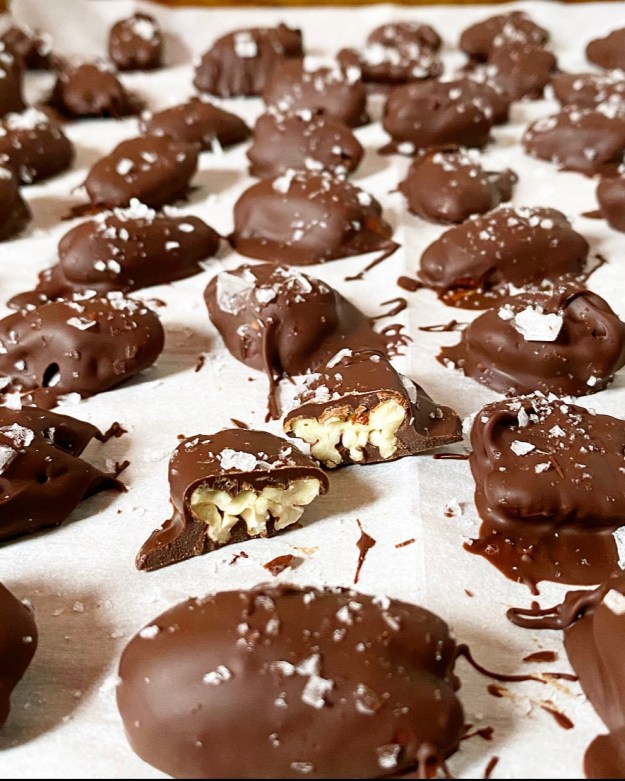 Merry Christmas! Happy Holidays! Whatever you do or don’t celebrate, I hope you find a way to enjoy the end of this challenging year. I’m taking Friday off for Christmas, but will be back next week with year-end round ups. Stay cozy, everyone.


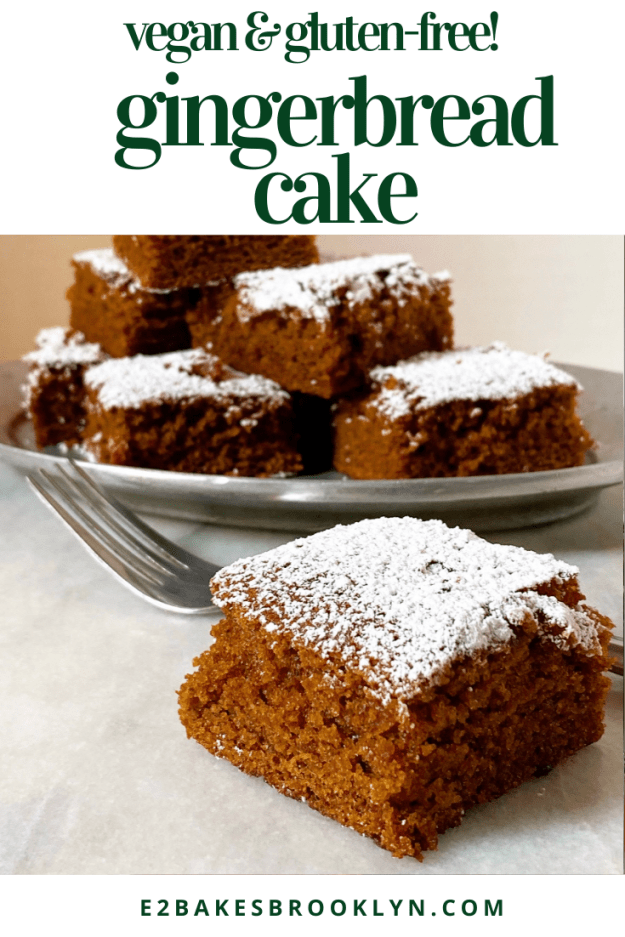
 My friend, VJ, loves gingerbread. Loves it. She speaks often about how before she had to stop eating gluten and went vegan, her grandma used to serve hers with canned peaches and whipped cream. While I am not much for canned peaches, the
  Over the years, VJ has asked me to make gingerbread cakes for various milestones and occasions, but I have mostly failed. I even failed this past Thanksgiving! Too greasy, too dry, vaguely tarry, completely flavorless—I’ve made all the gingerbread cake failures under the sun. Let’s not discuss the occasion on which she had to serve store-bought ice cream cakes (that she couldn’t even eat!) at her own party because my attempt at this cake was so vile.
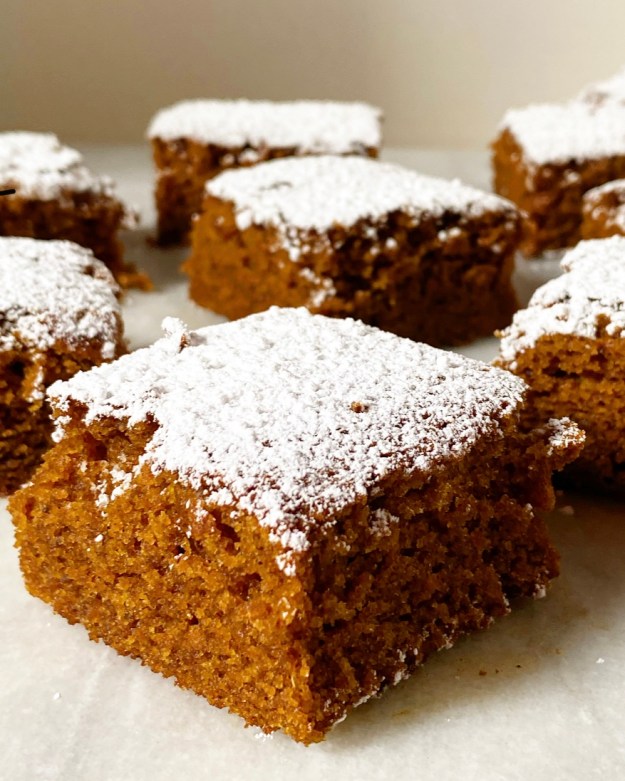 It’s not just because I like to have a gluten-free vegan item on my holiday line-up every year (which I do). It’s that VJ’s 40th birthday is next week—you know I can’t let my favorite gluten-free vegan’s milestone birthday pass without cake. No way. Not rain, nor sleet, nor masked and distanced delivery will stop me from getting this cake to her on December 23rd.
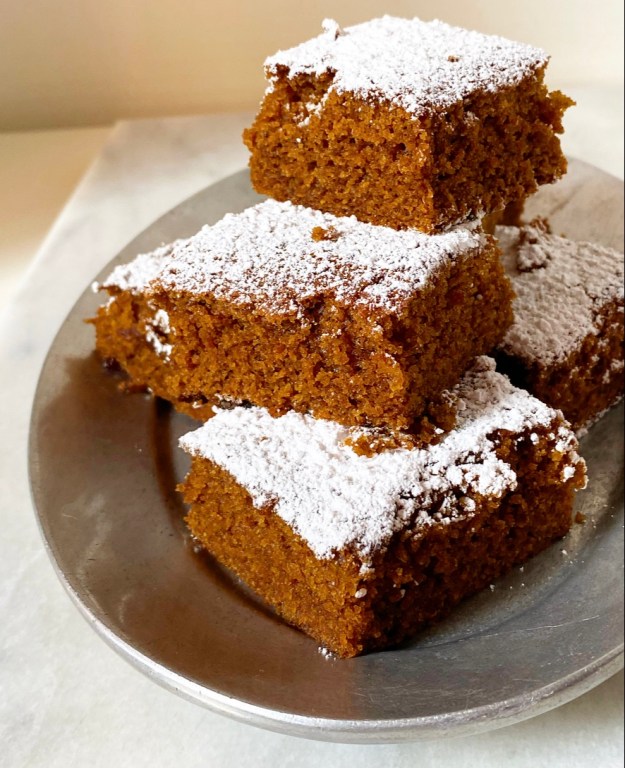 Holy crap, y’all, this is good. Super moist with nothing to distract from its deep dark flavor, it’s better than most traditional flour, egg and dairy-based gingerbreads I’ve had. It’s definitely not better than VJ’s grandma’s though, because nothing is ever better than grandma’s. Believe me, I’ve tried to out-do grandmas and it never goes well. But anyway…
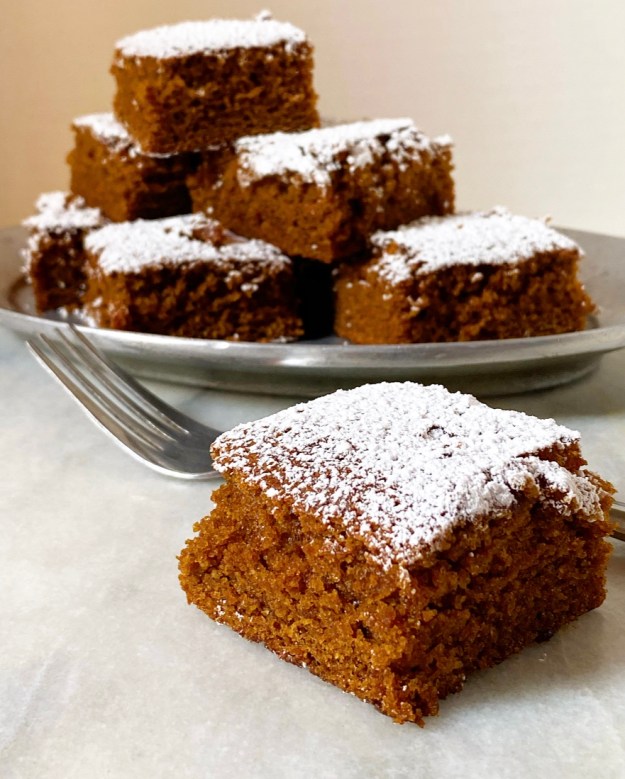
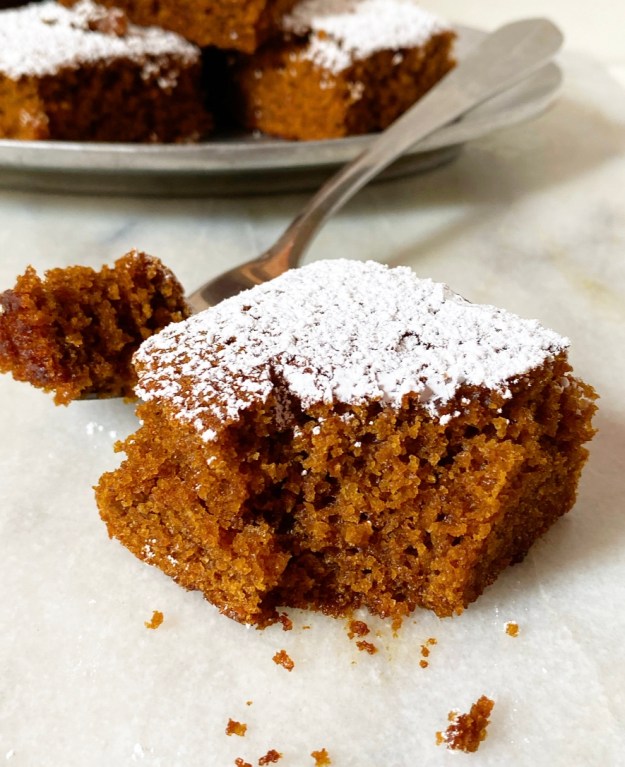 This Gingerbread Cake tows the line somewhere between holiday dessert and wintry everyday cake. It doesn’t need a blanket of frosting (although I think a little vegan
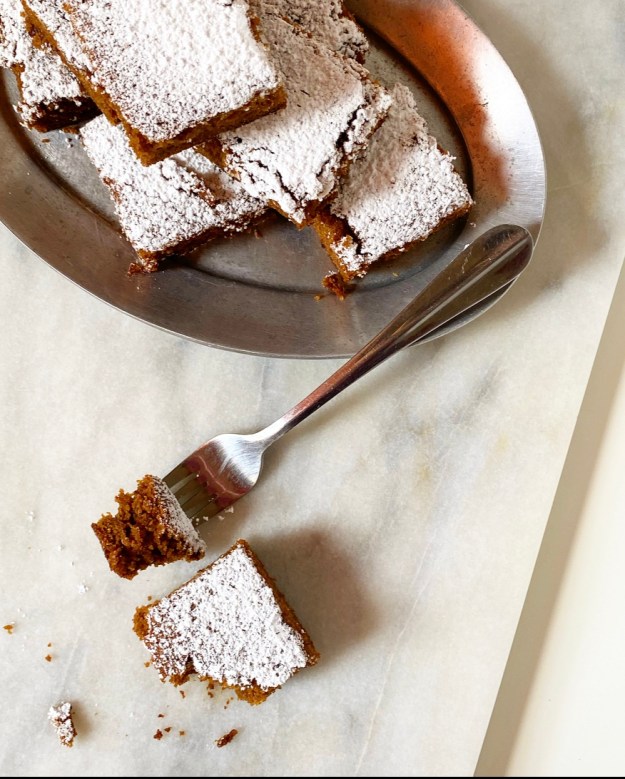
 This is just to let you know that if, on the second night of
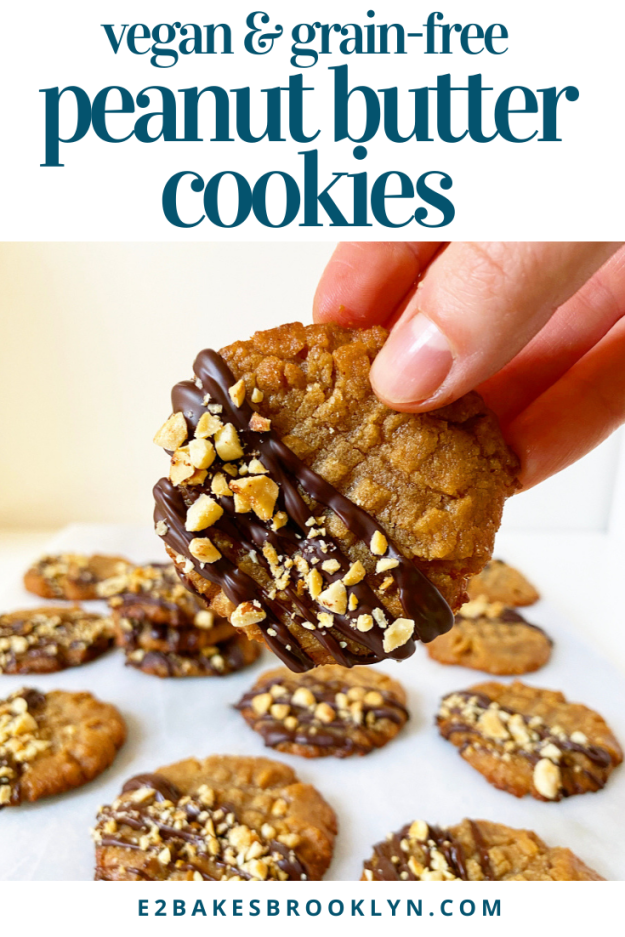
 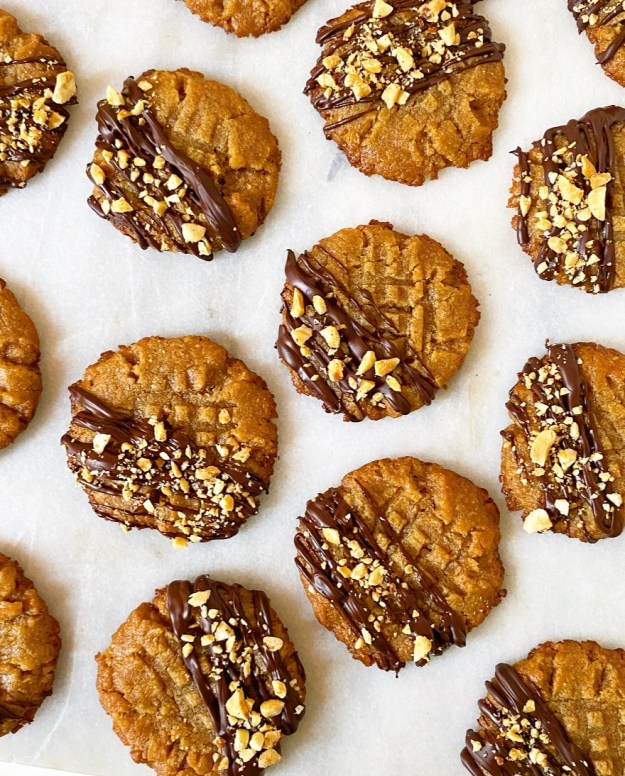 Did I mention that they’re vegan and grain-free? Because they are. This recipe is the lightest twist on the classic
 Here, I’ve kept it pretty traditional. I added a few extra ingredients like brown sugar, a dash of cinnamon, some salt and vanilla, but the dough still comes together in moments. In order to keep the cookies vegan, I swapped the egg for an equal volume of
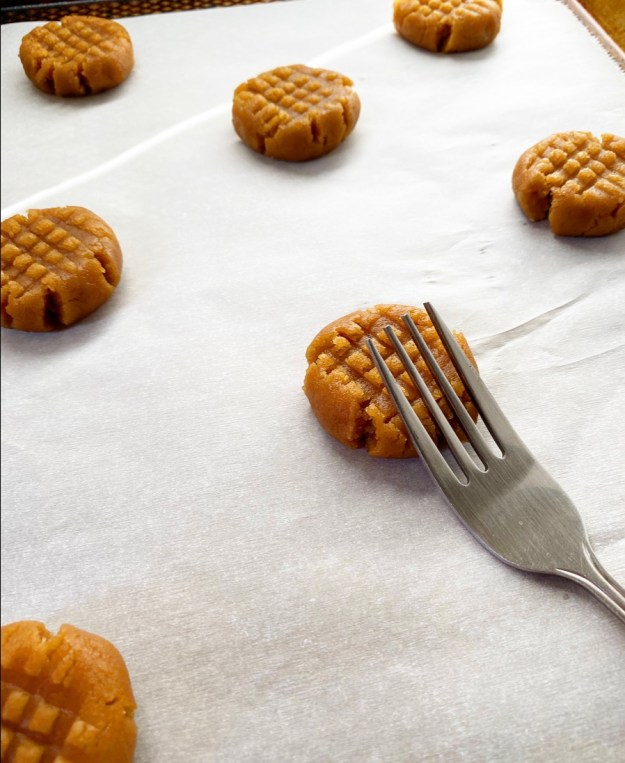
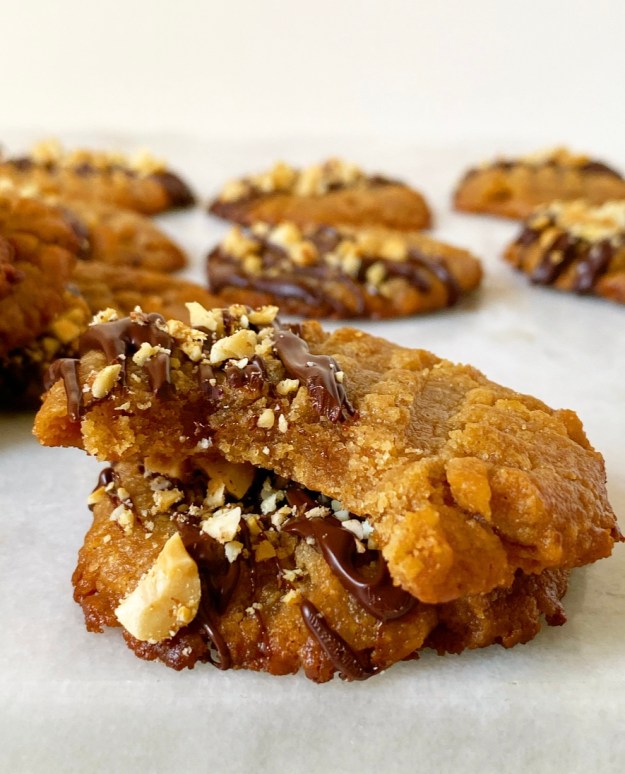
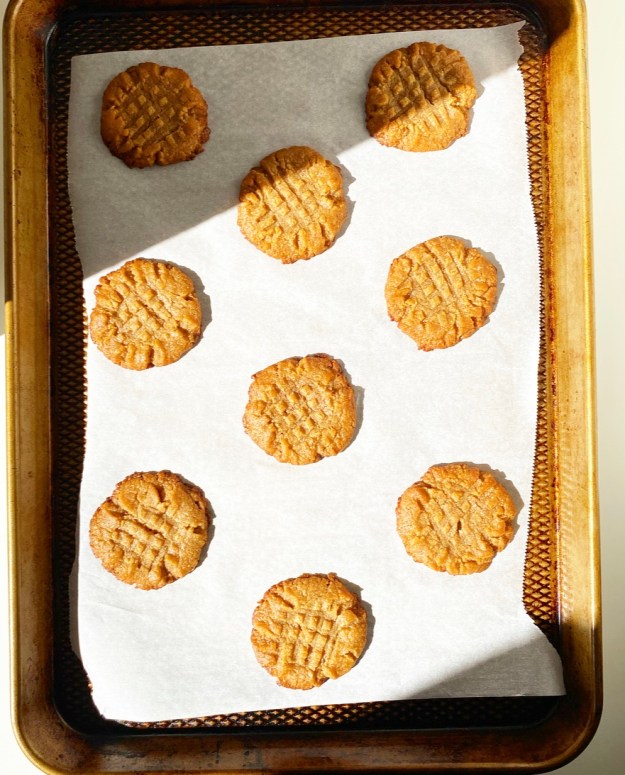 I’ve also added a short twenty-minute chill to this recipe, but it’s not strictly necessary and your cookies will work without it. They’ll just be a little thinner than mine. Whatever you do, don’t skip crosshatching the tops of your cookies with a fork. I don’t know where this started or why we do this to peanut butter cookies, but I’m pretty sure it’s the law.
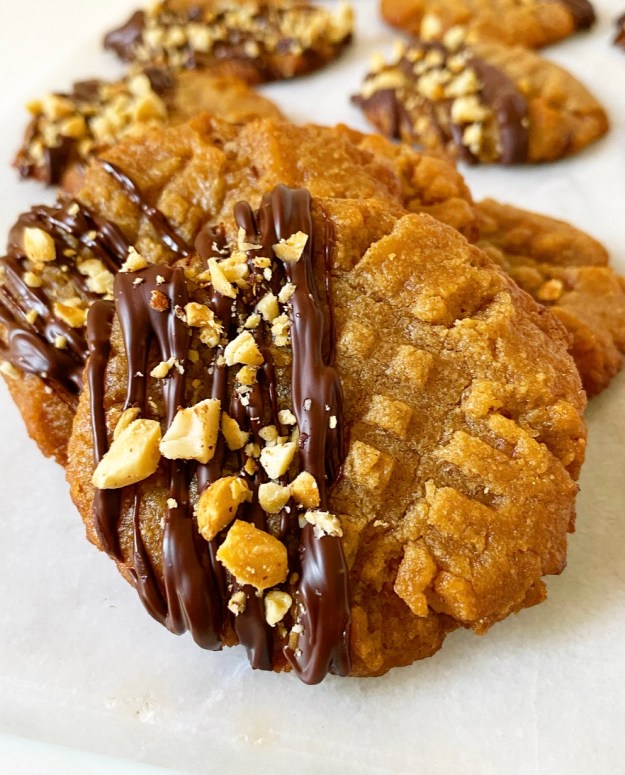 What? I don’t make the rules. I just break ‘em. Like finishing these Peanut Butter Cookies off with the easiest chocolate-peanut butter drizzle and some chopped peanuts. Is this necessary? No. But it’s pretty and freaking delicious. And really, when it comes to
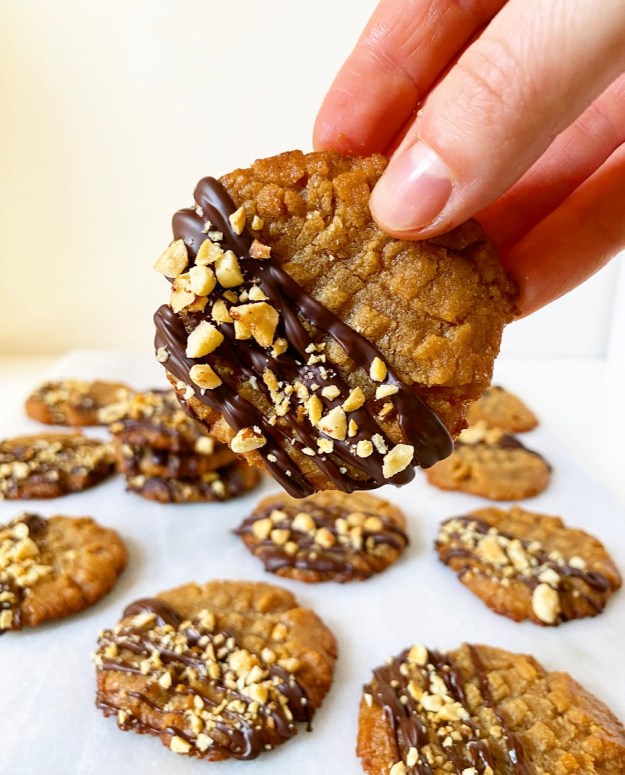


 A week on
  We keep saying “two weeks next year” but only getting half of that. I’m putting it out to the universe now: one month next year. That way, when we only get half, it’ll be two weeks. Am I trying to con the universe in to more vacation? Sure, why not. You can’t blame me for wanting to spend time with the friends we’ve made up there (even socially distanced) instead of carrying on entire relationships via Facebook.
 I mean, would you believe that I’ve pretty much never baked for anyone on Swan’s Island? It’s true. I’ve been going there regularly for the last six years, made some friends, and know the people who own the general store well enough that they recognized me immediately with my mask on, but I’ve never really baked for any of them. They know, of course, that I bake and blog, and I always say I’m going to make something for them, but then time gets away and suddenly I’m on the ferry back to the mainland.
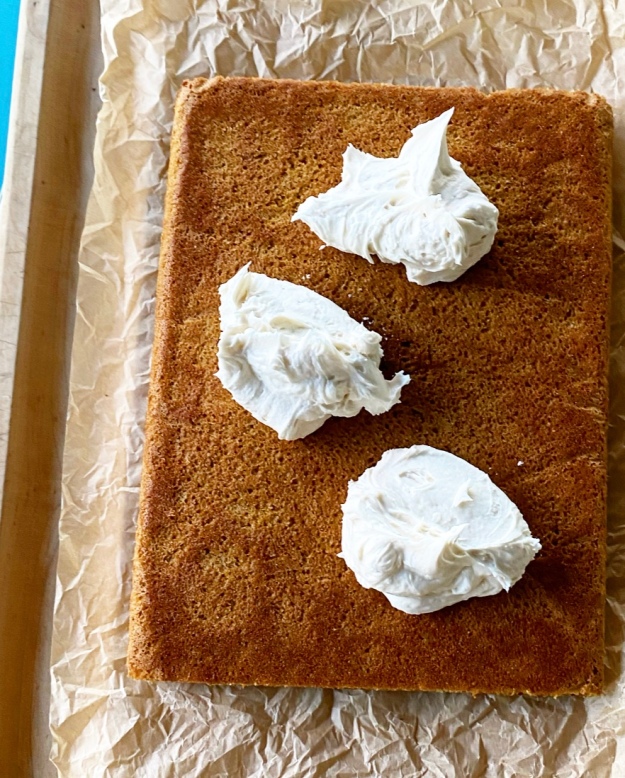
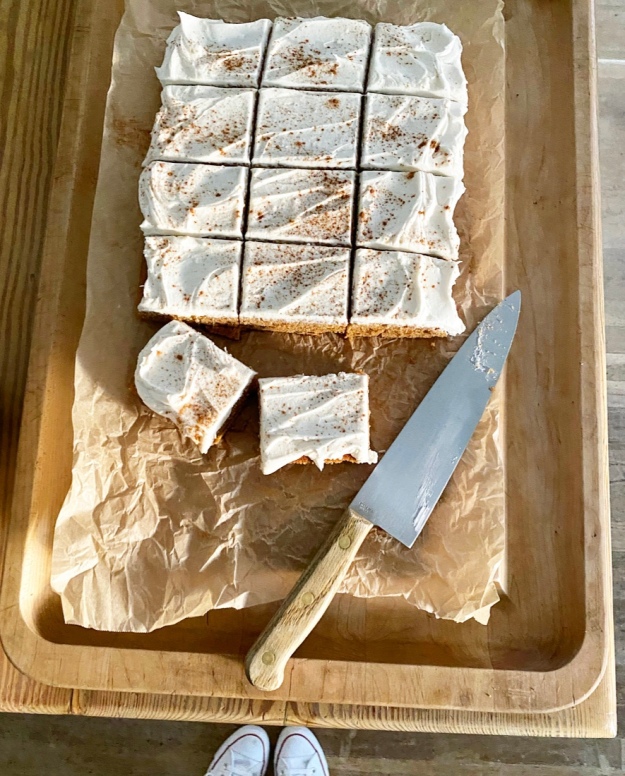
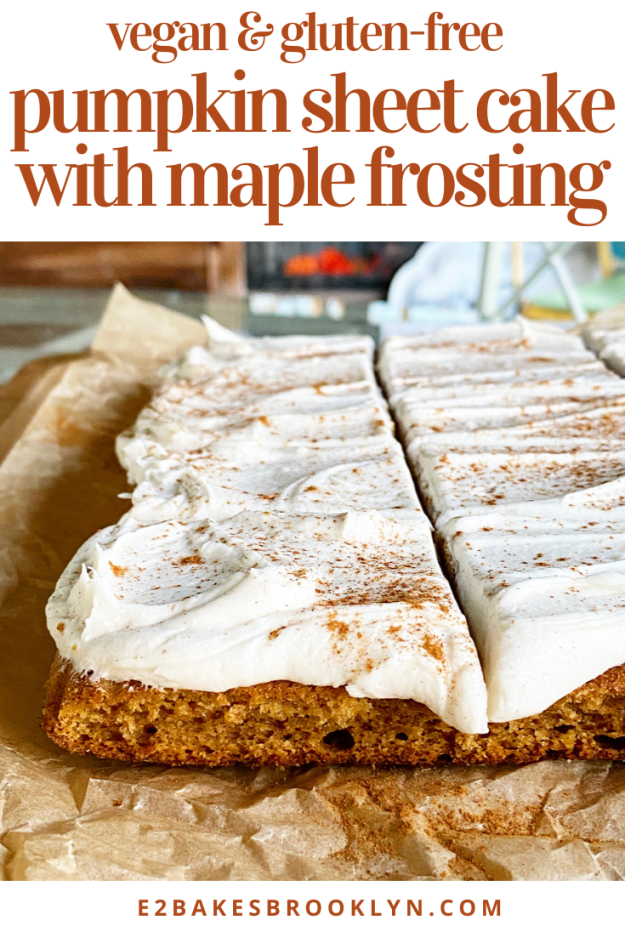
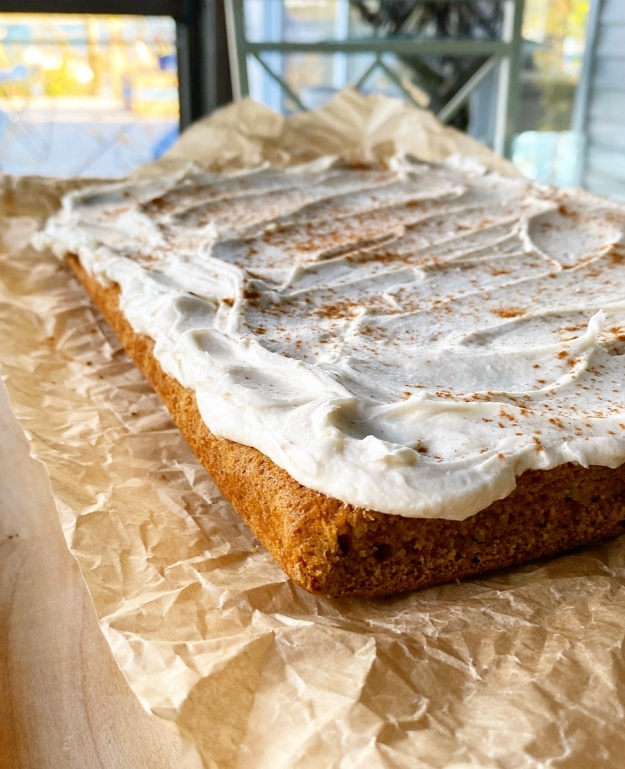
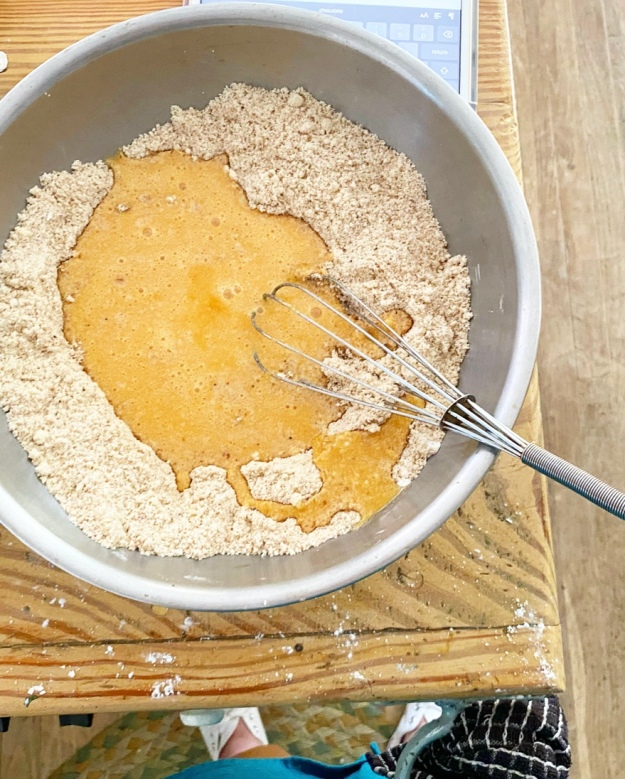
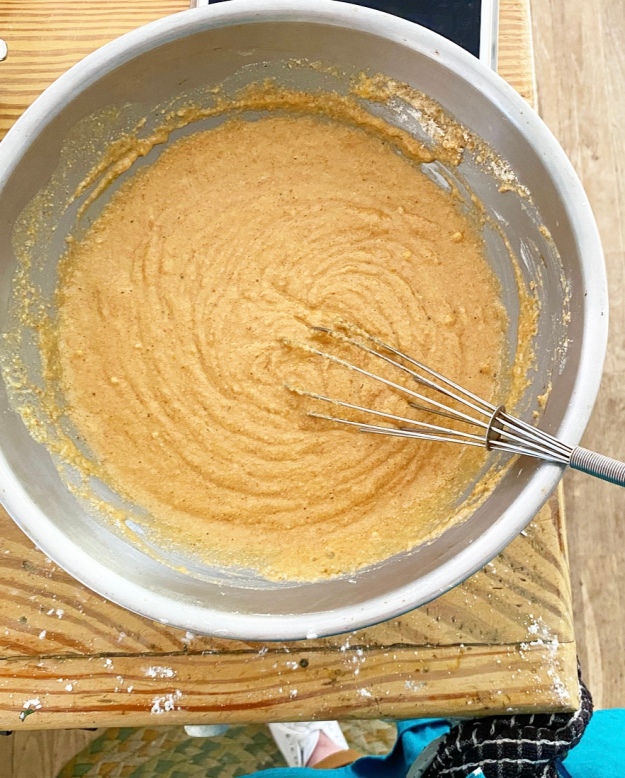
 All that said, when we booked our trip in July, I decided this year was *the* year. I tested a recipe before I left Brooklyn, brought a box of potato starch and the vegan butter I like, and it took until the second-to-last day, but I baked this Pumpkin Sheet Cake with Maple Frosting for my Maine people. Finally.
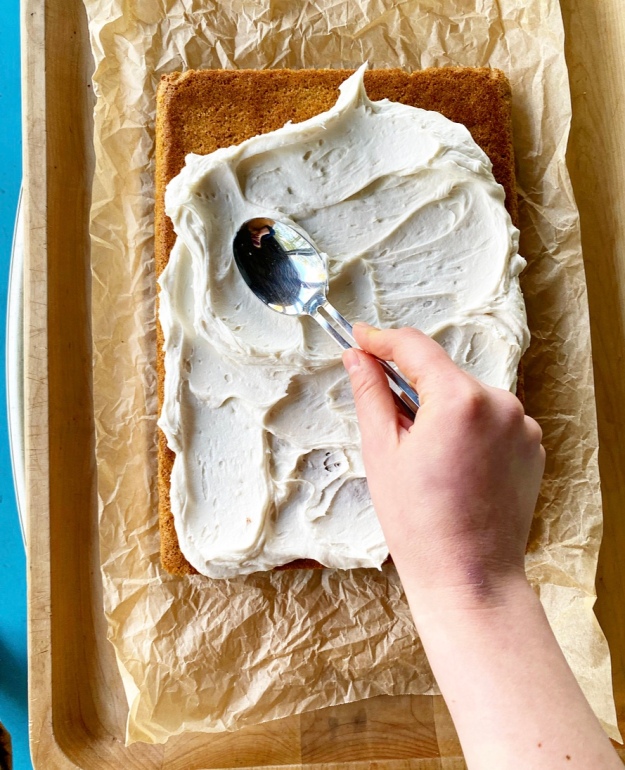
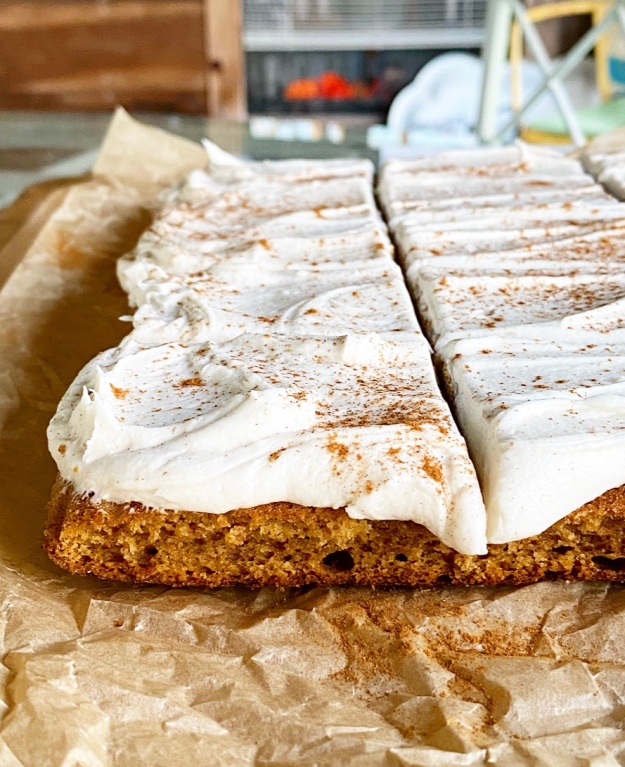 I’ve never put a sheet cake on here. It’s not because I think they’re “less than” or something—I just have occasions for other configurations of cake and frosting far more frequently than I do for this super simple slice-and-share situation. But our annual Swan’s Island trip? That’s a slice-and-share situation if I’ve ever seen one. Especially in COVID, when get-togethers with people outside my immediate germ pod aren’t a thing, it was so nice to be able to wrap up and dole out slices of this Pumpkin Sheet Cake with Maple Frosting without having to worry about keeping layers intact.
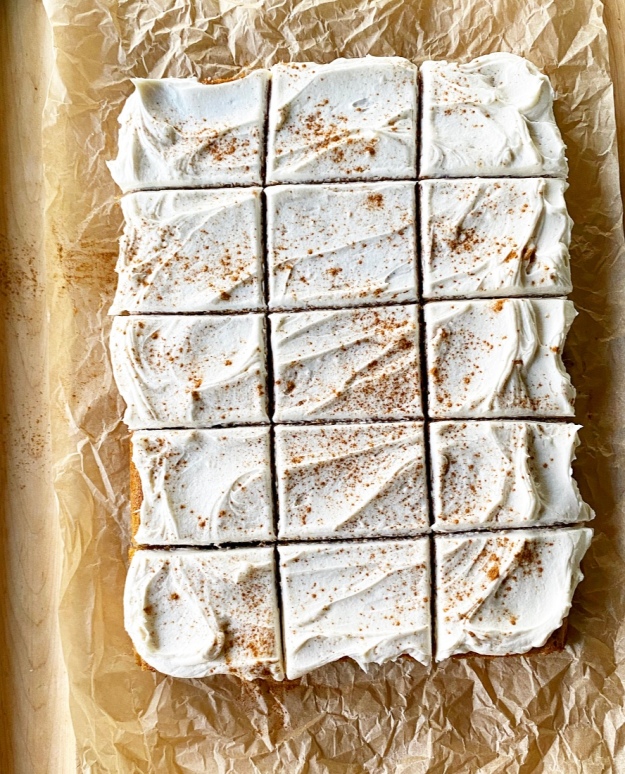 As with most of what we eat on Swan’s Island, this cake was made with my trusty co-traveler/fellow Maine enthusiast, VJ, in mind. I’ve mentioned many times that she is a
 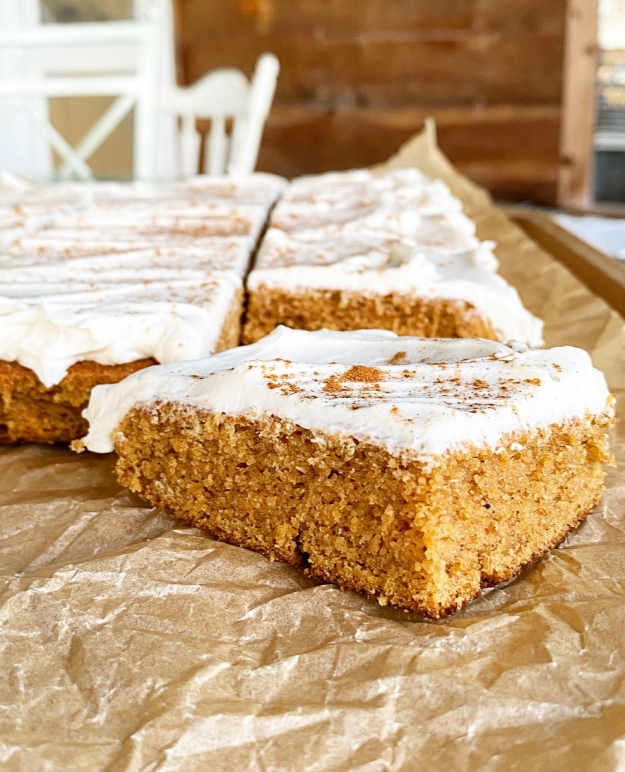 The pumpkin cake is a variation on the
 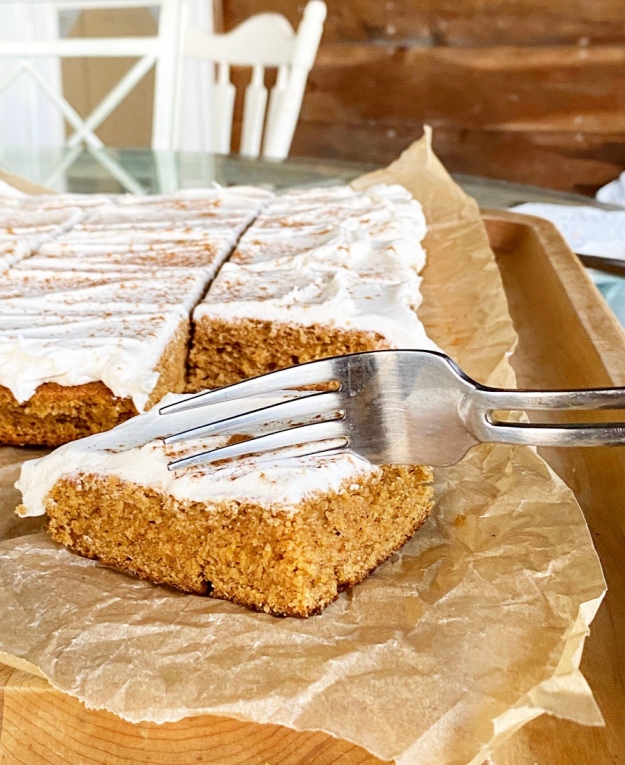 Believe me when I tell you that I understand wanting to eat this cake by its lonesome straight out of the oven, or with a simple dusting of confectioner’s sugar…but also? Believe me when I tell you that a swoopy layer of Maple Frosting takes this seasonal dessert from very good to fabulous. For real.
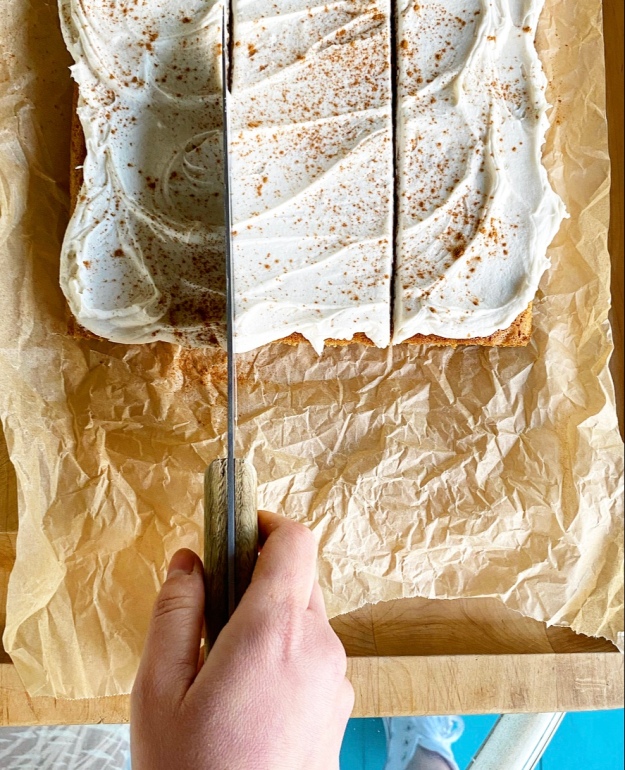
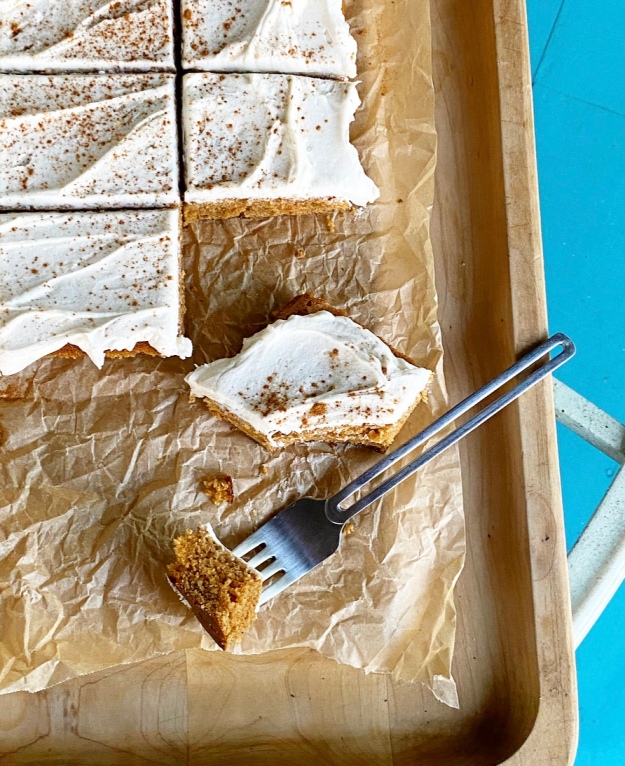 Pumpkin Sheet Cake with Maple Frosting is very good the day it’s made, but as with many pumpkin spice things, it’s actually more delicious the next day, after the flavors have melded. But with a cake this good around, I can’t blame anyone for not waiting to dig in. I mean, I certainly didn’t.