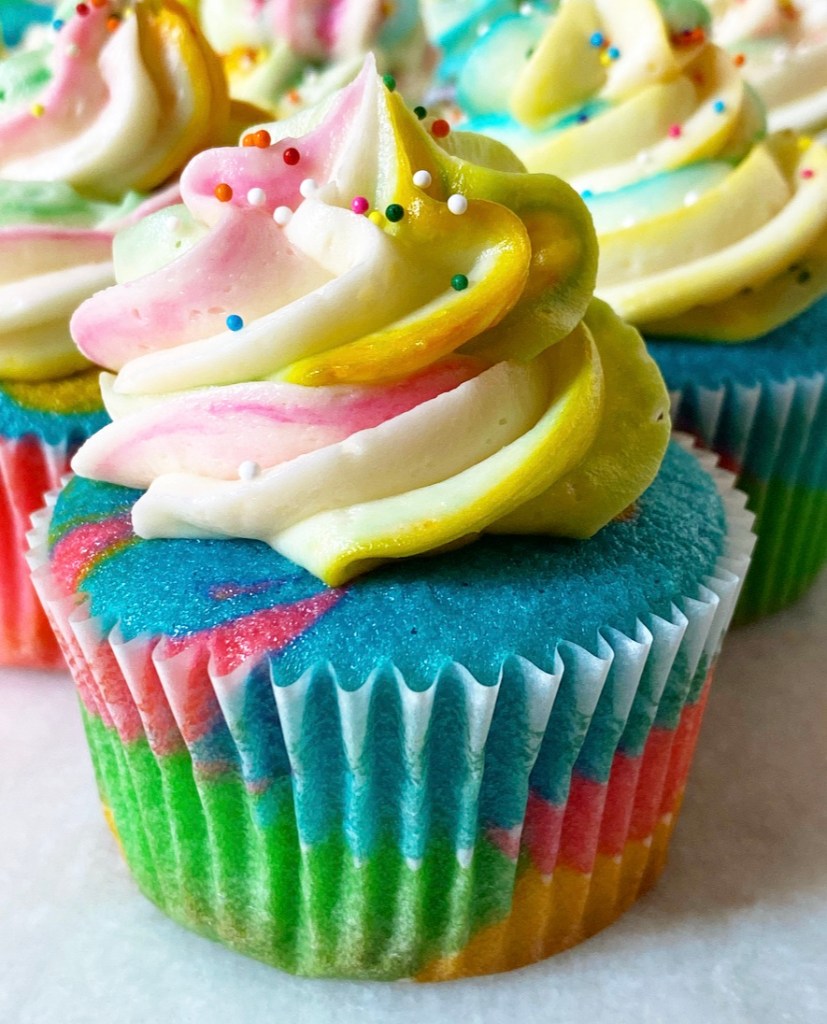
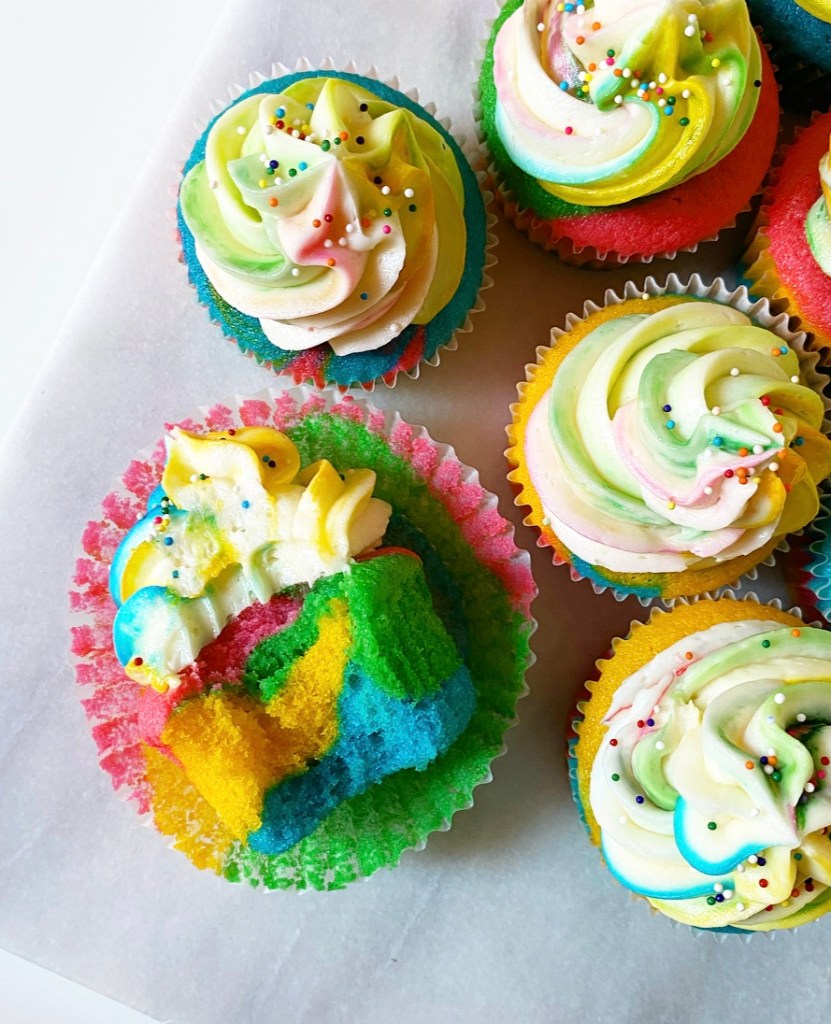
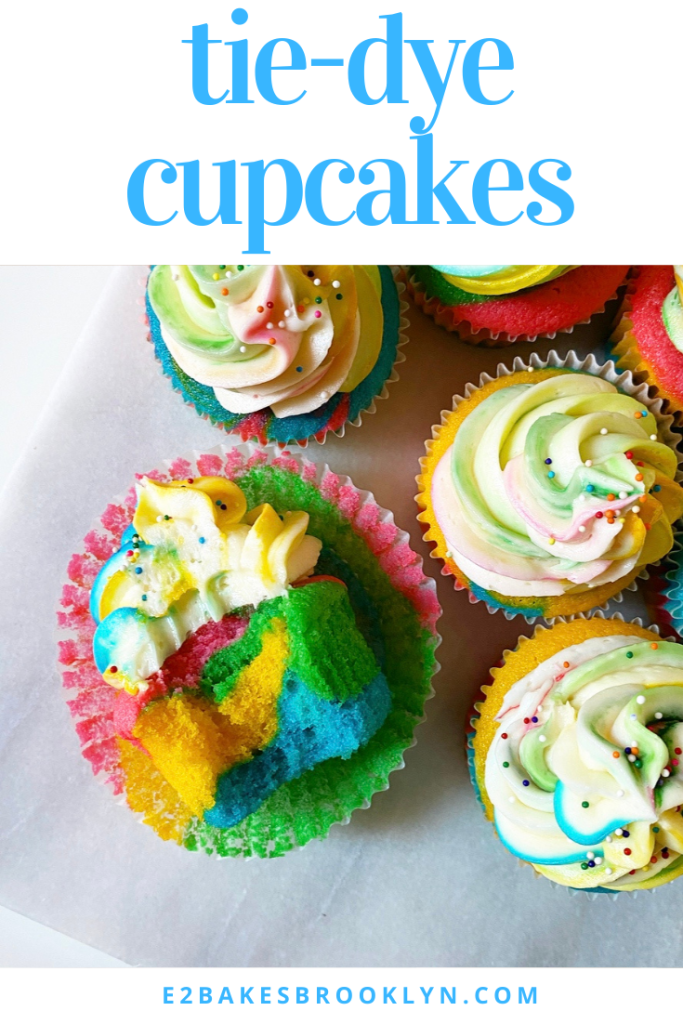
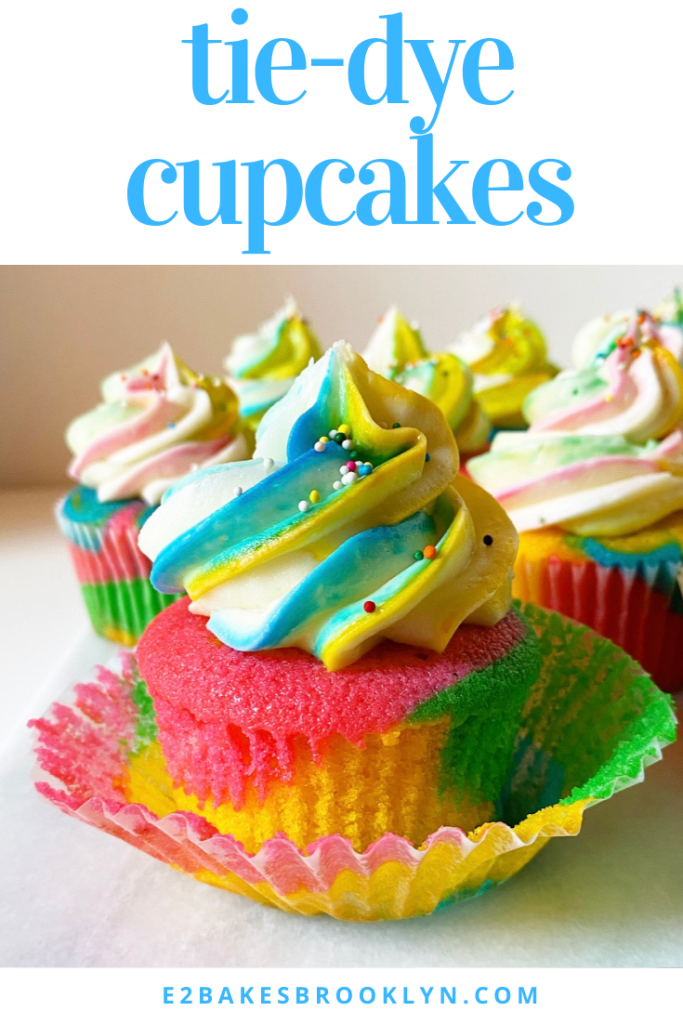
While all of us were inside last year, tie-dye made a huge comeback. It’s a fun and easy way to augment clothes, towels, bedsheets or anything else that will absorb color. Why not take that same bright & twisty aesthetic and apply it to dessert?! We’re talking colorful little cups of cake and clouds of vanilla buttercream with technicolor details. They’re fun and funky, and summery as all get-out!
You’ve seen these cupcakes on here before, but never like this. The base is my favorite vanilla sour cream cupcake batter which has been everything from yellow with Nutella Buttercream to spiked with honey and finished with candy corn to marbled with a streak of red velvet to dolled up for the Easter bunny. Today’s version might be my favorite variation of all. Tie-Dye Cupcakes are beautiful to look at and incredibly fun to make.


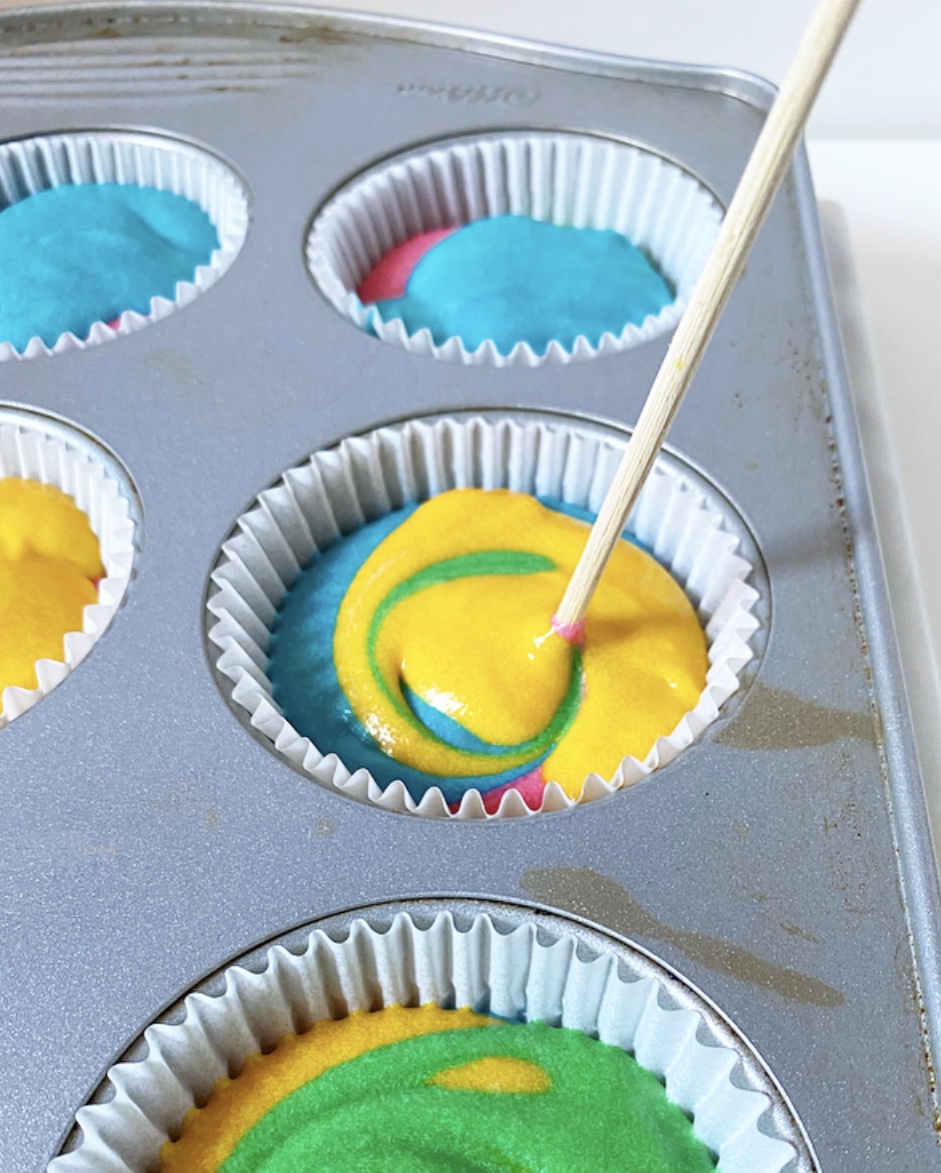

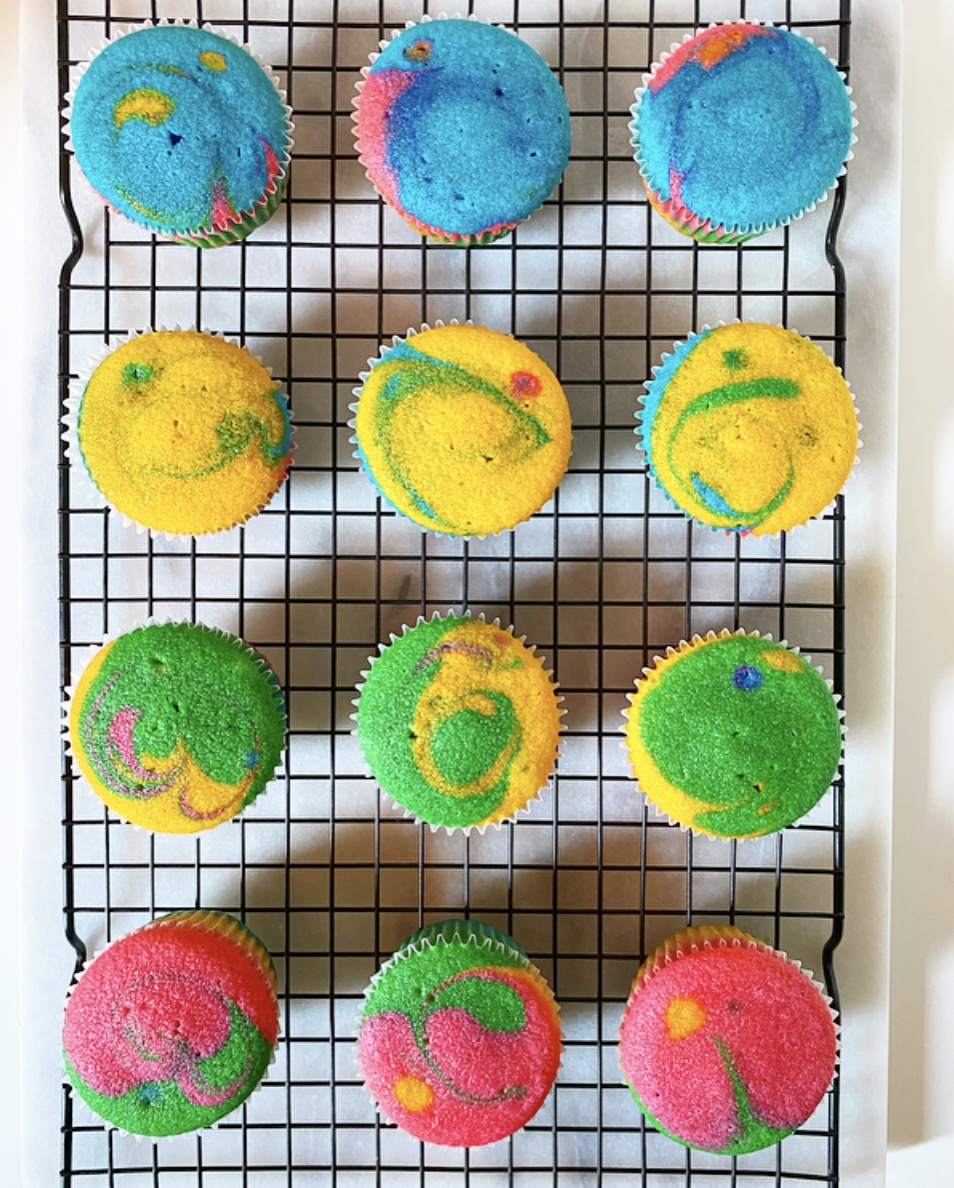
Start by mixing together the batter and dividing it into four bowls. Grab a few of your favorite shades of food coloring and dye each bowl of batter a different color. A word to the wise that gel food coloring makes for richer colors and doesn’t threaten to add too much liquid to your batter. That said, if liquid is what you have on hand, use it!
Once your batter is dyed, spoon the colors into your cupcake pans. There are no hard and fast rules on how to do this, except to get all the colors in each cup and only up to 2/3-3/4 full. I like to give mine a little swirl with a skewer before baking, but this is strictly optional. After you’ve got all your batters in your pans, bake your cupcakes and let them cool.
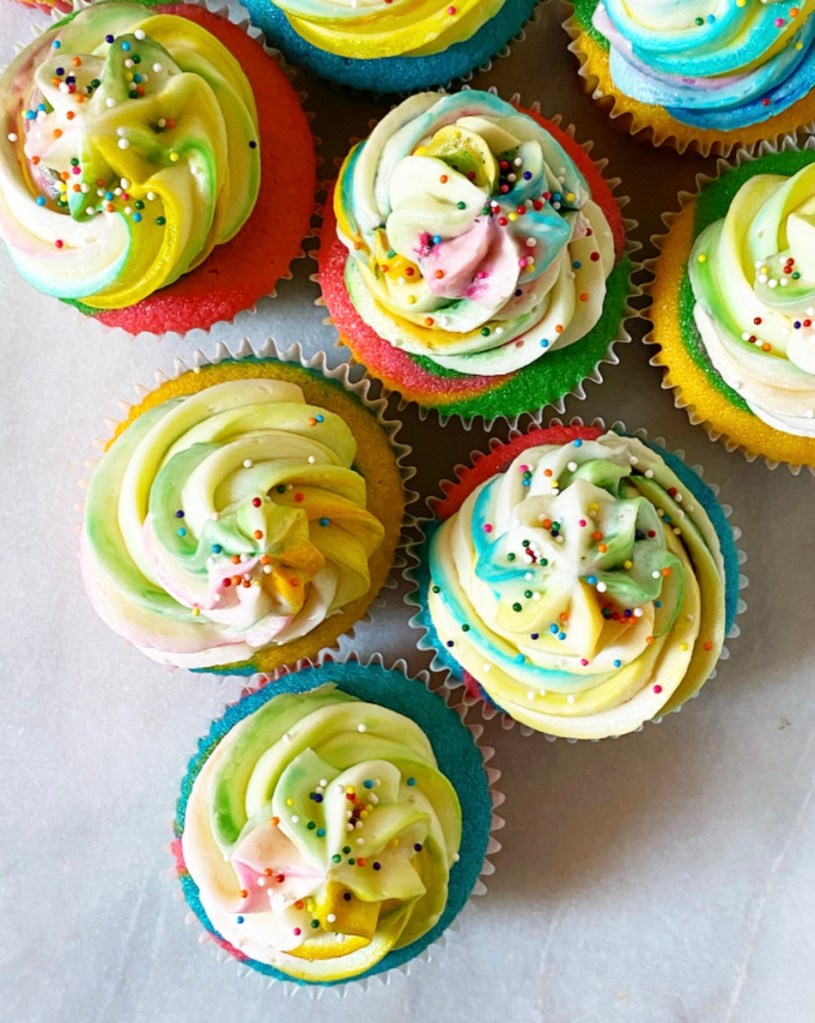
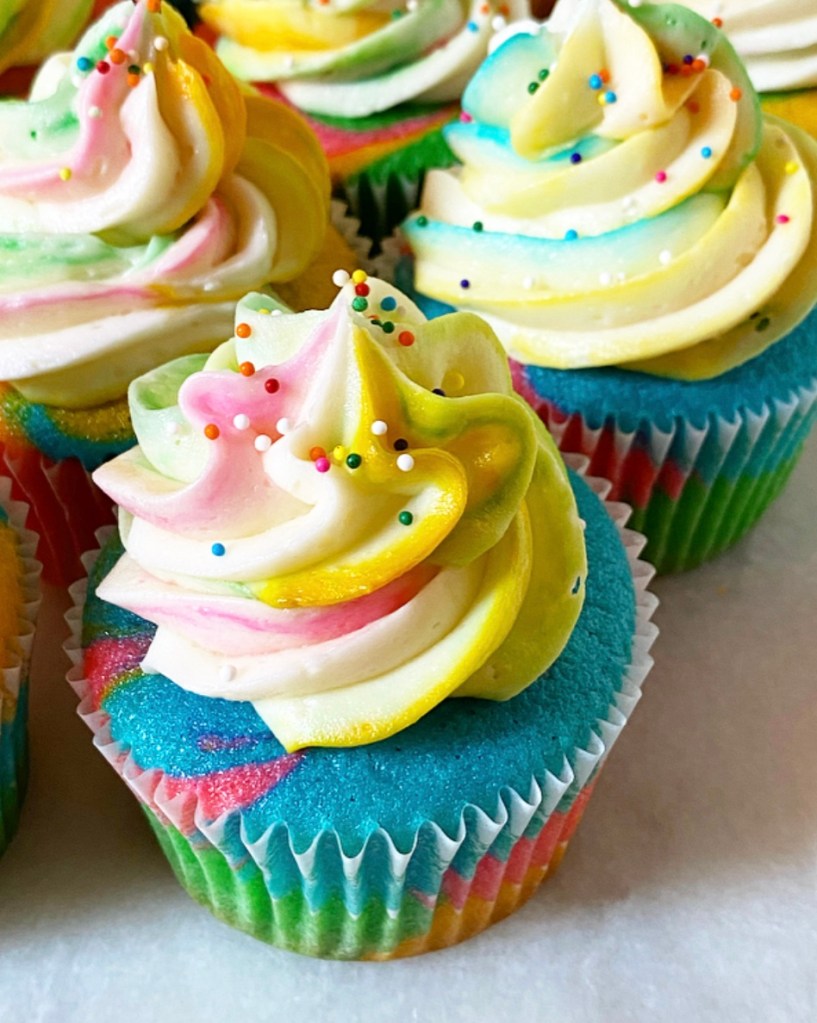
Next up: frosting! These swirly-twirly colorful plumes of buttercream may look intimidating, but they are just regular old vanilla buttercream with a little food coloring. Where most colorful frosting recipes ask you to whip the dye directly into the mix, I take a different approach here.
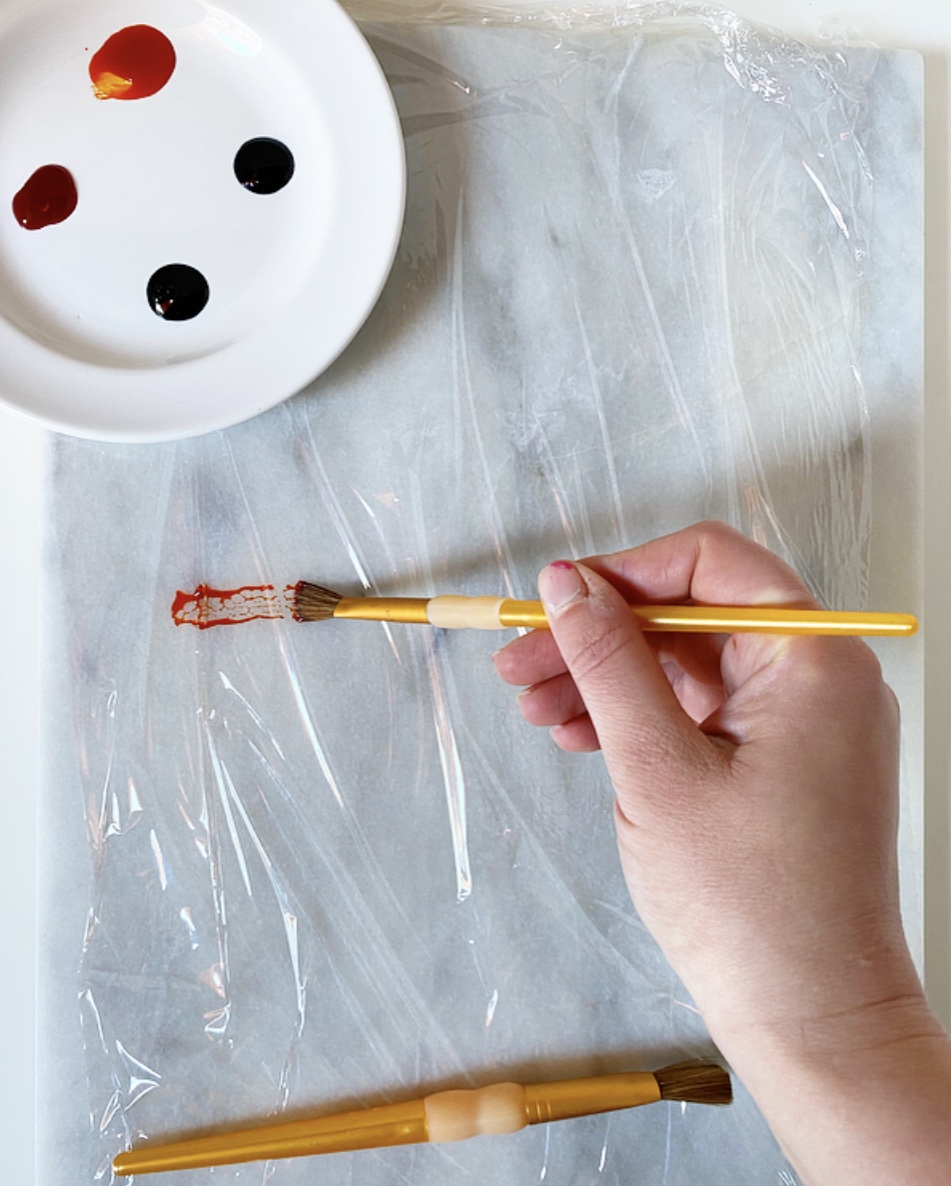
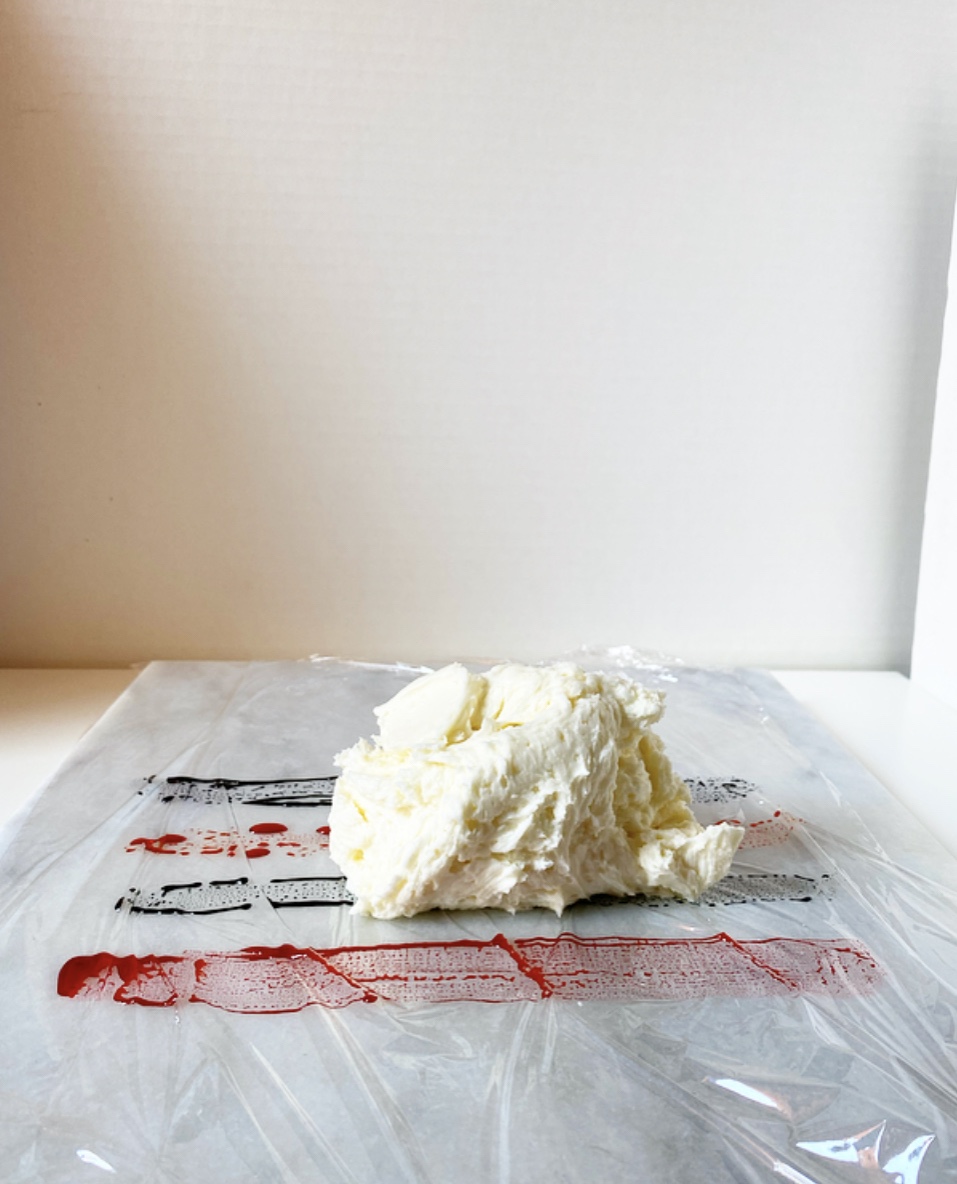
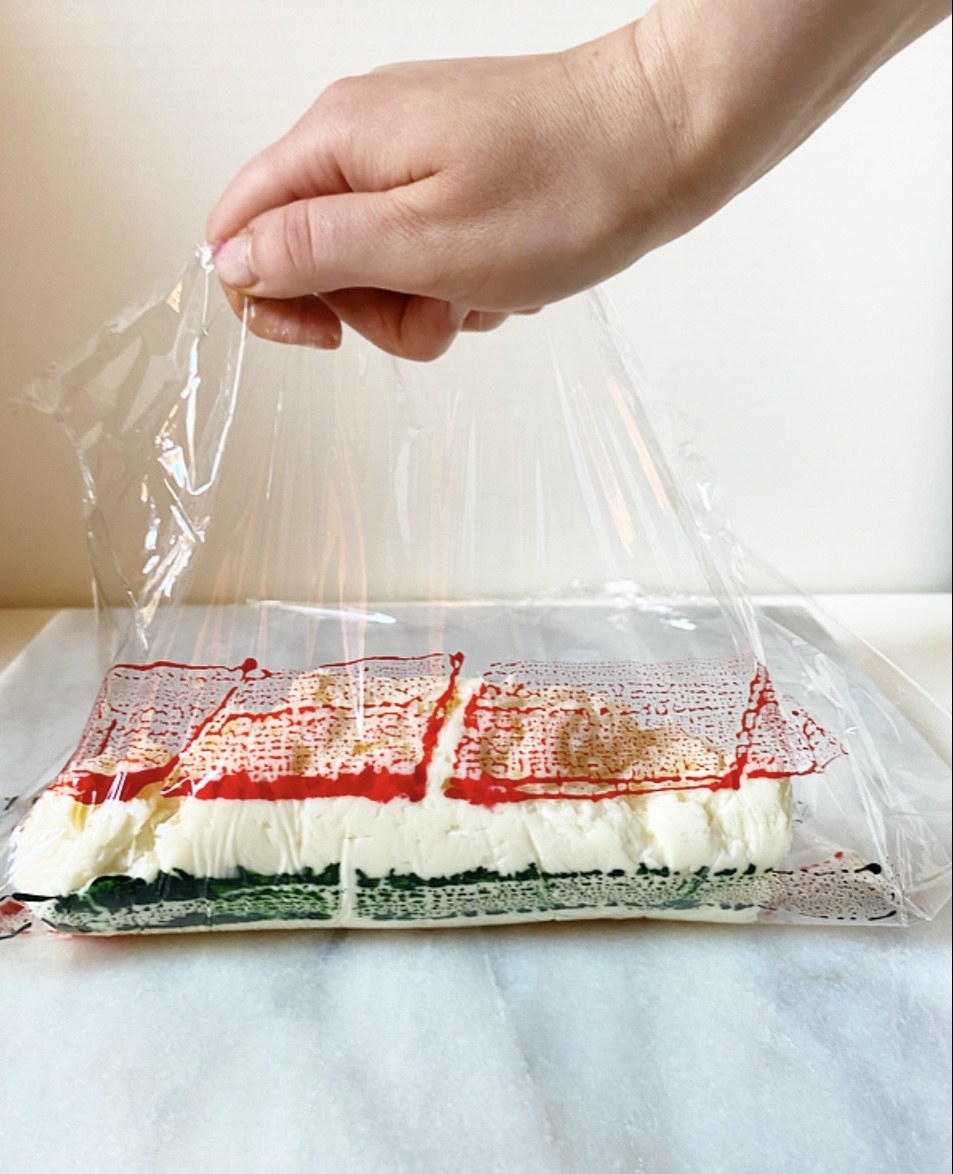

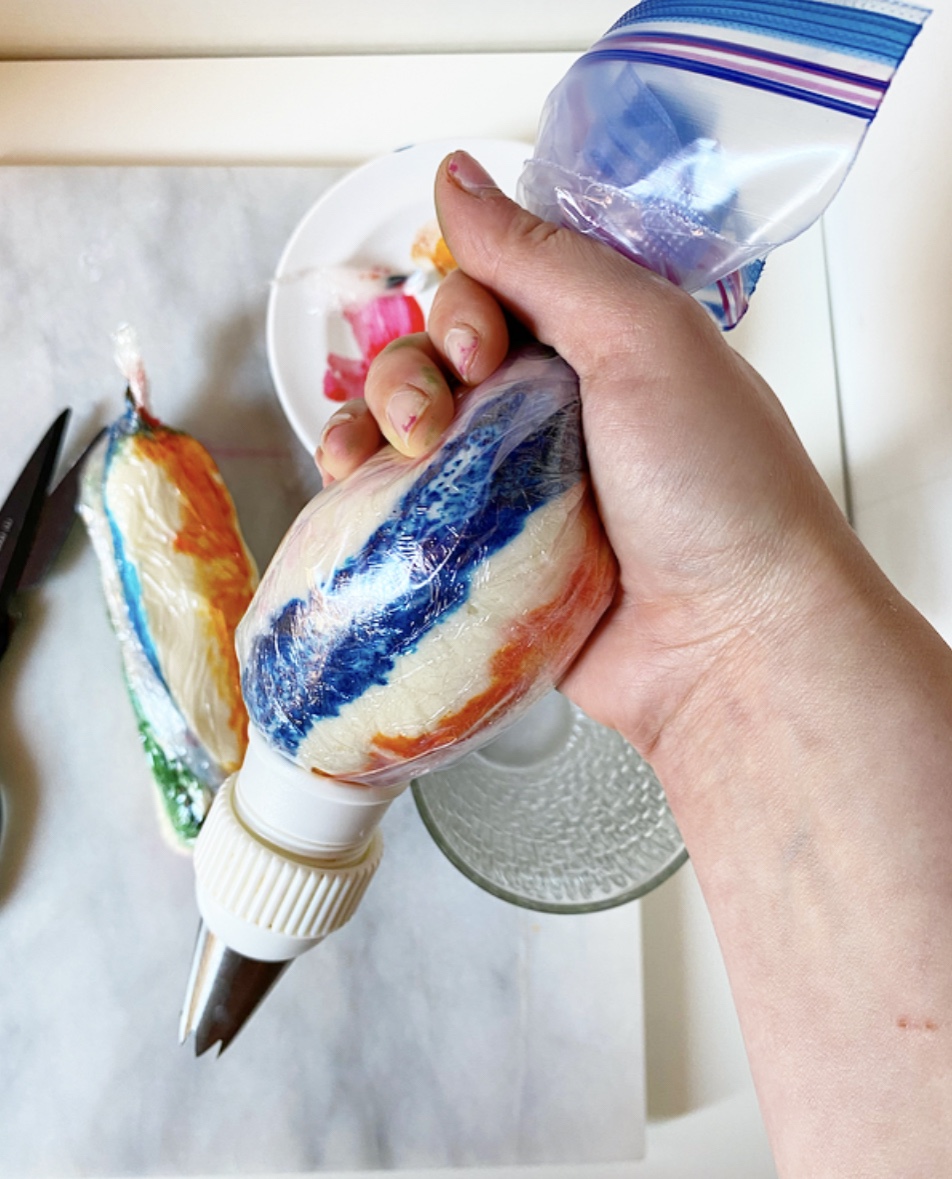
Before the buttercream is loaded into the piping bag, it’s rolled up in a piece of plastic wrap that has been painted with lines of gel food coloring, then formed into a log. I found it easiest to divide the frosting in half for this step. Once rolled, one end of the log is trimmed off before the whole kit and caboodle is placed in the piping bag and then…well, it’s piping business as usual. You know, except for the part where each cupcake looks different and the edges of the frosting are bright and beautiful!

It goes without saying that Tie-Dye Cupcakes are delicious, but let’s be real: these are all about aesthetics. They’re so fun—perfect for summer get-togethers, birthdays, or any occasion that could use a pop (or four) of color and a really spectacular bit of vanilla cake.
Tie-Dye Cupcakes
makes 12-14 cupcakes
Cupcakes:
1/2 cup milk, room temperature
1/2 cup sour cream, room temperature
1 1/2 cups all-purpose flour
2 tablespoons cornstarch
1/2 teaspoon baking powder
1/4 teaspoon baking soda
1/2 teaspoon Kosher or sea salt
1/2 cup (1 stick) unsalted butter, softened to room temperature
1 cup granulated sugar
2 large eggs, room temperature
2 teaspoons pure vanilla extract
4 food colorings of choice (I used gel)
Frosting:
3/4 cup (1 1/2 sticks) unsalted butter, softened to room temperature
2 1/2 cups confectioner’s sugar
pinch of Kosher or sea salt
1 1/2 teaspoons pure vanilla extract
3 tablespoons heavy cream
4 food colorings of choice (I used the same gels from the cake)
Special Equipment:
plastic wrap
food-safe paintbrushes
piping bag with a tip and coupler
Make the cupcakes. Preheat oven to 350F. Line a 12-cup standard muffin tin with cupcake liners. Set aside.
Combine milk and sour cream a liquid measuring cup, then use a fork to whisk them together. Set aside.
In a small-medium mixing bowl, whisk together flour, cornstarch, baking powder, baking soda, and salt. Set aside.
In a large mixing bowl, use an electric mixer to beat butter until light and fluffy. Beat in sugar. Add eggs one at a time, combining completely after each addition. Beat in vanilla. Mix in half the dry ingredients, followed by half the milk/sour cream. Add the remaining dry ingredients followed by the remaining milk/sour cream.
Divide batter into four small bowls (about 2/3-3/4 cup batter in each). Add a different food coloring to each one and stir with forks to distribute the color (I used 5 drops each pink, blue, green and yellow gel).
To achieve the tie-dye effect, spoon a heaping 1/2 tablespoon of each color into each liner, adjusting as needed, until each one is 2/3-3/4 full. Tap full pan on the counter five times before baking cupcakes for 18-19 minutes, until a toothpick inserted in the centers comes out clean. Let cupcakes cool in the pan for 10 minutes before removing to a rack to cool completely.
Make the frosting. In a large mixing bowl, use an electric mixer to beat butter until light and fluffy. Add confectioner’s sugar and salt in two installments, combining completely after each addition. Beat in vanilla & heavy cream until combined. Set aside.
Lay 2 14-16-inch long pieces of plastic wrap on a surface. On each one, use paintbrushes to paint parallel 6-inch stripes of each color of food coloring about 1/2-inch apart. The food coloring may bead on the surface of the plastic wrap—this is okay.
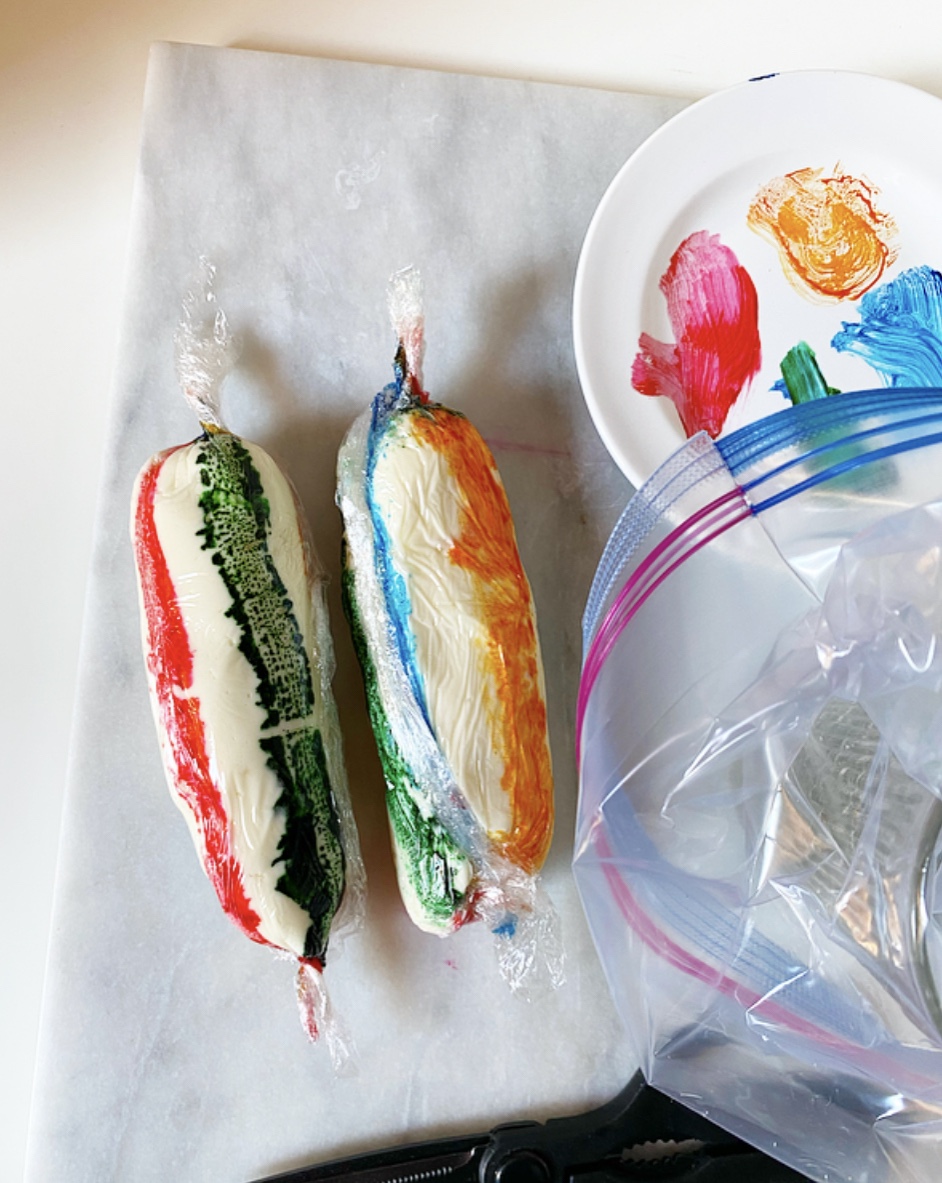
Top each set of stripes with half the frosting. Working with one assemblage of frosting/food coloring/ plastic wrap at a time, use the plastic wrap to roll and manipulate the frosting into a log shape with food coloring stripes going down all sides. Twist the ends of the plastic wrap so that the log looks like a piece of old-fashioned candy. Repeat this process with the other assemblage.
Working with one log of frosting at a time, trim one end and place the wrapped log trimmed-end-down in a piping bag fitted with a tip. Twist the piping bag closed and pipe frosting onto the cupcakes. Repeat trimming process with the second log of frosting when needed.
Serve cupcakes. Leftovers will keep covered at room temperature for 2 days or in the refrigerator for up to 4.

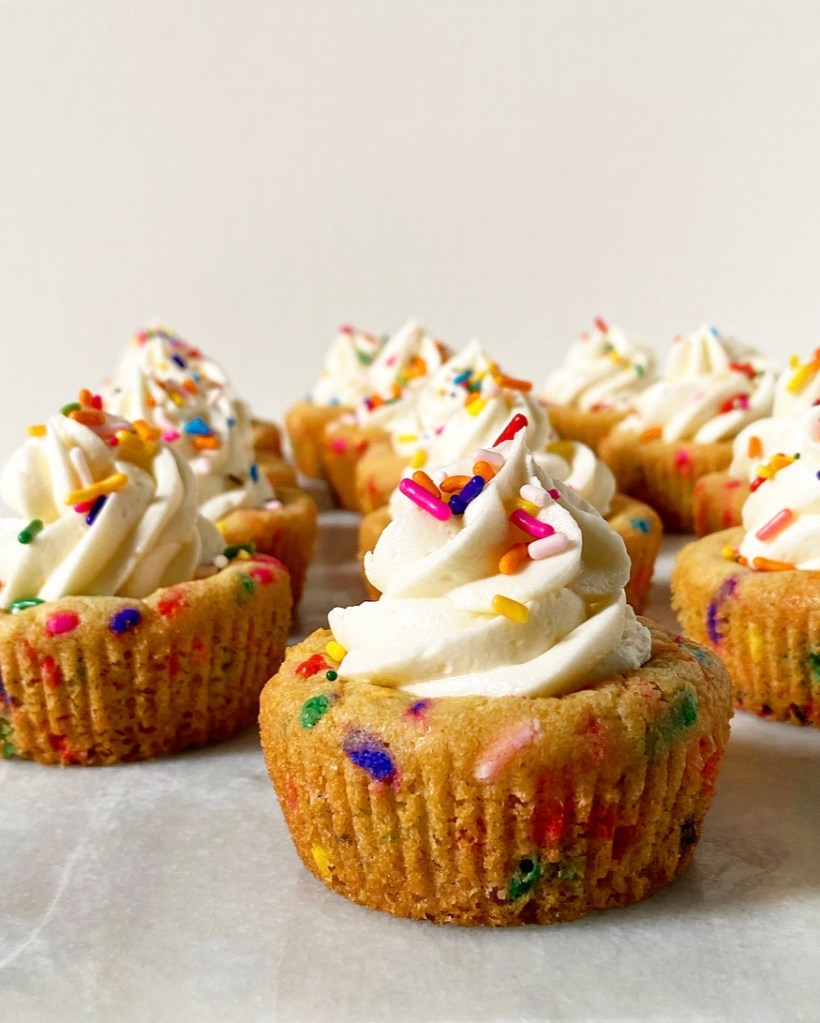


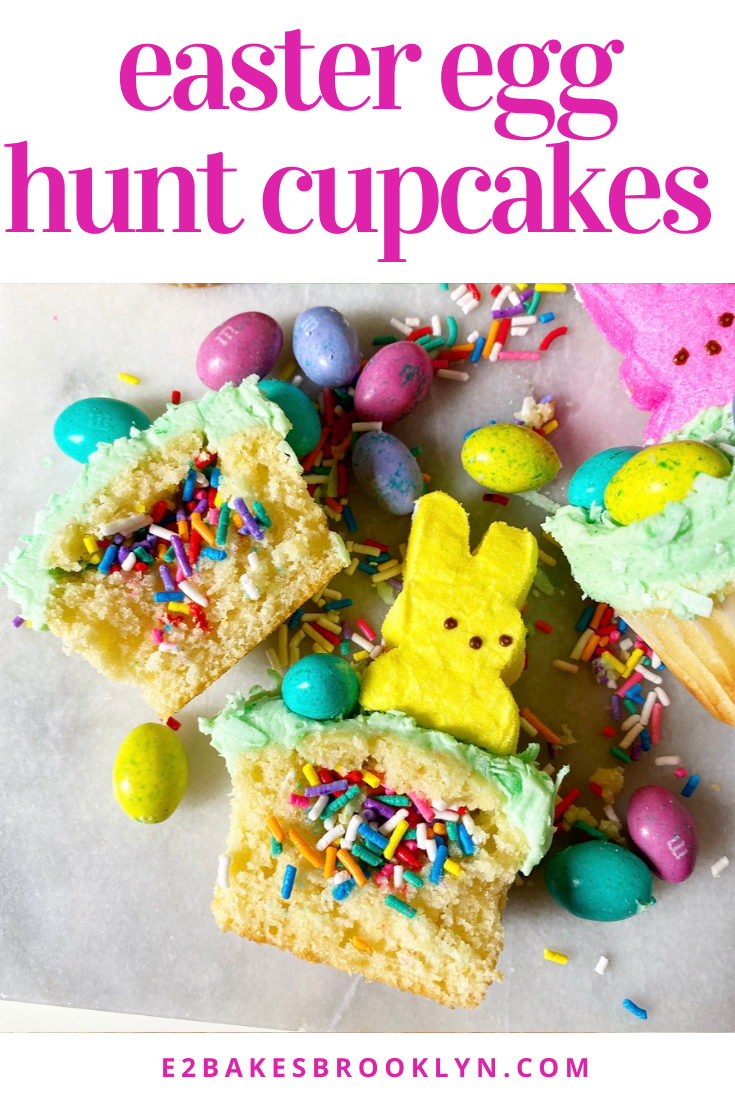
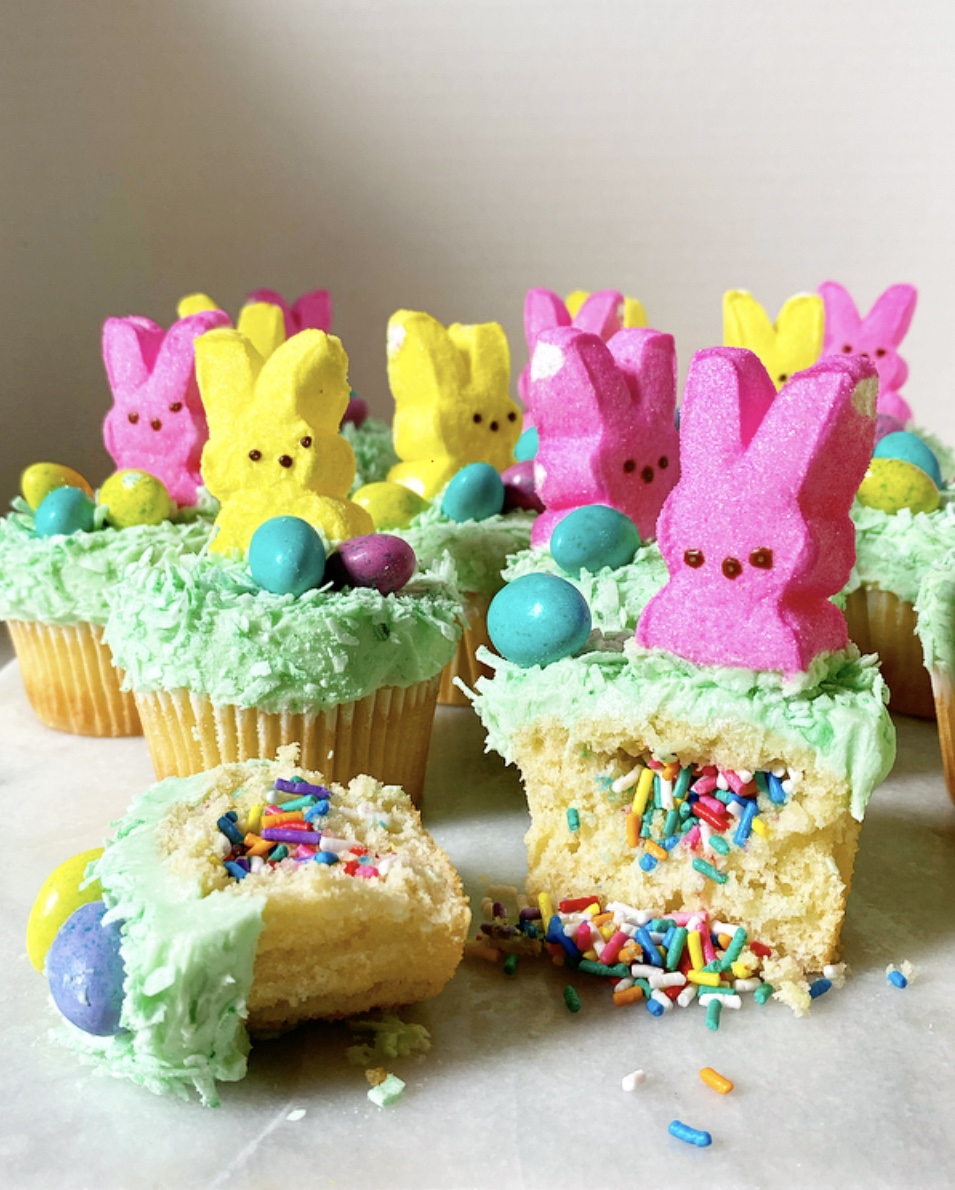 How cute are these Easter Egg Hunt Cupcakes?! They’re a miniature version of the towering surprise-inside
 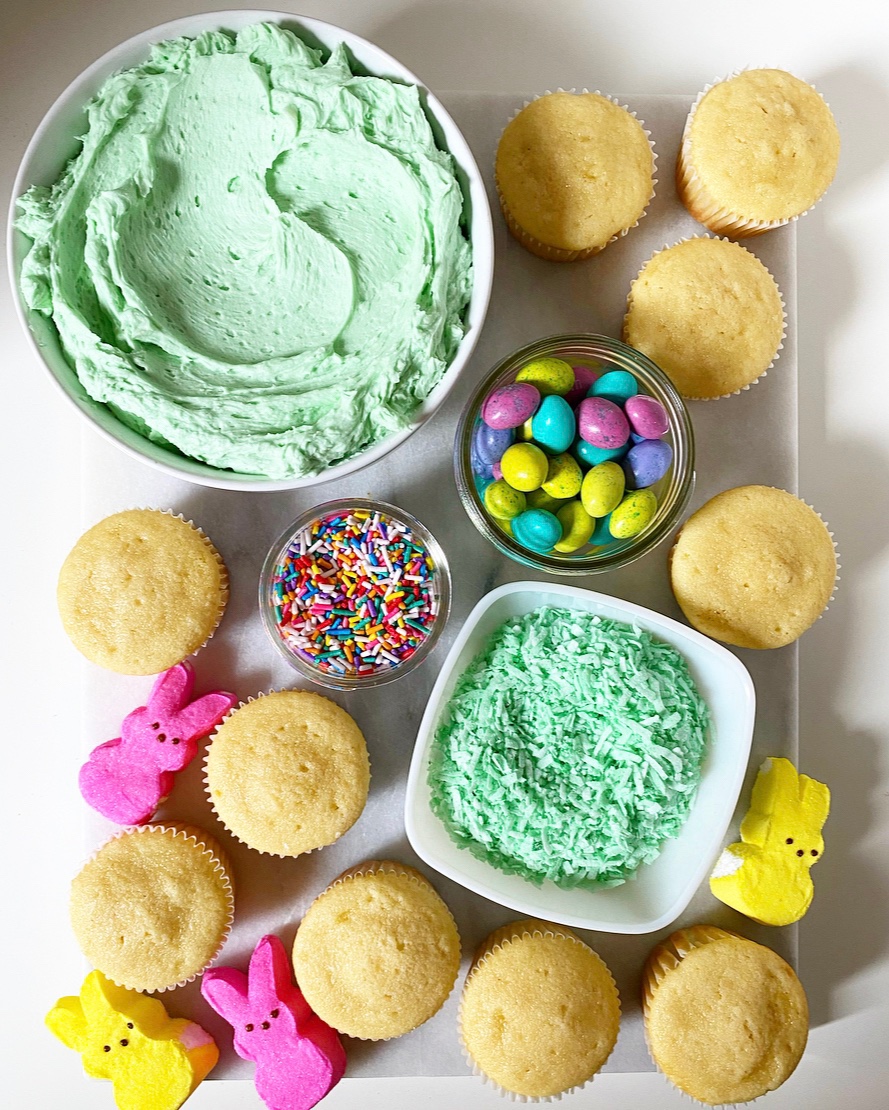 Easter Egg Hunt Cupcakes start with the same vanilla sour cream cupcake base I used for my
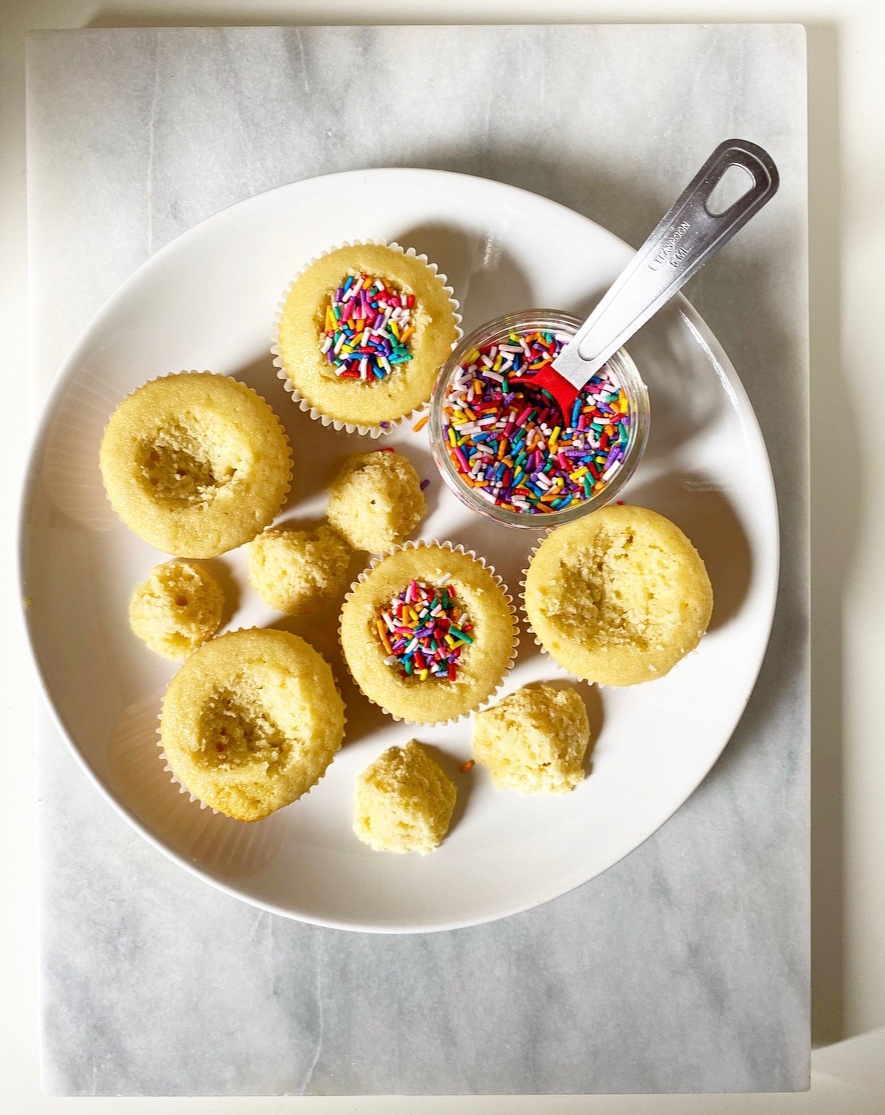
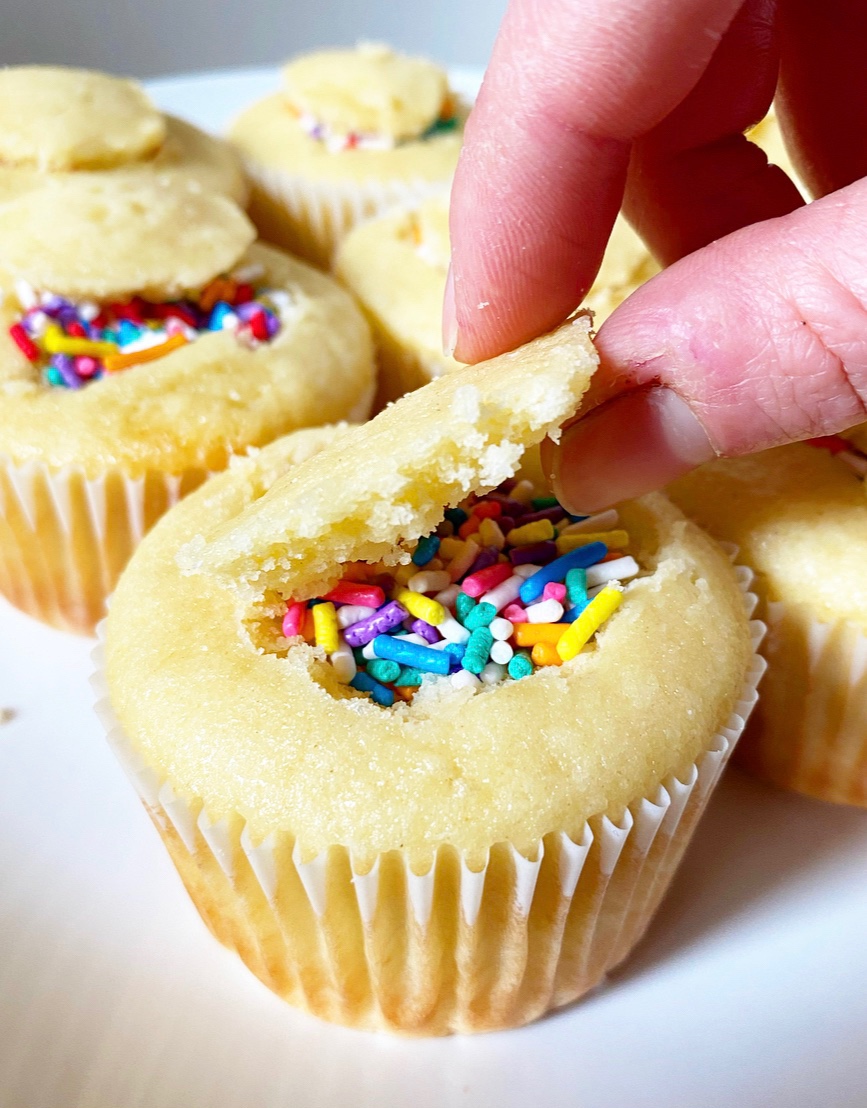 Before frosting, each cupcake is filled with sprinkles for a surprise effect. To achieve this, a cone-shaped piece of cake is cut out of the top of each cupcake, leaving behind just enough room for a teaspoon of sprinkles. Then the little conical toppers are trimmed into disks so that they fit right back on top of the cupcakes, concealing the surprise inside. Once the cupcakes are frosted, the cut-outs won’t be visible, making it all the more fun when your family and friends bite in and sprinkles come running out!
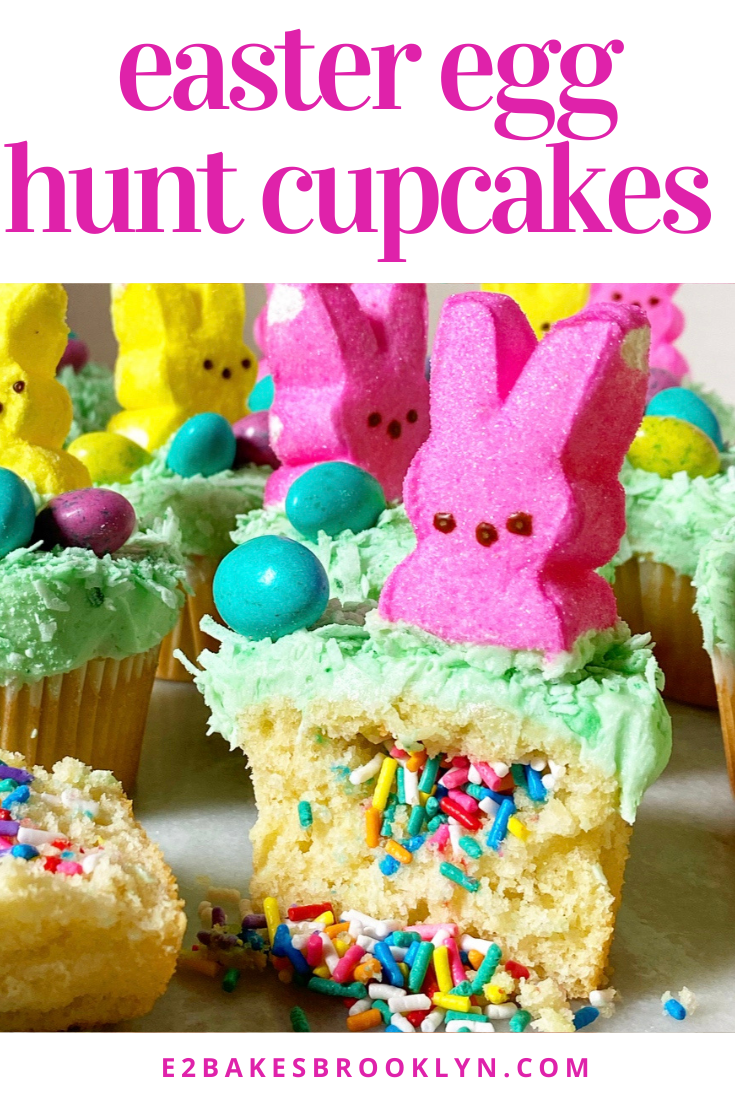
 Like the layer cake that inspired them, these cupcakes are frosted with green-tinted vanilla buttercream and decorated with little Easter scenes made of green coconut “grass,” egg-shaped candies and Peeps bunnies.
 I can’t get over how festive these are! I say this about at least one recipe a year, but these might be the cutest things I’ve ever made. And maybe soon they’ll be the cutest things you’ve ever made.
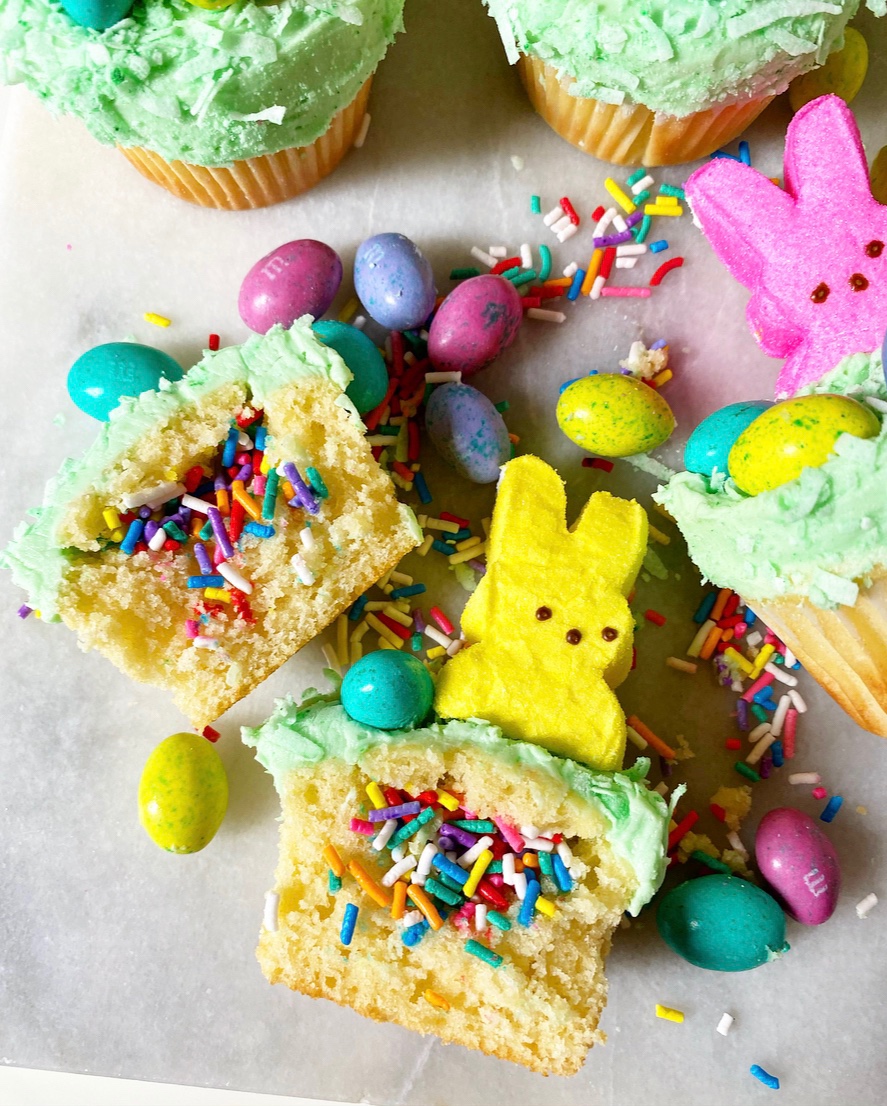
 I professed my love for


 This marks the first time I’ve posted a new cupcake recipe on here in more than
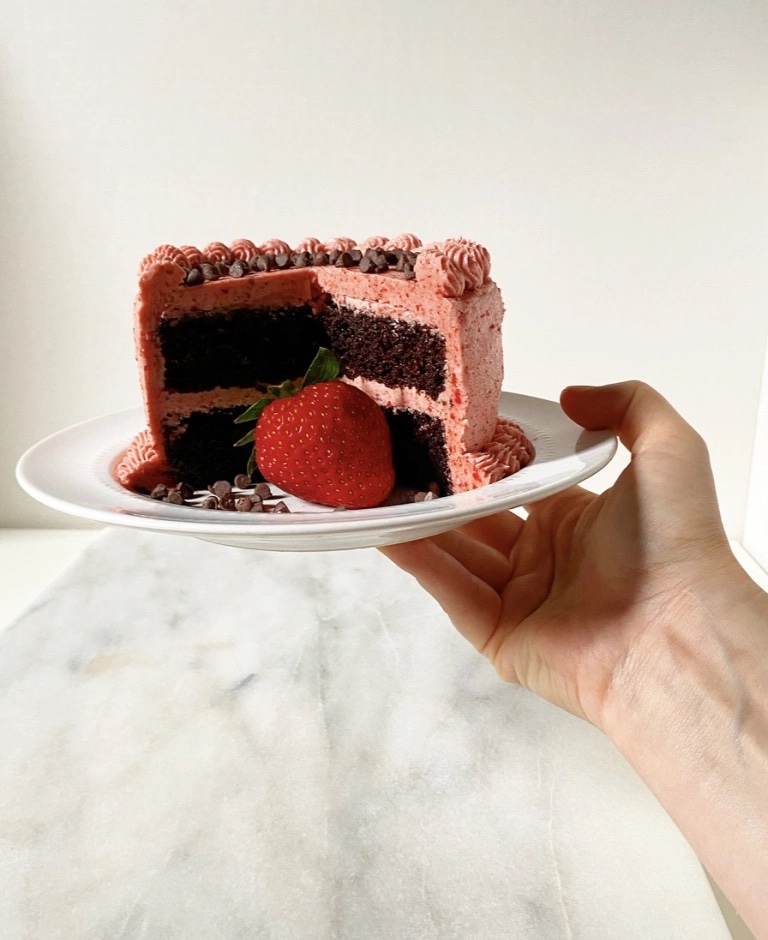
  Before I get to how these cupcakes get their marble, let’s discuss red velvet on its own. This southern flavor is divisive; some love it, some hate it, and some love to hate it. I obviously love it, as evidenced by years of red velvet treats for
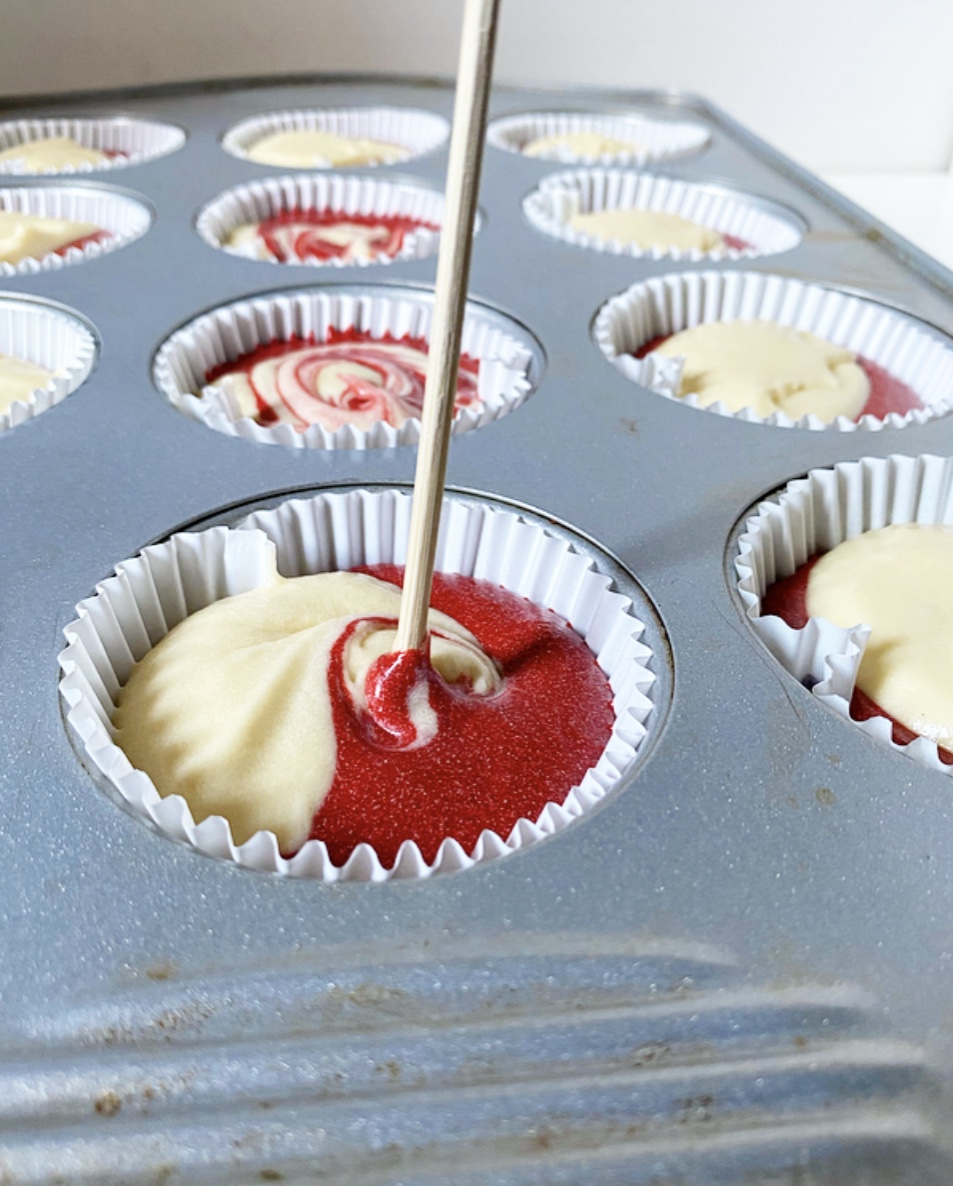
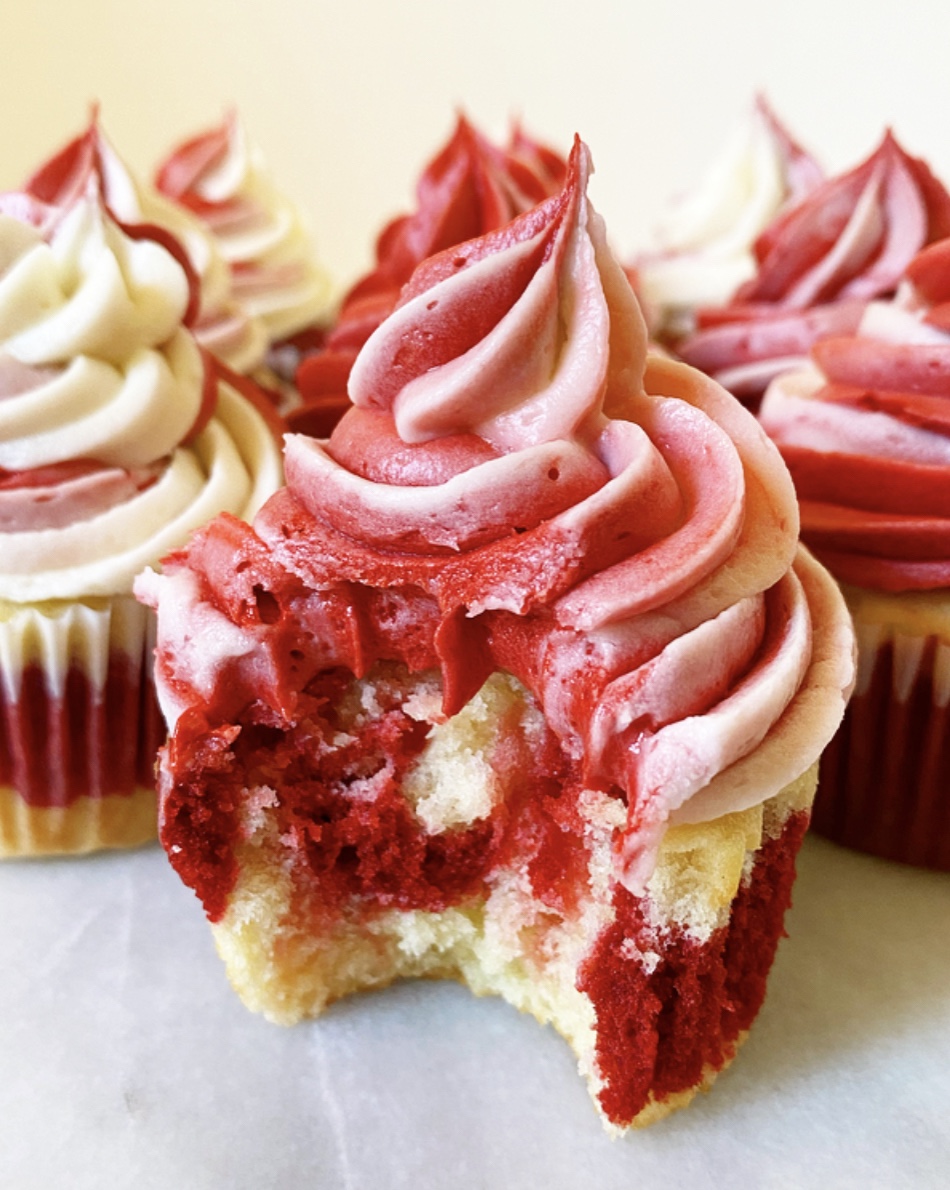
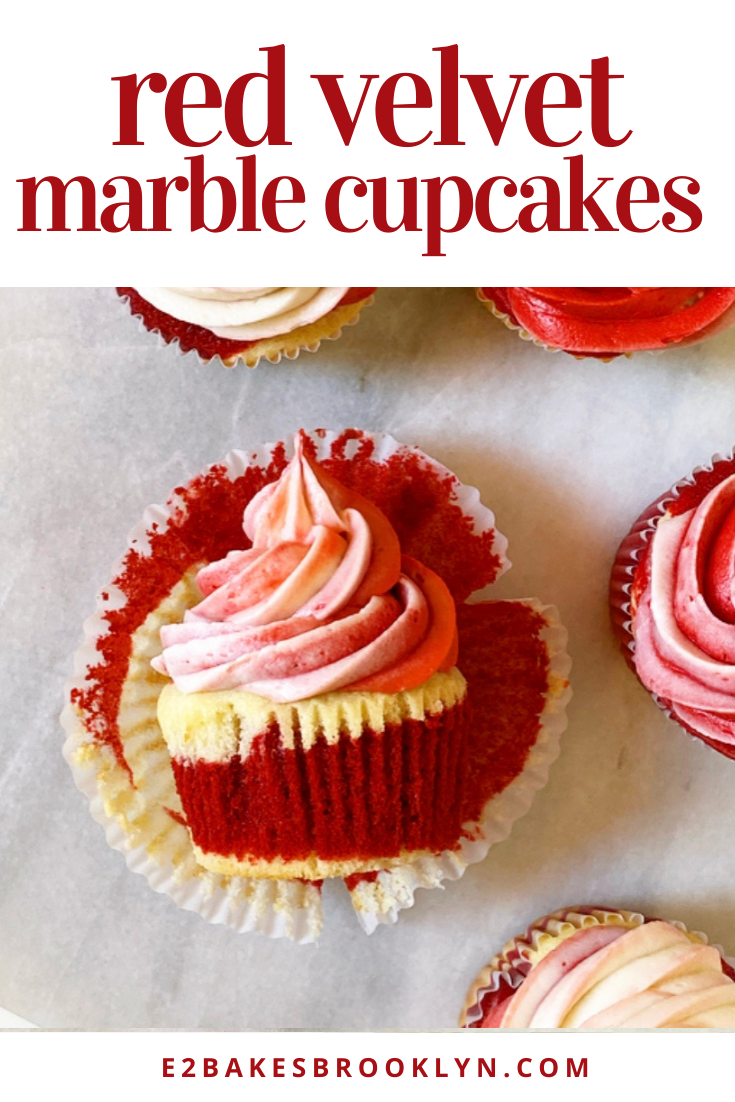
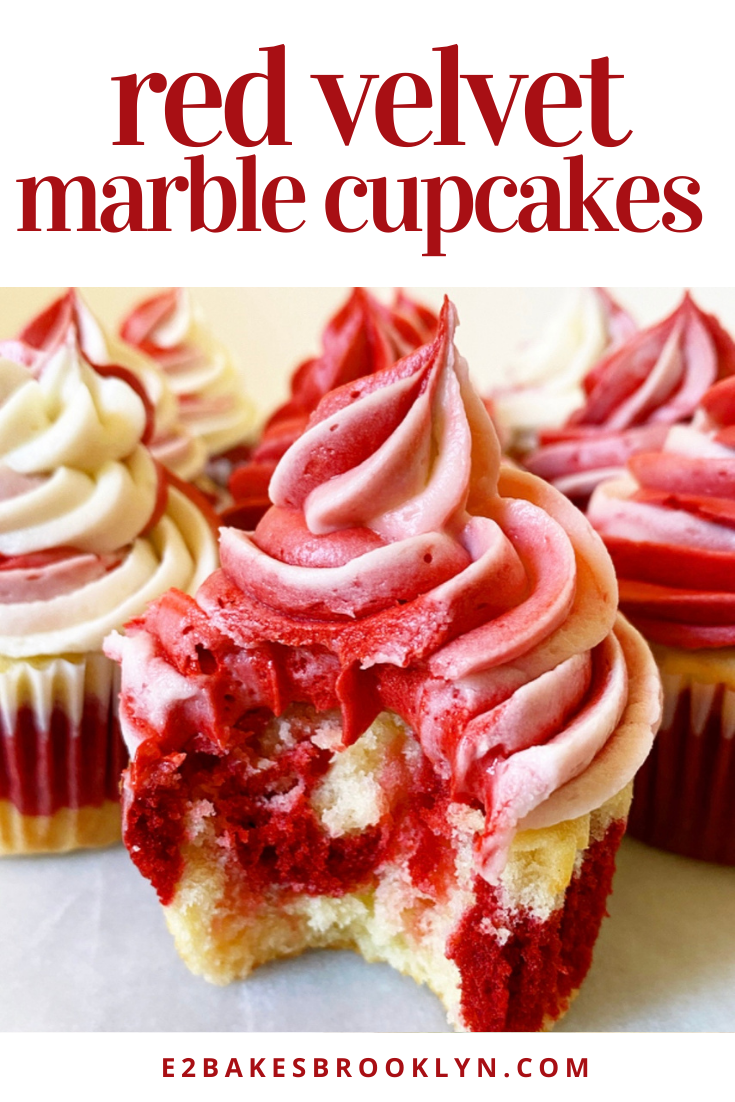
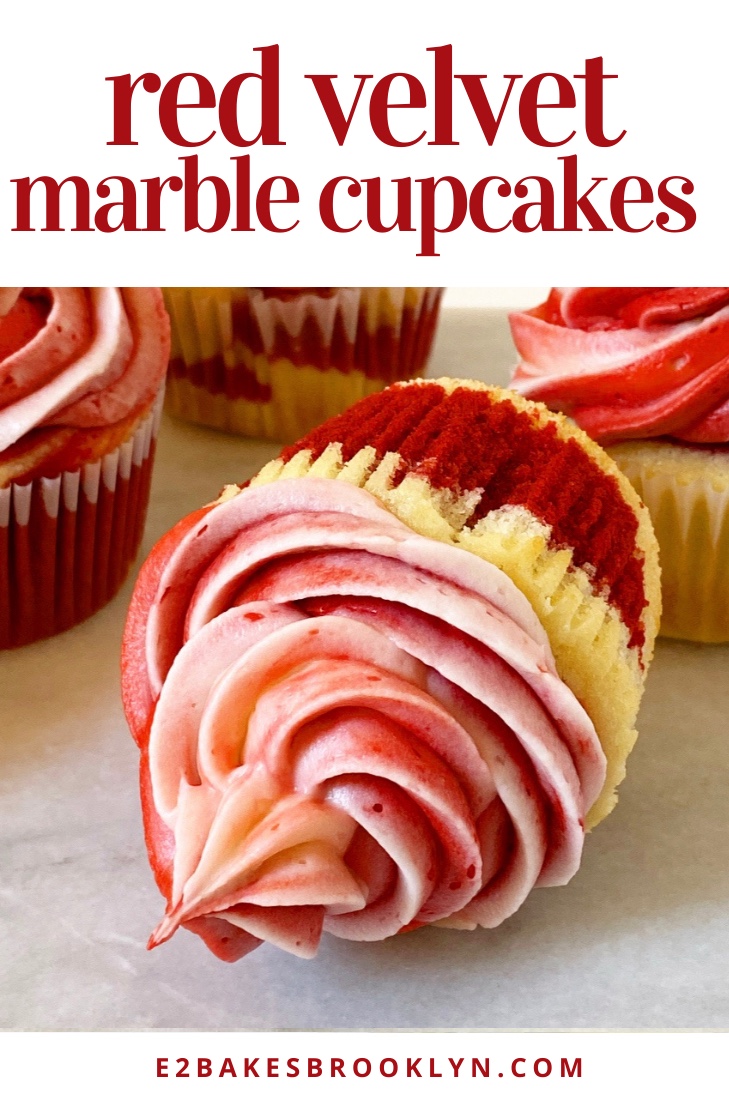
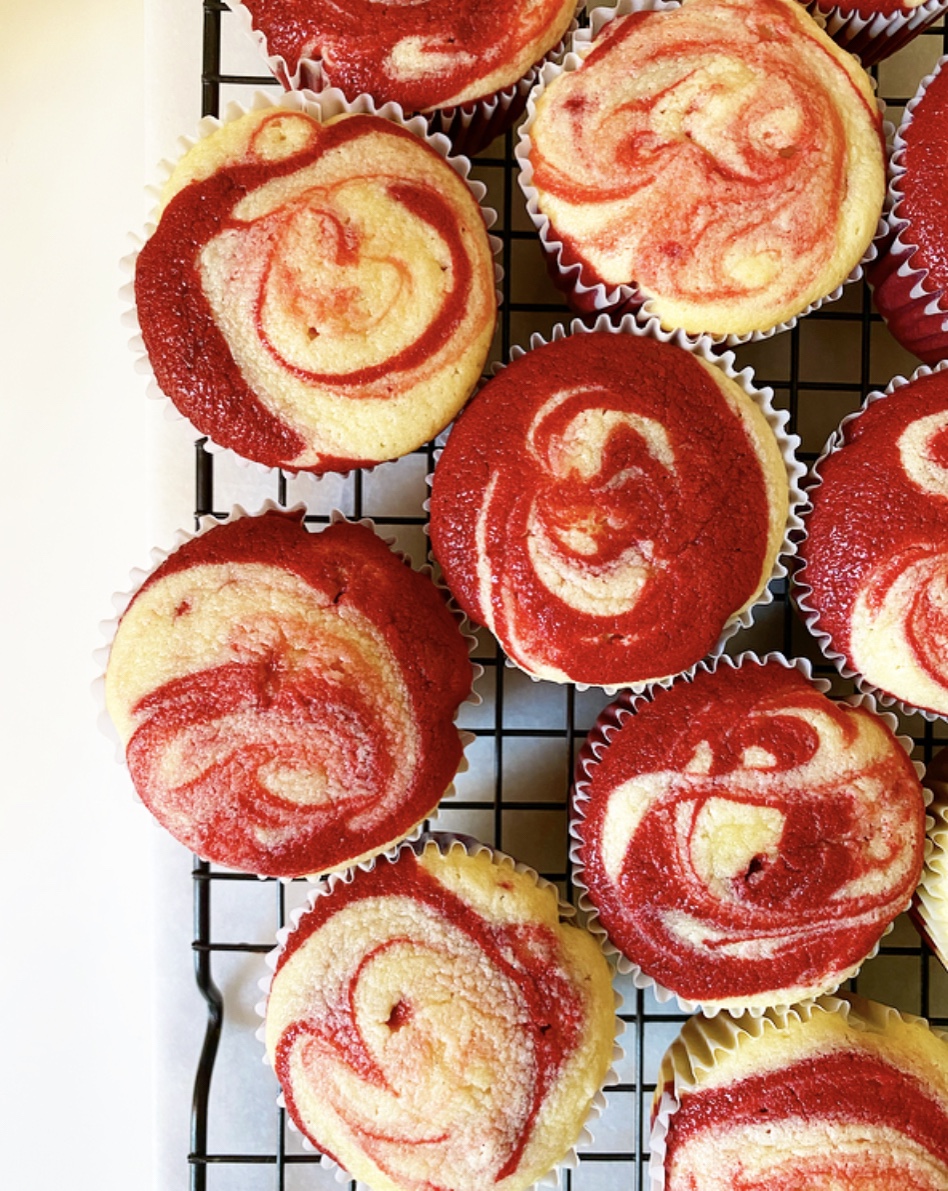 Now for the marbling! Here, red velvet cake batter is swirled into delicious vanilla sour cream cupcakes. These little cakes are moist and springy and out-of-this-world good. They are assembled from just one batter—the red velvet is made by stirring cocoa powder, a tablespoon of milk and red food coloring into a small portion of the vanilla mixture. Both colors are scooped into the cupcake pans, then swirled together before baking.
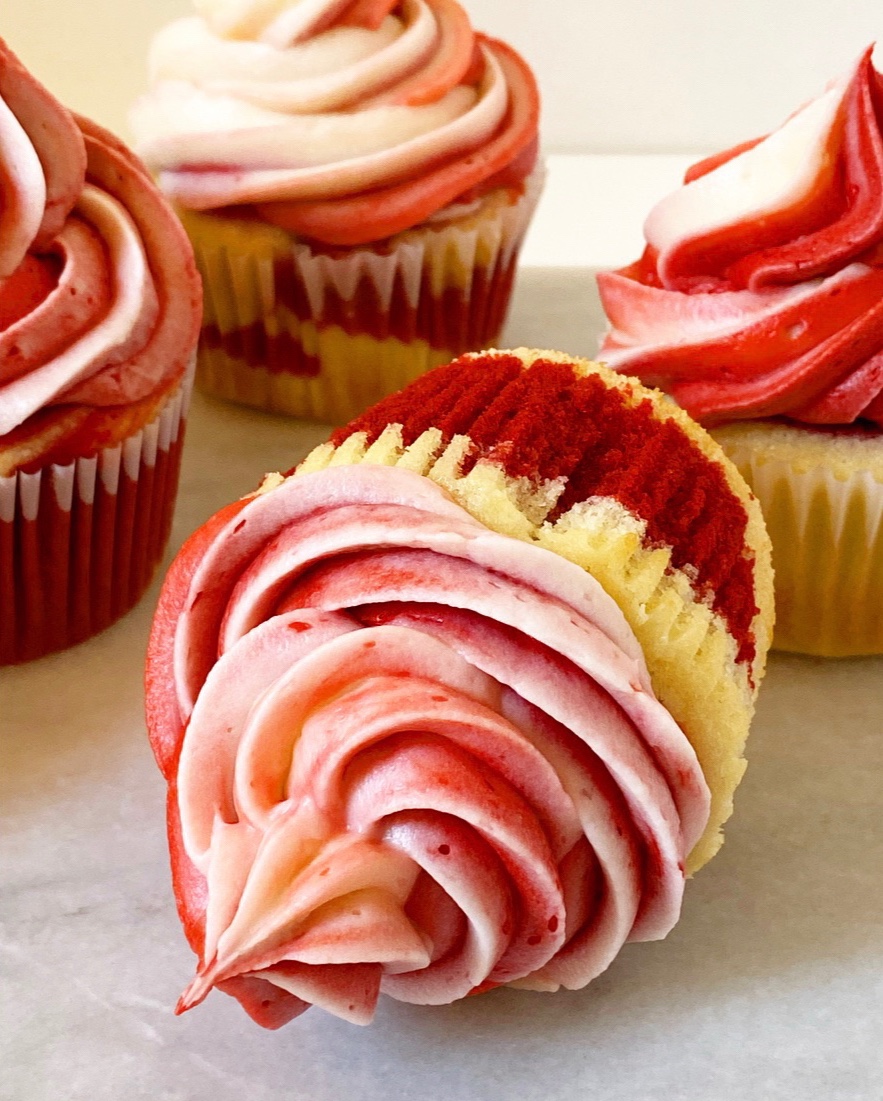 As for the cream cheese frosting, I had originally planned to keep it completely traditional, but ultimately decided to continue the marble motif, dying half the frosting red and flavoring it with a hint of cocoa for maximum red velvet realness.
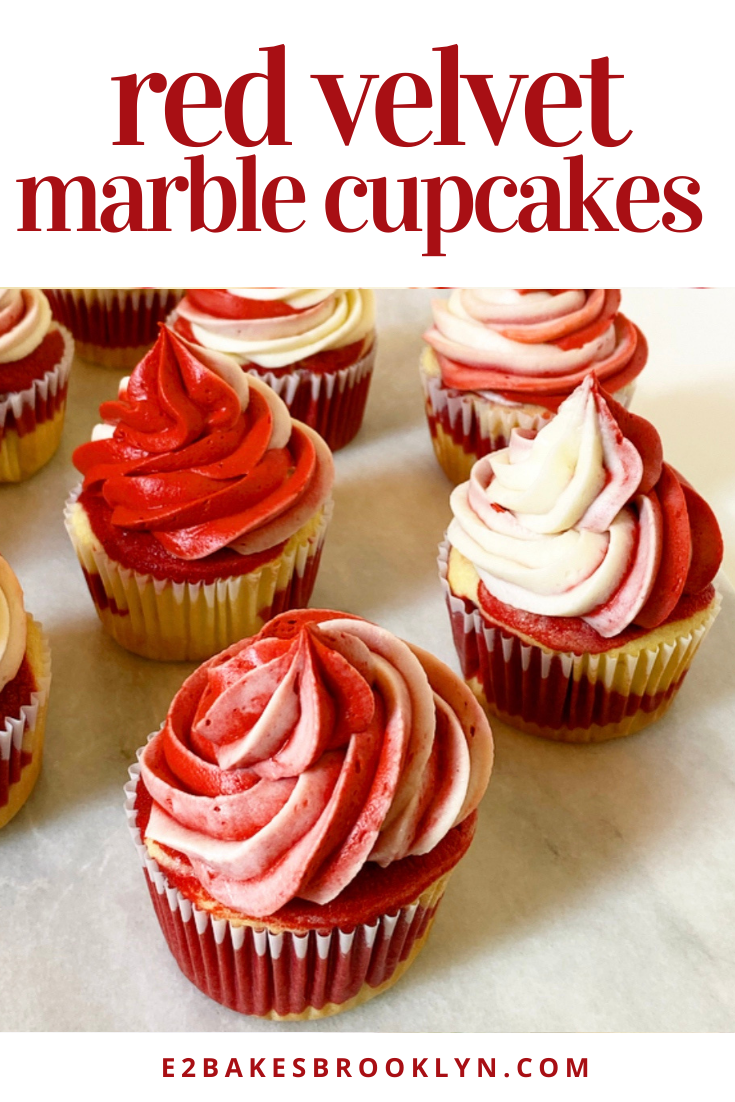
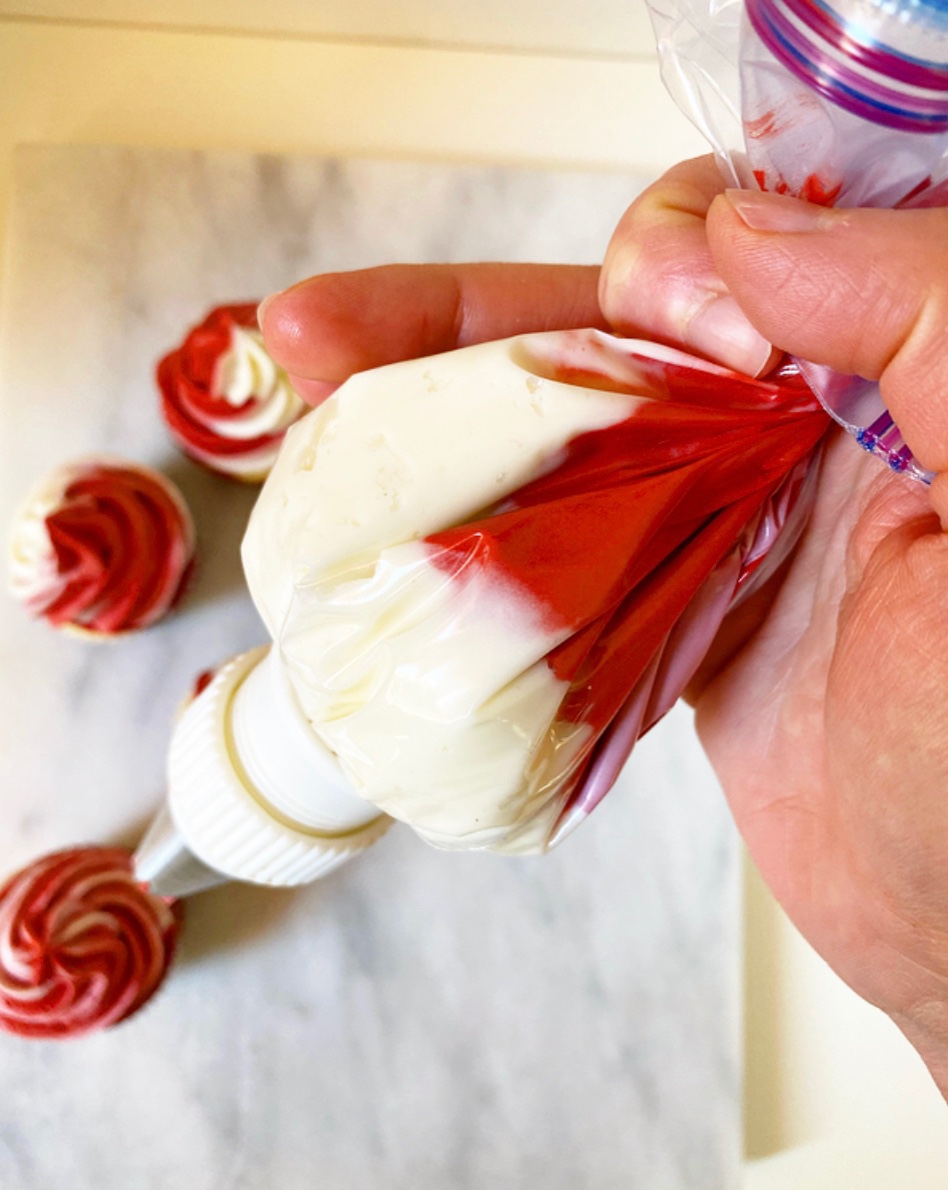
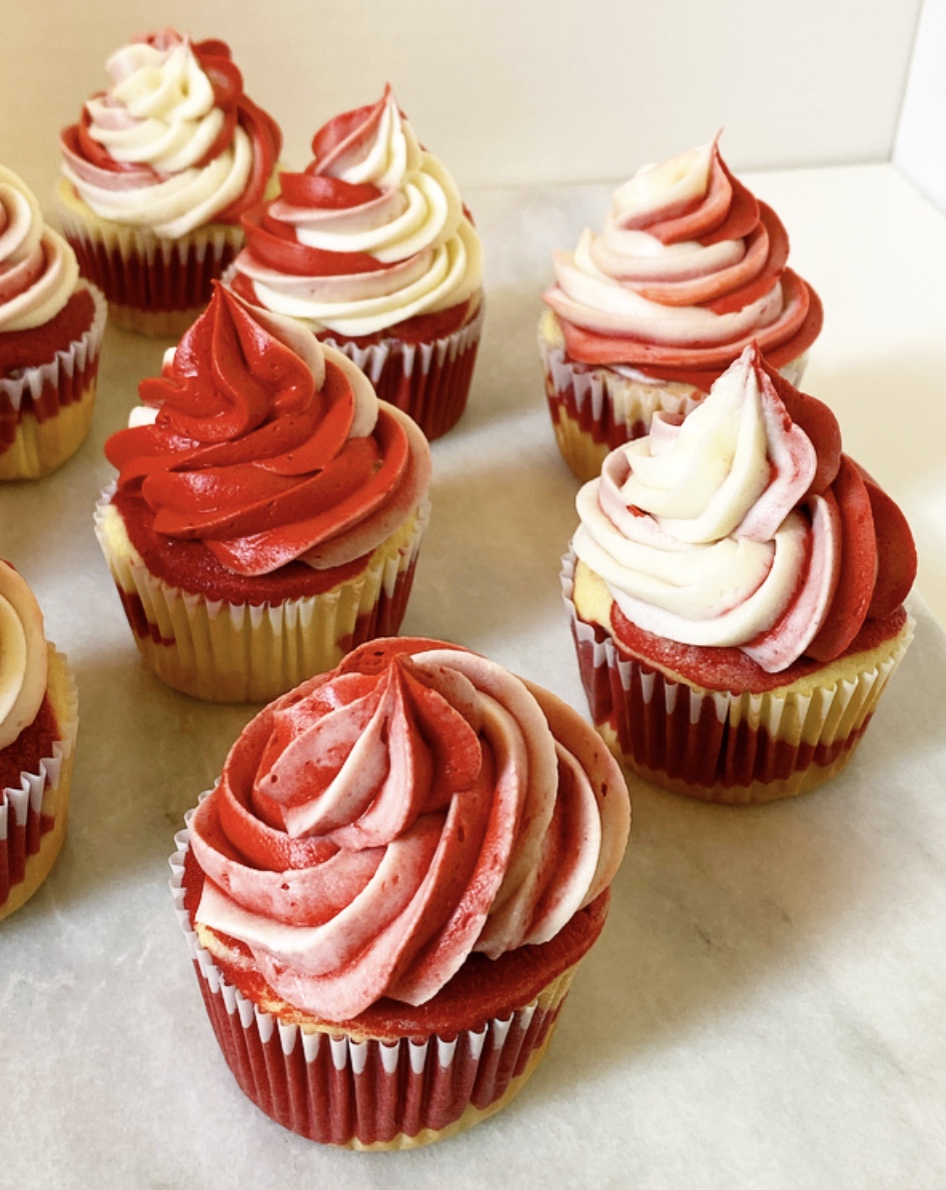 To achieve a marbled/swirled frosting effect, I loaded both colors into the same piping bag, doing my best to keep them on separate sides. You can purchase specialty piping bags for this, or use two smaller bags in a larger bag, but I took the easy way out and also tried to let go of the outcome. Baking is much more fun when you let go of the outcome. I totally love how they all turned out a bit differently!
 These cupcakes, y’all! If you or your valentine(s) are into red velvet, you’re going to love them. The vanilla portion is delicious, but that chocolate-vanilla hint of red velvet really takes the (cup)cake!