 Last Pi Day (March 14th aka 3.14 aka π), I posted a recipe for Pecan Pie Kolaches that was mostly just me saying “What is happening? What is happening? Here’s a recipe, I guess,” and trying not to have a full-scale meltdown while the world closed up. Needless to say, this year’s post is a little less dramatic.
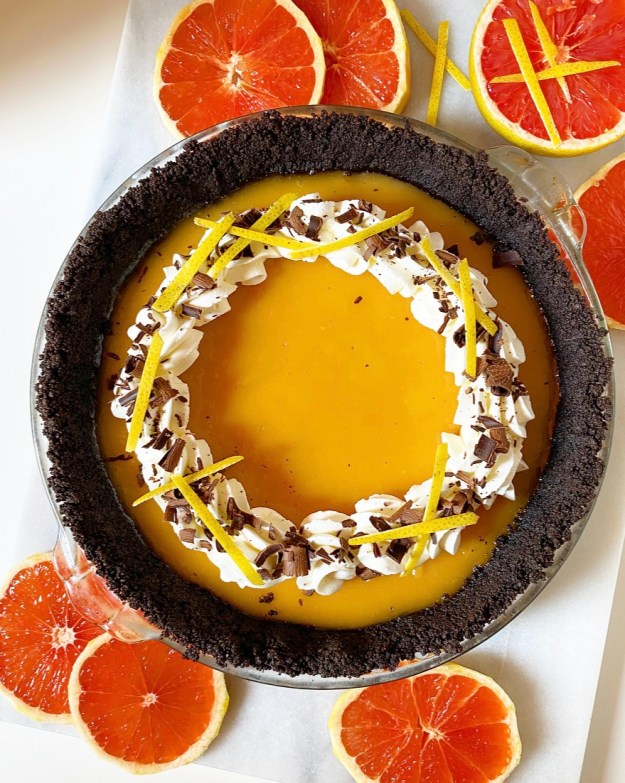
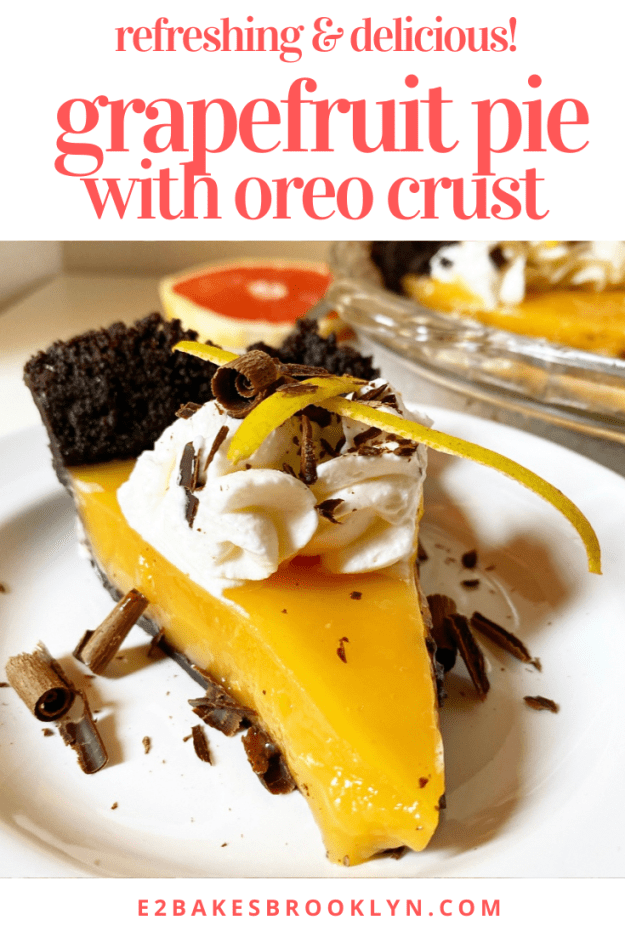
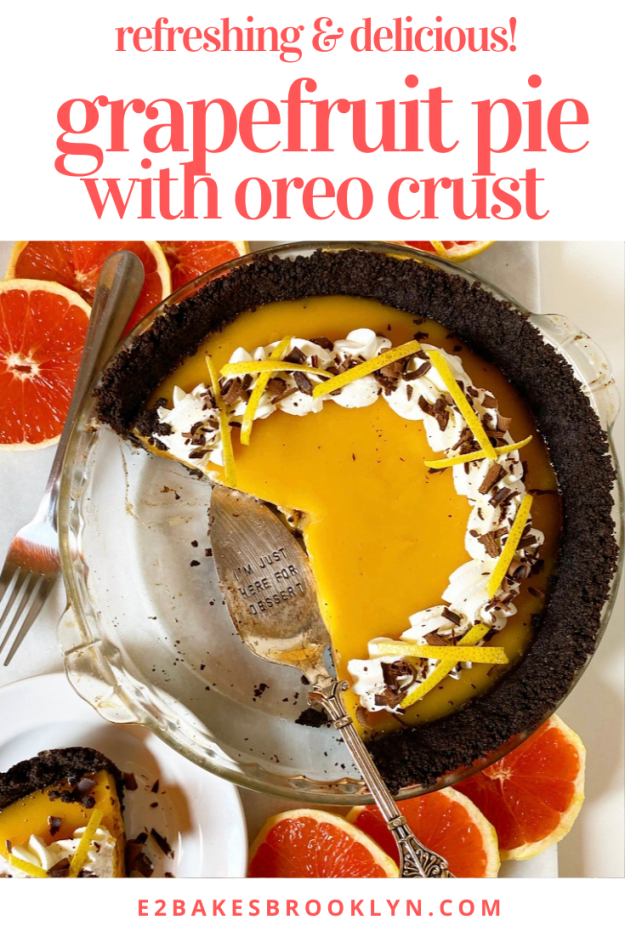
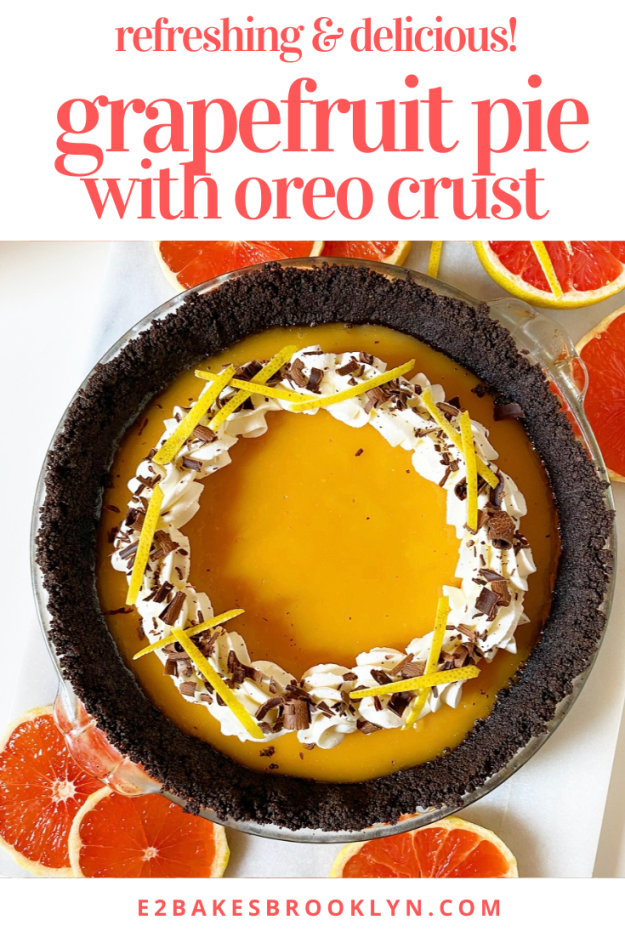
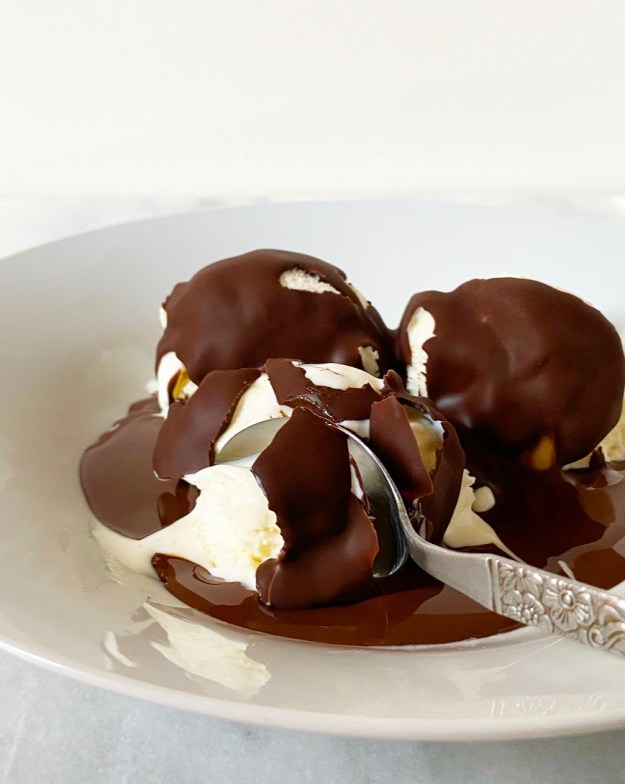
Except for the pie. It’s bringing all the drama in the best possible way. The colors, the textures, the slightly unusual flavor combination–it’s everything I want these days.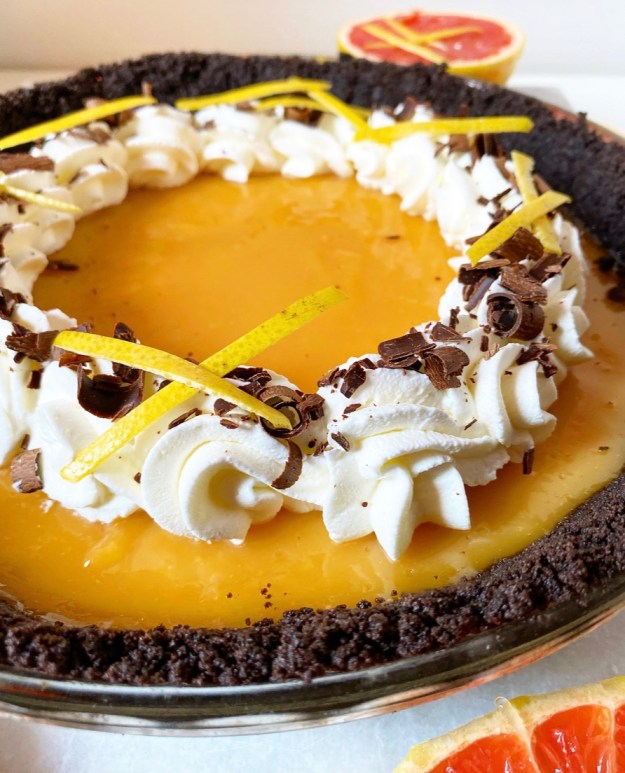 Grapefruit Pie with Oreo Crust is out of this world delicious and a stunner to boot. Crumbly Oreo crust is filled with a soft and tangy Grapefruit filling and finished with whipped cream, chocolate curls and thin strips of grapefruit zest.
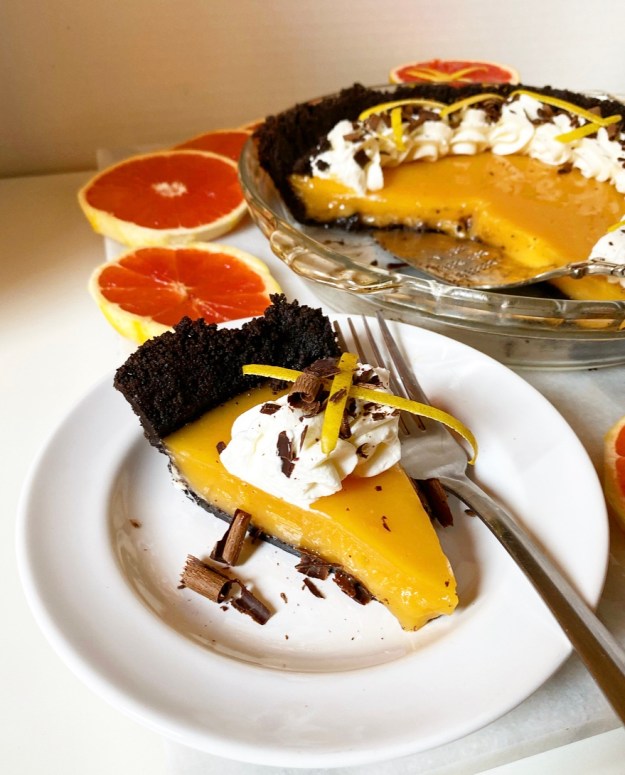 If you think I’ve lost my mind combining grapefruit and chocolate, know that I would have turned my nose up at this just a few years ago. However, after trying key lime and chocolate together, I am sold. The tang of citrus and the bitterness of chocolate are a perfect pairing. Try it—you’ll love it.
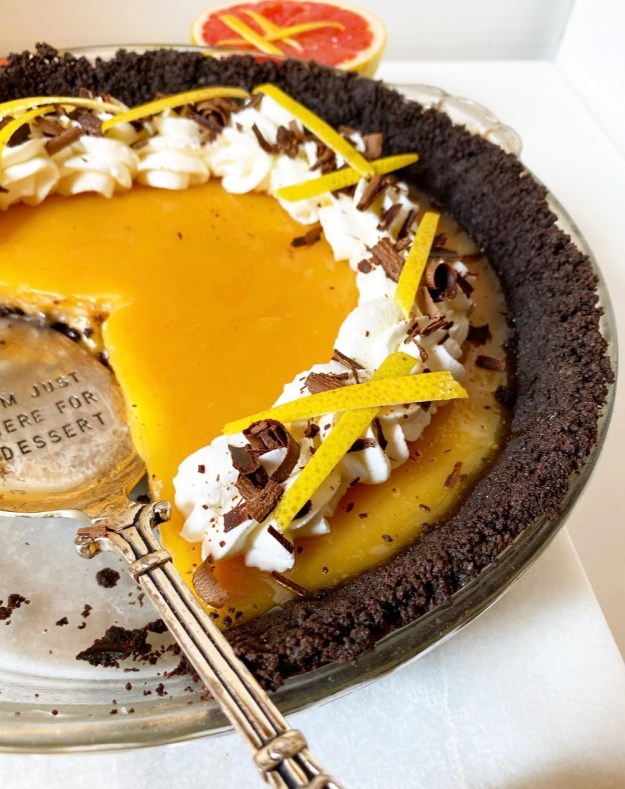 This pie is pretty simple to make, but as with most simple things, it does require some preparation. The filling is a play on my Lemon Meringue Pie, wherein the structure mostly comes from egg yolks and cornstarch. It’s a lot like making homemade pudding, which is really no big deal.
Cornstarch, sugar, salt and water are whisked together over medium heat until thick. This mixture is used to temper (warm) the egg yolks, before it’s all simmered with a grapefruit reduction and a hint of lemon juice. Whisk in a little butter, pour it through a sieve and voila! Grapefruit pie filling.
(I think I may have accidentally made it sound complicated by laying the method out like that, but I promise you it’s simple and comes together quickly.)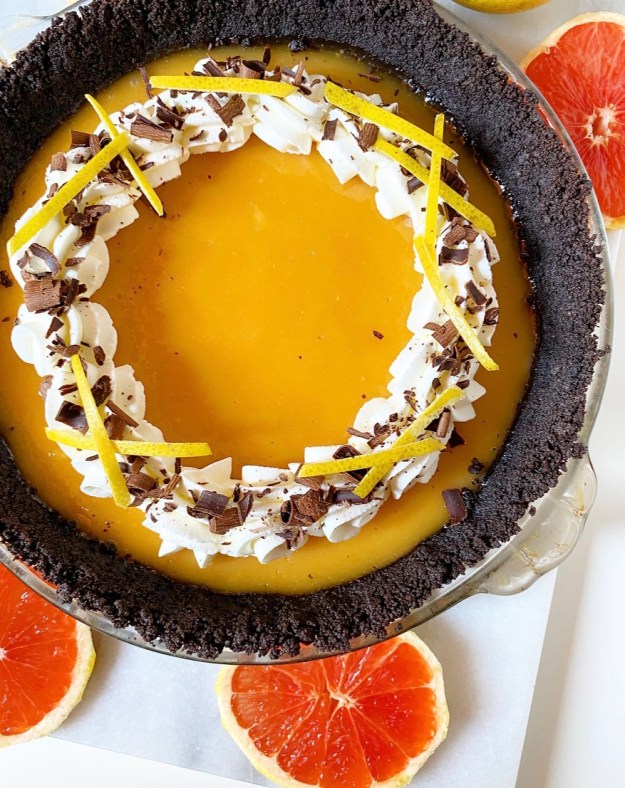 Once the filling and crust are prepared, it’s just a matter of pouring one into the other and letting them get nice and cold together. This cannot be rushed, so plan ahead.
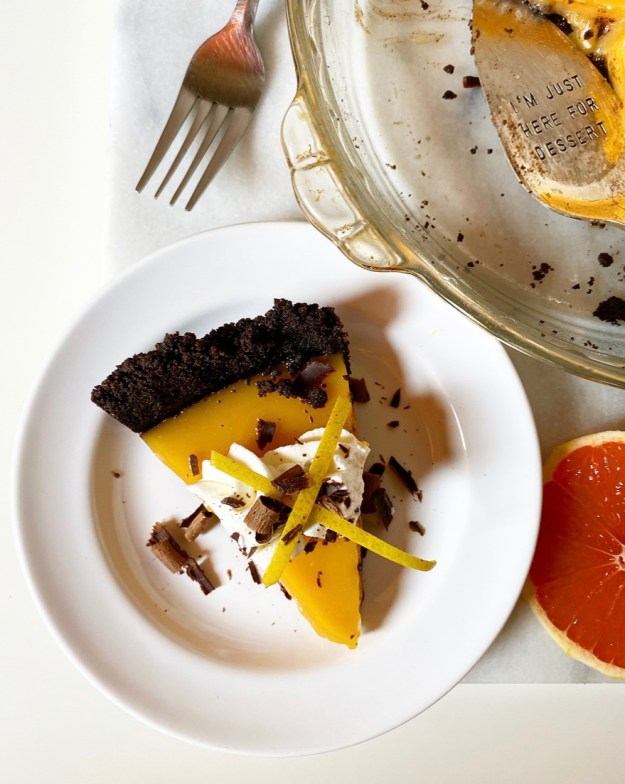
 When Grapefruit Pie with Oreo Crust is completely chilled, it will still be a little on the jiggly side, like a citrus curd with a little more body. After you add a flourish of whipped cream and the garnishes of your choosing, you’ll be treated to a tart, sweet, creamy, crumbly confluence of goodness. The cream offsets the tanginess of the filling, and the buttery chocolate crumb crust rounds it all out. This pie is rich and refreshing–the perfect way to start what will hopefully be a much simpler twelve months for us all.
Happy Pi Day, y’all. 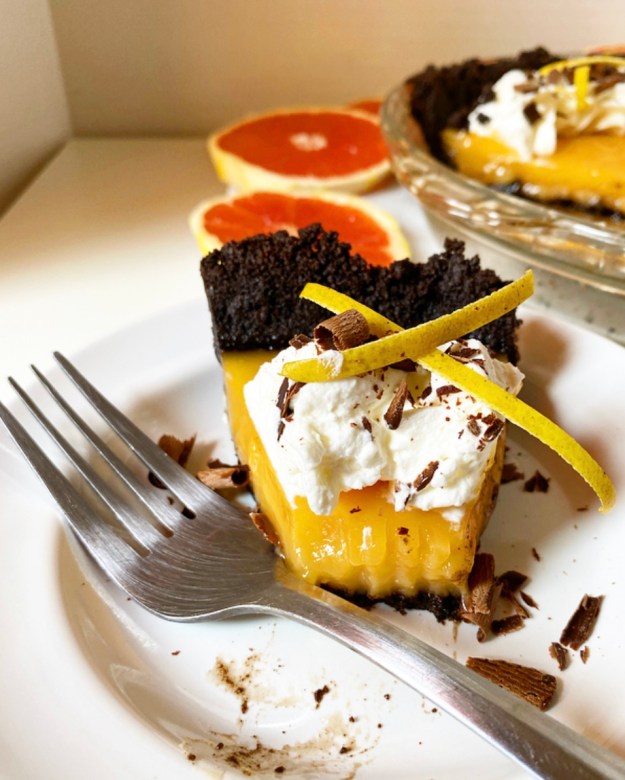
Grapefruit Pie with Oreo Crust
makes one 9-inch pie
Oreo Crust:
24 Oreos
5 tablespoons unsalted butter, melted
Grapefruit Filling:
2 cups fresh grapefruit juice (from about 3 medium-large grapefruits)
1 cup granulated sugar
1/4 cup cornstarch
1/4 teaspoon Kosher or sea salt
1 1/3 cup water
5 large egg yolks
1 tablespoon fresh grapefruit zest
1 tablespoon fresh lemon juice
2 tablespoon unsalted butter
1 teaspoon pure vanilla extract
1 drop red liquid food coloring (optional)
Whipped Cream & Garnish:
1 cup heavy cream, very cold
4 tablespoons confectioner’s sugar
grapefruit zest (strips or grated)
chocolate curls
Preheat oven to 350F. Lightly grease a 9-inch pie plate.
Make the crust. Place Oreos in the bowl of a food processor and blitz until they are crumbs. Add melted butter and pulse until the mixture can be pinched together. Press it into the bottom and up the sides of the pie plate (I find that a 1/4 cup measuring cup helps with this). Bake the crust for 10 minutes and then let it cool while you make the filling.
Pour grapefruit juice in a small saucepan. Bring to a boil over medium-high heat and cook until reduced to 1 cup (about 10-12 minutes). Remove from heat and cool 5 minutes.
In a small mixing bowl, use a fork to beat egg yolks. Set aside.
In a large saucepan, whisk together sugar, cornstarch, and salt. Whisk in water. Heat over medium heat, stirring frequently, until the mixture reaches a simmer and thickens. Turn heat to low.
Whisking constantly, pour 1/3 cup of the mixture into the bowl of egg yolks until fully combined. Whisking constantly, add egg yolk mixture back to the pan. Return heat to medium. Stir in grapefruit zest, followed by grapefruit reduction and lemon juice. Continue whisking until the mixture has boiled for 1 full minute. Remove from heat. Whisk in butter, vanilla and optional red food coloring. Push filling through a sieve to remove solids.
Pour filling into crust. Gently tap the pan on the counter a few times to help air bubbles disperse. Pop any surface bubbles with a toothpick as needed. Let pie cool to room temperature, then chill for at least 4 hours. Filling will be set, but jiggly, when ready.
Just before serving, make whipped cream. Combine heavy cream and confectioner’s sugar in a large mixing bowl. Use an electric mixer to whip the mixture on low for 30 seconds before whipping on high for 1-2 minutes, or until stiff peaks form.
Load whipped cream into a piping bag fitted with a large star tip. Pipe as desired over the top of the pie. Garnish with grapefruit zest strips and/or chocolate curls, if desired.
Slice pie with a large, sharp chef’s knife, wiping it clean between cuts. Serve immediately.
Pie is best upon assembly, but leftovers may be kept in the refrigerator for a day. The filling may weep a tiny bit over time.
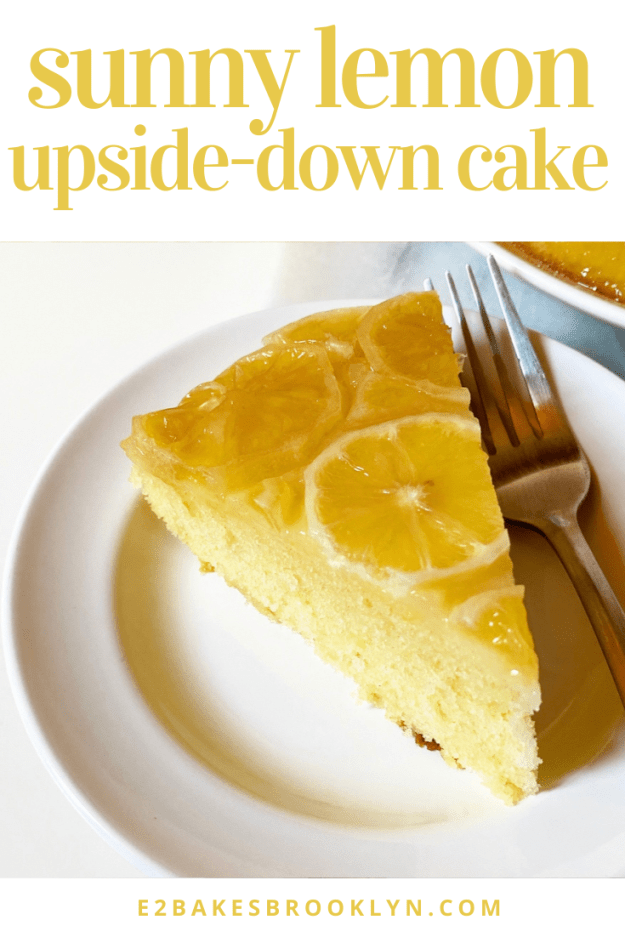
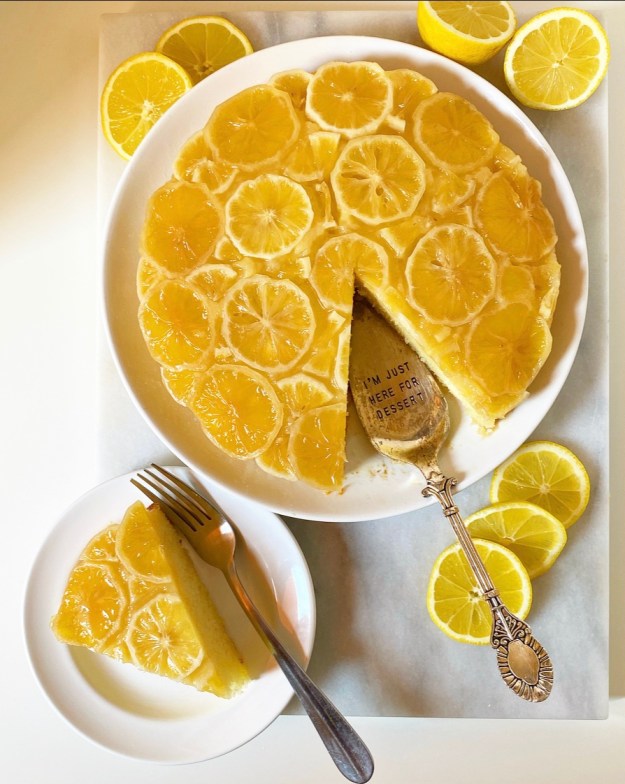 If you love a real mouth-puckering punch of lemon, this Sunny Lemon Upside-Down Cake is for you. We’re talking buttery lemon cake topped with a sticky mosaic of sliced lemons—all the lemon flavor you could ever want. It’s sunny and happy-looking enough to drive any late-winter blues away, at least for the two minutes it takes to eat a slice!
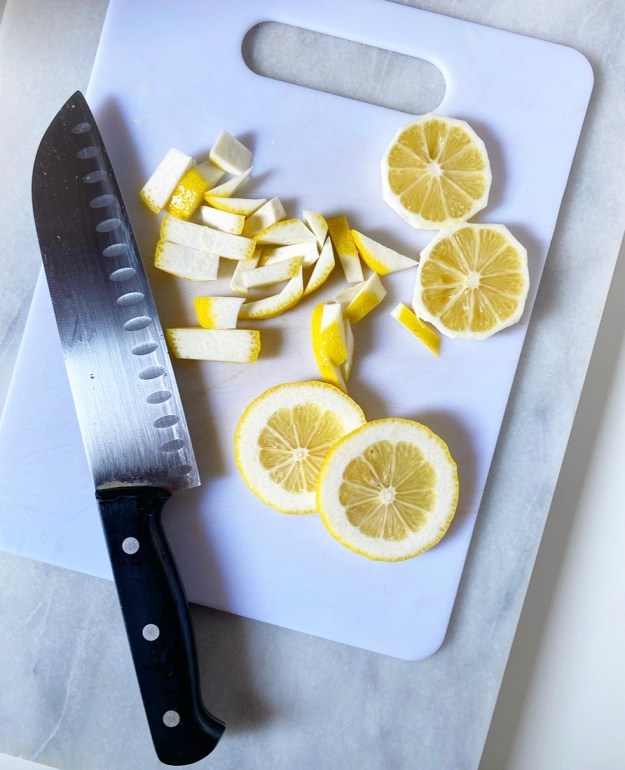
 All my previous
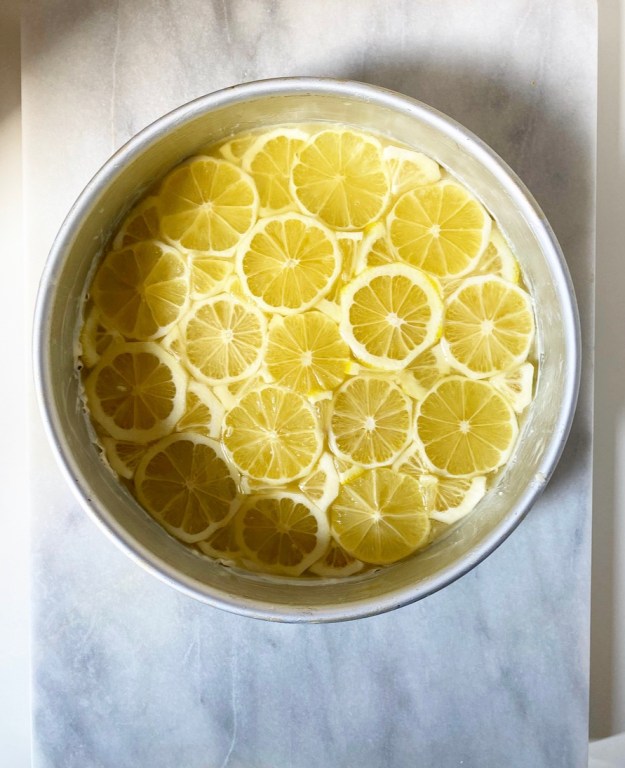
  Once your lemon mosaic is assembled, bury it in thick lemon cake batter; this recipe is my go-to vanilla cake with some lemony flair. The cake will need nearly an hour to bake. Don’t be alarmed when when you pull it from the oven and it looks like a nightmare—there’s a reason this cake is served upside down!
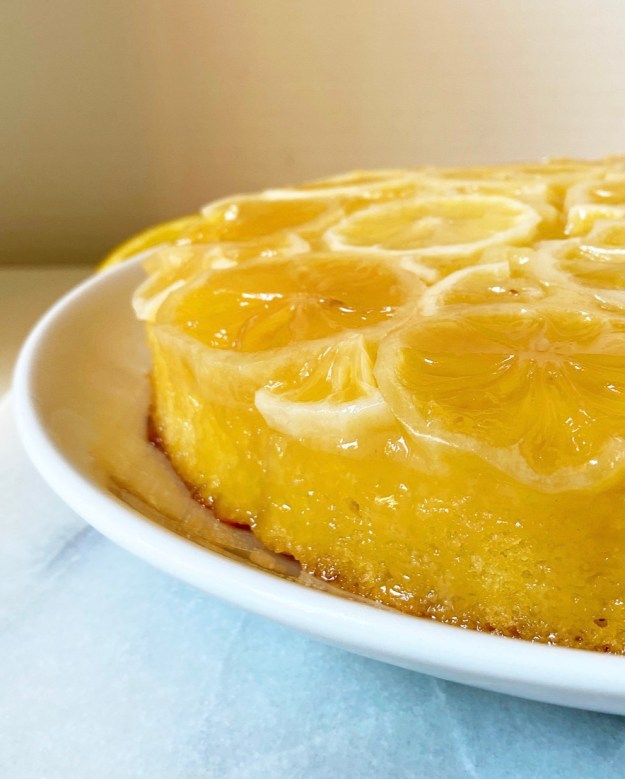 Another way this cake is different from my other
 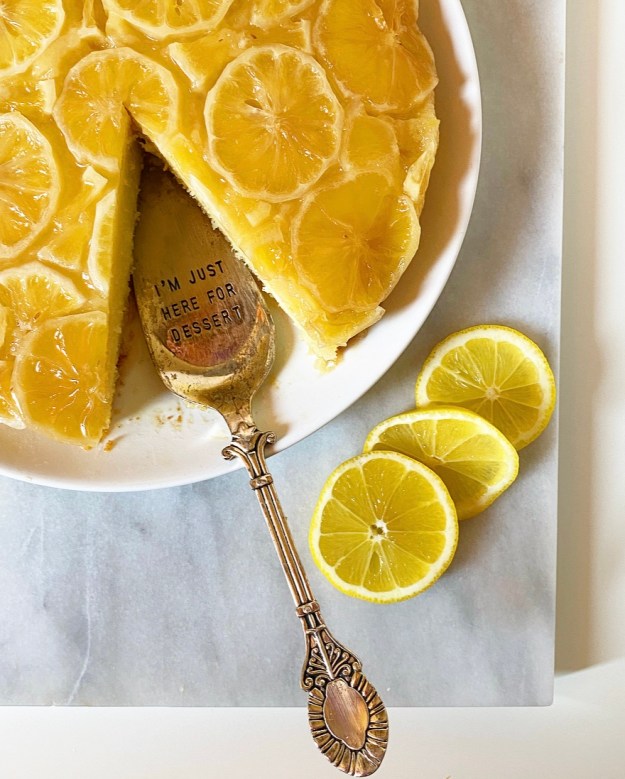 Once your cake is on a plate, all that’s left to do is slice through the top with a serrated knife, grab a fork and enjoy this dessert which, like it’s name suggests, both looks and tastes like a ray of sunshine. I, for one, can’t see or taste it without smiling.
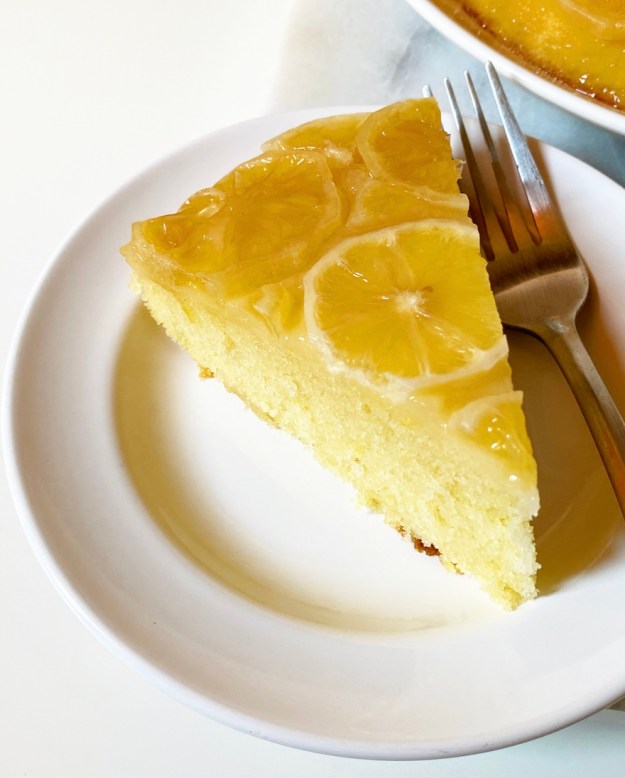

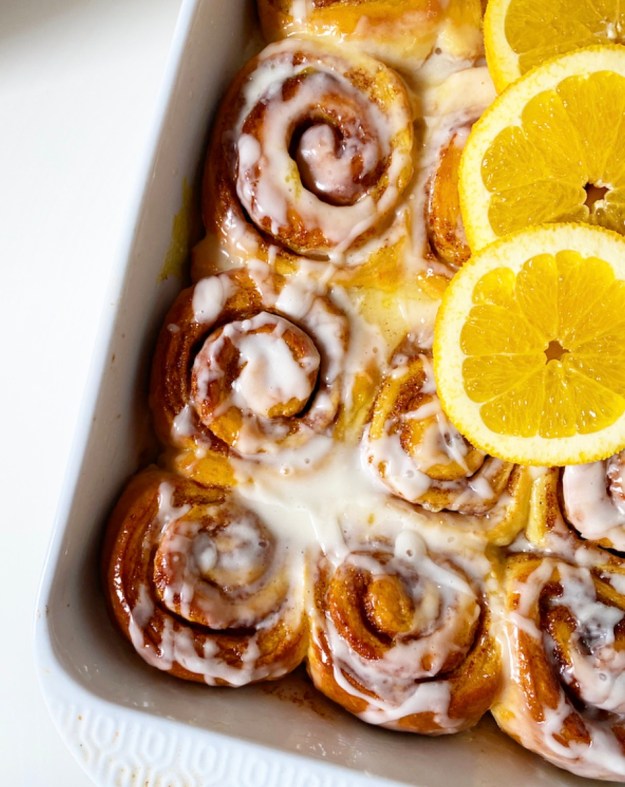 When I was a kid, I had a friend whose mom hated to cook except for Saturday breakfast. A lot of the meals I ate with this family were takeout, but come the weekend, there were eggs and bacon, orange juice, blueberry muffins, and cinnamon rolls from one of those cans you have to thwack against the edge of your countertop. Little me thought it was the best ever (Puff Pancakes obviously excepted).
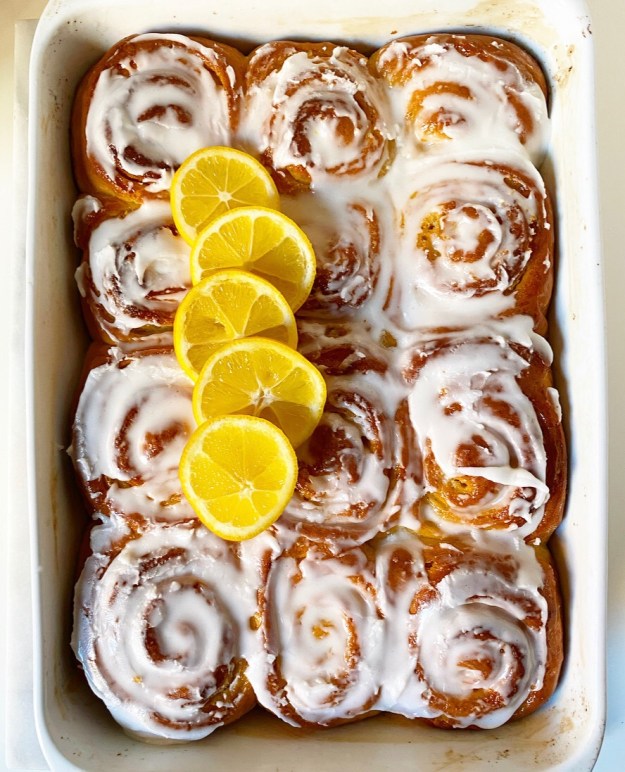
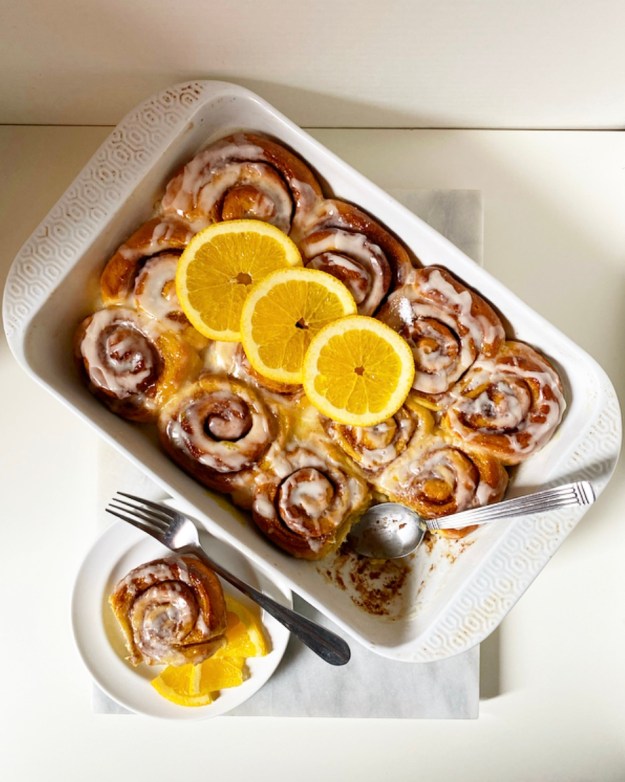 I had one complaint though, because of course I did. Every once in a while the cinnamon rolls would be the orange kind, and while everyone in that family loved them, I deeply did not. I kept my mouth shut—#manners—but I hated them. In fact, I still do, but only because I hate fake orange flavoring.
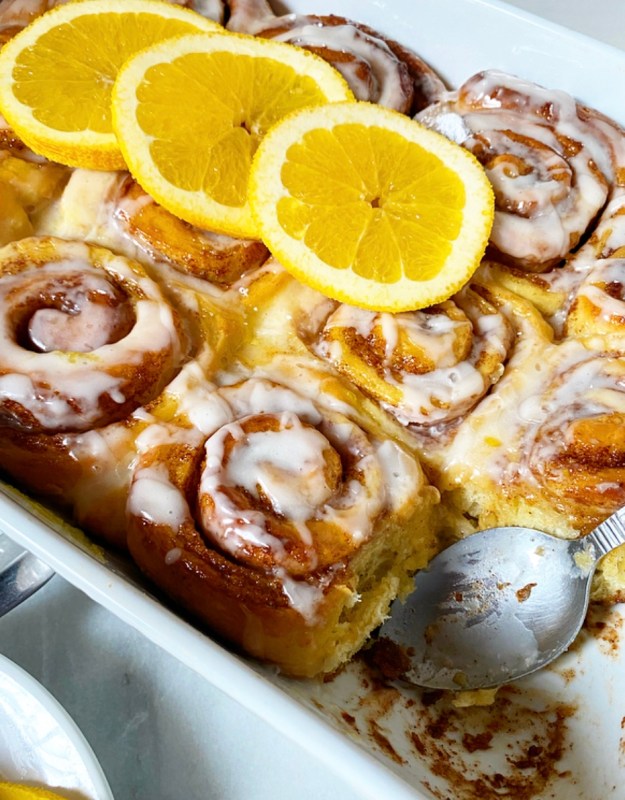 Turns out, I love Orange Cinnamon Rolls made with real fresh oranges. Like really, really love them. I mean, what’s not to love about fluffy, buttery, orangey cinnamon rolls?!
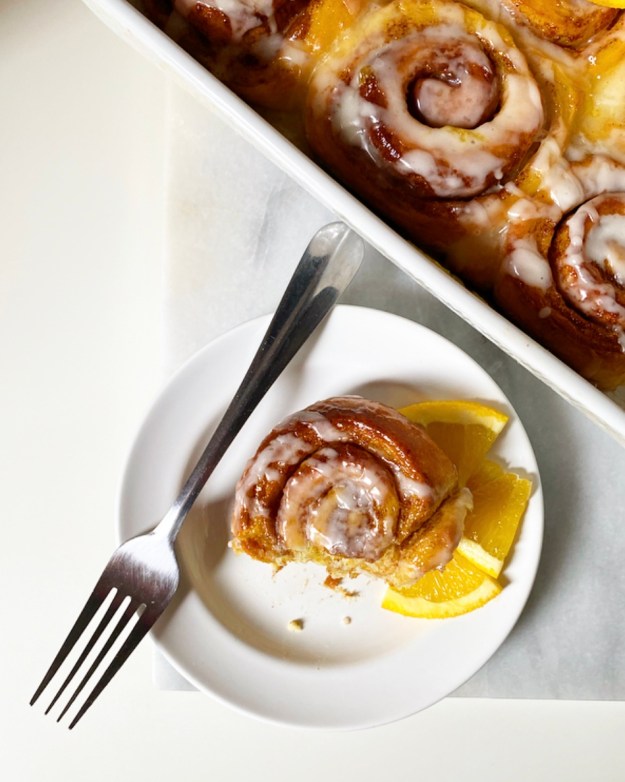 I’m over the moon for these, y’all. There’s orange zest in the dough and cinnamon filling, and orange juice in the glaze and the icing! Yes, you read that correctly, these babies have a glaze *and* an icing! I did this on last year’s
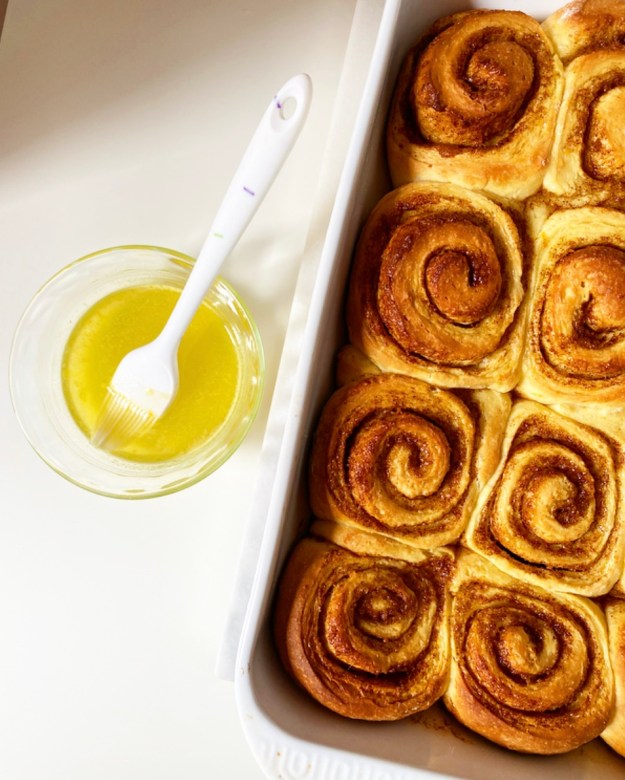
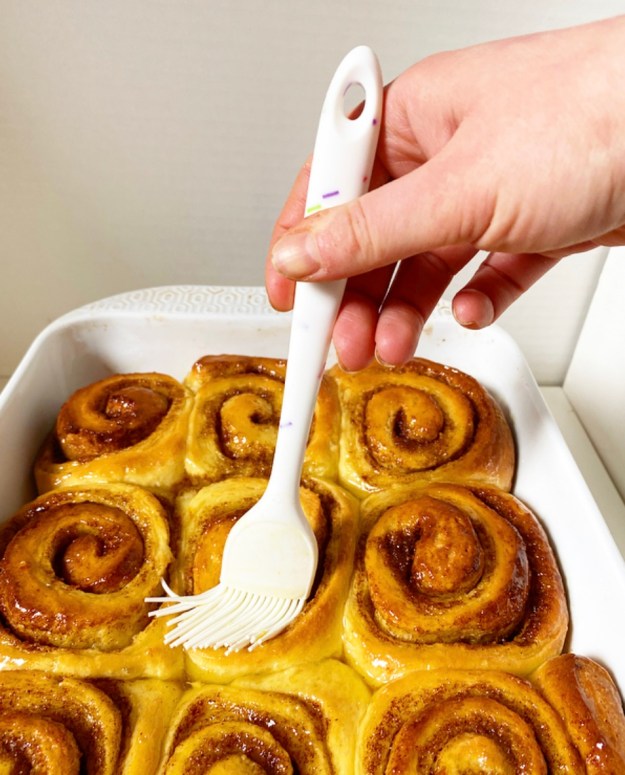
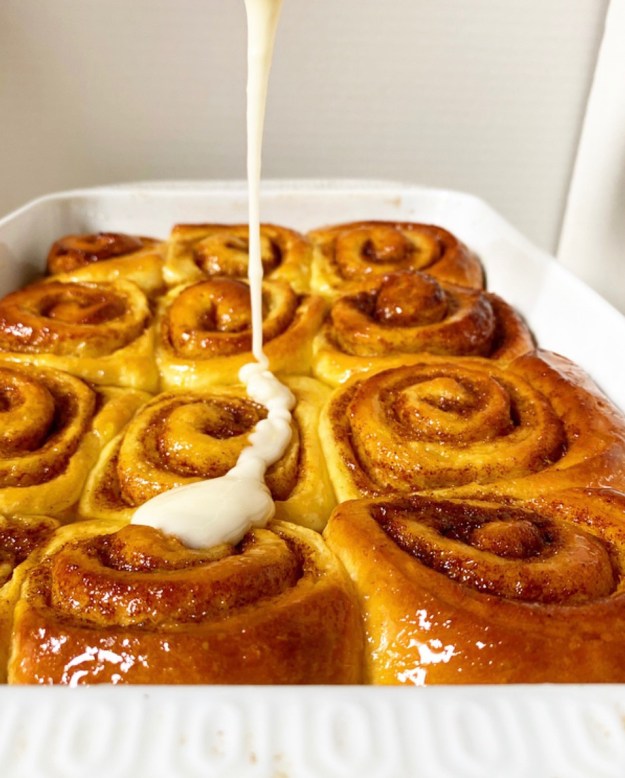
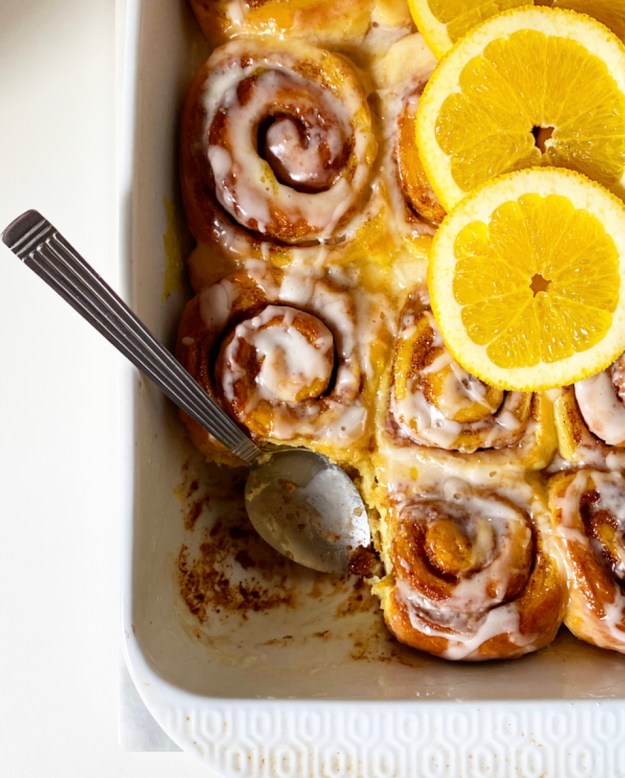 Just after you pull your rolls from the oven, paint them with the orange glaze so they get glossy and soak up all that sticky orange flavor. Let that absorb for a few minutes and then hit them with a simple orange icing. This goes without saying, but yes, you can double it.
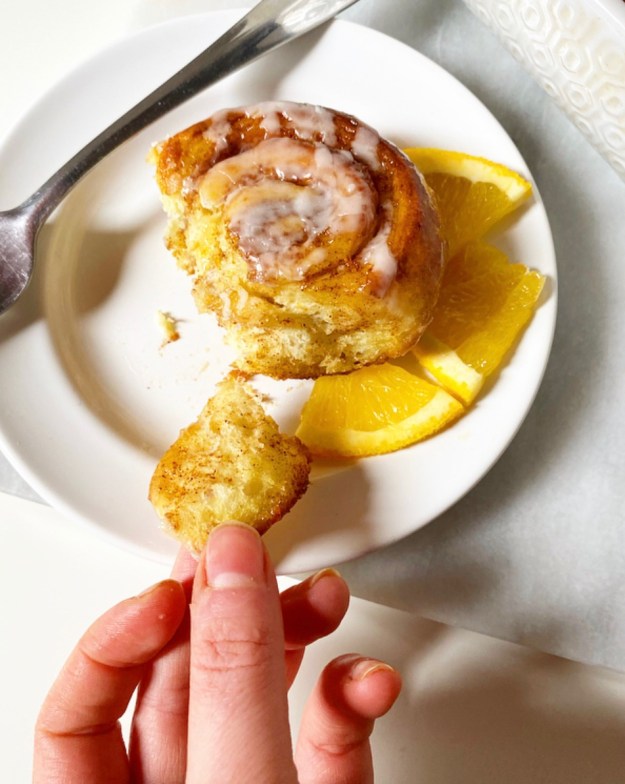 And then, well, you know what to do.
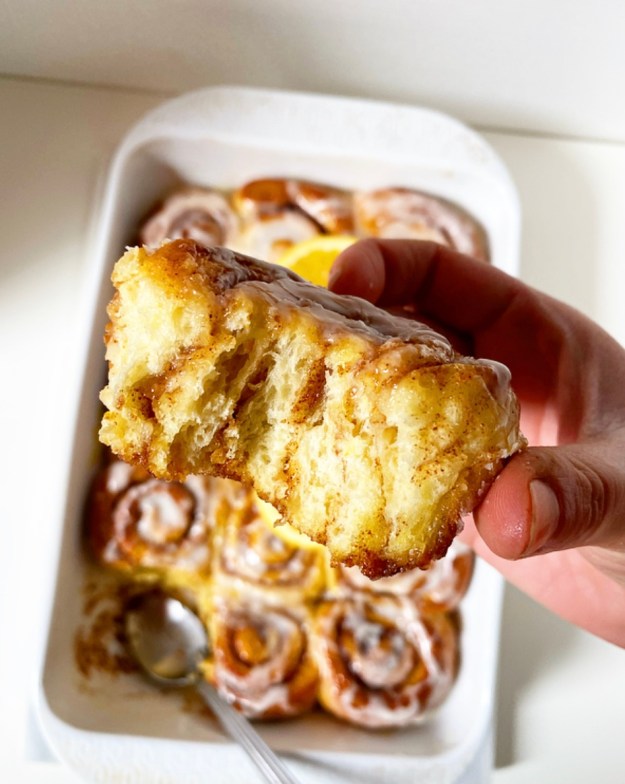


 Happy New Year! This post is coming at you from the recent past—December 29th—so I hope no new terrible things have happened between then and this posting. 2020 was such a weird year. It started off okay, but quickly devolved to…well, whatever this is. I, for one, am hoping for hope in 2021.


 It feels weird to be posting Fourth of July recipes because of literally everything, but I’m doing it anyway. I mean, none of them are red, white and blue…
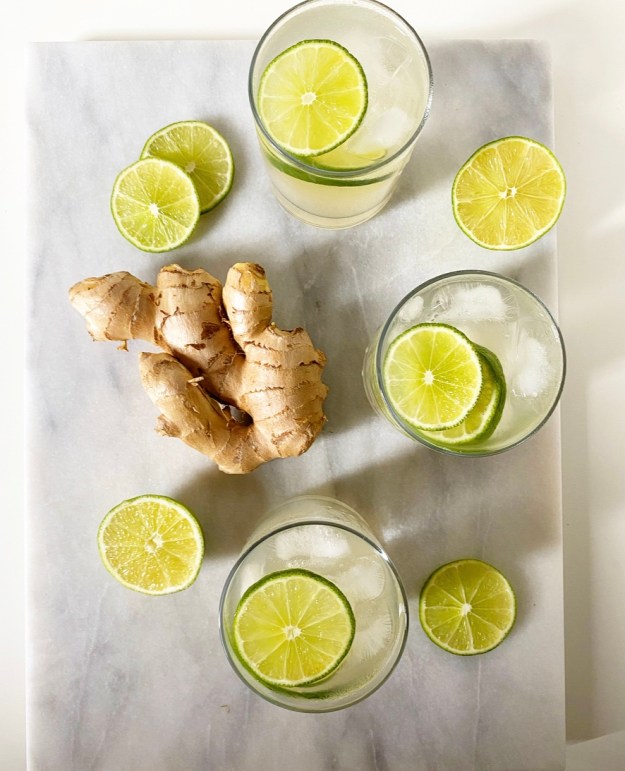
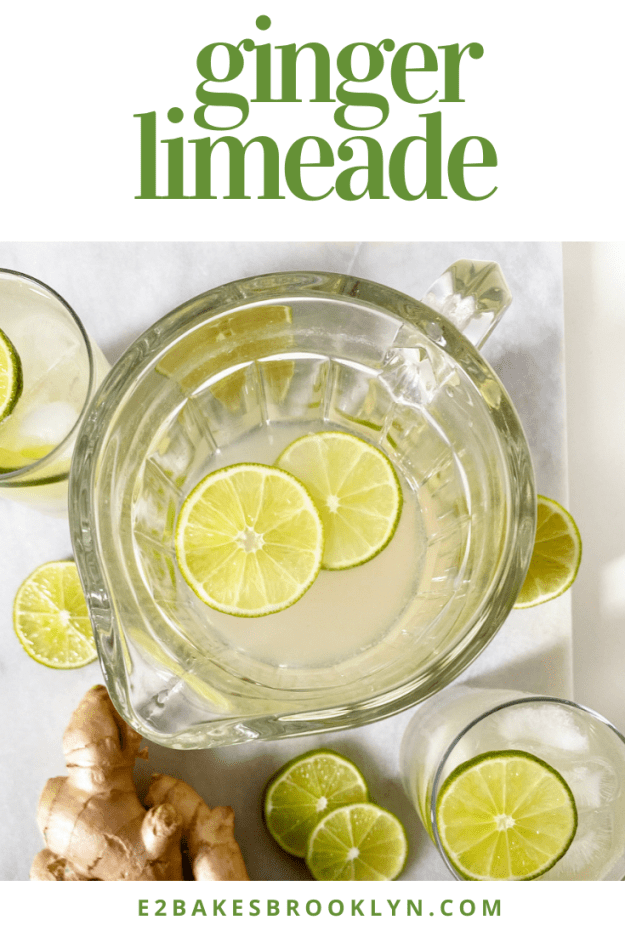
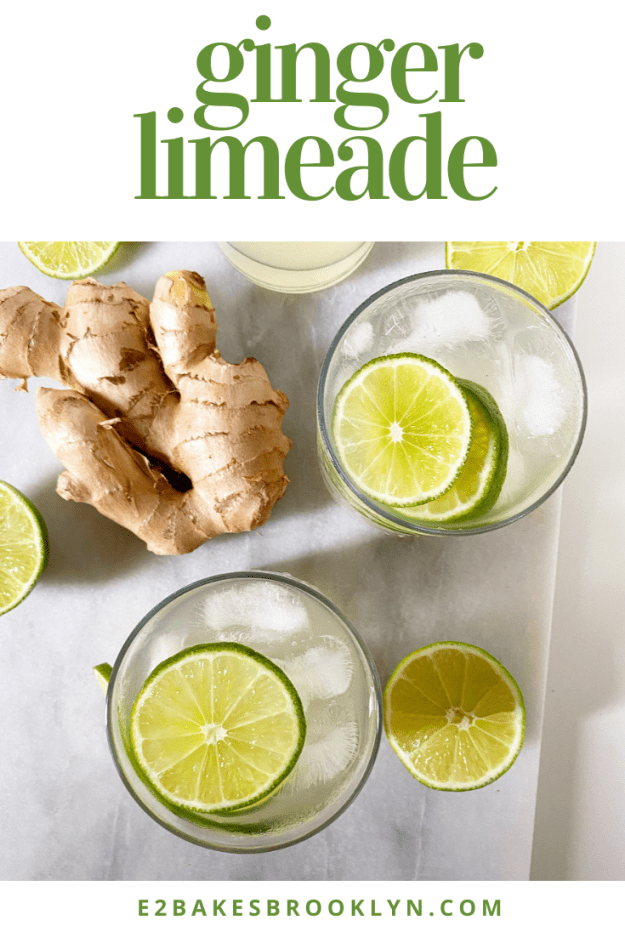
 Ginger Limeade is a perfect summery option for this weekend or any weekend. Crisp and light with a zippy ginger finish, Ginger Limeade would be a great addition to your (socially distanced) Fourth of July. It’s simple to make and a bit more sophisticated than your average non-alcoholic summertime beverage. I love a
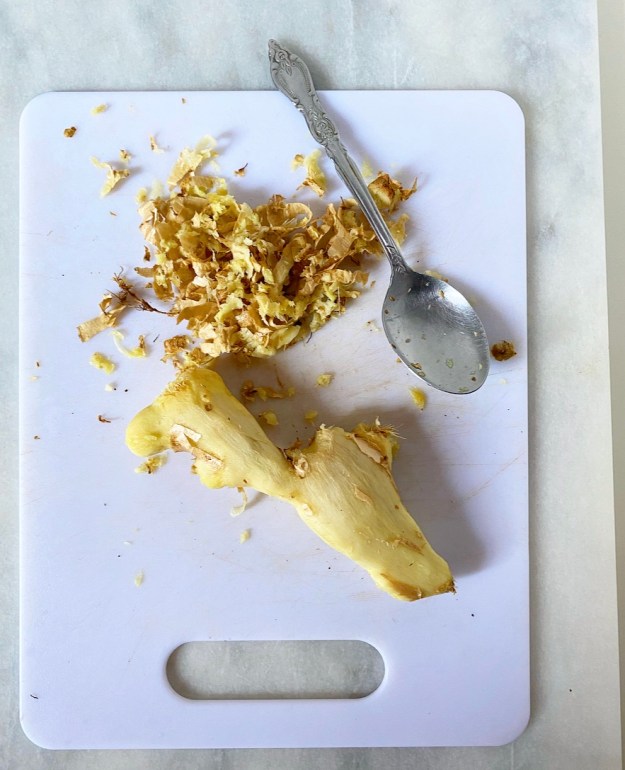

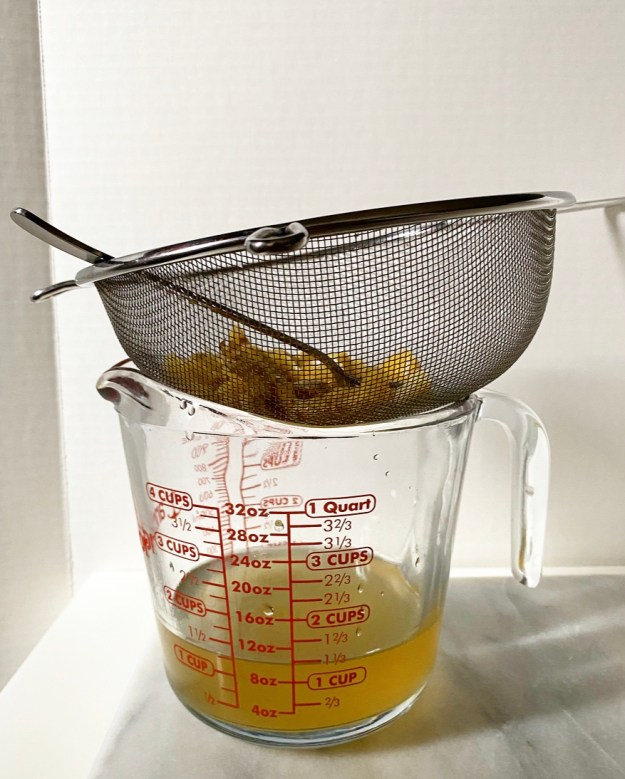 Ginger Limeade starts with a homemade ginger simple syrup. It’s as easy as combining sugar, water and sliced fresh ginger in a 1:1:1 ratio, simmering it and letting it steep until completely cool. You can use this syrup to make homemade ginger sodas, put it in milkshakes, or liven up some iced tea.
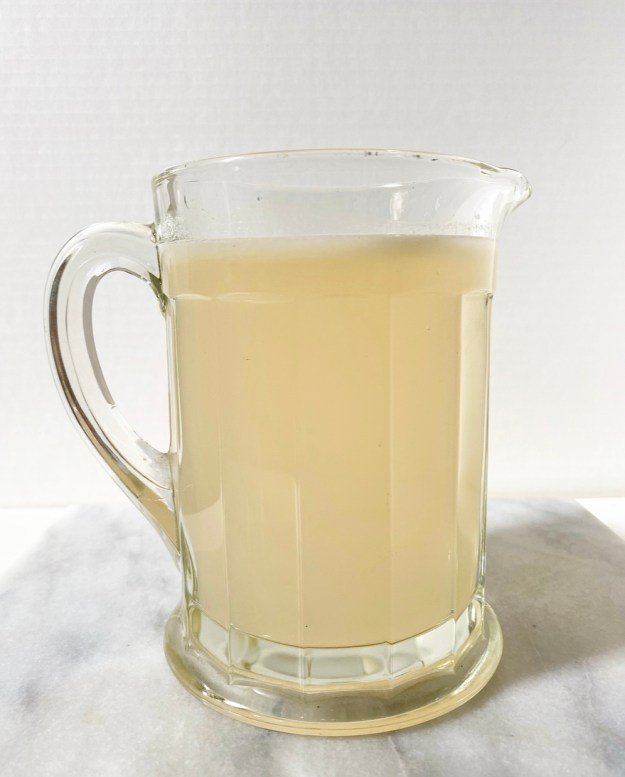
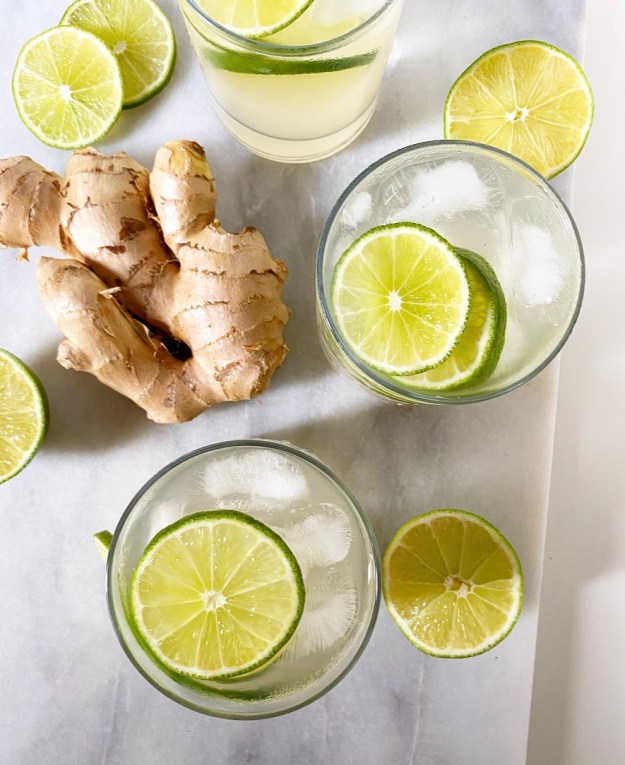
 Today we’re combining the syrup with an equal part (1 1/3 cup) of fresh lime juice and a few cups of cold water, then pouring it over ice and floating lime slices on top. Yum!
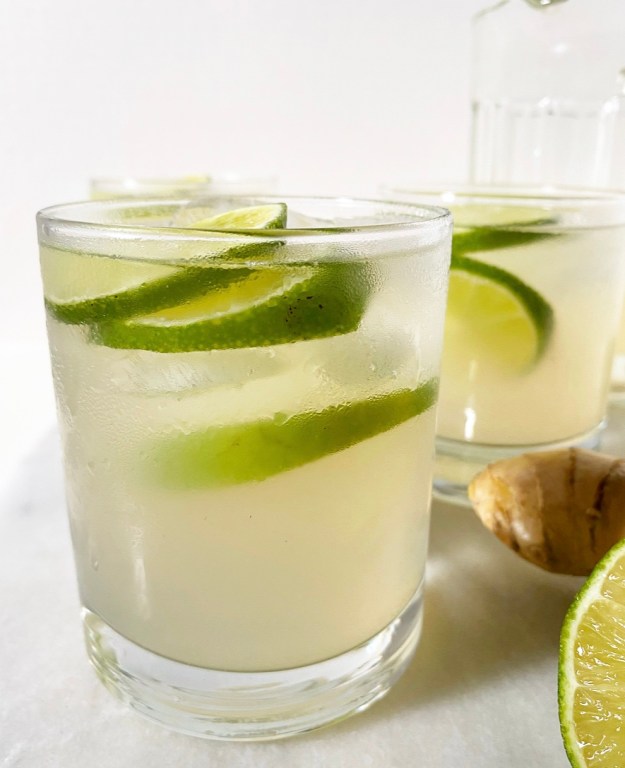 As with most beverages, Ginger Limeade is easily customizable. I think the 1:1 ginger syrup to lime juice ratio allows both to shine, but feel free to adjust them up or down to your preference. If you want to jazz it up, use sparkling water instead of still.
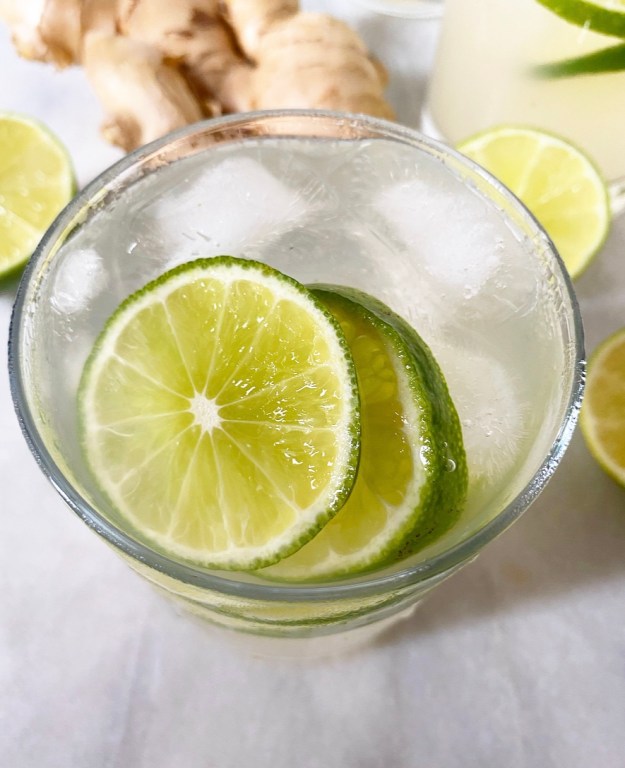 Ginger Limeade is the sort of thing you can sip during a cocktail hour, have by the pool, or pour into a large mason jar and take to the beach. Not to be Debbie Downer, but keep in mind that lime juice can burn your skin when exposed to sun. Yes, really.