I want you to know that these took me a while—like 24 test batches, and also years of making subpar pancakes and wondering if there was something wrong with me or if I should give in to a lifetime of Bisquick.
How difficult could pancakes from scratch possibly be? Well, not difficult at all, it turns out. I just had to stop nitpicking and get out of my own damn way. Very good, very easy Buttermilk Pancakes happen when I stop nitpicking and get out of my own damn way. These Buttermilk Pancakes are on the thick and fluffy side of things—perfect for piling high with butter and maple syrup. They are so soft and tender that I can’t get enough, which is a very good thing considering that I have 24 batches-worth triple-wrapped in plastic and stacked into columns in my freezer. I’d invite you all over for pancakes and Sahadi coffee if inviting blog friends over to eat reheated leftovers weren’t extra weird. Also, the whole pandemic thing.
 Anyway…I didn’t reinvent the wheel here. Flour, sugar, baking powder & soda, salt, buttermilk, melted butter, eggs, and vanilla—those are the ingredients you’ll find in most buttermilk pancakes, including mine. You’ll notice that the volume of wet ingredients far surpasses the dry, so these are fluffy but not heavy or rubbery.
 I don’t have any magical tips for you except to rest the batter for a few minutes (it will change dramatically as the gluten develops), make sure your surface isn’t too hot, and don’t cook your batter in too much fat. That last bit of advice seems to be the secret to evenly-browned pancakes, at least when it comes to this recipe. I brush the pan with oil and then wipe out any excess with a paper towel before pouring batter.
 These are buttermilk pancakes, so I tested them primarily with full- and low-fat buttermilk. If you don’t have buttermilk on hand, you can use a vinegar/lemon juice + milk substitute. Your pancakes will be a little thinner than mine, but they will still be delicious. I also had pancake success with a mixture of 1 cup sour cream and 1 cup milk. Yogurt and milk would probably work just fine, too. We’re making pancakes, not doing rocket science–work with what you have.
Oh, and don’t worry about whisking out every last lump in your batter. In fact, you absolutely shouldn’t do that. Normally we’d want those bits of unincorporated flour and leaveners gone, but here they keep the gluten from overdeveloping and the baking powder and soda from all reacting at once. All of that is a very long way of saying that a few lumps keep our pancakes tender and fluffy instead of tough and chewy. You may think this batter is particularly thick, or at least I do (maybe from my lifetime of Bisquick?), but it’s still pourable. I find that rotating my wrist/the measuring cup 90 degrees while pouring batter onto the pan helps to develop a good round shape…not that I’ve ever discriminated against a pancake based on its shape. Pancake positivity all the way.
 As for when to make and eat Buttermilk Pancakes, I know the weekend is traditional, but days are just days now, and there’s never really a bad time for pancakes, now is there? Maybe, just this once, be like me–Stop nitpicking and get out of your own damn way. Very good, very easy pancakes happen when you stop nitpicking and get out of your own damn way.
Buttermilk Pancakes
makes about 18 pancakes
1 2/3 cups all-purpose flour
2 tablespoons granulated sugar
1 1/2 teaspoons baking powder
1 teaspoon baking soda
3/4 teaspoon Kosher or sea salt
2 cups buttermilk, room temperature*
1/4 cup (1/2 stick) unsalted butter, melted
2 large eggs, cold or room temperature (both work)
1 teaspoon pure vanilla extract
canola or vegetable oil, for cooking
For serving:
pats of butter
maple syrup
Preheat oven to 200F. Line a rimmed sheet pan with parchment. Set aside.
In a large mixing bowl, whisk together flour, sugar, baking powder, baking soda and salt.
In a medium mixing bowl or large measuring cup, whisk together buttermilk, melted butter, eggs and vanilla. Add wet ingredients to dry and whisk until no streaks of flour remain—there will still be some lumps. Let batter rest 5-10 minutes.
Heat your griddle or pan (I used anodized non-stick and cast iron) over medium heat for a few minutes, until heated through. Brush with oil (or grease lightly), then wipe excess out with a folded paper towel or dish towel.
Stir rested batter one or two strokes. Pour 1/4 cup increments of batter on greased pan. Let cook 2-3 minutes, until bubbles are forming and they are turning golden. Flip with a spatula and cook for 2 minutes, or until the bottom is turning golden. Remove to prepared baking sheet and keep warm in the oven until serving.
Continue making pancakes with remaining batter, greasing the pan only as necessary.
Serve immediately with pats of butter and maple syrup.
Leftover pancakes may be stacked in threes, triple-wrapped in plastic wrap and frozen for a couple of months. Discard plastic and microwave 2.5 to 3 minutes before serving.
Note:
I take the chill off my buttermilk by microwaving it for 35-45 seconds and giving it a stir with a fork before using.

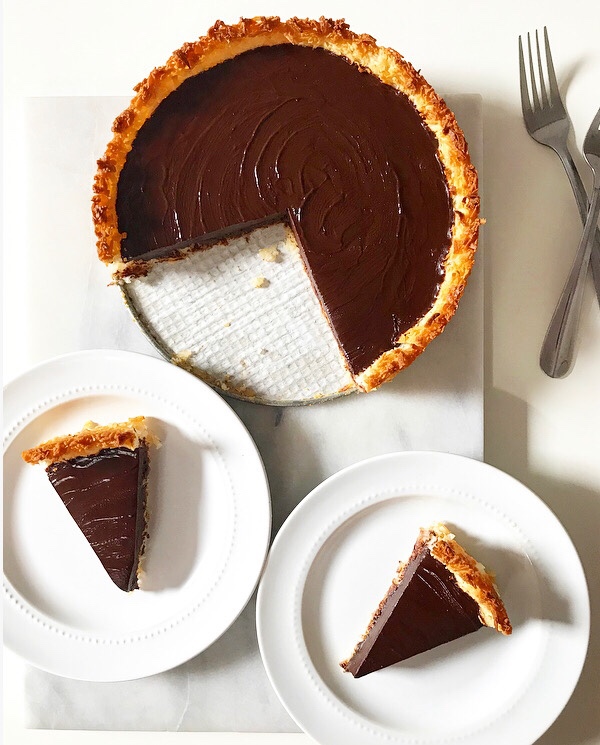
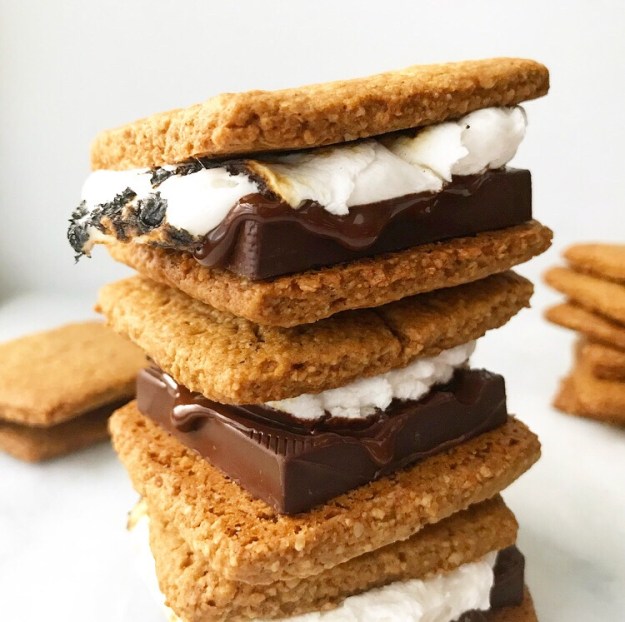
 I had never seen
 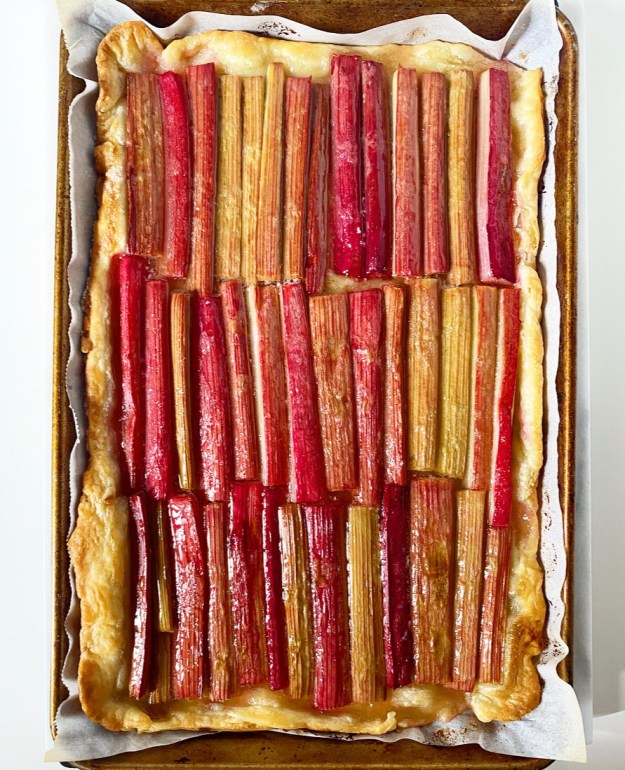 I love tarts like
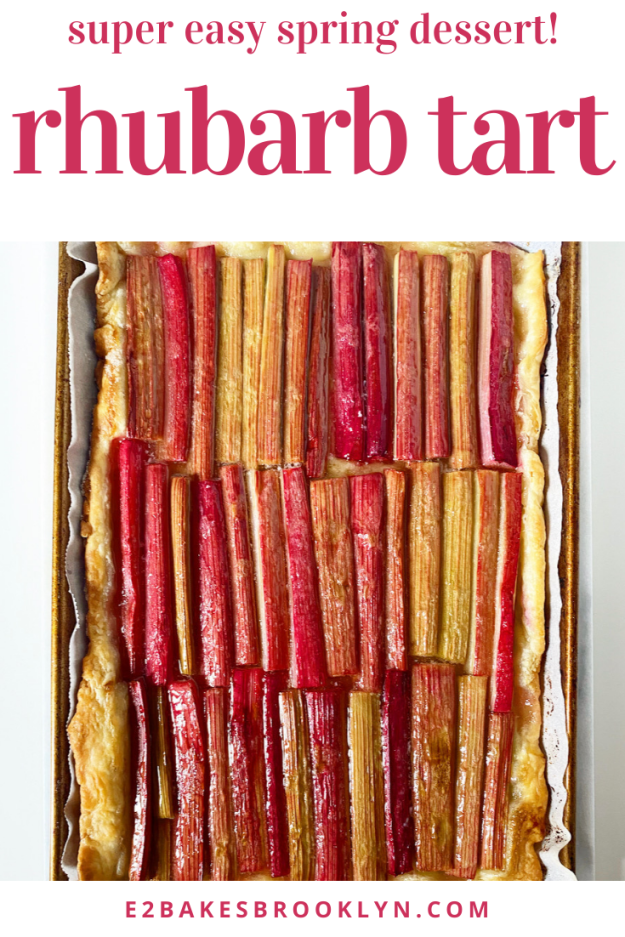
 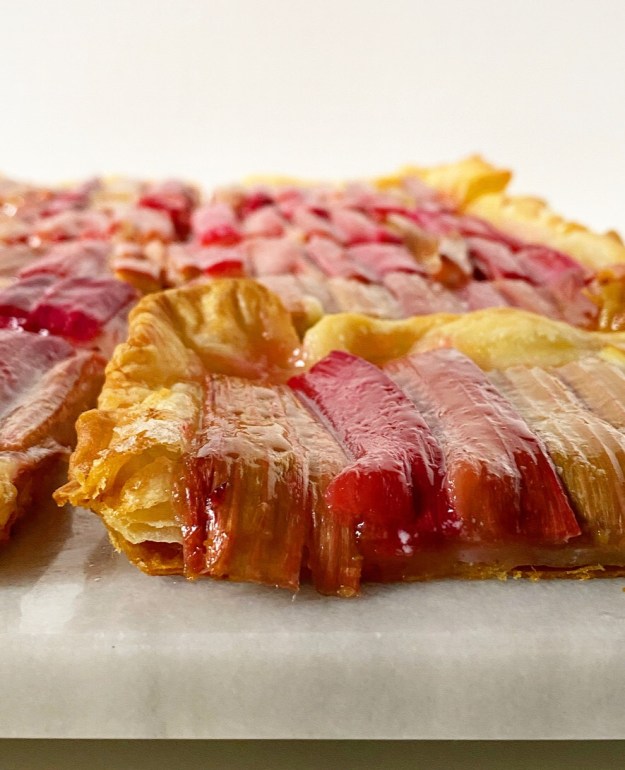 Regarding the crust, you can follow my lead by making your own flaky, buttery rough puff, or make it easy and use thawed frozen puff pastry. Don’t have European butter in this pandemic? Neither do I! Use whatever you have.
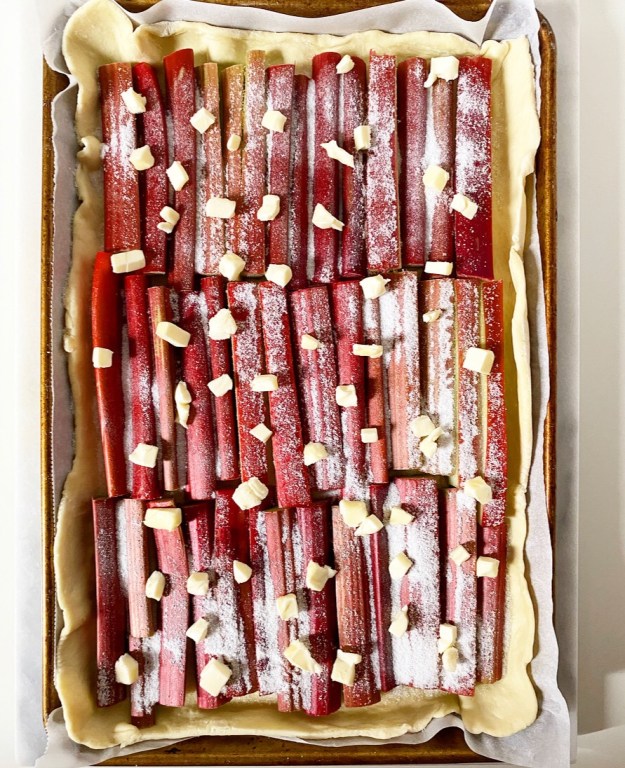
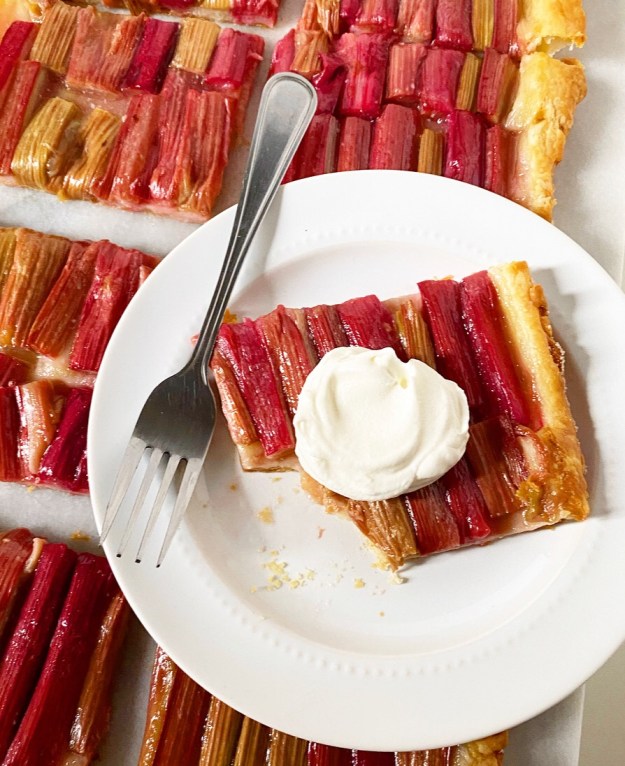
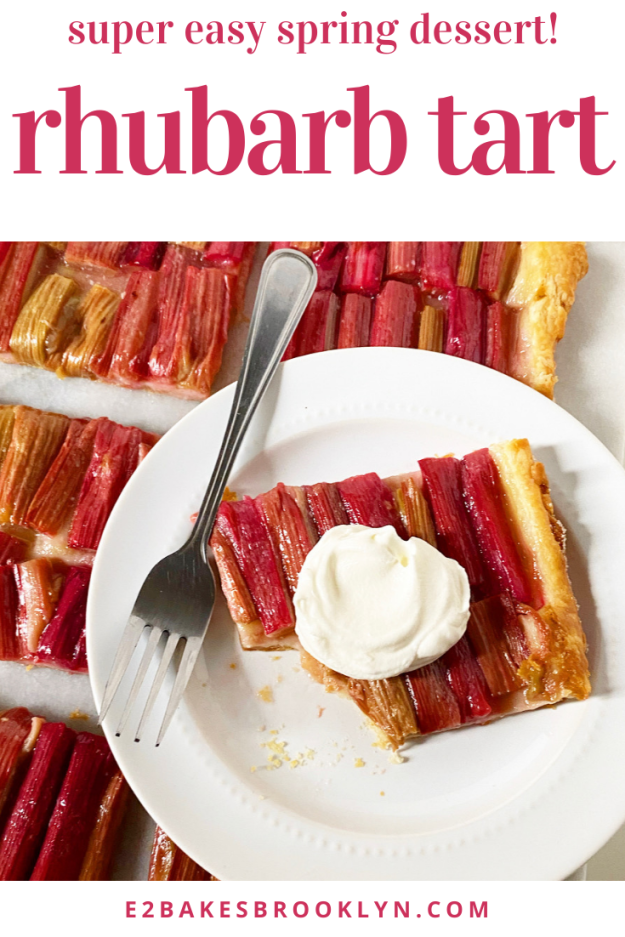
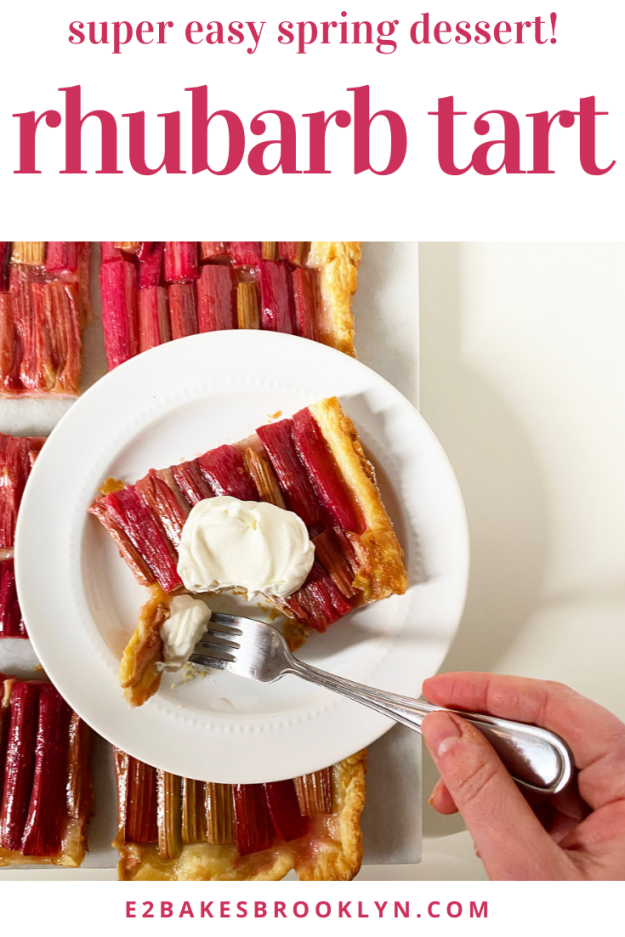
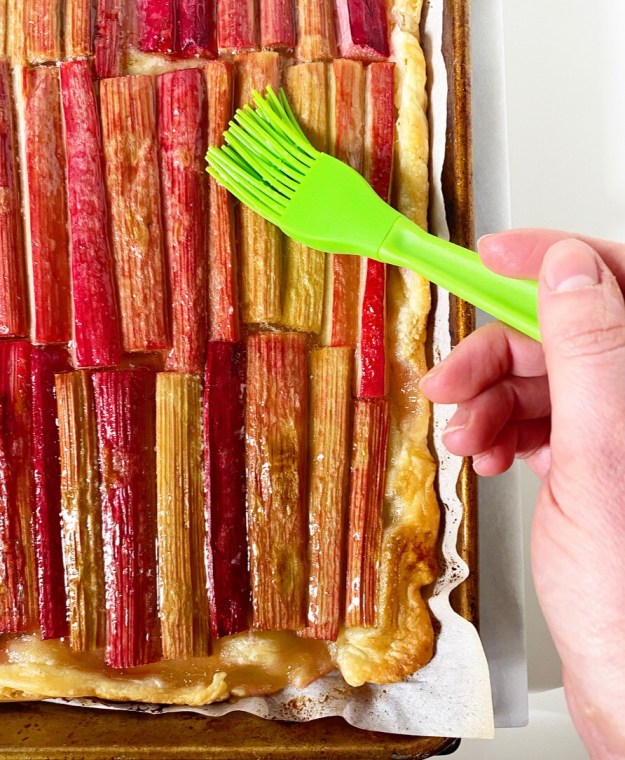 The filling couldn’t be simpler. Rhubarb stalks are sliced into thin pieces, arranged on the pastry in whatever fashion makes you happy, sprinkled with sugar and dotted with butter. Bake the tart until the crust is golden and the rhubarb is soft, then paint on warm honey for a little extra sweetness and shine. Since this tart doesn’t have any berries to offset the tanginess of the rhubarb, that hint of honey goes a long way.
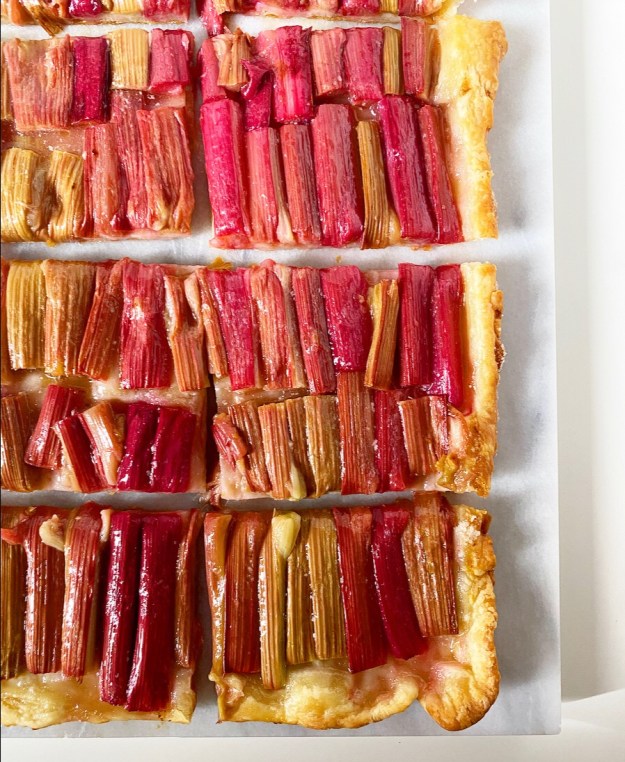 Where pies are thick and take hours to cool, this tart is so thin that it only needs 45-60 minutes to reach room temperature. The flavor is more tangy than it is sweet, but the flaky crust and a dollop of
 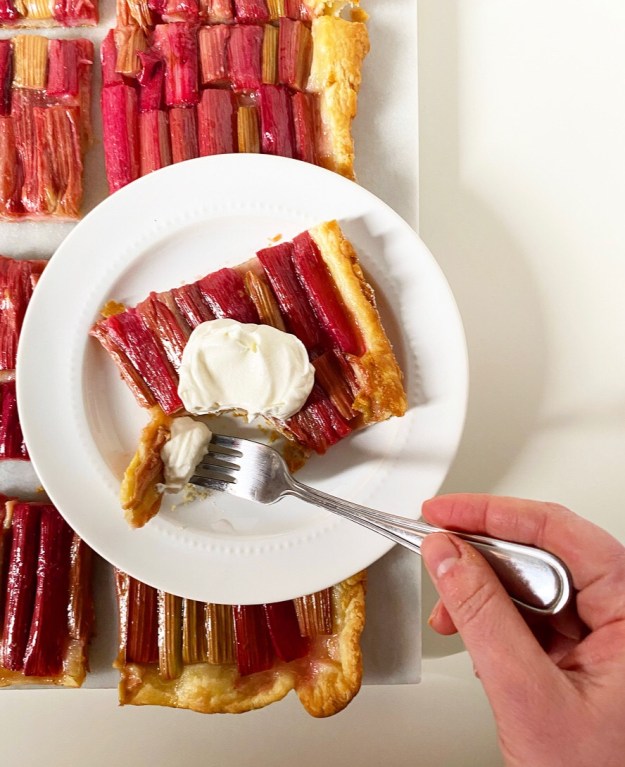 Need a reason to make a Rhubarb Tart? Well, first of all, we are in a pandemic and you can have whatever dessert you want and anyone who says otherwise is flat wrong. But also, it’s perfect for celebrating literally any day of the week or that you put on real pants or that you didn’t see anyone not wearing a face-covering today.
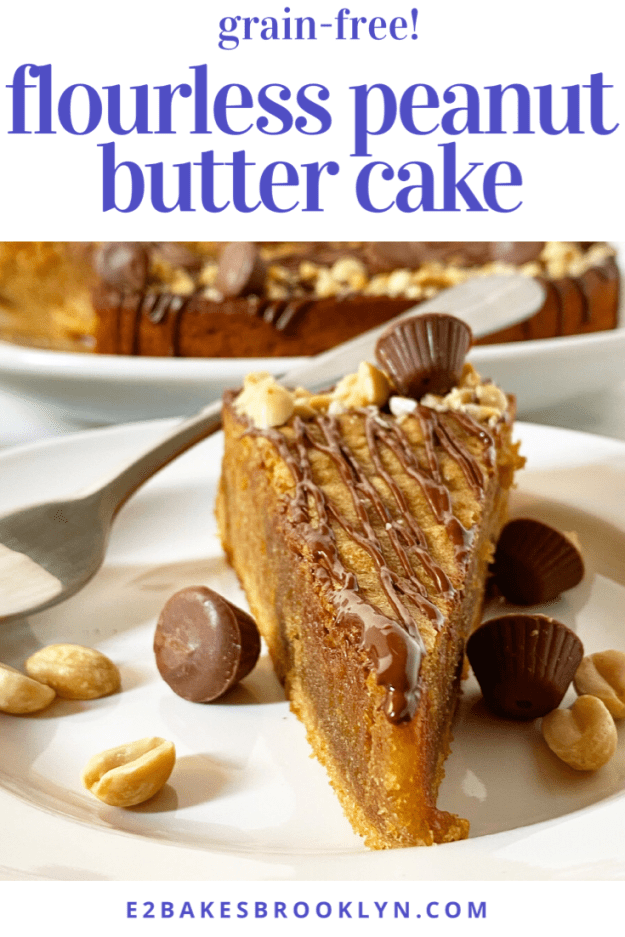
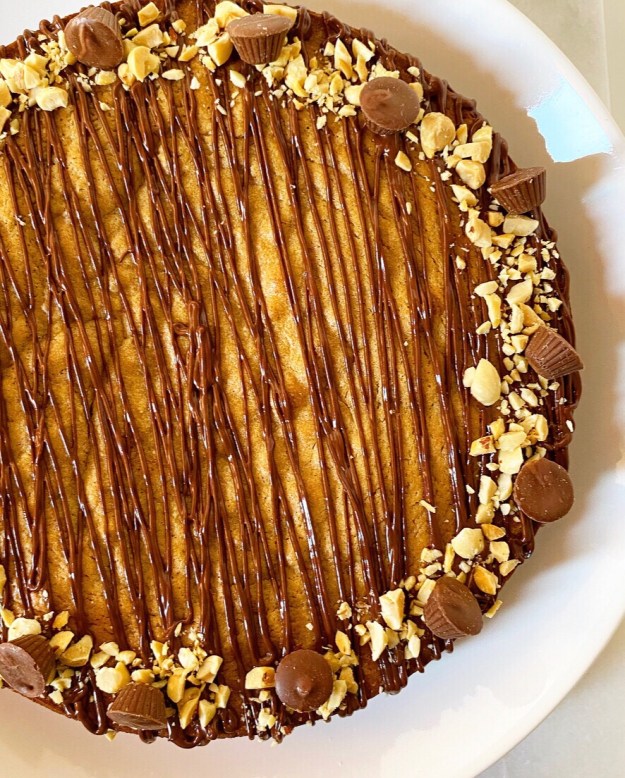 If you are into rich, thick, salty-sweet, intensely peanut buttery peanut butter things…well, let me introduce you to your new favorite cake. This Flourless Peanut Butter Cake is the sort of thing that you can whip together for a casual night in (also known as every night right now) or dress it up for a birthday or dinner party (when dinner parties are a thing again).
 This recipe is a play on the three ingredient
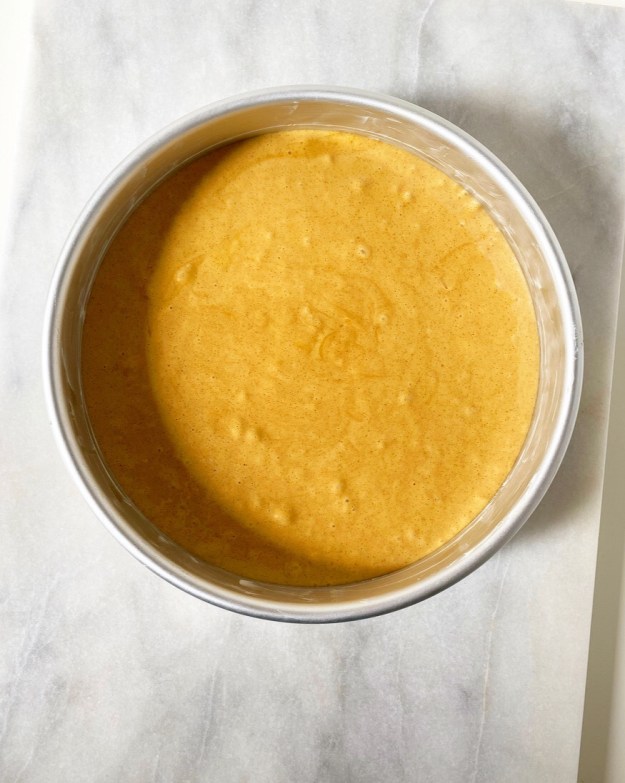
 This cake is almost exactly the same thing, except that I add a few more eggs, a pinch of salt and a little vanilla, and bake it all up in a cake pan. The result is a little chewy at the edges and tender in the center—think somewhere between
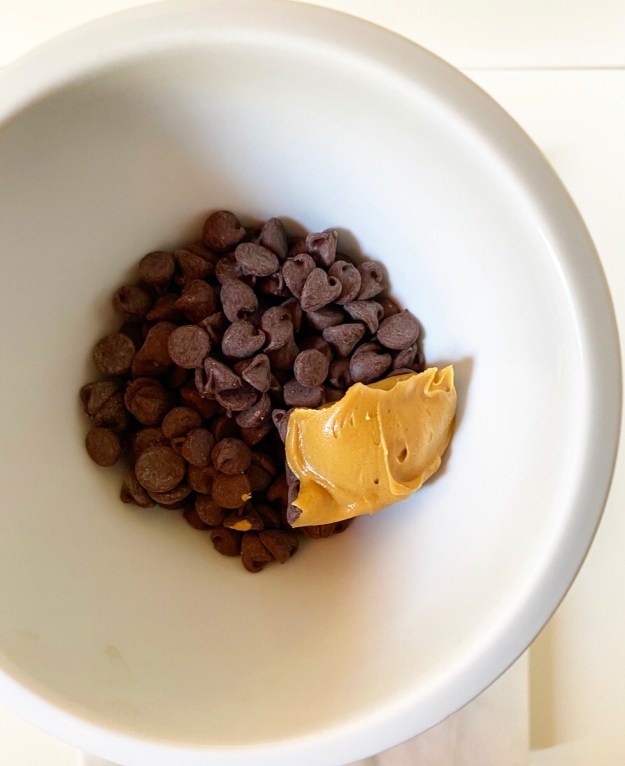
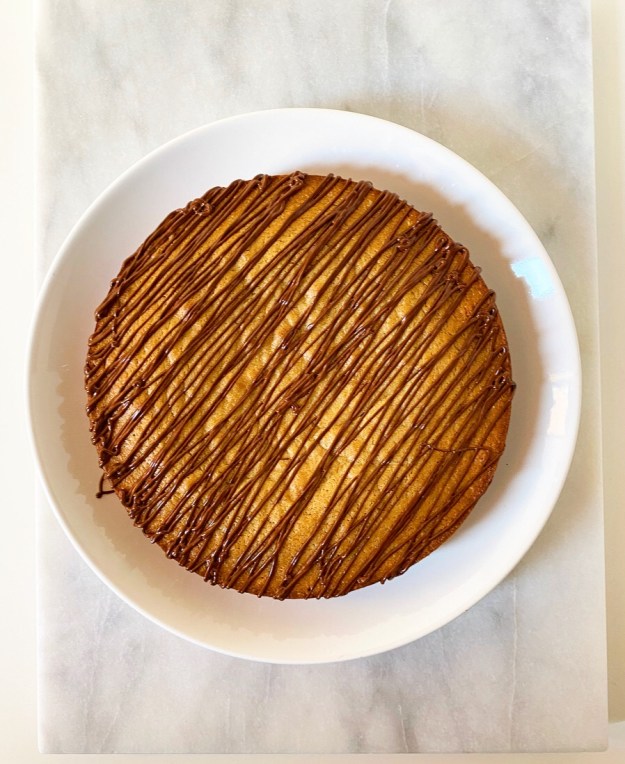 After the cake has cooled, garnish all up to you. Leave it plain, dust with powdered sugar, serve with ice cream, make it into
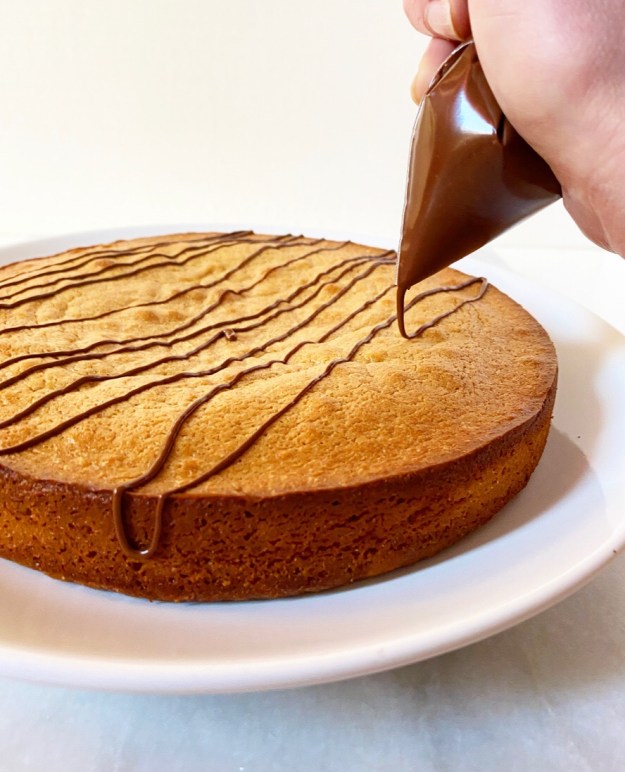
 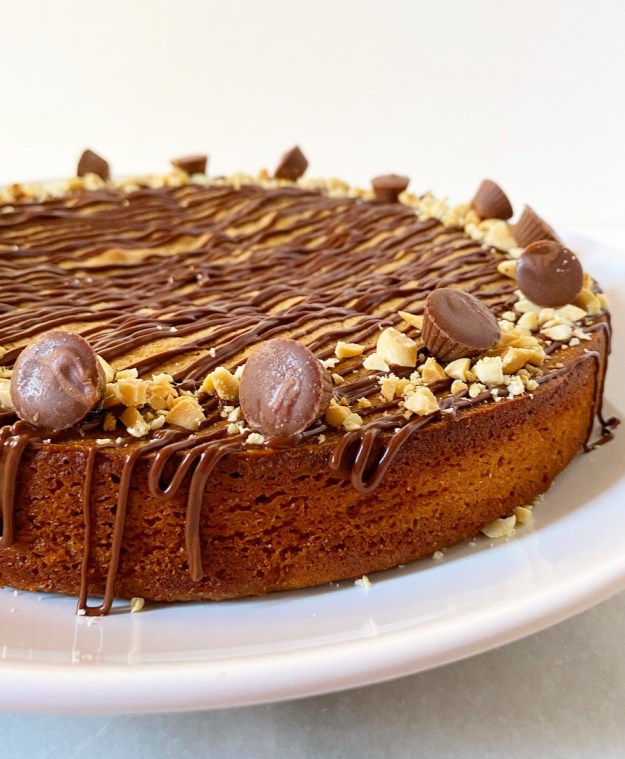 Today marks fifty days of lockdown in NYC, so I felt the need to jazz it up a little. I nuked chocolate chips and peanut butter until smooth, then loaded it into a bag, snipped a tiny corner and drizzled til I liked what I saw. The border is just chopped roasted peanuts and mini peanut butter cups from Trader Joe’s. I know it’s gilding the lily, but like…what else are we doing seven weeks in?


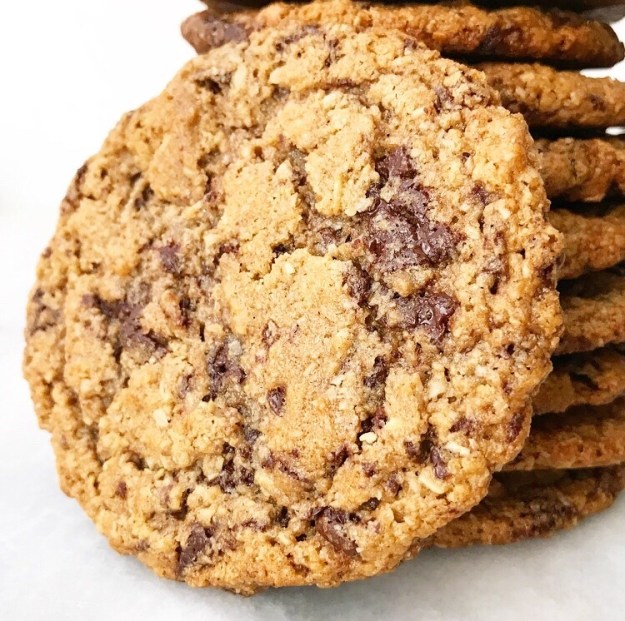
 I posted my best-yet
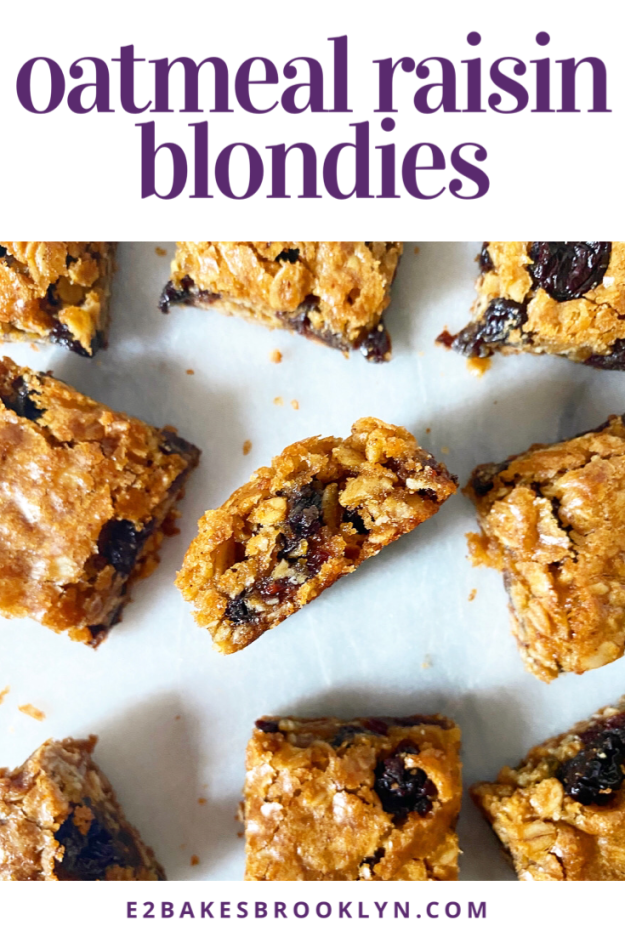
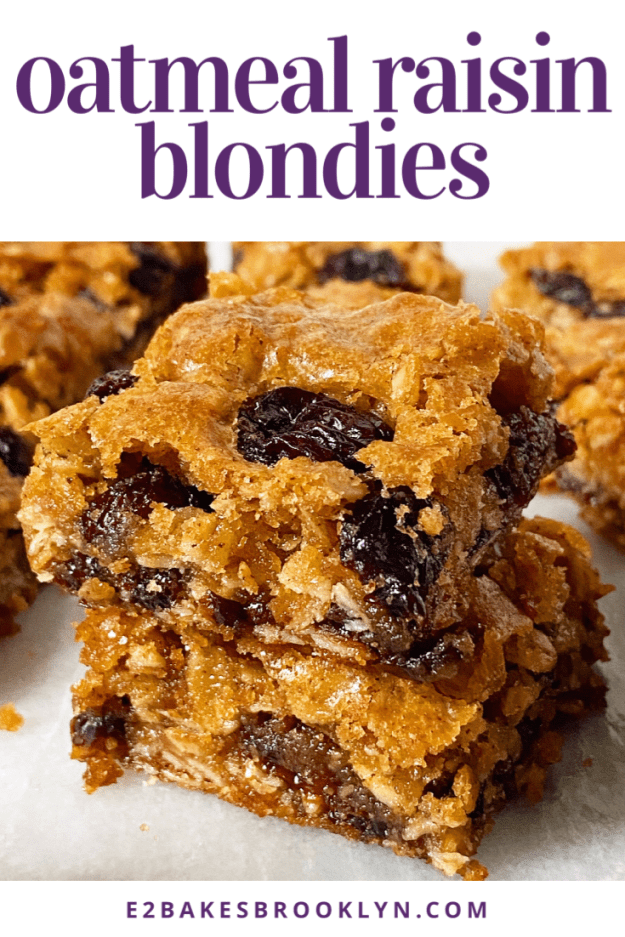
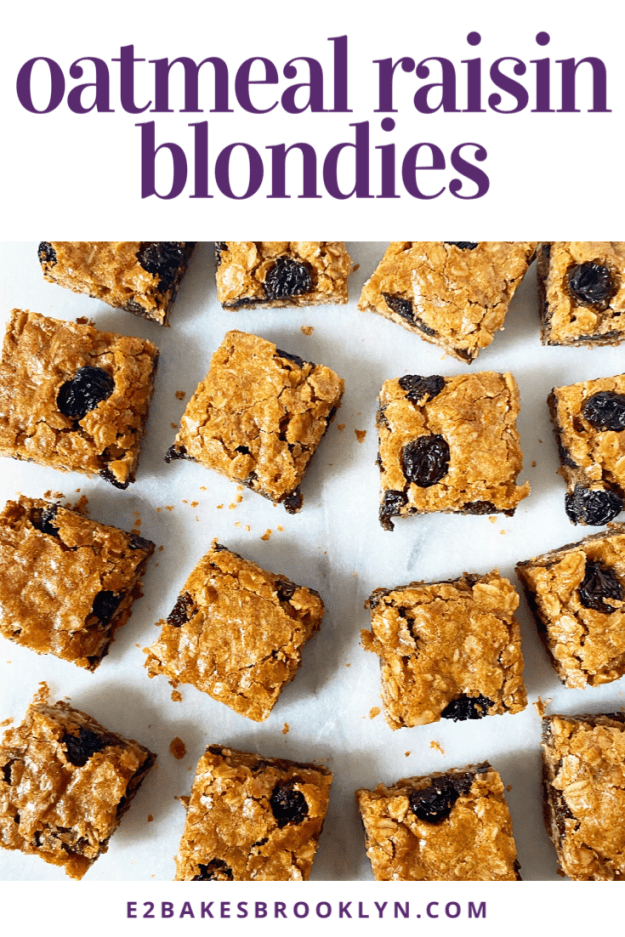
 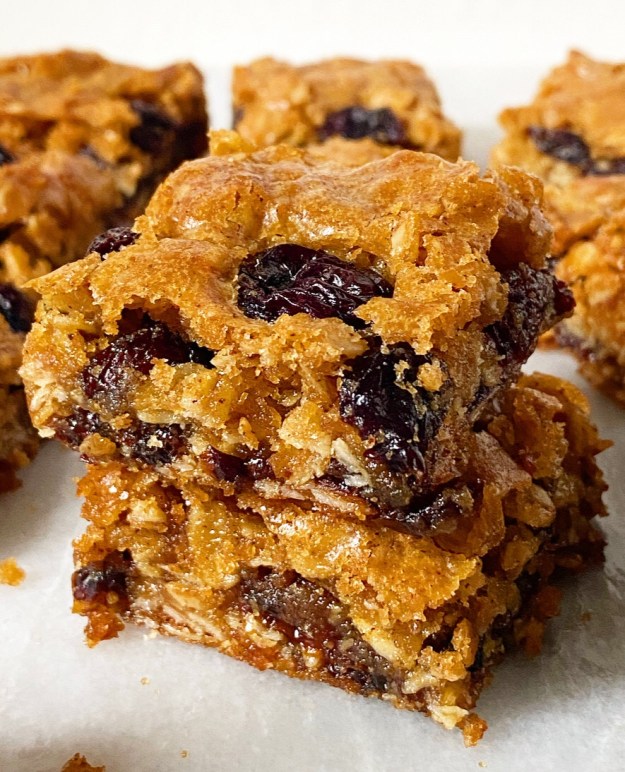 If you are an Oatmeal Raisin fan, you’ll love these sweet little bars. They’re super chewy thanks to low flour content, a glut of old-fashioned oats, and a high brown sugar-to-dry ingredients ratio. The raisins are plumped in simmering water before mixing for maximum flavor and texture.
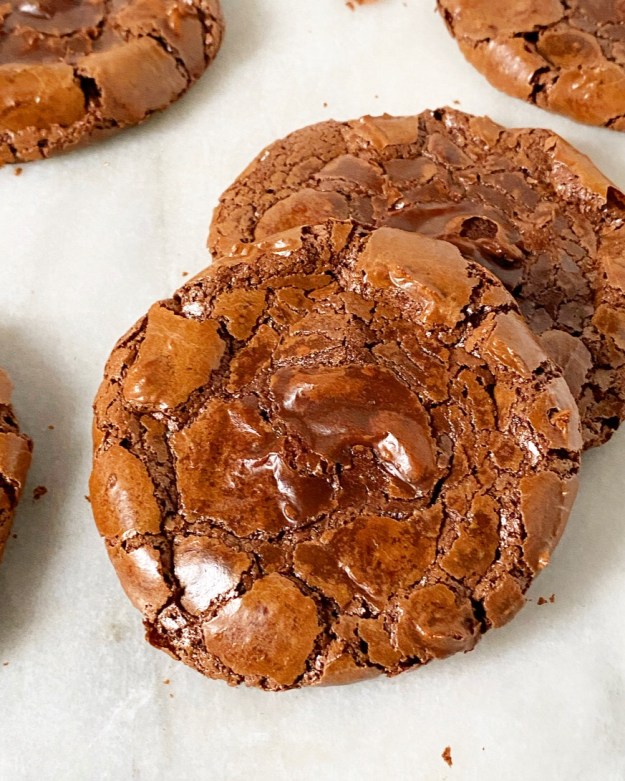
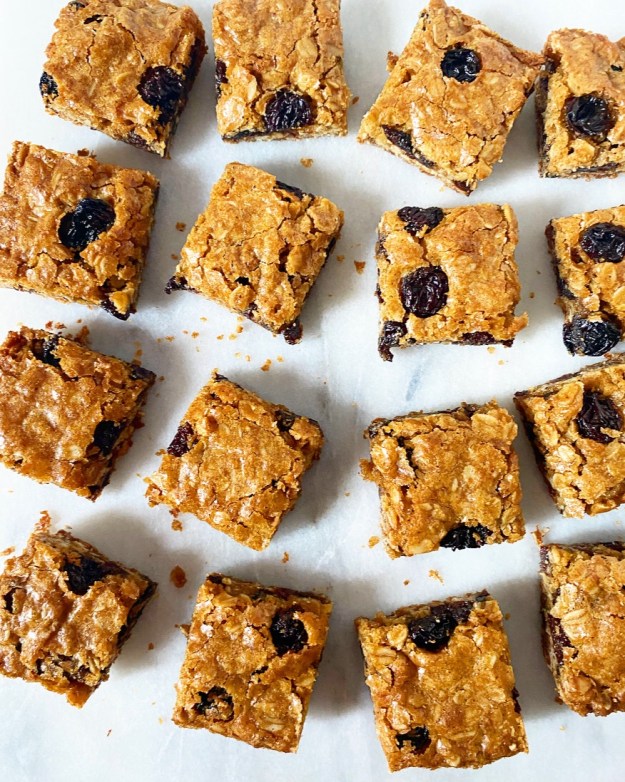 Deep toasty flavor comes courtesy of brown butter and toasted oats. You could, of course, just melt your butter and use your oats straight out of the bag, but spending a few minutes drawing out their nutty richness makes a huge difference in the final outcome. A teaspoon of cinnamon rounds out the batter and makes these blondies pretty irresistible!
 These blondies bake up in 25 or so minutes, until the top is puffed and a little glossy. Let them cool until room temperature and then slice into pieces. The tops will crack in the best way and the middles will be dense and…well, they’re *very* good. The perfect low-maintenance sort of thing to make on this quarantine Wednesday.