Category Archives: Entertaining

Chocolate Cake with Malted Chocolate Buttercream

 My birthday is this weekend! I’m going to be 31 😁 I feel a little old, but I’m also really enjoying this phase of my life. 

In my 31st year, I have:

  • seen my family on six separate occasions (together and individually), including my 30th birthday trip to Santa Fe, a super-secret surprise trip to Austin for E3’s birthday, and visits to NYC from my mom, both sisters, and sister-in-law. That’s the most time I’ve spent with them since I moved to NYC in 2007. The older I get, the more I appreciate the amazing people who made me who I am.
  • spent some time off the grid in Maine, and enjoyed it way more than I ever expected. I can’t wait to do it again in a few weeks.
  • catered a dinner party for 300 people. I had three amazing helpers, and it went off without a hitch despite the six weeks of panic that preceded it. I hope to do it again this year…because I am insane.
  • moved. And moving in New York is horrible. Heck, moving anywhere is horrible. But I love my new apartment. Shoutout to my mom for coming to help me on the coldest weekend ever.
  • navigated my way through some major life changes and lessons with some modicum of grace and dignity.
  • opened my own Netflix account. #adulting
  • realized that I am still figuring out who I am. I hope this never ends.
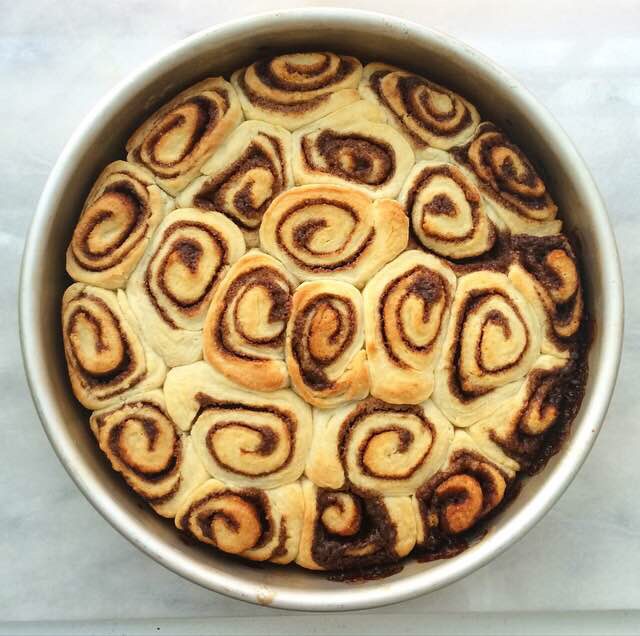
  • made a lot of cookies. And eaten a lot of cookies.
  • really fallen in love with my friendships. My friends really stepped up and took care of me this year when I didn’t feel like I could do it myself. There’s nothing like laughing ’til you cry when you feel like your life is a mess. Thanks, guys.
  • started a baking blog. I dreamt of having this blog for six years before hitting “publish.” Thank you for reading, liking, sharing, and making the recipes. Thank you for making this little corner of the Internet what it is: a place filled with sugar and ridiculousness. Without you, I’m just talking to myself. 

…that got a lot mushier than I intended. 

This weekend, I’ll be celebrating at a cookout with those I hold nearest and dearest. My friends are making dinner, and I can’t wait! They offered to make dessert too, but being me, I just couldn’t leave well enough alone. I’ll be there with pie 😊

Of course, I thought about cake, but with the heat we’ve been having, I am afraid the frosting would melt. But I just can’t let my birthday go by without cake, so I’ve been celebrating a little early with this Chocolate Cake with Malted Chocolate Buttercream. The cake is moist, fluffy, and so, so easy. The best part? No mixer required! I’ve been making this cake for two years, and I can safely say that it’s the best chocolate cake I’ve ever had. And that’s coming from a self-proclaimed vanilla person. 

The frosting is a tribute to one of my very favorite things: chocolate malts. Oh yes, I love a chocolate malt. I just *have* to have one at least twice a month. It only seems appropriate that I’d use it as inspiration for my birthday cake frosting. This is a super easy chocolate buttercream with a hefty dose of malted milk powder. It’s creamy, dreamy, chocolaty, malty magic. If malt isn’t your thing, I recommend replacing the cup of malted milk powder in the recipe with an additional cup of confectioner’s sugar. It’ll still be delicious 😊 

As for decorating, I went for a sort of naked cake approach here, using the bulk of the frosting to frost the top and fill the layers. This recipe makes enough frosting to fully frost and fill a two layer 9″ round cake, if you’d like to cover the whole thing. If you want to pipe, you’ll need to make 1.5 times the recipe. No matter which route you choose to go, your cake will be fantastic.

If you don’t have a reason to make cake this weekend, I give you full permission to use my birthday as an excuse. We’re Internet friends after all. And friends who eat Malted Chocolate Buttercream together stay together, right?!

Have a great weekend! 

 Chocolate Cake with Malted Chocolate Buttercream
cake recipe adapted from Sally’s Baking Addiction
makes one two layer 9″ round cake

For the pan:
2 tablespoons neutral-flavored oil (I use canola)
2 tablespoons natural unsweetened cocoa powder

Cake:
1 3/4 cups all purpose flour
3/4 cup natural unsweetened cocoa powder (not Dutch Process)
1 cup granulated sugar
3/4 cup light or dark brown sugar
1 teaspoon baking powder
2 teaspoons baking soda
1 teaspoon Kosher or sea salt
1/2 cup neutral-flavored oil (I use canola)
2 large eggs, room temperature
2 teaspoons pure vanilla extract
1 cup buttermilk (low fat is fine)*
1 cup strong, hot coffee (decaf is fine)

Frosting:
1 cup (2 sticks) unsalted butter, softened to room temperature
2 cups confectioner’s sugar
3/4 cup natural unsweetened cocoa powder
1 cup malted milk powder (I use Carnation)
pinch of Kosher or sea salt
1 teaspoon pure vanilla extract
3-4 tablespoons heavy cream

chocolate chips, for decorating (optional)

Preheat the oven to 350F. Grease the pans. In a small bowl, use a fork to whisk together oil and cocoa powder. Use a pastry brush to paint the entire insides of the pans with the mixture. Set aside.

Make the cake batter. In a large mixing bowl to sift together flour, cocoa powder, granulated sugar, brown sugar, baking powder, baking soda, and salt. Set aside.

In a separate large mixing bowl, whisk together oil and eggs, followed by vanilla, buttermilk, and coffee. Whisk in dry ingredients in three installments, just until combined. Divide batter evenly among the pans. Tap full pans on the counter five times to release any air bubbles. Bake 23-27 minutes, until a toothpick inserted in the middle comes out clean.

Let cakes cool in pans for ten minutes before running a small, thin knife around the edges. Invert cakes onto cooling racks and allow to cool to room temperature.

Make the frosting. In a large mixing bowl, use an electric mixer to beat butter until light and fluffy (about two minutes). Beat in confectioner’s sugar, followed by cocoa powder. Mix in malted milk powder and salt, scraping down the bowl as necessary. Add in vanilla and 3 tablespoons of heavy cream, and beat on high for two minutes. Add more cream by the tablespoon until desired consistency is reached. Fill the layers and frost as desired. Decorate with chocolate chips, if desired.

Frosted cake will keep covered at room temperature for up to two days, and in the refrigerator for up to a week.

Note:

If you don’t have buttermilk, put one tablespoon of white vinegar in the bottom of a liquid measuring cup, then pour milk up to the 2 cup mark. Stir and let sit for five minutes, until curdled. Use as instructed in the recipe. Do not use skim or fat free milk.

Vanilla Bean Ricotta Cake

 Everyone has their go-to dessert–that thing they make when a friend has a baby or they’re asked to bring dessert for a dinner party. For my mom, it’s angel food cake with fresh blueberries and whipped cream. For my grandmother, Mame, it was a cherry-pineapple dump cake, which she called “Simply Delicious,” because who wants to eat something called dump cake?! 

My go-to? This Vanilla Bean Ricotta Cake. Now, the words “vanilla bean” and “ricotta” make it sound fancy, but it’s not–it’s basically pound cake. There’s no frosting or layering because this cake simply doesn’t need that kind of adornment. It’s easy to put together and bakes up super dense and moist, with tons of vanilla bean flavor.

For those of you who aren’t much for ricotta in other applications, you should know that I’m not either. Ricotta cheese doesn’t belong in my lasagna, on my toast, or anywhere else…except this cake. The milky flavor and grainy texture that turn me off in savory foods are what make this cake so insanely moist and delicious. The cheese melds so well into the simple batter, it’ll turn even the staunchest of ricotta-haters. If you really don’t want to use the stuff, you may substitute an equal volume of full-fat sour cream.
 This recipe makes a small loaf cake. It will not rise above the top of the pan. But what it lacks in size, it makes up for in versatility. Vanilla Bean Ricotta Cake is buttery and moist with a distinct vanilla flavor. It’s the kind of cake that’s fantastic by itself with a cup of coffee or tea, but it is a wonderful base for pretty much any toppings you can think of! Mix up a quick vanilla glaze (like the one used here) and drizzle it over the top of the cooled cake before slicing. Top slices with fresh strawberries and whipped cream for a sort of makeshift strawberry shortcake. Use it in trifles or ice cream cakes. Seriously, this cake is good with just about anything. 

This weekend, I’m going to serve Vanilla Bean Ricotta Cake with Blueberry Compote. I just love the look of the berries on the sliced cake, and the blueberry-lemon flavor goes so well with the vanilla bean! Make it this Memorial Day Weekend and enjoy it with your family and friends. Maybe it’ll become your go-to dessert, too 😊 

 Vanilla Bean Ricotta Cake
makes one 9×5″ loaf, about 8-12 servings

For the pan:
1 tablespoon all-purpose flour
1 tablespoon neutral-flavored oil (I like canola)

Cake:
1 1/3 cups all purpose flour
2 tablespoons cornstarch
1 teaspoon baking powder
1/4 teaspoon baking soda
1/2 teaspoon Kosher or sea salt
1/2 cup (1 stick) unsalted butter, softened to room temperature
3/4 cup granulated sugar
2 large eggs, room temperature
2 teaspoons vanilla bean paste**
4 ounces (1/2 cup) full-fat ricotta cheese, room temperature

Preheat oven to 350F. Grease the pan. Mix together flour and neutral-flavored oil. Use a pastry brush to paint mixture over the entire inside of the pan. Pour out any excess. Set aside.

Make the batter. In a small-medium mixing bowl, whisk together flour, cornstarch, baking powder, baking soda, and salt. Set aside.

In a large mixing bowl, use an electric mixer to beat butter until light and fluffy. Beat in sugar. Add eggs one at a time, mixing after each addition. Beat in vanilla bean paste, followed by ricotta. Add dry ingredients in two installments, combining completely after each addition.

Spread batter evenly into prepared pan. Tap full pan on the counter five times to release any air bubbles. Bake 35-40 minutes, tenting with foil if it starts to brown too quickly. Cake is done when it’s golden brown and a toothpick inserted in the center comes out clean, or with only a few moist crumbs.

Let cake cool in the pan for ten minutes. Run a small, thin knife around the edge of the pan to release the cake. Invert it onto a cooling rack, and then revert. Let cool completely.

Cake will keep at room temperature for up to three days, and in the refrigerator for up to five.

Notes:


1. I use Nielsen-Massey Vanilla Bean Paste.
2. If you don’t have or don’t want to use vanilla bean paste, you may use an equal volume of pure vanilla extract, or the scraped seeds of one vanilla bean + 1 teaspoon of pure vanilla extract.  

Roasted Tomatillo Salsa

New York City is not the place to move if you’re a salsa snob.

I should know. I’ve lived here almost nine years and have yet to find a Mexican restaurant whose salsa is not obviously from a jar. The worst experiences have been one that was mostly ketchup and Tabasco, and another that contained basil.*

*Note to Mexican restaurants everywhere: salsa and marinara are not interchangeable.

Luckily for me, I love to cook, so I have not been doomed to only eat subpar salsa for my tenure in NYC. I’ve learned to make several different varieties–my red Restaurant-Style Salsa is the favorite among my friends. I could definitely make that and some tostadas for Cinco de Mayo and have a perfectly good dinner. But lately, I’ve been seeing gorgeous green tomatillos at my favorite vegetable market, and they are just begging to be made into salsa. Being a total salsa fiend, I am happy to oblige.

This Roasted Tomatillo Salsa is my favorite salsa ever. It’s a little sour from the tomatillos (but not overly so) with pops of freshness from the cilantro and lime, and has a rich, smooth texture. Thick and chunky salsa is not my style.

Roasted Tomatillo Salsa takes slightly more work than the Restaurant-Style Salsa, but it’s still a breeze. Most of the 35 minute prep time is just waiting for everything to roast and cool, so it really is a snap.

Β Β Slice some fresh tomatillos in half and place them on a baking sheet with half an onion, two fresh jalapeΓ±os, and a couple of cloves of unpeeled fresh garlic. Drizzle everything with olive oil and roast it in a 425F oven for about twenty minutes. Let the vegetables cool for ten minutes, squeeze the soft garlic from its peels, and blitz everything in a food processor (or high-powered blender) with some fresh cilantro, lime juice, and salt. That’s it! This salsa is hardly any work at all, and is infinitely better than any prepared salsa you can imagine.

Β Β Serve Roasted Tomatillo Salsa with nachos, quesadillas, tacos, tostadas, or tortilla chips. Use it as the base for an amazing chicken soup! Pour it over chicken enchiladas before they go in the oven. Spoon it over eggs scrambled with tortillas and cheese and have migas for breakfast <– did that yesterday. Highly recommend.

Any way you serve it, this Roasted Tomatillo Salsa will be a new favorite.

Β Roasted Tomatillo Salsa
makes about 2 cups

1 1/2 pounds fresh tomatillos,* husked and rinsed
1-2 fresh jalapeΓ±o peppers, stems removed
1/2 medium white onion, peeled
2 cloves garlic, not peeled
olive oil, for drizzling
1/3-1/2 cup fresh cilantro, washed
juice of 1 lime
1/2-3/4 teaspoon Kosher or sea salt

Preheat oven to 425F. Line a baking sheet with parchment paper. Set aside.

Slice tomatillos in half. Slice jalapeΓ±os in half, and seed if desired. Place on baking sheet along with onion and garlic. Drizzle all vegetables with olive oil. Roast for 15-20 minutes, until starting to brown. Let cool ten minutes.

Squeeze garlic out of its skins. Place roasted vegetables in the bowl of a food processor or high-powered blender. Add cilantro, lime, and salt. PurΓ©e until smooth.

Serve immediately, or refrigerate in an airtight container for up to five days.

Note:

Tomatillos and green tomatoes are not interchangeable.

Roasted Tomatillo Salsa

Friday Favorites

I love anniversaries. Yes, I’m one of those people. If something happened once and warrants commemorating for any reason, I’m the one planning the party.

April 22nd is a big day for me. Today is my parents’ 33rd wedding anniversary, and I have another anniversary going on, too. It’s Earth Day. Heck, it’s my dog’s half-birthday 😜

All of that is great, but I’m writing today because this little blog began exactly six months ago!

Yes, I know six months does not technically constitute an anniversary, but for me, it means a lot. I talked about starting a food blog for six years before actually clicking “Publish.” Since October 22, 2015, I’ve posted 75 recipes. SEVENTY FIVE. Just…how?

I so appreciate all of you who have taken the time to read my posts, leave comments, follow me on social media, and make the recipes! Every time someone tells me they made something from my blog and enjoyed it, it brings me immeasurable joy. The idea that anyone would ever make and like a recipe that I created blows my mind. So, thank you.

And now that I’m done being sappy, let’s celebrate! Here are six of my favorite recipes from the archives to bring you into Spring! 

Chocolate Chip Shortbread Cookies are crunchy, buttery little cookies with all the flavors of a great chocolate chip cookie. They are super simple to make, and absolutely perfect with coffee or tea. I highly recommend using them for ice cream sandwiches 😊 

Spring is here, and that means we have four months of fantastic seasonal fruit ahead of us. More importantly, it means there will be pie! Make sure to use my Cream Cheese Pie Dough–it couldn’t be easier, and it makes the flakiest crust I’ve ever had. 

My grandmother’s Buttermilk Biscuits are one of my best memories of my childhood. Her recipe went with her when she passed many years ago, but I know she’d love mine. These biscuits are the perfect easy breakfast, and they are wonderful with a bowl of soup at dinner. 

It’s the beginning of picnic season, so you’ll need food that’s easy to make, transport, and share with your friends and family. My favorite thing to bring to an outdoor get-together? My Restaurant-Style Salsa! It takes just five minutes to whip up, and it puts prepared salsas to shame. 

And what’s warm weather without ice cream? No-Churn Mint Chocolate Chip Cookie Dough Ice Cream doesn’t require an ice cream maker, and is the creamiest, dreamiest ice cream I’ve made so far! And those little bits of edible cookie dough are everything. 

Springtime just demands carrot cake. But taking the time to make a whole layer cake when the weather is just begging for you to go outside is torture! Save yourself some time and make these Carrot Cake Blondies! They’re every bit as good as traditional carrot cake, and half the work!

Have you made any of these recipes? Let me know in the comments section below, or on Instagram @e2bakesbrooklyn!

Enjoy your weekend 😊

Mini Biscuit Cinnamon Rolls

 Cinnamon rolls are amazing. (Duh.) Gooey cinnamon filling rolled into soft pastry and covered in frosting–what’s not to love?!

Well…the time commitment. Even supposedly “quick and easy” recipes take three hours. The problem is the yeast. It takes a while. Like multiple-long-rises a while. Add to that the fact that working with yeast strikes fear into the hearts of many casual bakers. I’ve learned that yeast is nothing to fear, but still. When I want cinnamon rolls, I want them *now.* Not in three or six or eight hours–NOW.

I clearly have some pretty serious breakfast pastry needs. 

What if I told you that you could have some seriously good cinnamon rolls on your table in less than 90 minutes? And that you didn’t have to proof any yeast or let anything rise? Would you be interested?

Yeah, I thought so.

Enter Mini Biscuit Cinnamon Rolls. All the sweet cinnamon goodness of classic cinnamon rolls, wrapped up in a delightfully easy cream biscuit dough and positively smothered in cream cheese frosting. Oh my word, are these good. And they’re miniature, because tiny food just tastes better somehow. 

The dough base is the same as the one I used in my Scratch Biscuit Monkey Bread. It’s super easy: mix together flour, sugar, salt, and baking powder, and stir in 2 cups of cream (I said quick and easy, not healthy). That’s it. Seriously easy. I do not recommend using a regular buttermilk biscuit dough here–the butter in that dough must be kept cold, or your results will be bricks. No, thank you. This simple cream biscuit dough has no butter, so it doesn’t need to be kept absolutely frigid to bake up properly. Using this base, you can roll and flip and handle the dough as much as you want! 

    Once the dough is made, divide it in half. Take one half and roll it into a large rectangle on a floured surface. Then, take some butter that’s been spiked with granulated sugar, dark brown sugar, cinnamon, and salt, and spread it over the whole thing, leaving only a thin border. Gently roll the long edge of the dough toward your body until you have a tight cylinder. 

 Cut the rolled dough into 1-inch rolls and place them close together in a buttered pan. Repeat that process with the other half of the dough, and then bake the rolls for 15-20 minutes at 400F.  
 Make a half-batch of my cream cheese frosting, and spread it over the warm rolls. Yes, this is a lot of frosting, but that’s how I roll. <–Ha! Roll. 

Seriously, look at that.

If a metric ton of frosting isn’t your thing, you may halve the recipe. The frosting will melt into every nook and cranny of the cinnamon rolls and make everything super gooey and delicious. In fact, the frosting is so thick, I had a hard time seeing while cutting out individual rolls–but when they’re this good, I don’t care if they’re totally gorgeous. The tang of the frosting with the fluffy biscuit base and sweet cinnamon filling is just…everything. 

So, the next time you have a craving for cinnamon rolls, make these Mini Biscuit Cinnamon Rolls. In less than 90 minutes, you’ll be tucking into a full pan of amazingness, and you won’t have fretted over yeast or waited an eternity! These are perfect for any weekend morning or brunch party. Nobody can resist these sweet little rolls 😊 

 Mini Biscuit Cinnamon Rolls
makes about two dozen miniature rolls

Filling:
6 tablespoons unsalted butter, softened to room temperature
1/4 cup granulated sugar
1/4 cup dark brown sugar, packed
2 tablespoons ground cinnamon
1/2 teaspoon Kosher or sea salt

Biscuits:
3 cups all-purpose flour
2 tablespoons granulated sugar
1 teaspoon Kosher or sea salt
1 tablespoon baking powder
1 pint (2 cups) heavy cream, cold

Frosting:
4-ounces (1/2 brick) full-fat cream cheese, softened to room temperature
1/2 cup (1 stick) unsalted butter, softened to room temperature
2 cups confectioner’s sugar
pinch of Kosher or sea salt
1 teaspoon pure vanilla extract

Preheat oven to 400F. Grease a 9-inch round cake pan with butter. Set aside.

Make the filling. In a small mixing bowl, use a fork to mash together softened unsalted butter, granulated sugar, dark brown sugar, cinnamon, and salt, until it’s completely combined. Set aside.

Make the biscuit dough. In a large mixing bowl, whisk together flour, granulated sugar, salt, and baking powder. Use a silicone spatula or wooden spoon to fold in heavy cream, making sure to scrape the sides and bottom of the bowl. Dough will be shaggy. Divide dough in halves.

On a floured surface, roll half the dough into a 14×8-inch rectangle. Use an offset knife (or butter knife) to spread half the filling onto the rectangle, leaving a 1-inch border at the edge. Starting at the long edge furthest away from your body, tightly roll the dough toward you until you have one large cylinder. Slice into 1-inch pieces, and place close together in the prepared pan. Repeat process with the second half of the dough.

Bake rolls for 15-20 minutes, until light golden and fully cooked. Let cool ten minutes while you make the frosting.

In a large mixing bowl, use an electric mixer to beat cream cheese and butter until light and fluffy. Beat in confectioner’s sugar and salt, followed by vanilla. Scrape down the sides of the bowl as necessary. Drop frosting in dollops over the top of the warm rolls. Spread with an offset knife to cover the entire top of the rolls. Let set for ten minutes before serving.

Mini Biscuit Cinnamon Rolls are best served the day they are made, but may be kept covered at room temperature for up to three days.