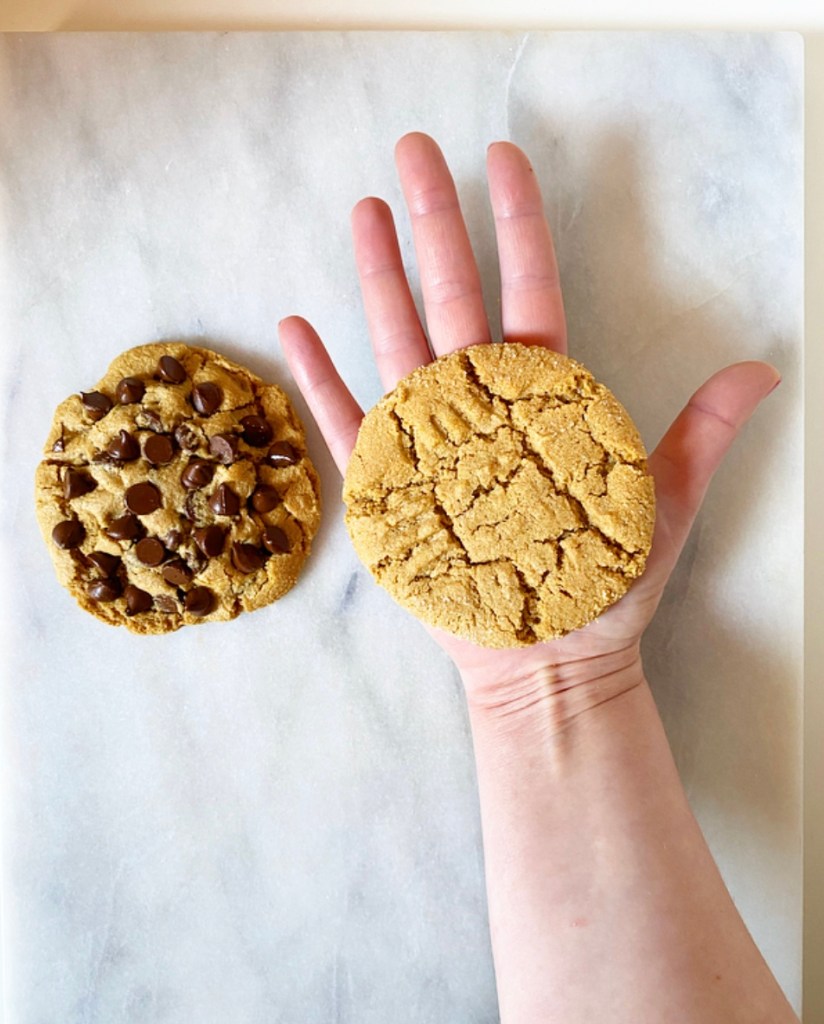
This is my fifth single-serving cookie recipe. Or fifth and sixth, if you want to get technical.
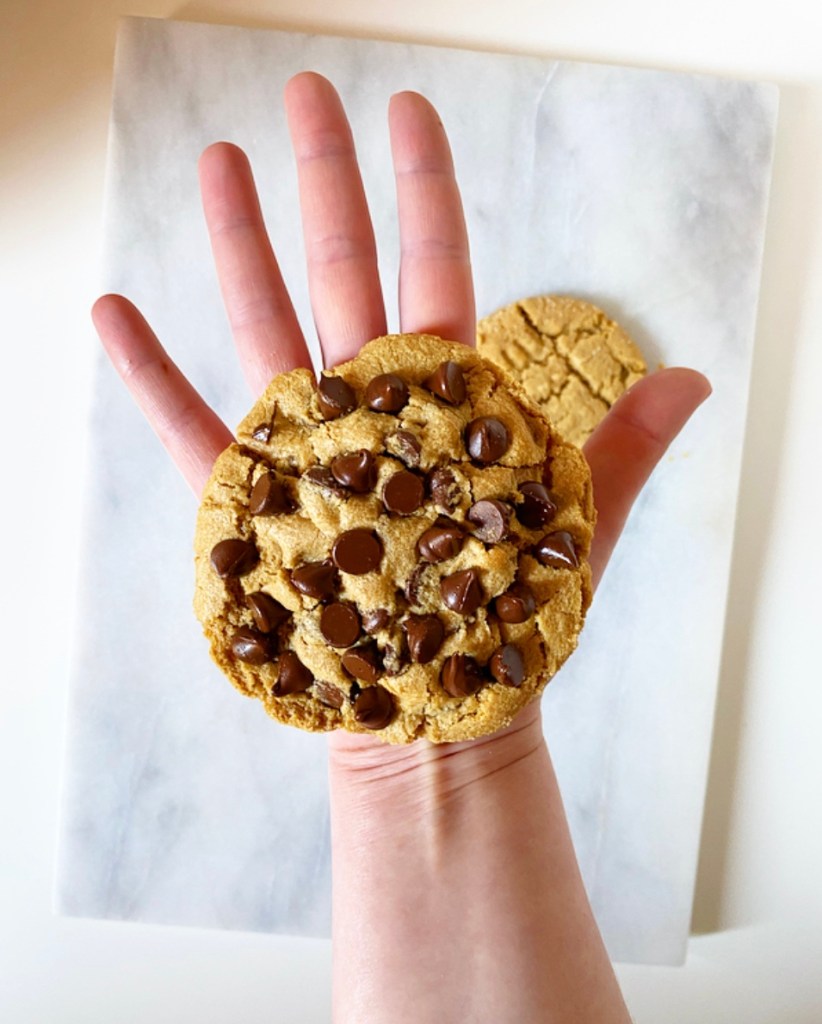
You see, when I set out to make One Big Peanut Butter Cookie, I had just planned to make it one way: the classic cross-hatched way. But then I realized that at least a few of you would ask “can I put chocolate chips in it?” so I got real wild and made a second version, and then I put them together in this one lone post. You’re welcome, super-small-batch cookie bakers of the internet.
This is yet another twist on the classic three ingredient peanut butter cookie recipe that has been around since long before it ever occurred to me that baking might scratch all my creative itches. You’d think a three ingredient recipe (1 cup peanut butter, 1 cup sugar, 1 large egg) would be pretty difficult to manipulate more than once or twice, but I’ve managed it many times. This is my fifth (?) vegan variation, and as none contains any flour, they’re all gluten-free too.

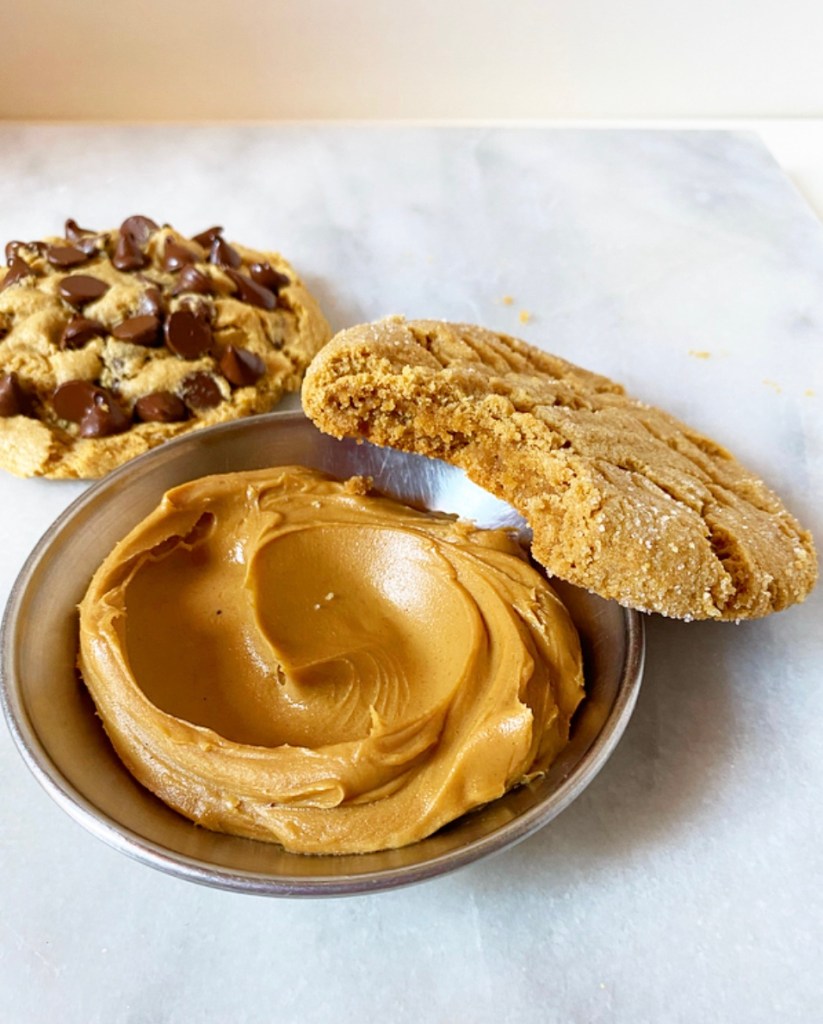
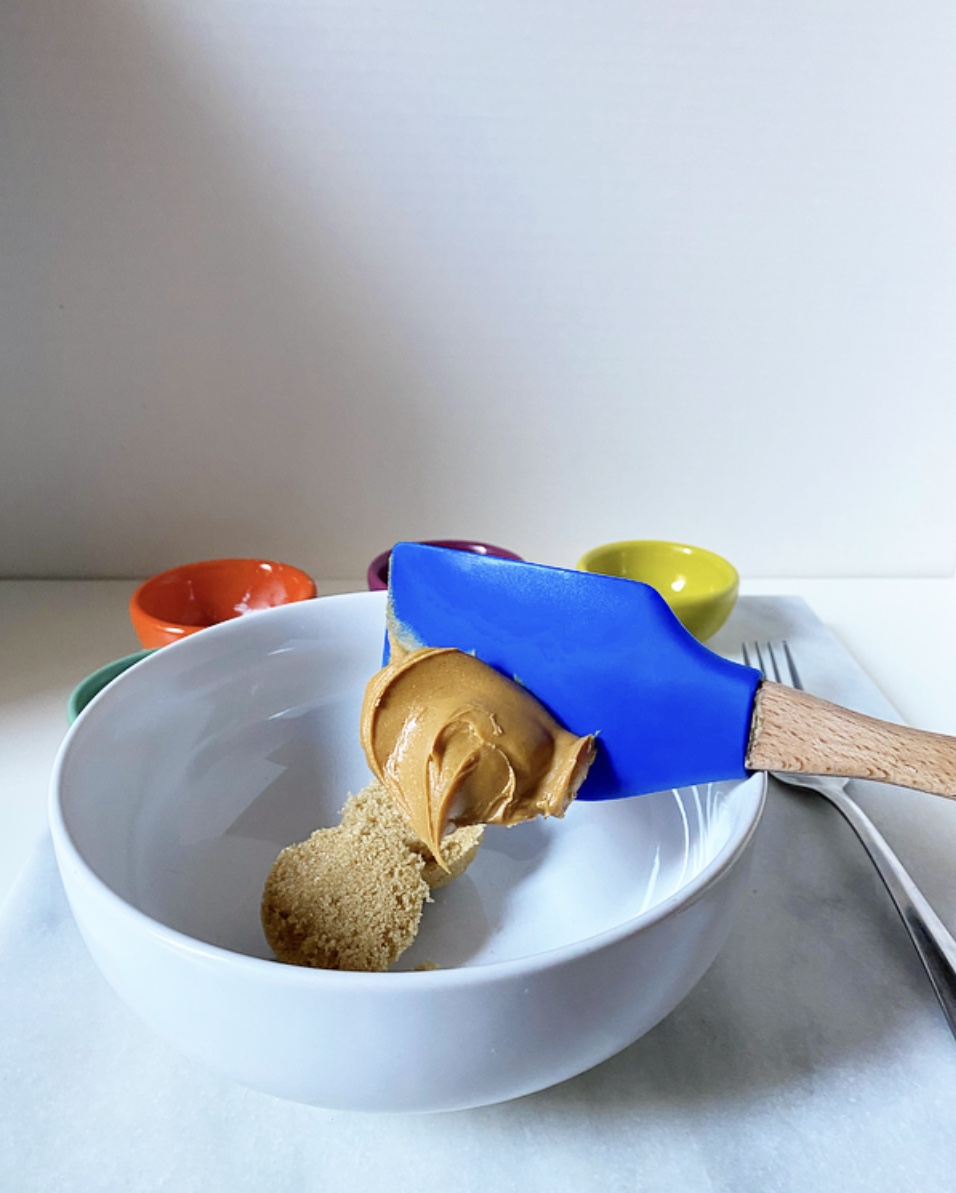
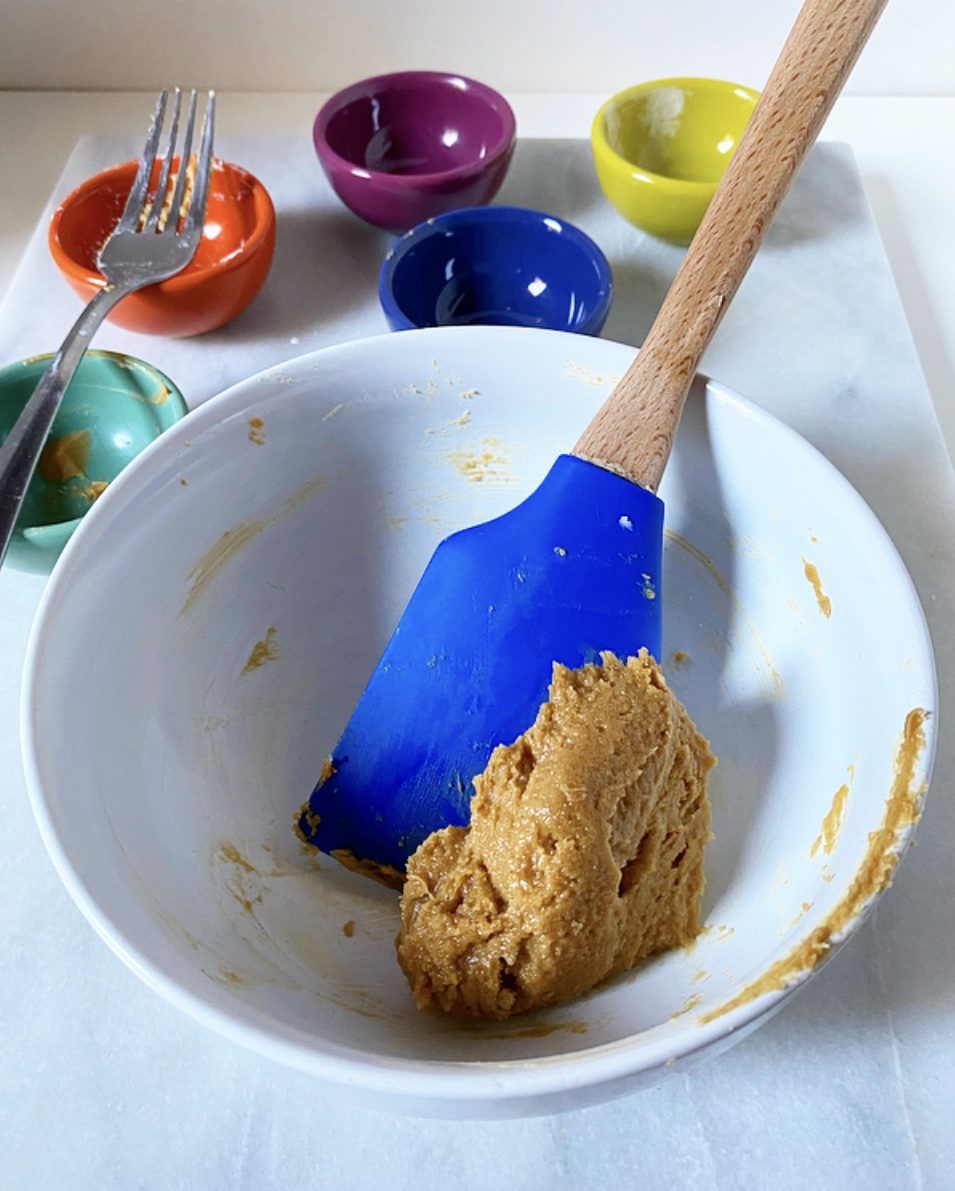
The method here is simple. Use a fork to whisk together two tablespoons each of peanut butter and packed brown sugar. Add some cornstarch and water to bind, some salt for balance, and a teensy bit of baking soda for lift. Though baking soda cannot be replaced in most recipes, here you can swap baking powder in as the leavener with the only major difference being that your cookie will be a touch lighter in color.


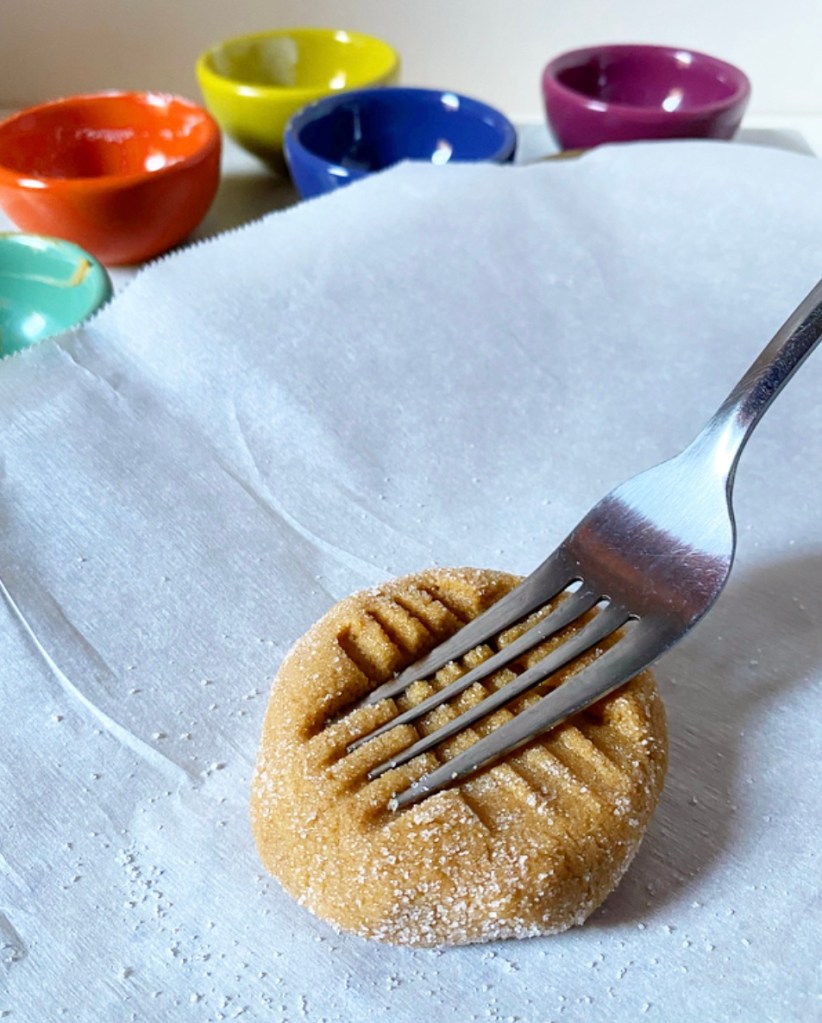

This is where things get exciting (as far as cookie baking goes). You can either roll this dough into a ball, coat it in granulated sugar and crosshatch it with a fork, or you can mix in chocolate chips and flatten it slightly with the heel of your hand. You could even nix the sugar coating or use M&Ms as your mix-in! Do whatever makes your little dessert-for-one heart sing. However you choose to proceed, your cookie will need to bake for about 12 minutes in a 350F oven.

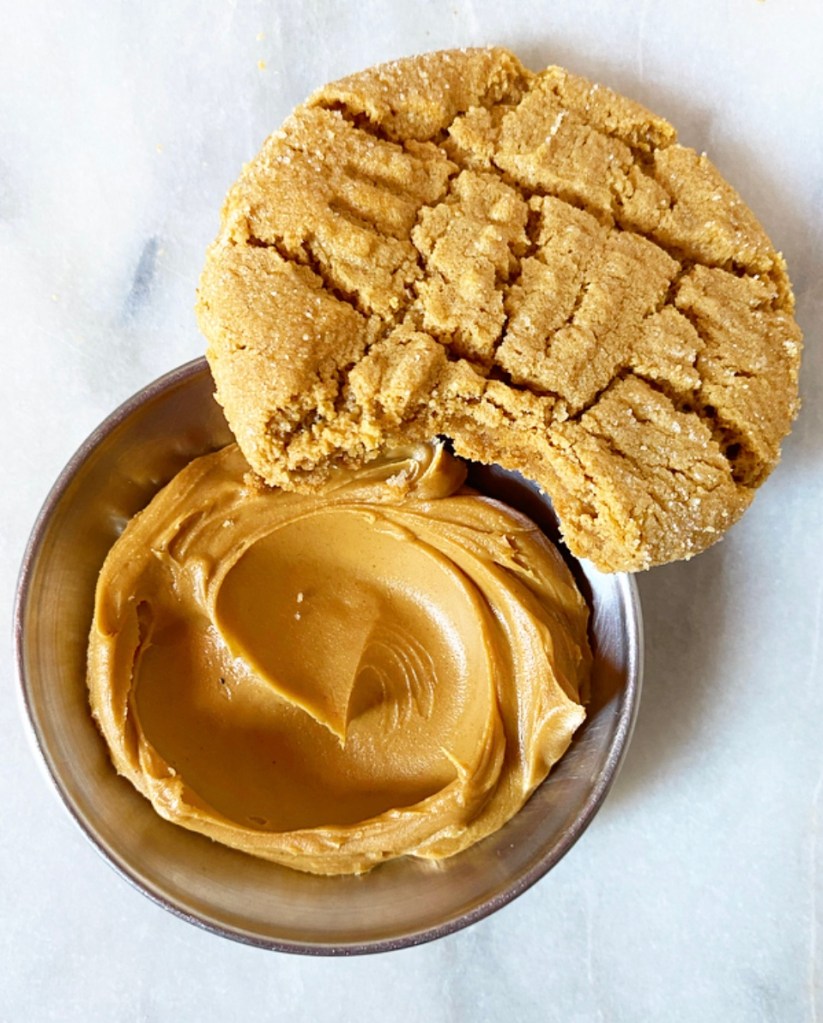
Once it’s cool enough to handle, your minimal effort will be rewarded with one of *the* peanut butteriest peanut butter cookies you’ve ever had. Sweet, salty, rich & thick, studded with chocolate or not, this is one hell of a dessert for one. Or…two…hells?
Who’s writing this thing?
Have a great weekend, y’all. Make yourself a cookie (or two).
One Big Peanut Butter Cookie, Two Ways
makes 1 large cookie, about 1-2 servings

2 tablespoons creamy peanut butter (not natural-style)
2 tablespoons light or dark brown sugar, packed
1/8 teaspoon baking soda*
pinch of salt
1 teaspoon cornstarch
1 teaspoon water

If making a classic peanut butter cookie:
2 tablespoons granulated sugar, for rolling (optional)

If making a peanut butter chocolate chip cookie:
2 tablespoons semisweet chocolate chips + more for topping (use dairy-free for a vegan cookie)

Preheat oven to 350F. Line a baking sheet with parchment. Set aside.

In a small bowl, use a fork to whisk together peanut butter and brown sugar. Add baking soda, salt, cornstarch and water, and whisk to combine. Use a silicone spatula or wooden spoon to make sure your dough is fully combined.

If making a classic peanut butter cookie, place granulated sugar in a shallow dish. Use your hands to form dough into a ball, then gently roll the ball in the sugar to coat. Place on the prepared pan.

If making a peanut butter chocolate chip cookie, use your silicone spatula or wooden spoon to fold in chocolate chips. Use your hands to form dough into a ball and place on prepared pan. Dot the top with more chocolate chips (for aesthetic purposes), if desired. Use the heel of your hand to press down gently on the dough, just so that the dough is a 1-inch thick puck.

For both cookie variations, bake for 12-13 minutes or until puffed and no longer raw-looking.

Let cookie cool on the pan for at least 10 minutes before using a spatula to remove it to a plate. Enjoy warm or at room temperature.

Note:

An equal volume of baking powder will work in place of baking soda. The cookie it produces will be a bit paler, but still delicious. I do not recommend swapping baking soda and baking powder in any other recipes.

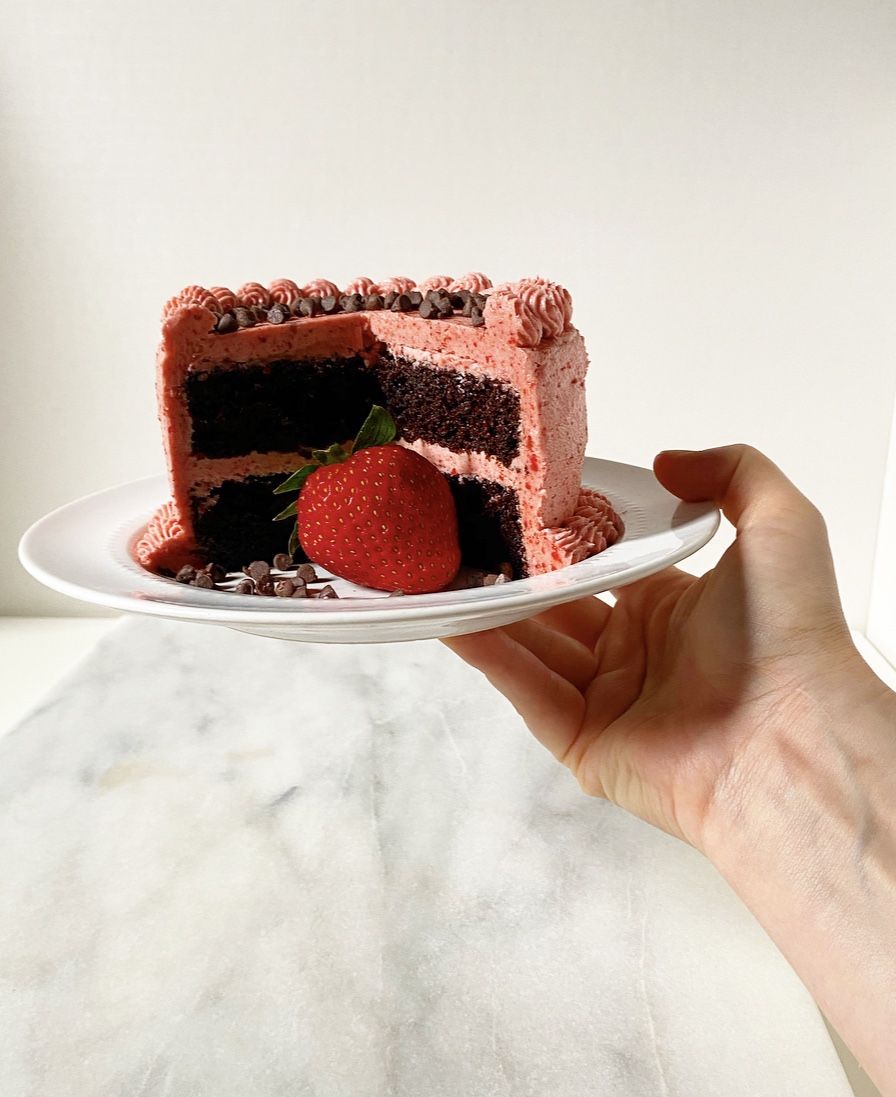
 I posted my Oscar Night
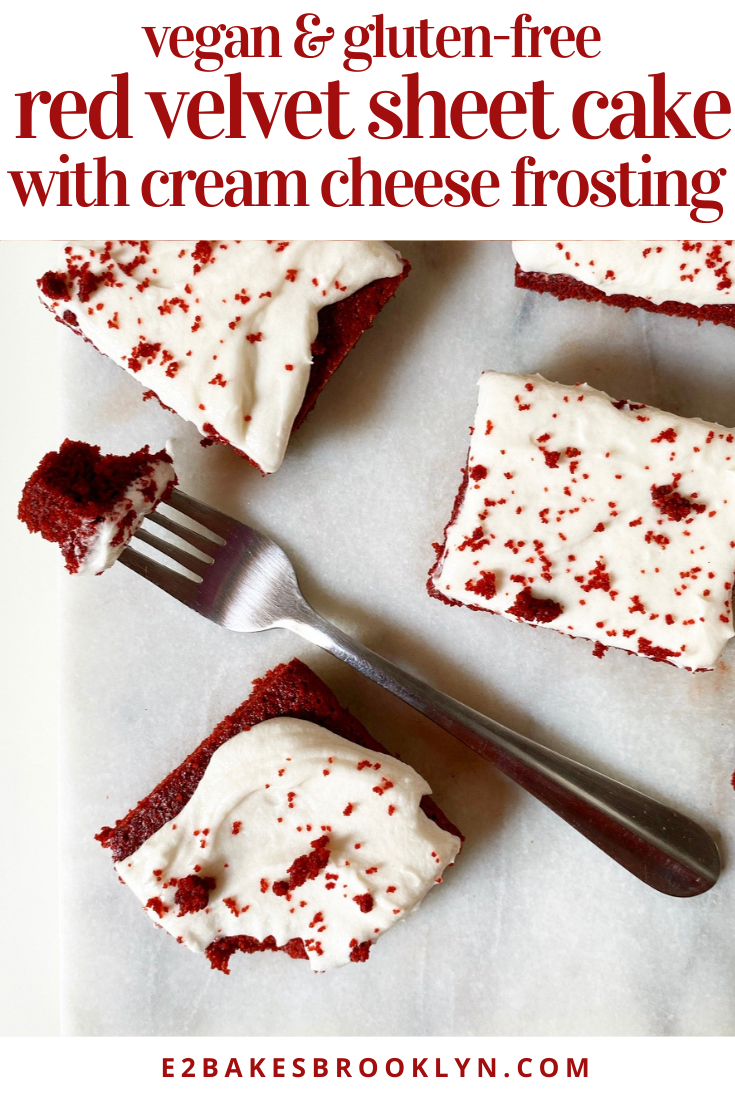
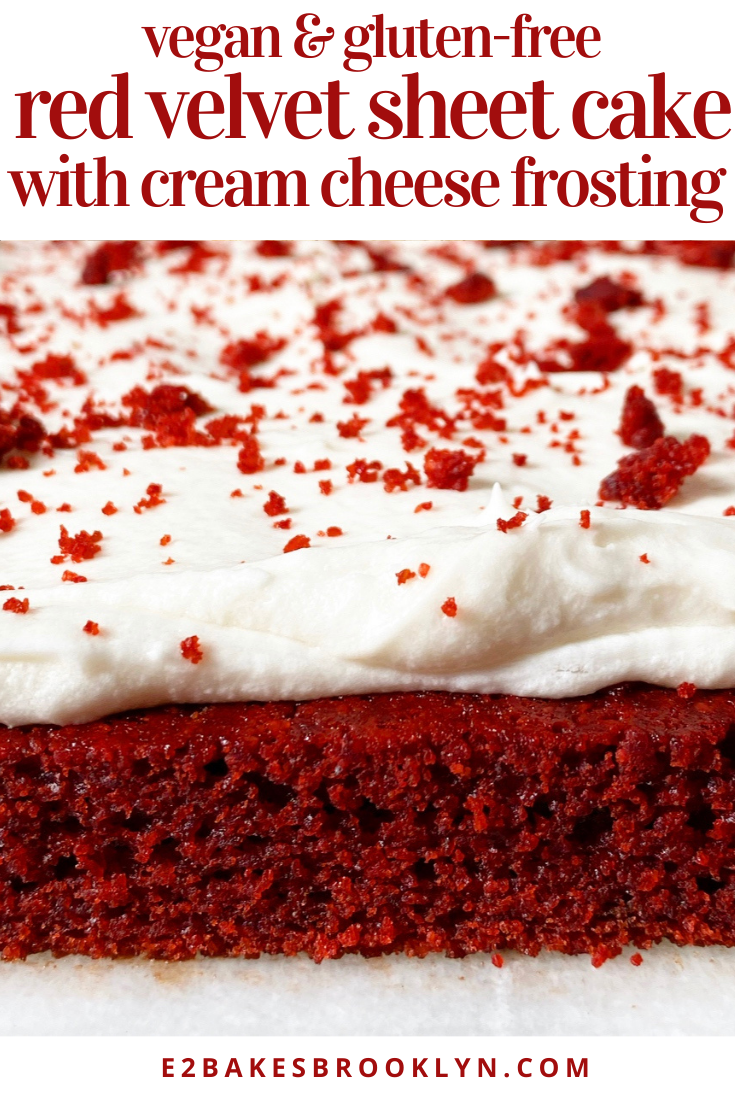
 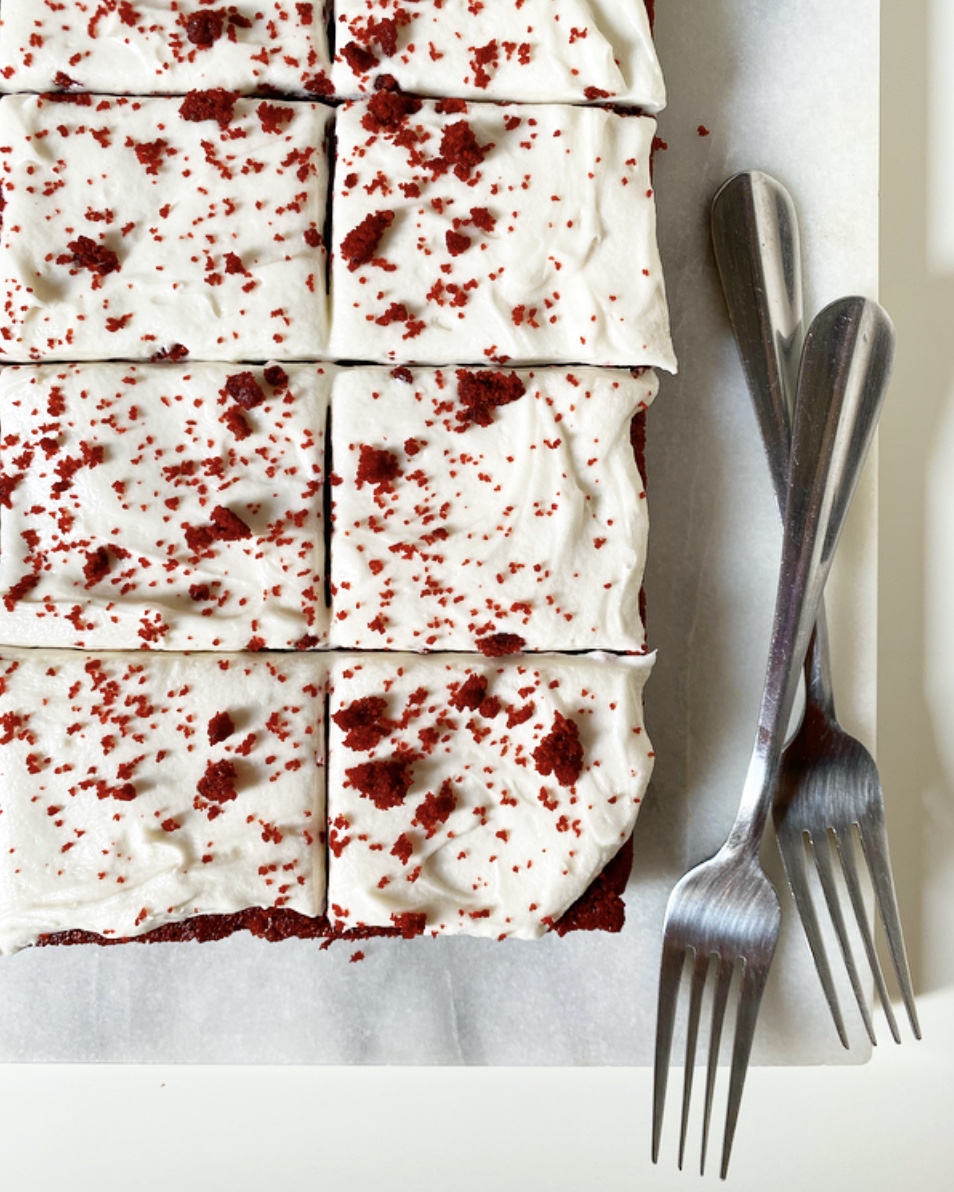 The cake itself is another spin on my go-to vegan, gluten-free
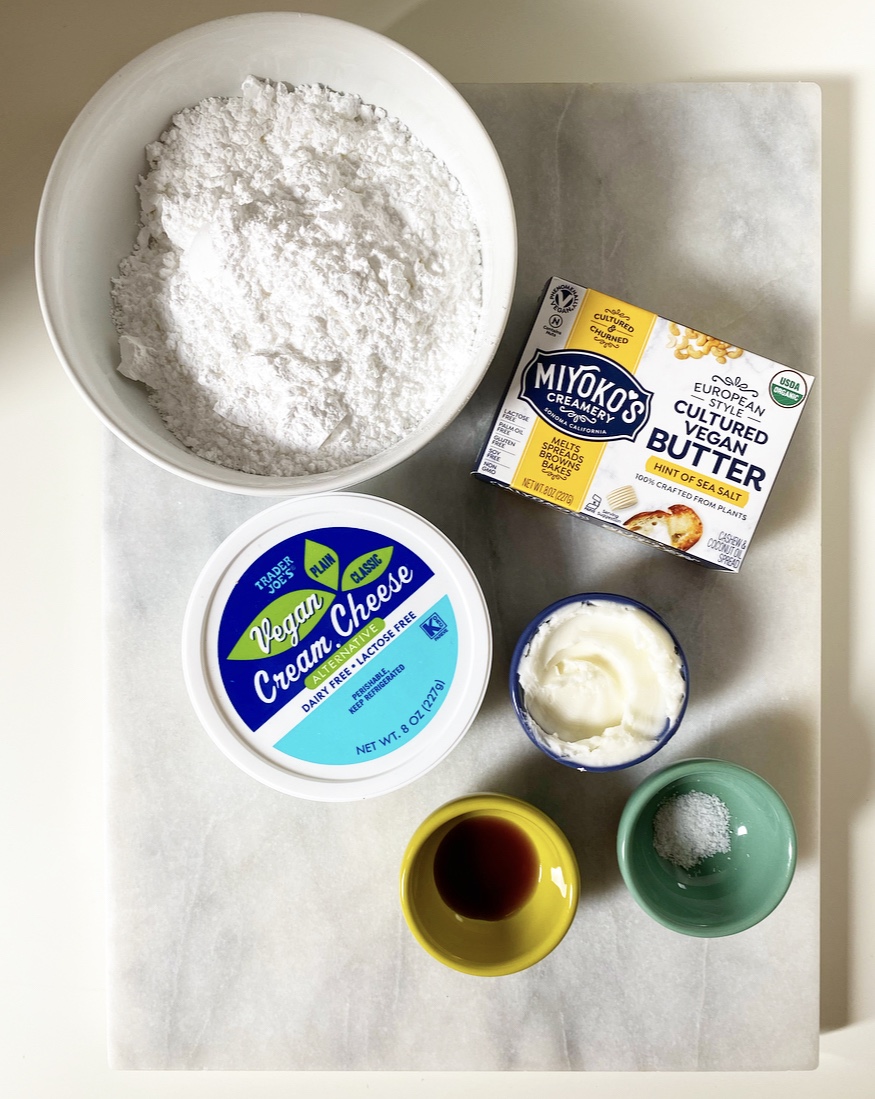
 But I’m getting ahead of myself! Let’s talk frosting—you simply can’t have red velvet cake without cream cheese frosting. I’m pretty sure it’s the law, even if the cake is vegan. Here, the cream cheese in the frosting is the dairy-free stuff that comes in a tub. You’ll notice that this recipe uses a tiny amount of cream cheese compared to
 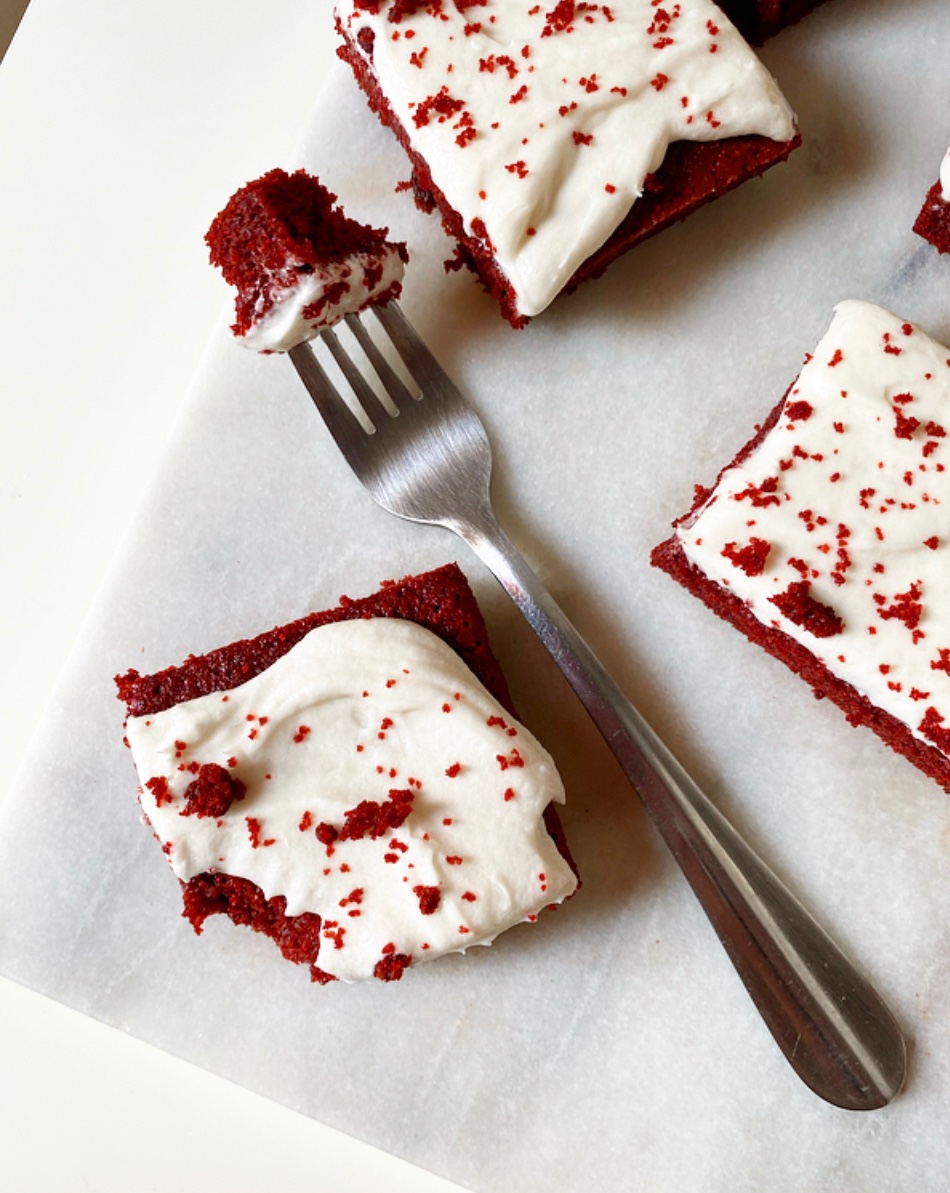 Vegan, gluten-free Red Velvet Sheet Cake with Cream Cheese Frosting is so good, y’all. So. Good. It’s soft and tender with all the chocolate-tinged vanilla flavor you love, and those swirls of vegan cream cheese frosting are the perfect counterpart. It’s traditional with a twist, like so many of the best things are.
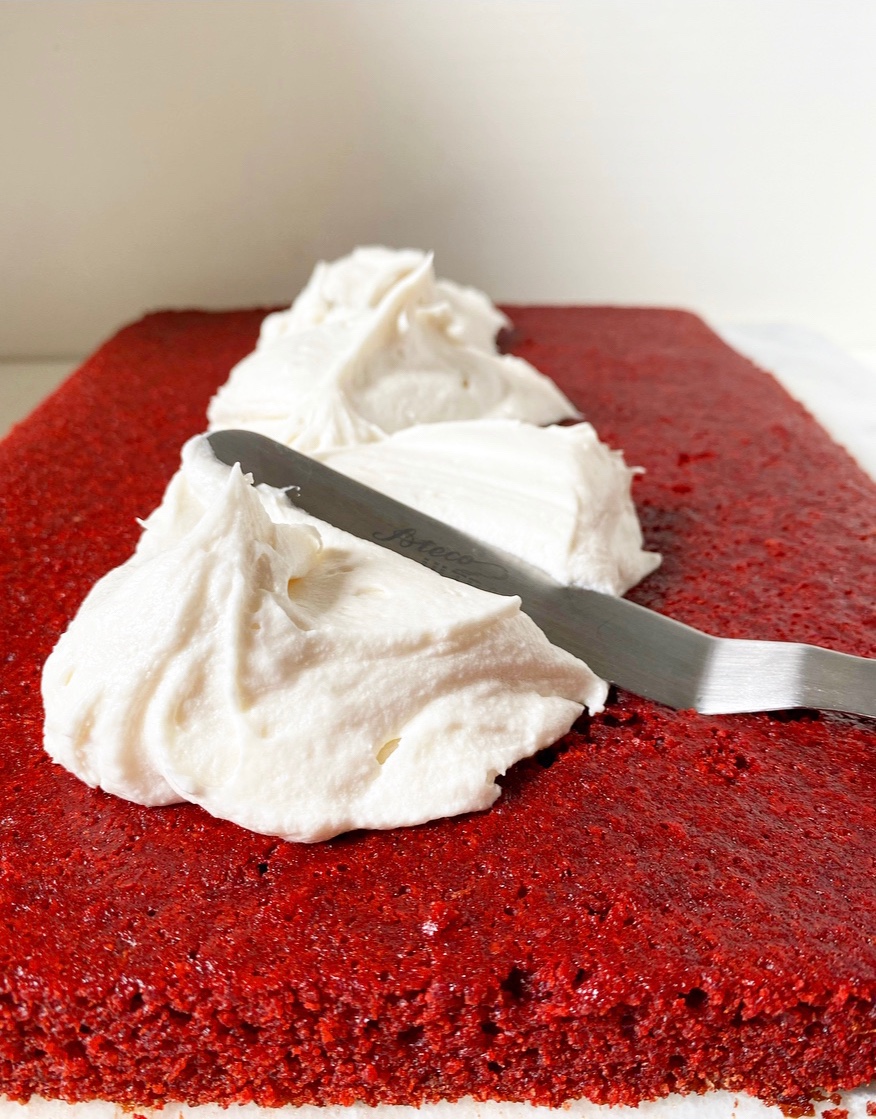
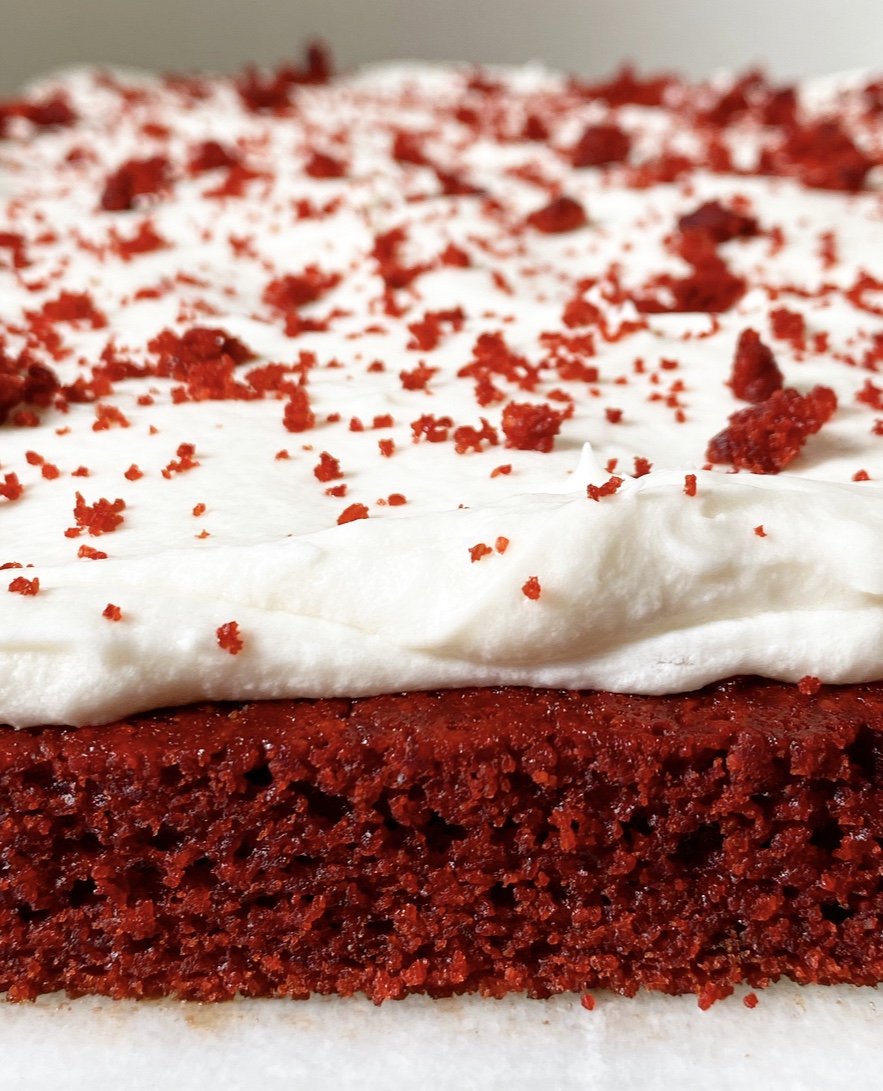
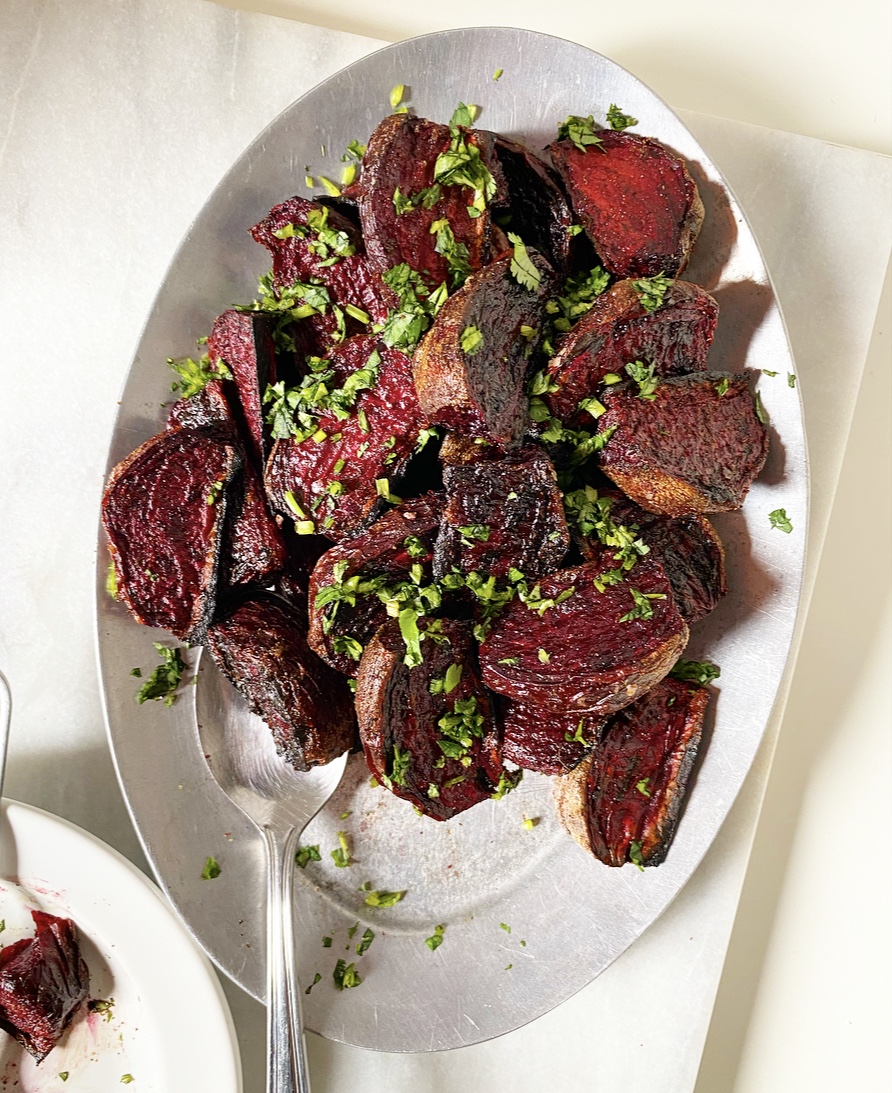 I have never been a particularly picky eater, but I have spent the majority of my 35+ years hating beets. Hating them. My mom used to serve pickled beets at least once a week, which meant I had to choke down (and I do mean “choke”) one or two with some regularity until I grew up, moved out, and lived a blissfully beetless existence until three years ago. I’d still be beet-free today if it weren’t for a request for them for a birthday dinner.
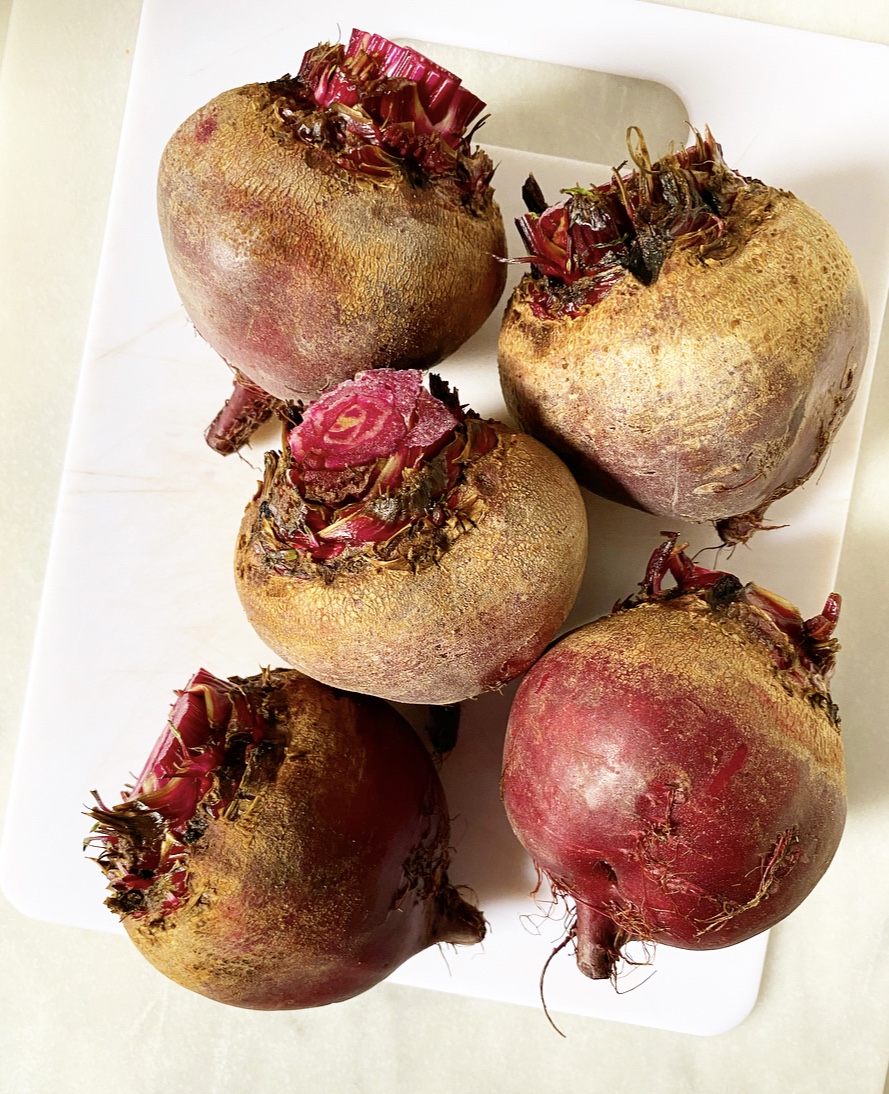
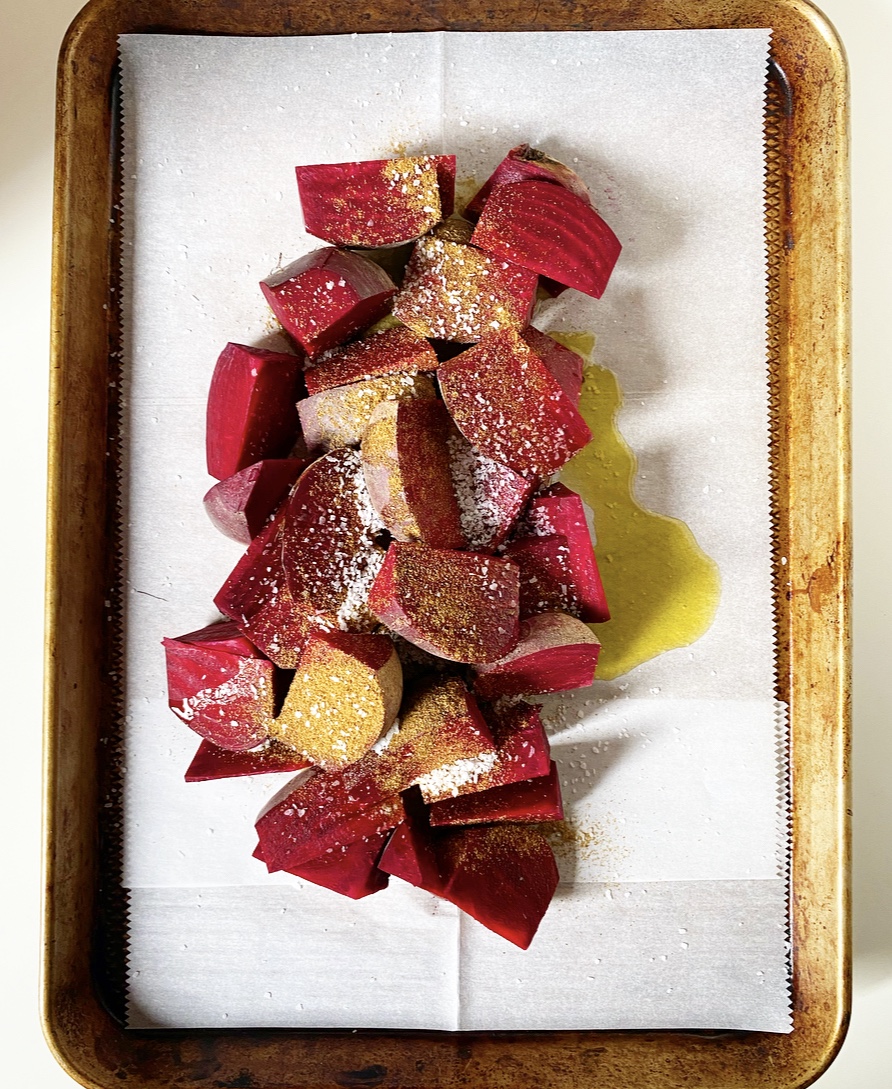
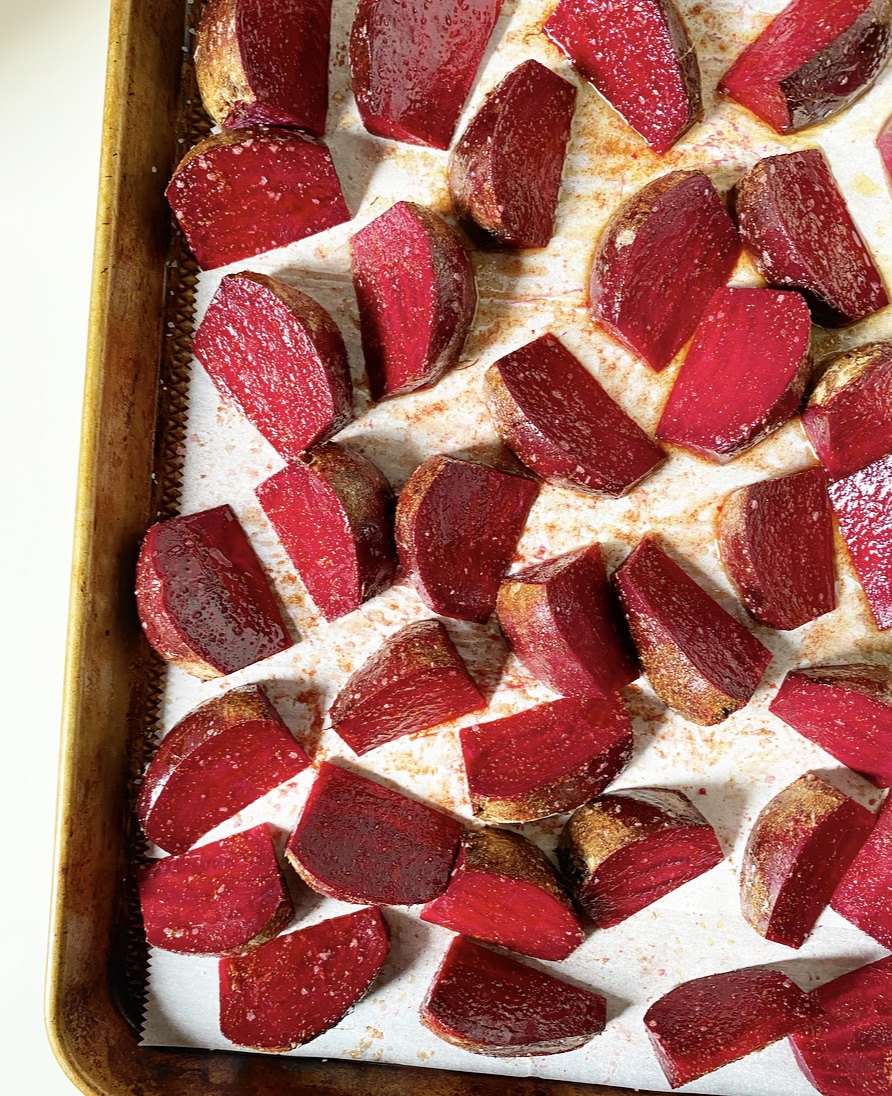
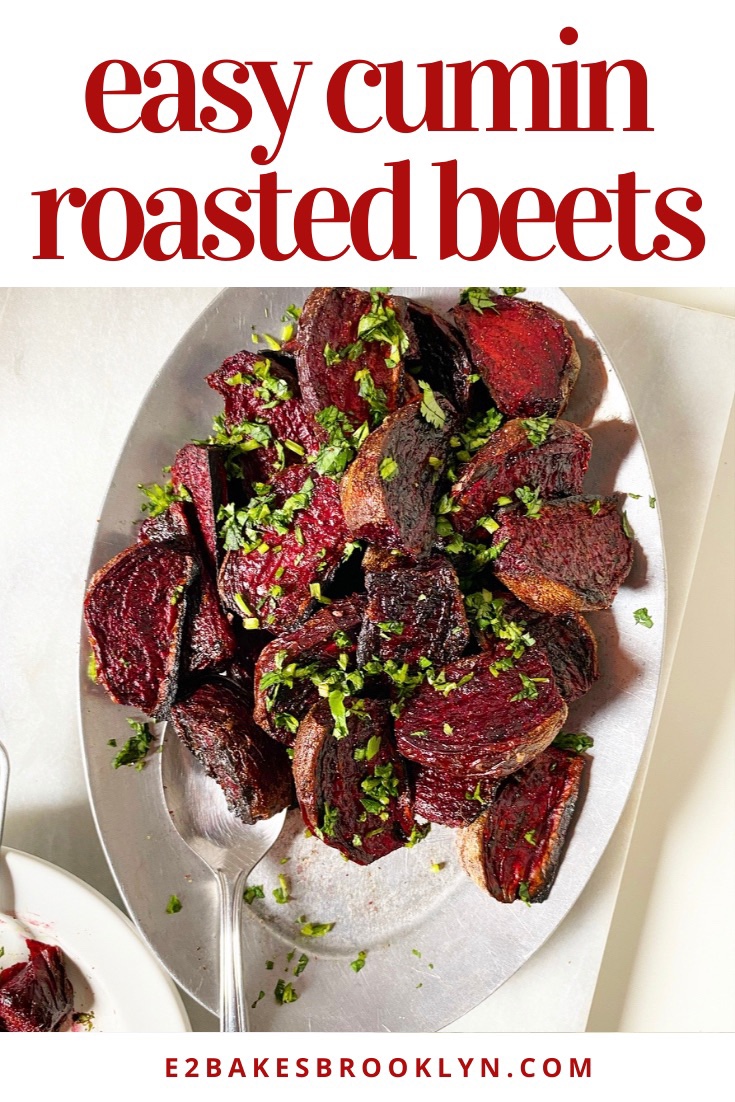
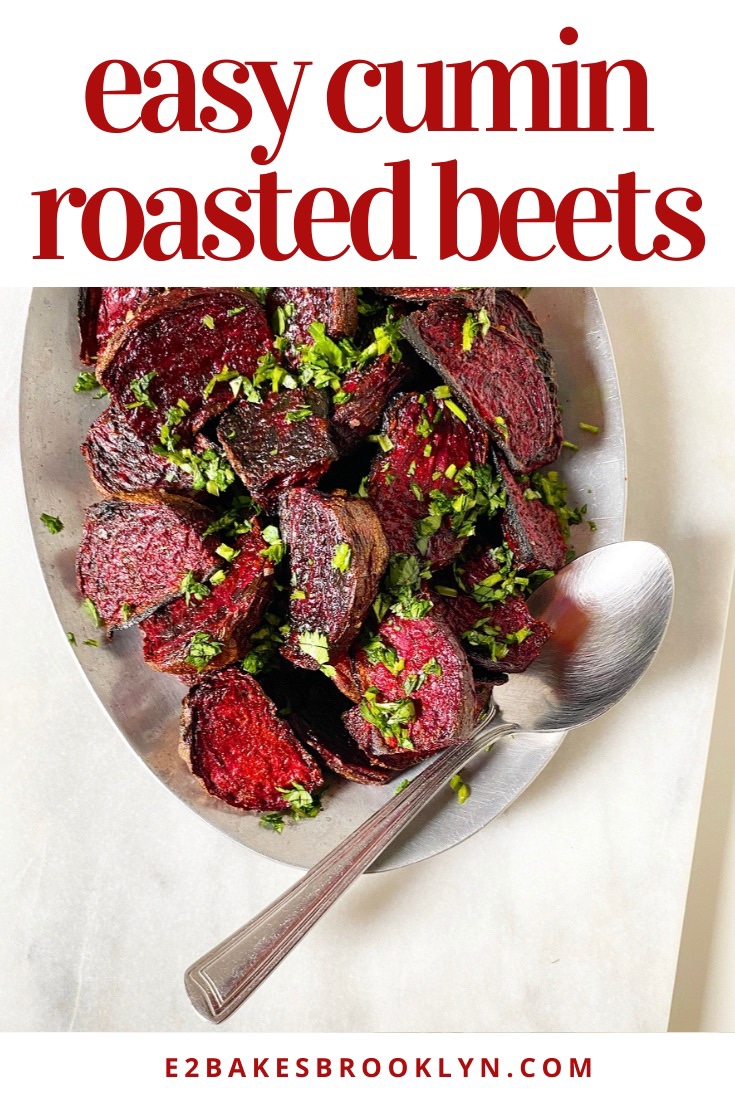
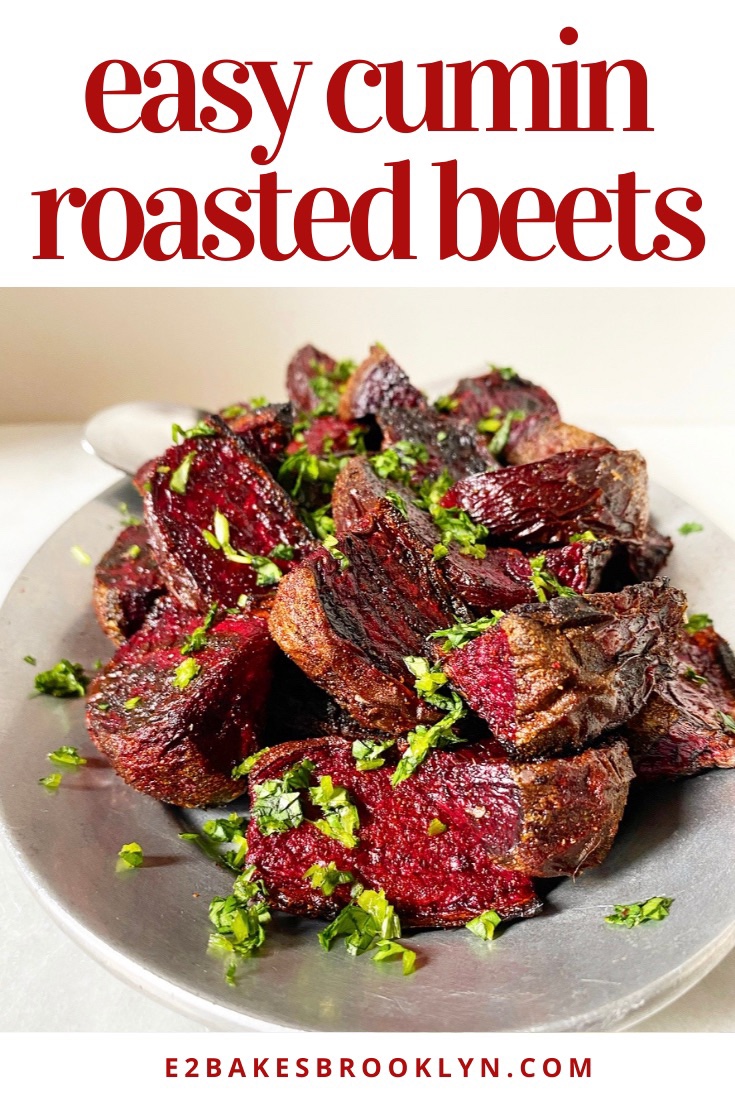
 As I prepared for this party (remember parties?), I looked online for beet roasting methods and mostly saw the same one: wrap beets in foil, roast them whole, let them cool, rub off the skins with your hands, and slice. It seemed like a lot of time and work for something I couldn’t stand. Instead, I took a gamble and did things the easy way: giving my beets a really good scrub, lopping off the root and tip, slicing them into thick wedges, and roasting them with olive oil, cumin and salt until caramelized.
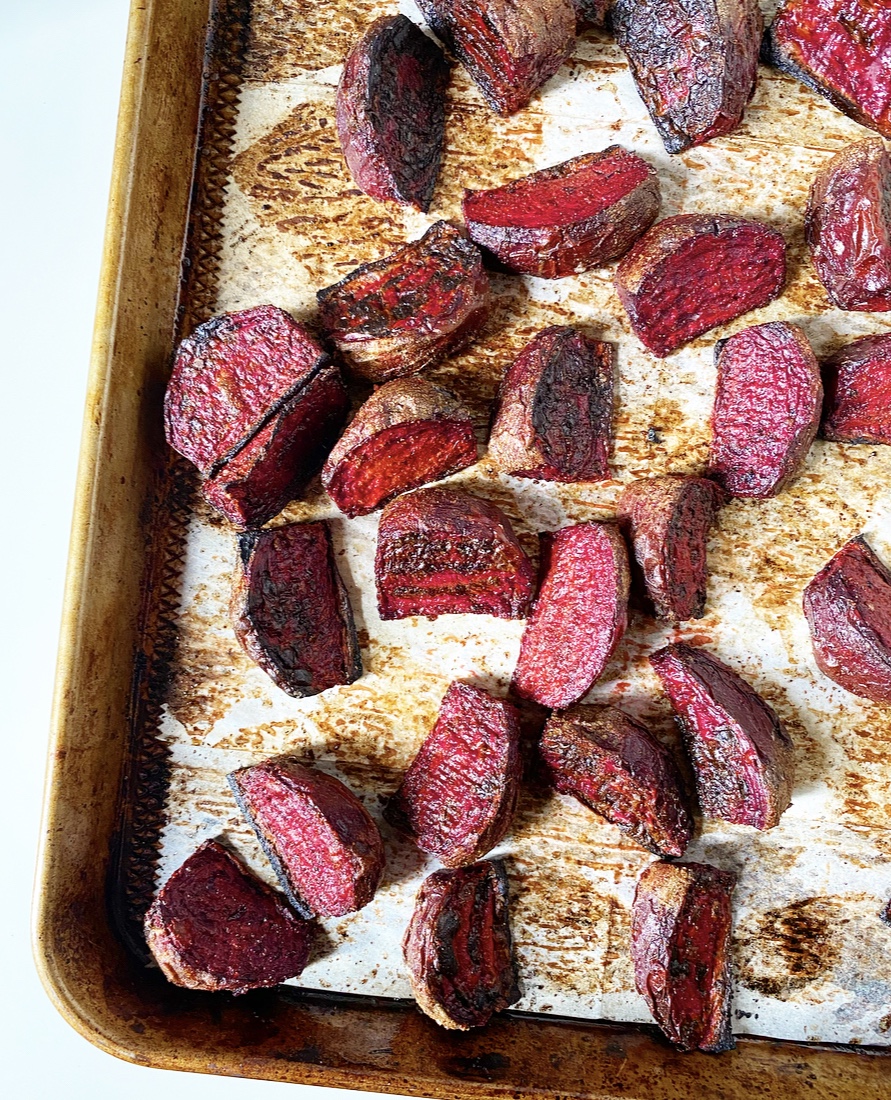
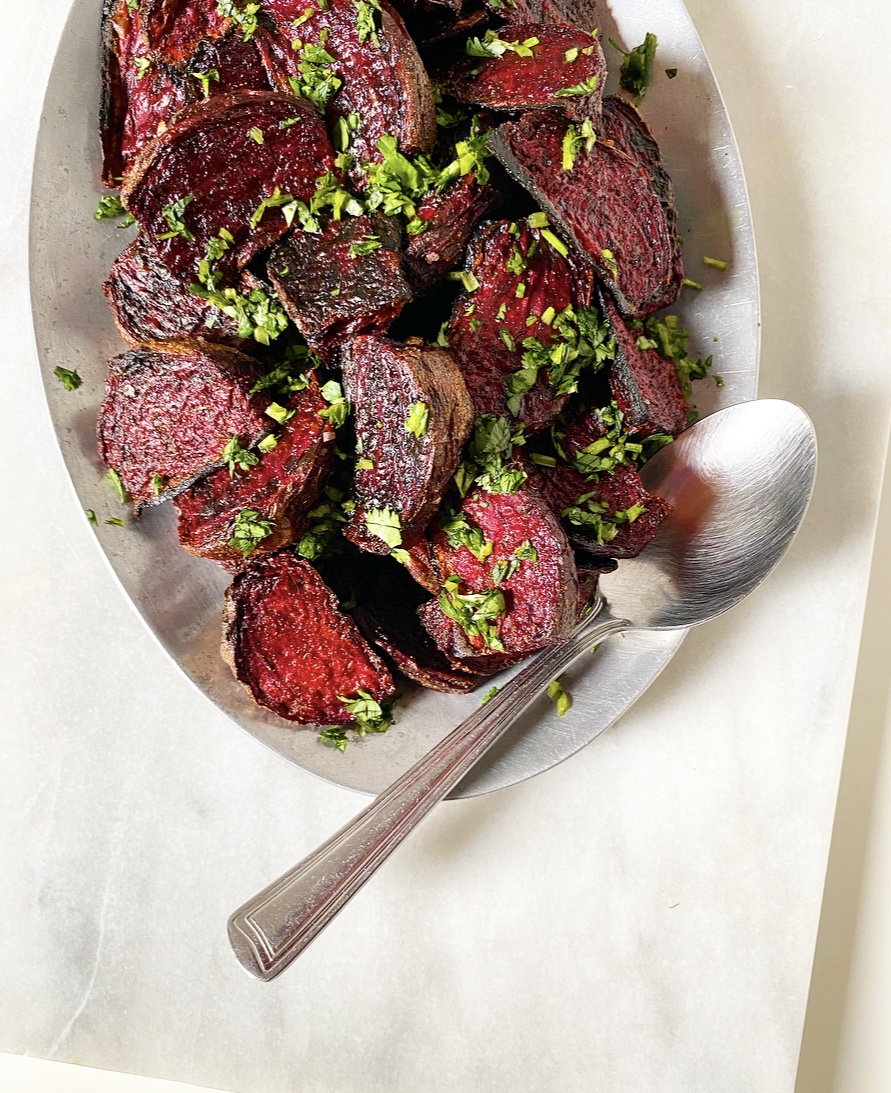 Being a careful cook, I had to taste the finished beets for seasoning regardless of personal preference, so I scrunched my nose, closed my eyes (?), took a tiny bite and…they were delicious. Earthy and sweet, yes, but also salty, smoky and crisp-edged. I couldn’t believe it—one of my top five all-time least favorite foods! Delicious! Sometimes it just takes the right preparation to change someone’s life (er, palate).
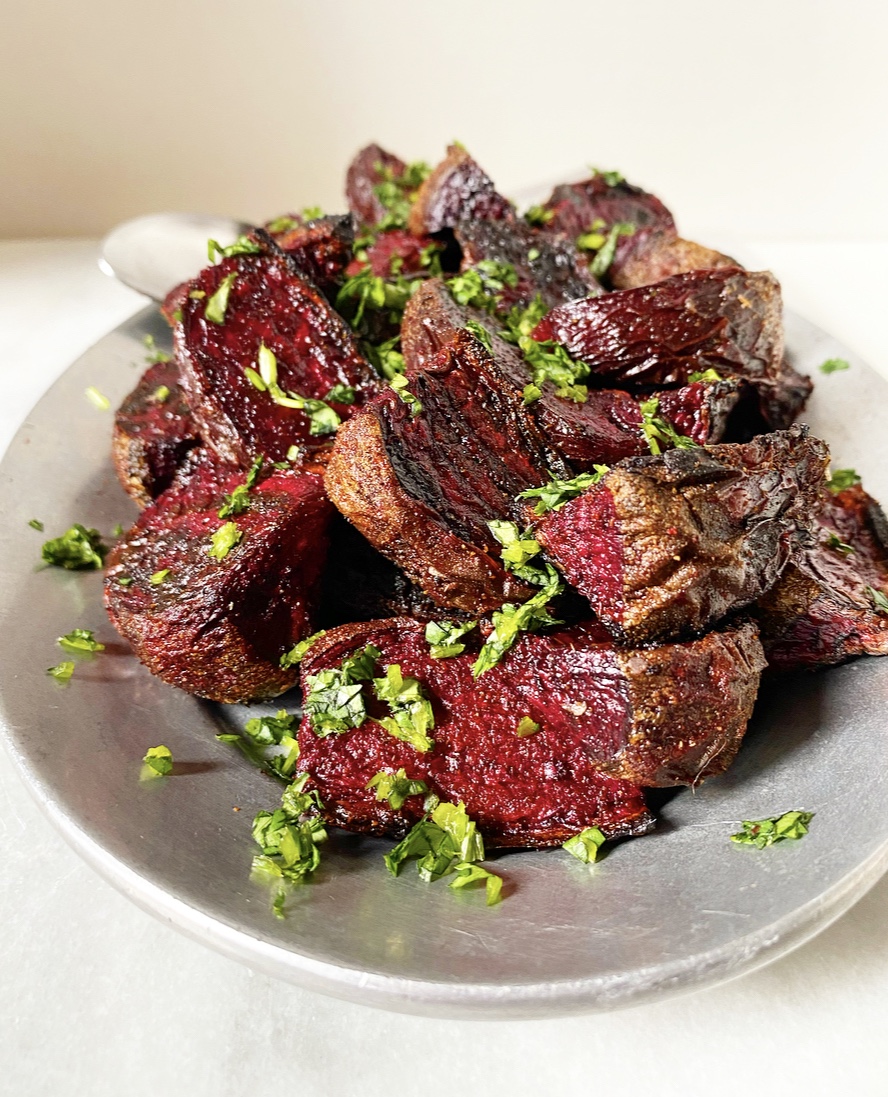 Now, I don’t know if I’ve actually changed—you won’t find me eating pickled beets out of the jar anytime soon. But these? I’ve made them at least once a week for the last three years and I freaking love them. They’re so easy and so good, the perfect low-maintenance side dish. I’ll throw a pan of Easy Cumin Roasted Beets in the oven alongside a chicken, serve them with fresh hummus on a casual night in, or pair them with feta and greens for a killer beet salad.
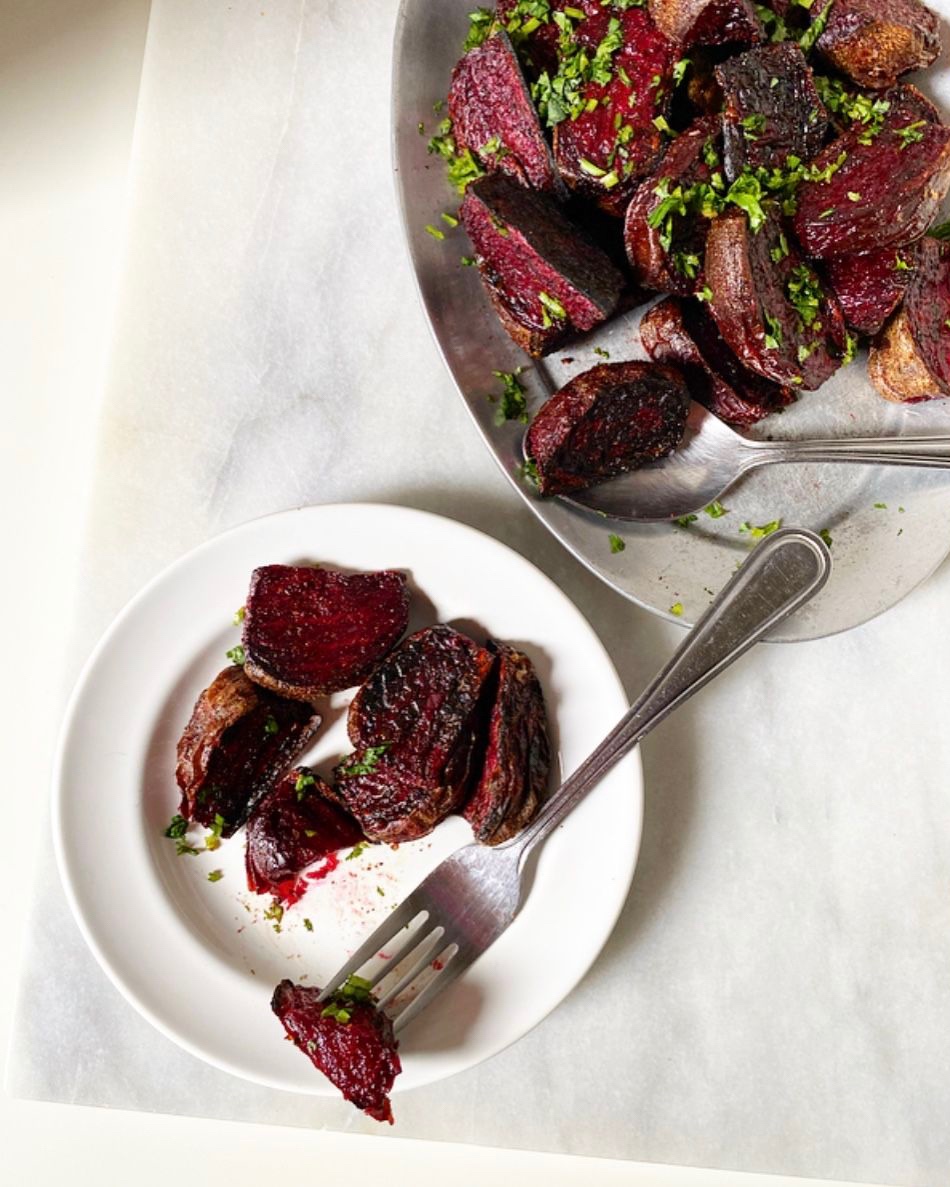 Did I just say “killer beet salad”? Maybe I’ve changed after all.
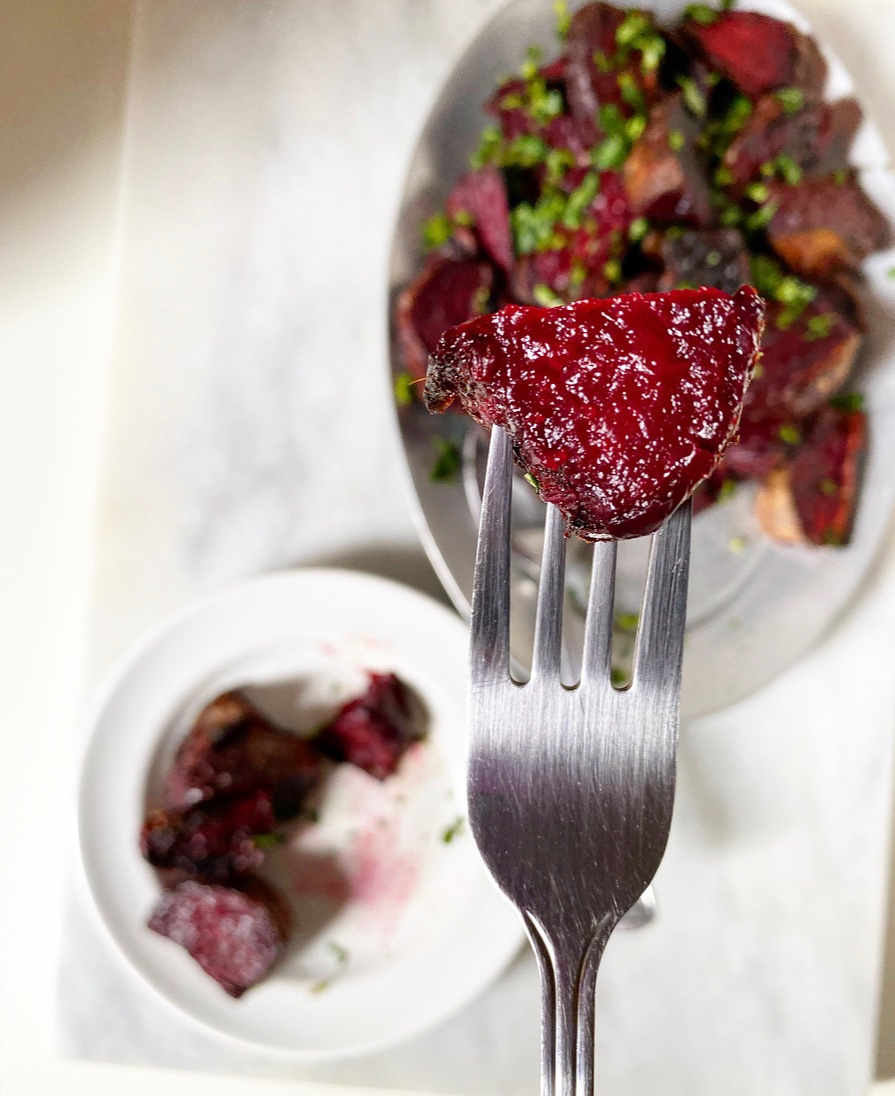
 Although I have never publicized it this way, I have privately referred to this time of my blogging year as “Savory January” for some time now. You see, every January since starting this site, I (mostly) switch focus from sweets to weeknight meals, sides and other savory pursuits. It’s not for weight loss, “cleansing” or any reason beyond keeping things interesting—I cook as much as I bake, and those recipes deserve their moment in the blogging sun, too. Is switching up my blog POV for one month a year weird? Sure. But I like variety, and also this is my website and I can do what I want.
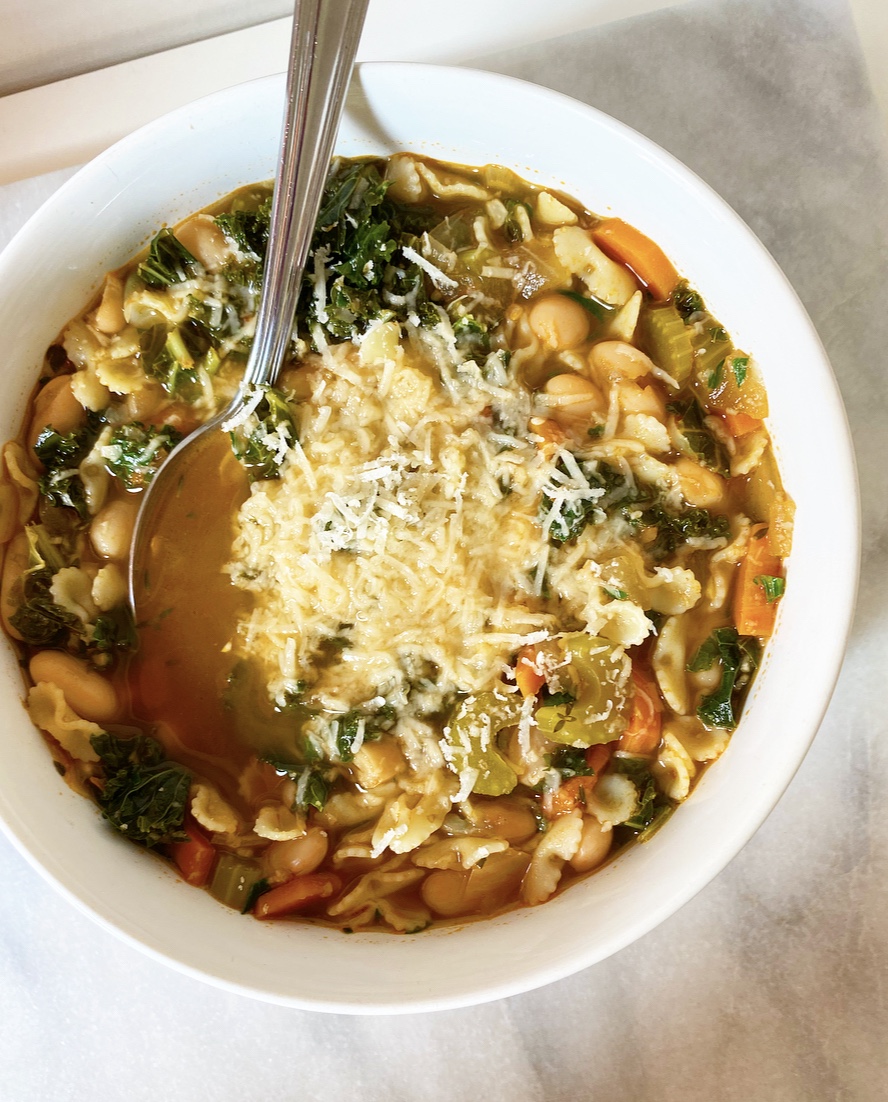
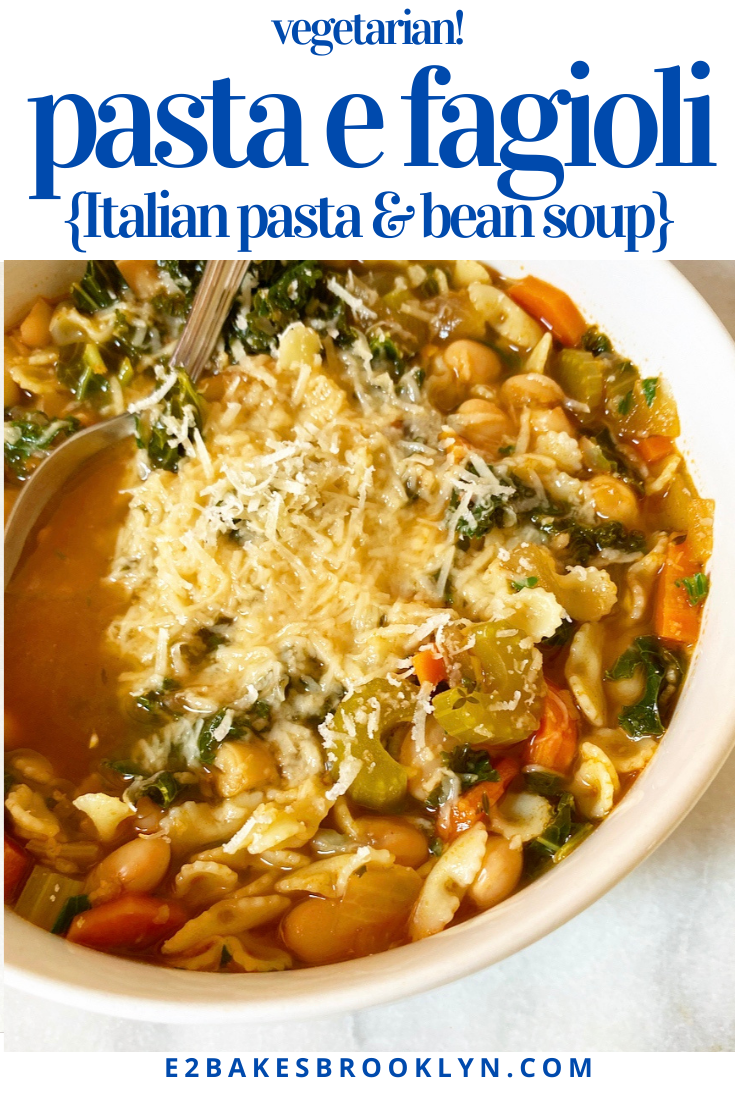
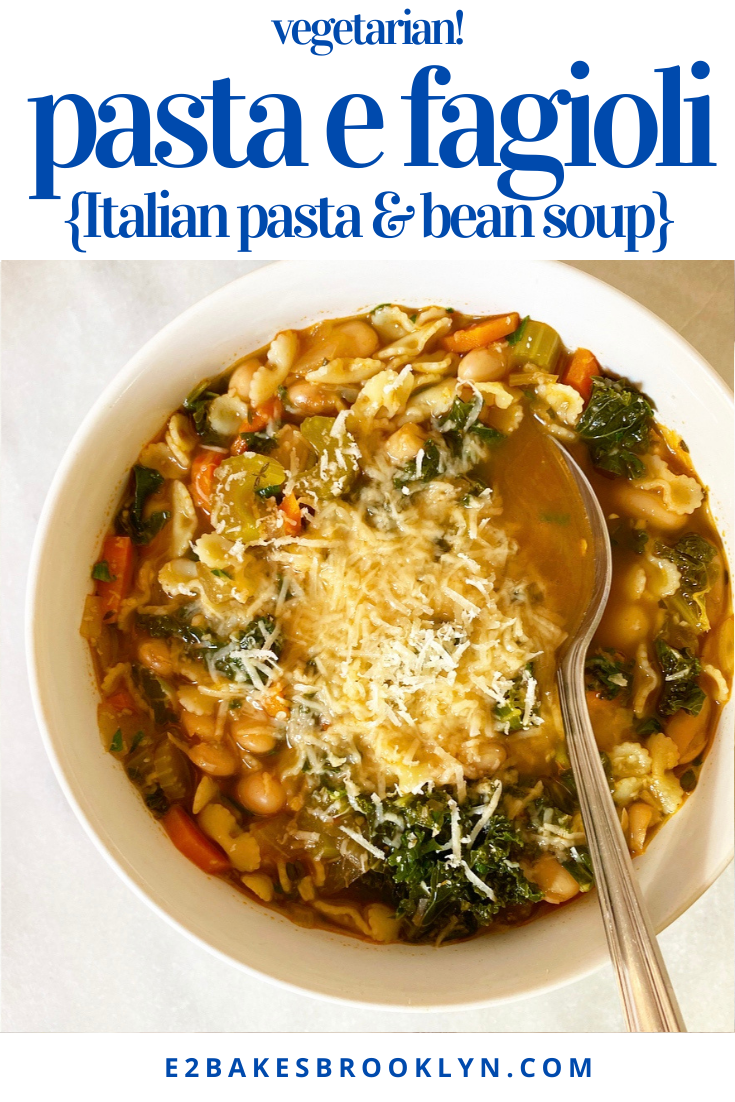
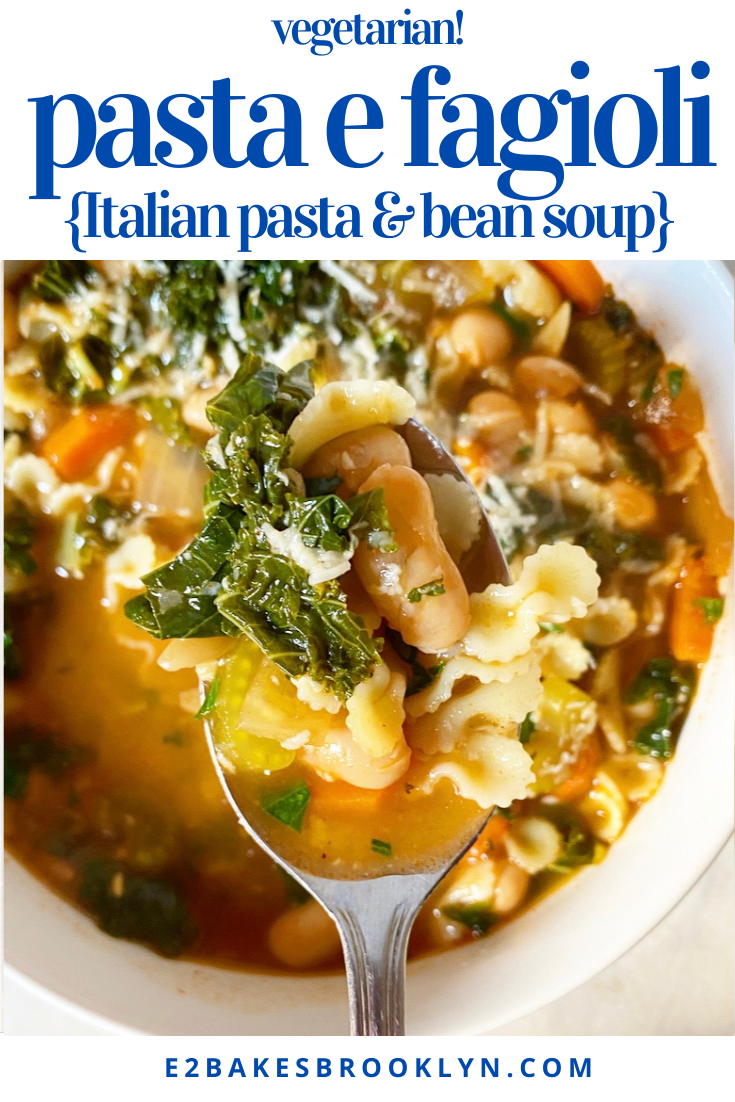
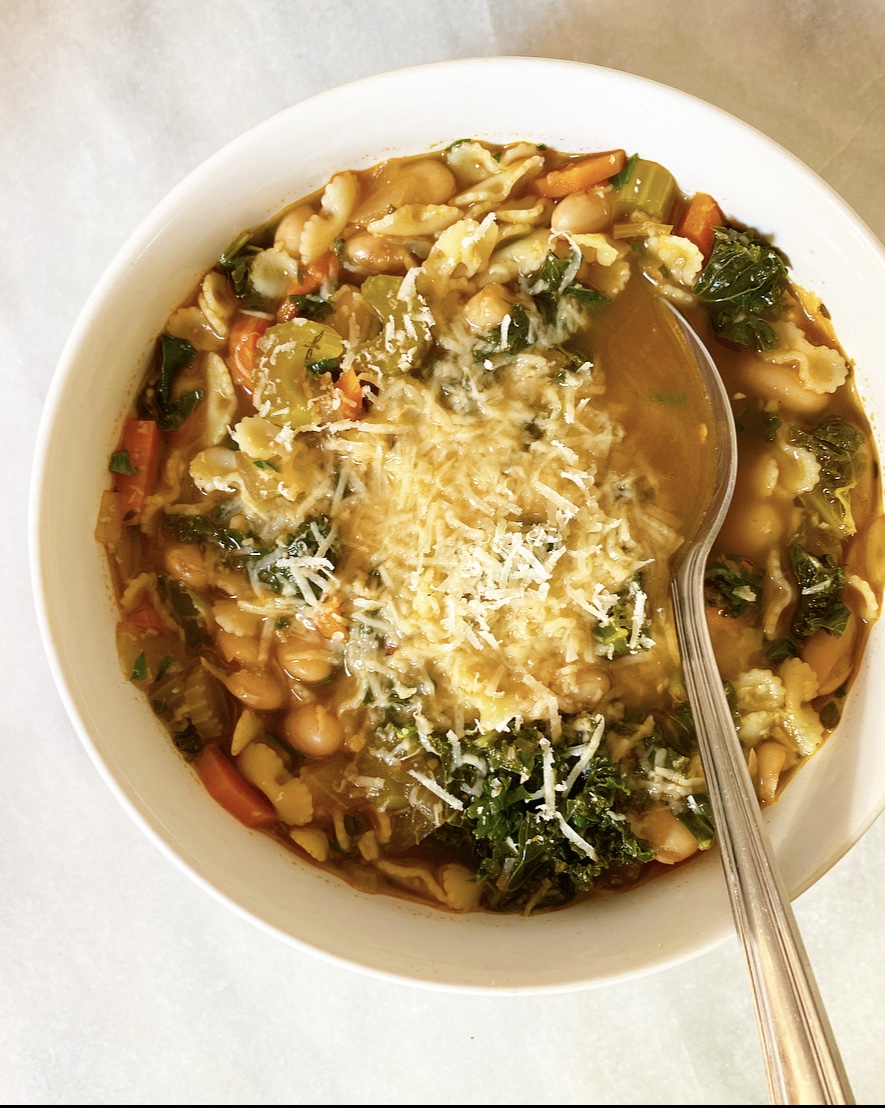 Pasta e Fagioli has been one of my favorite recipes for years and years. At its most basic, it’s a vegetable soup with pasta and beans, but it’s so much more! It’s easy, it’s cheap, it’s hearty, and it’s dang delicious. Oh, and it’s vegetarian—vegan without the cheese, gluten-free depending what kind of pasta you use. Yesssss.
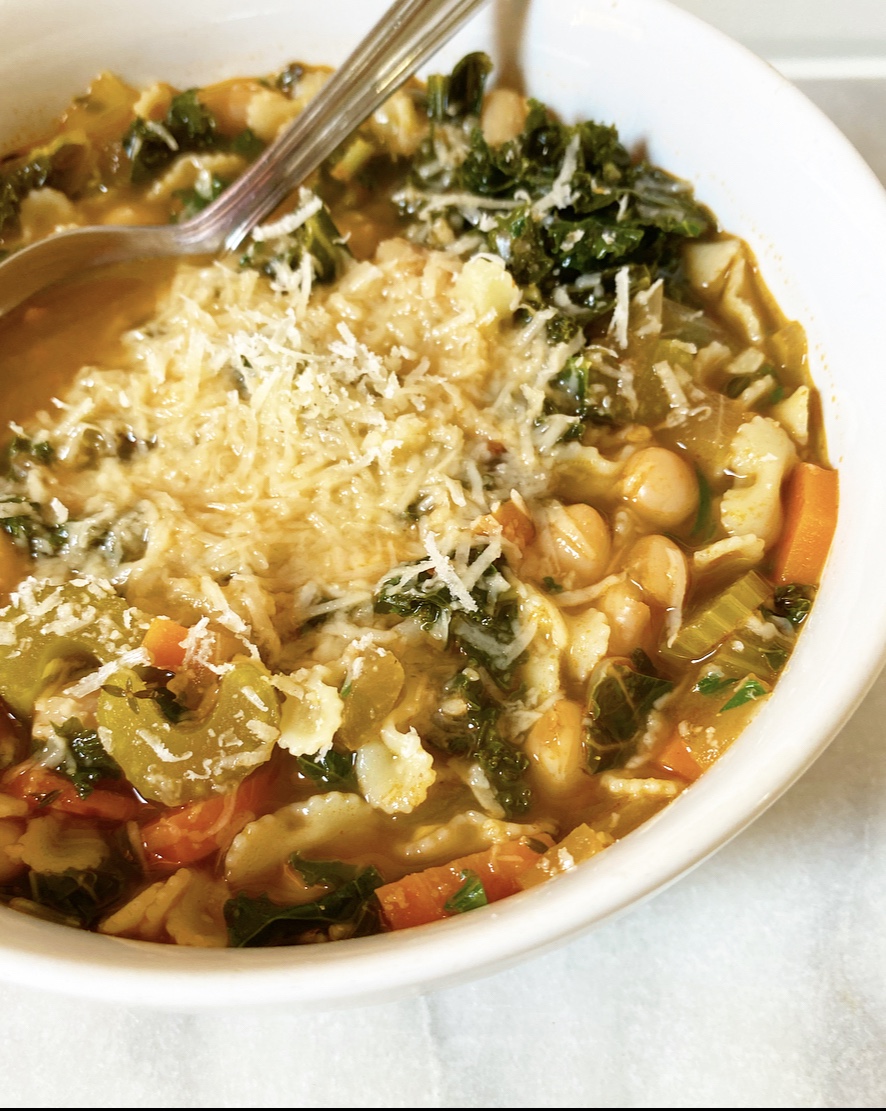 I made this Italian staple all the time when I first moved to NYC, but moved on to other things because that’s just how cooking goes for me. I make something regularly for a few weeks/months/years and then I completely forget about it for a few more weeks/months/years. In this case, I remembered Pasta e Fagioli on the last night of our Maine trip this past October. We had some produce to use up, and we had some tomato paste, beans (aka fagioli), pasta and cheese ends lingering…and well, when life gives you lemons, you know.
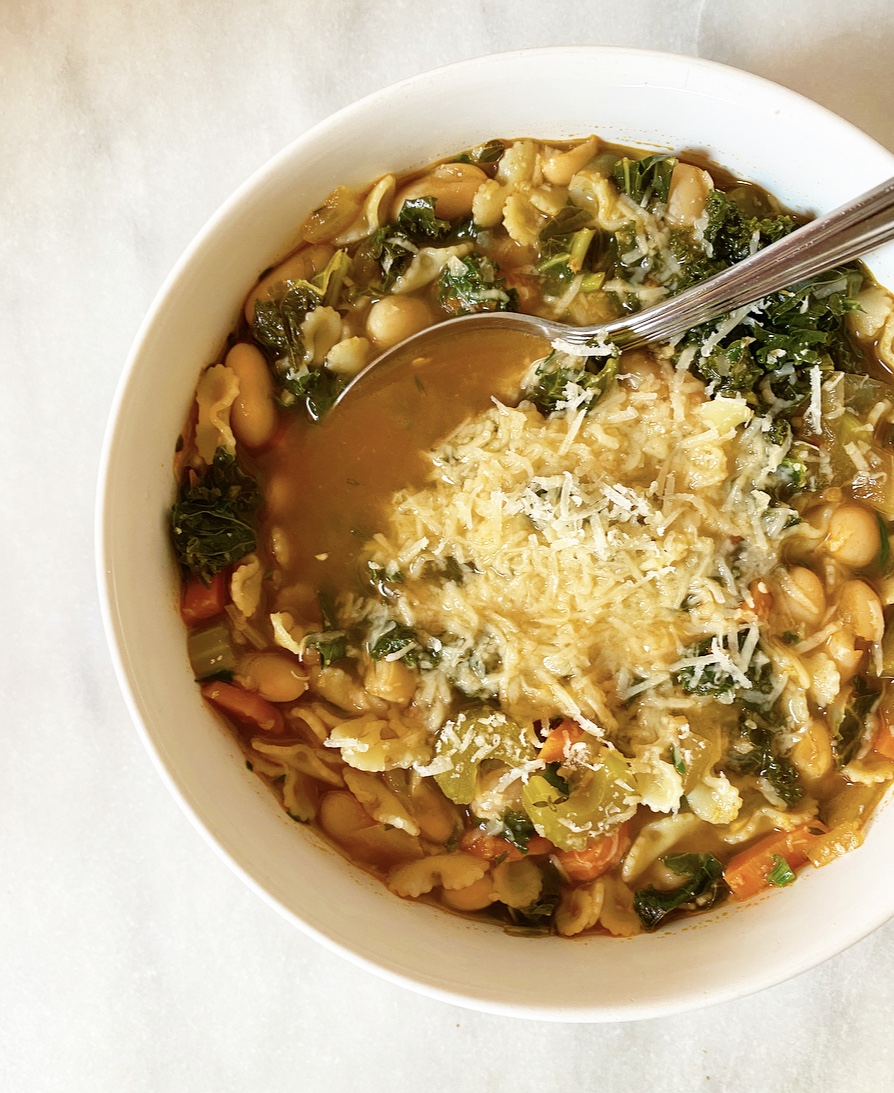 Making Pasta e Fagioli is super simple and you probably have most of the ingredients already. The method is nearly identical fo the way I make
 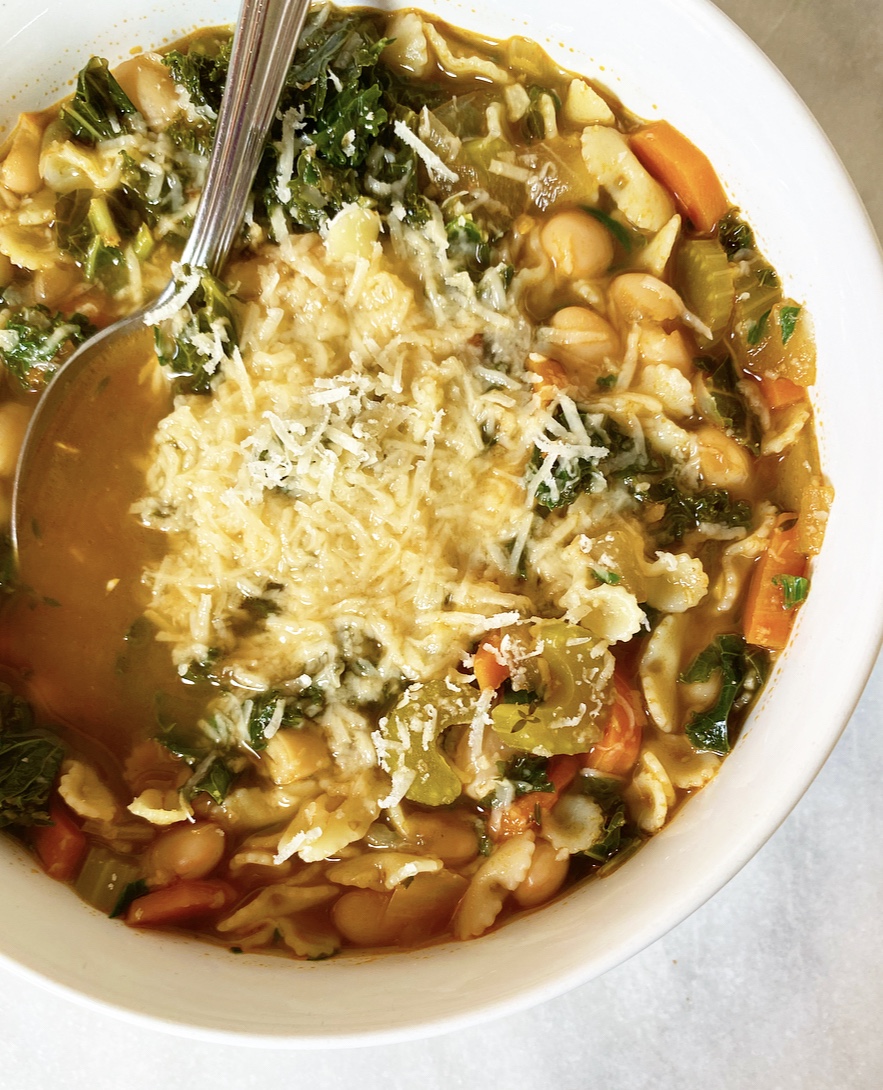 If you’re wondering why I cook the pasta separately from the rest of the soup, it’s because I’m a single lady who eats a lot of leftovers and hates mushy pasta. I do this with chicken noodle soup as well—by keeping the two components separate, the pasta doesn’t overcook or get waterlogged and sad. If you have a group to feed or will otherwise not have leftovers (or maybe like your pasta really soft?), feel free to toss it in the pot with the beans and kale.
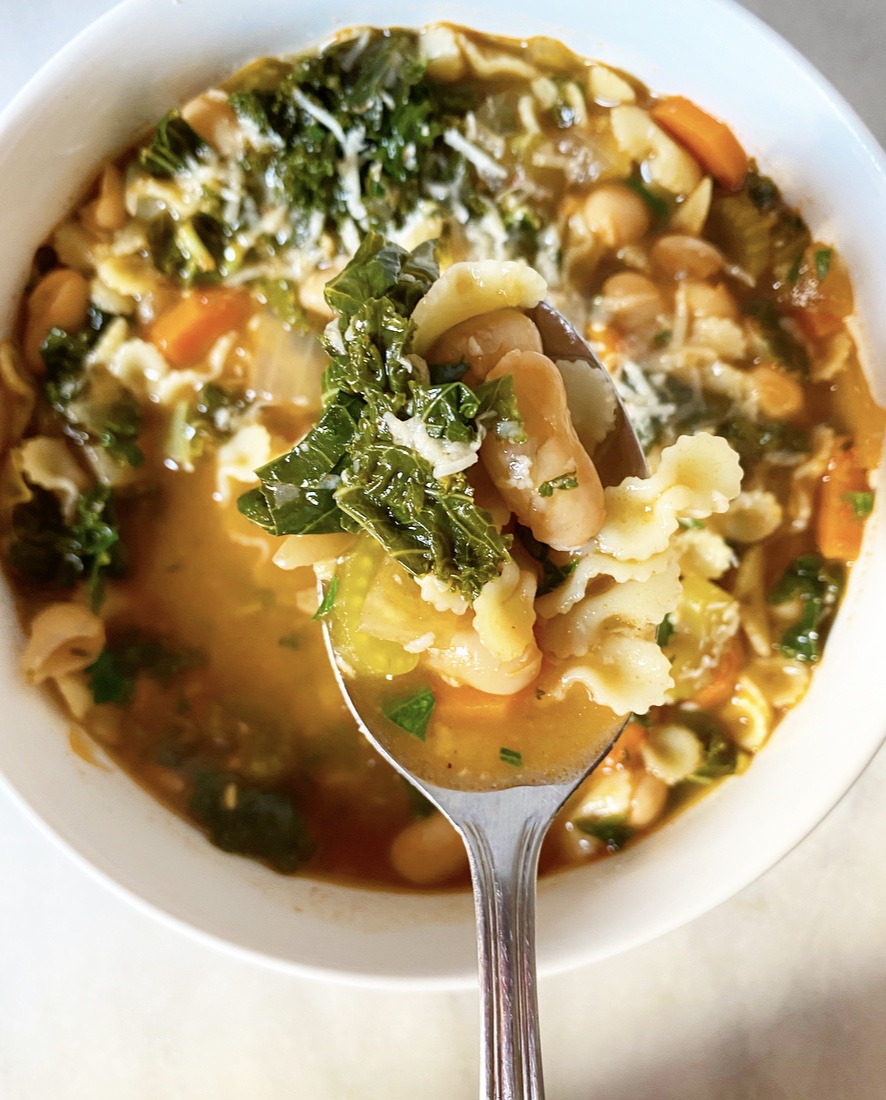
 Happy New Year! This post is coming at you from the recent past—December 29th—so I hope no new terrible things have happened between then and this posting. 2020 was such a weird year. It started off okay, but quickly devolved to…well, whatever this is. I, for one, am hoping for hope in 2021.